Amazon S3 & Amazon CloudFront - AWS
Objective
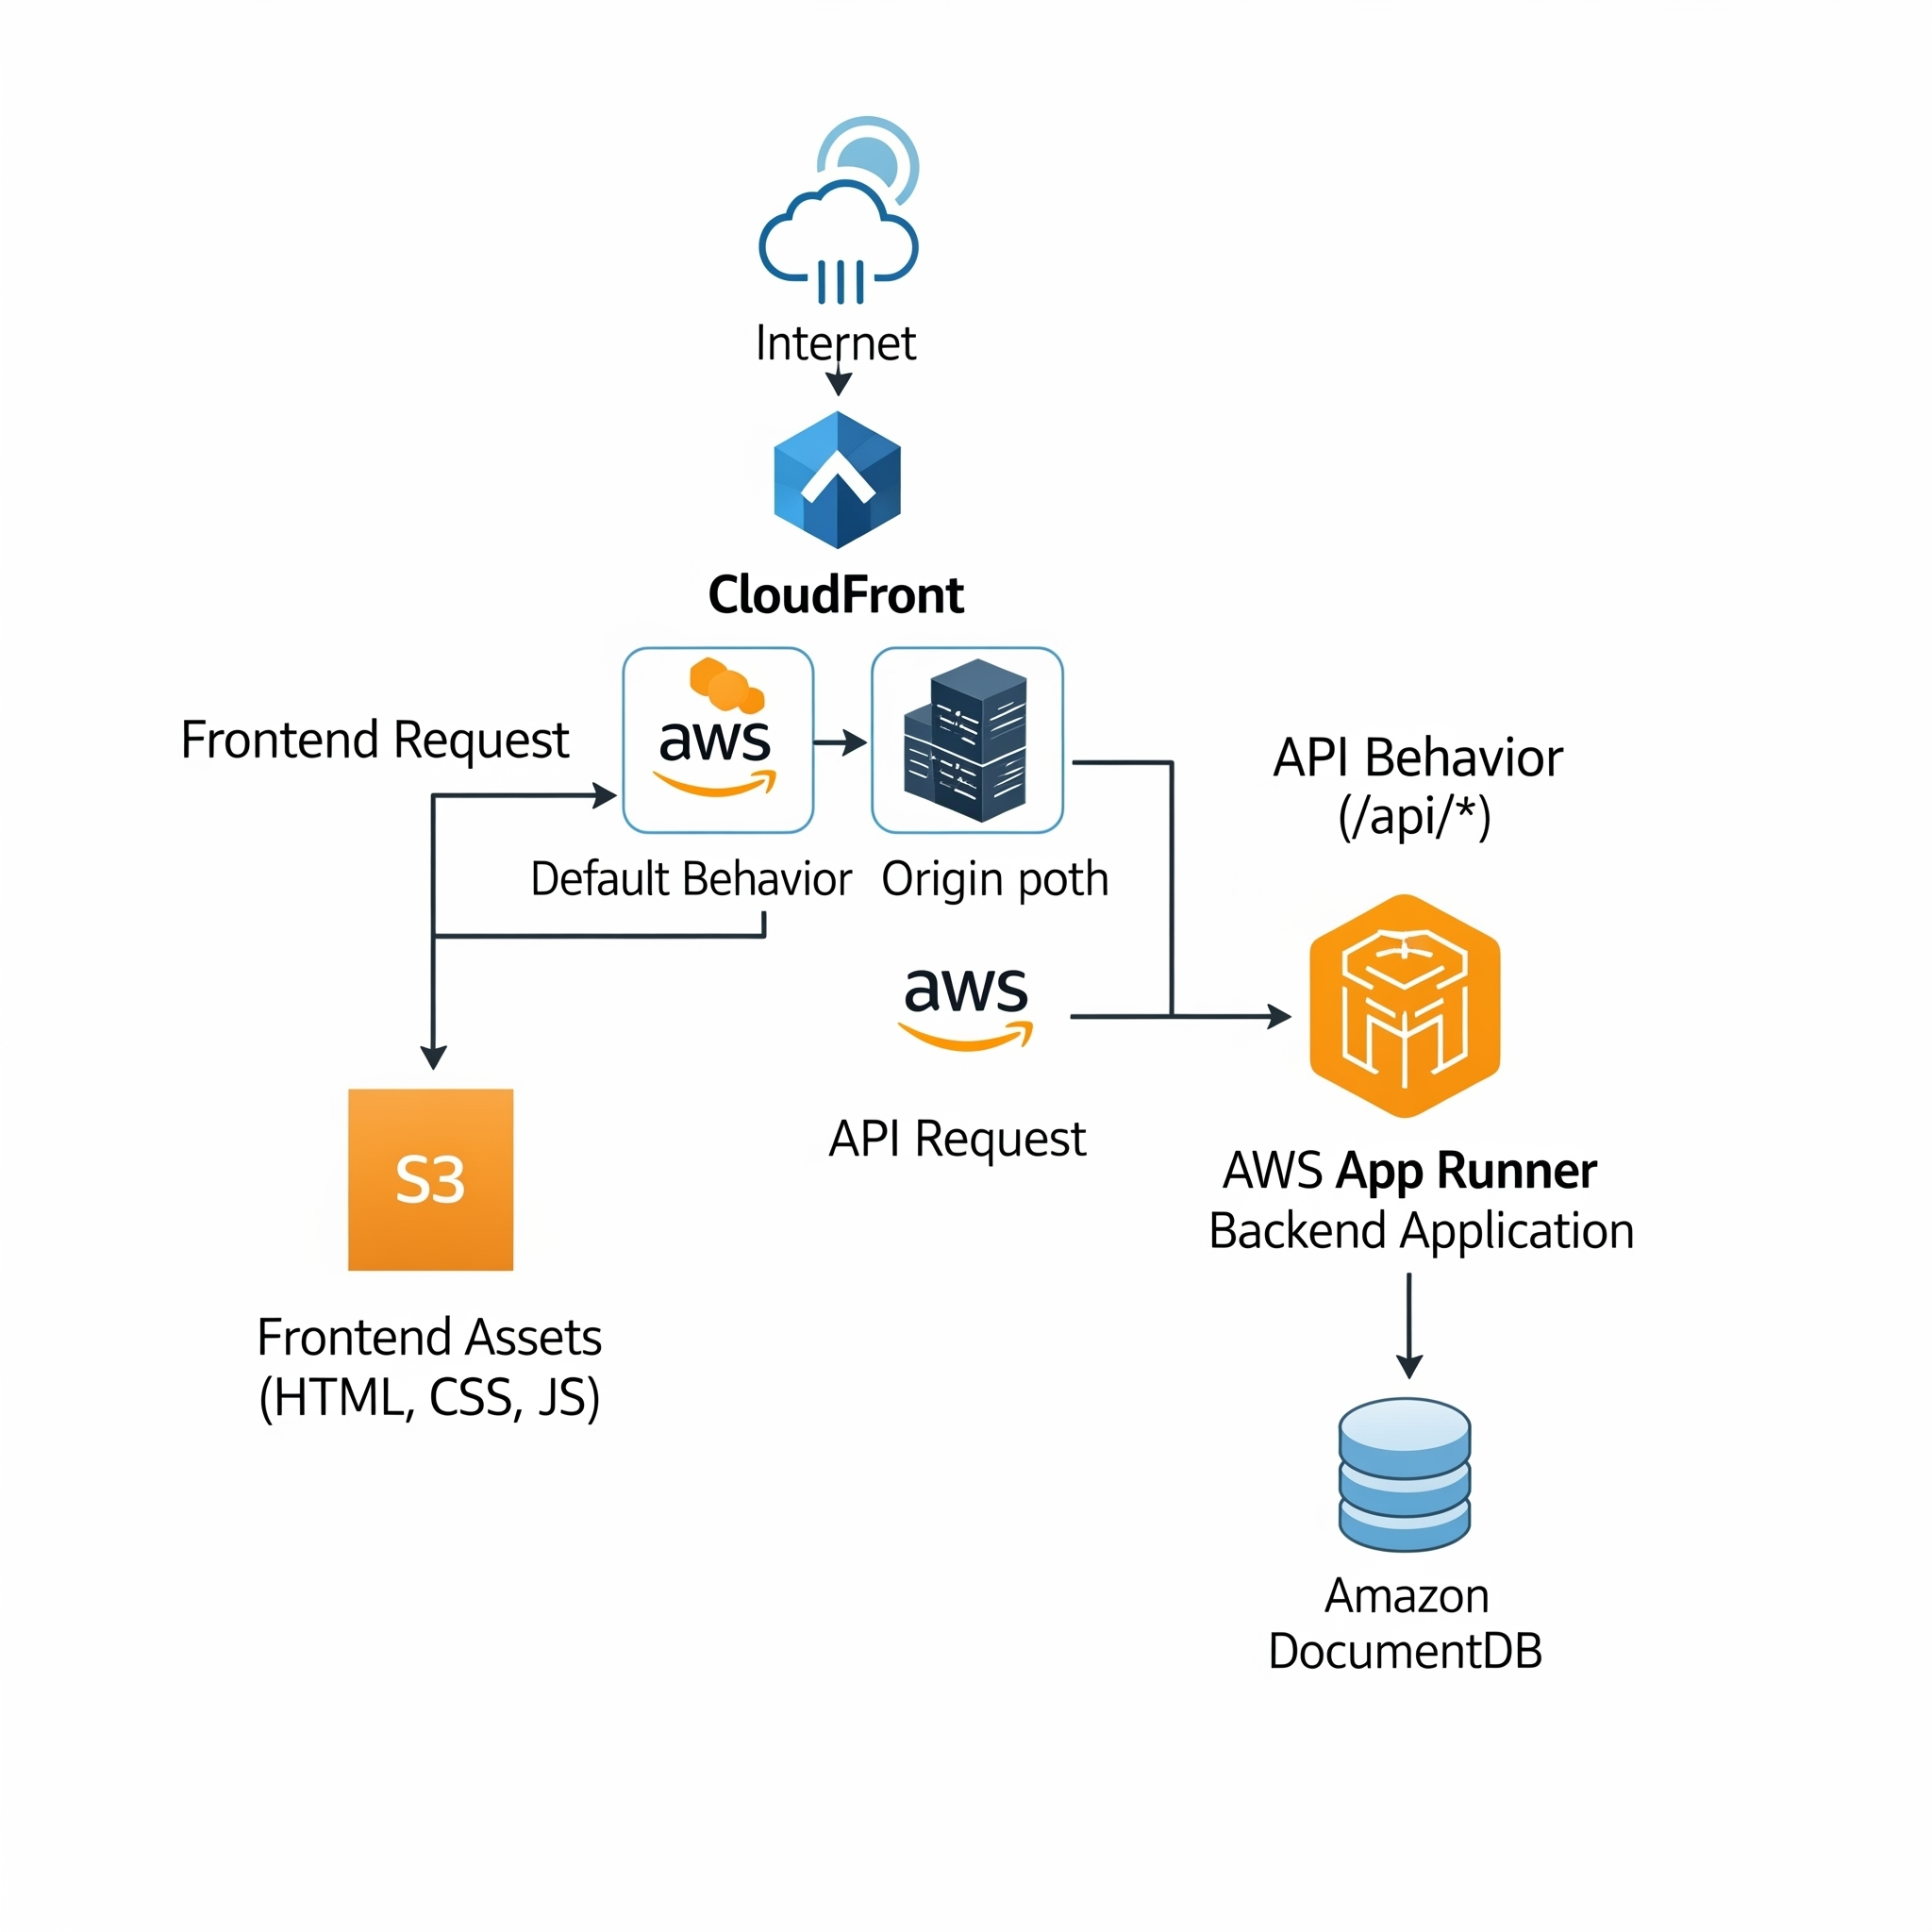
In this post, we’ll take our AWS full-stack web app one step further — hosting the frontend using Amazon S3 and Amazon CloudFront, and then fully integrating it with the backend we built earlier.
Amazon S3
Amazon Simple Storage Service (Amazon S3) is a scalable object storage service designed for high durability, availability, and performance. It “stores data as objects, hierarchical data, or tabular data within buckets. An object is a file and any metadata that describes the file. A bucket is a container for objects”. The advantage with S3 is that it integrates well into other AWS services, like CodeBuild or CloudFront (we will talk about this one later).
When storing files into S3 we first need to create a bucket which is a place where we can store files. The idea is that we can have multiple of those buckets with (for example) multiple access rules attached to them for different parts of our application.
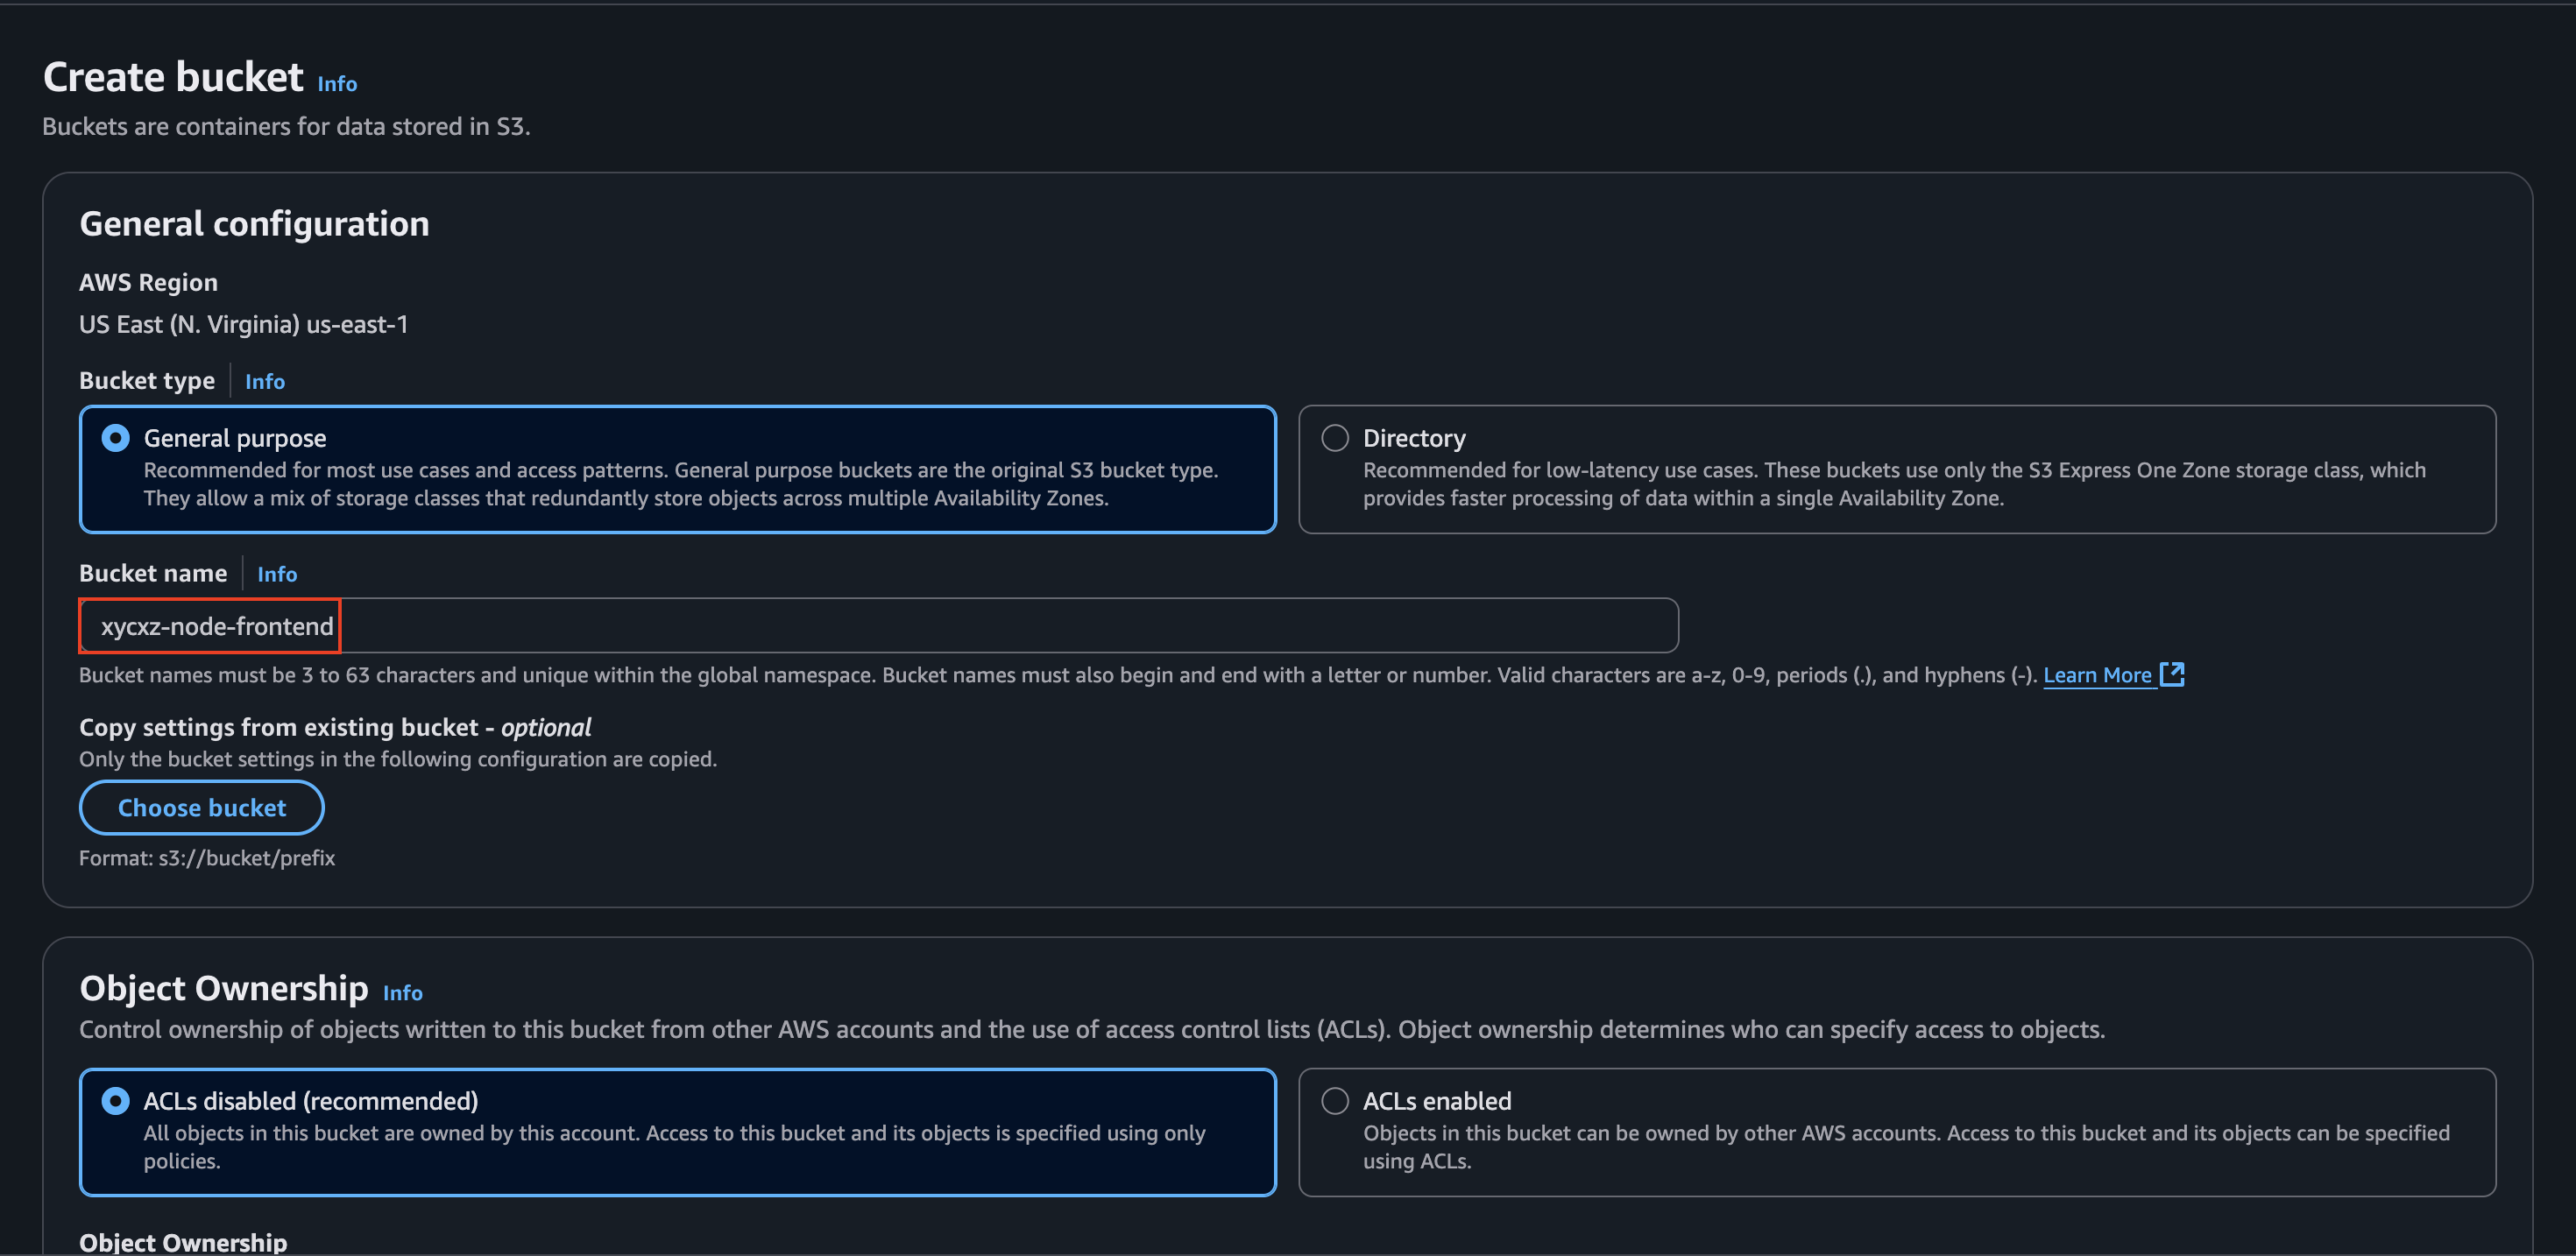
S3 bucket names must be globally unique, like a domain name. You can’t create a bucket with a name that someone else in the world is already using!
Creating a S3 Bucket
To create a SC3 bucket, we will first navigate to the service dashboard and then click on Create bucket. We can leave the settings as is after giving our bucket a name:
If we click on the recently created bucker, we will see several options that we can use to interact with it:
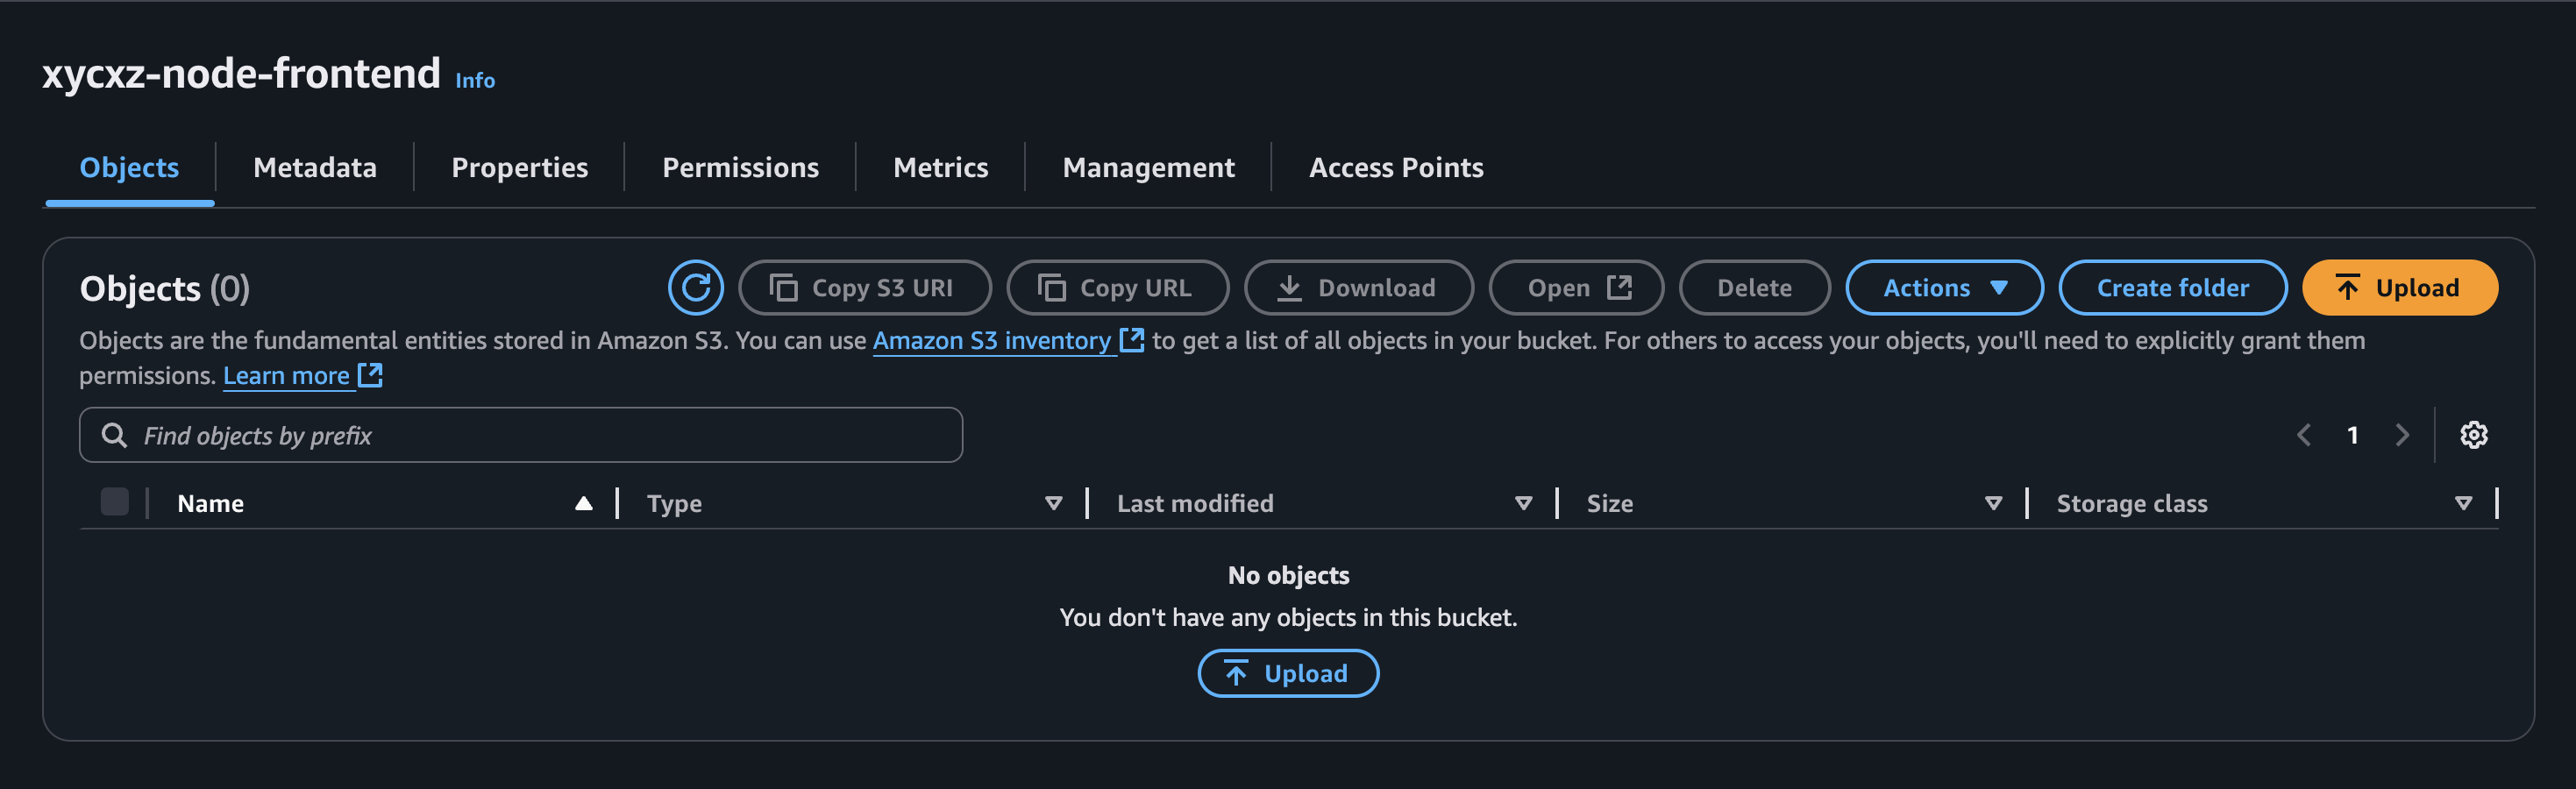
Even though we could upload our files here manually, the question would be if that’s what we really want. Of course, the answer is a big no, because we know this is not sustainable when working in a production environment and with multiple clients.
CodeBuild Automation
Remember when I said that the S3 service can integrate well with CodeBuild service. Well, this is the path we will follow to have a fully automated deployment system for the frontend. Although I did not demonstrate using CodeBuild in the previous post to build the backend, you should definitely do it yourself. A general guide you can follow can also be found in my project here.
Once again, I will skip most of the demonstration of this step because I don’t want to repeat a process that you can see in my blog.
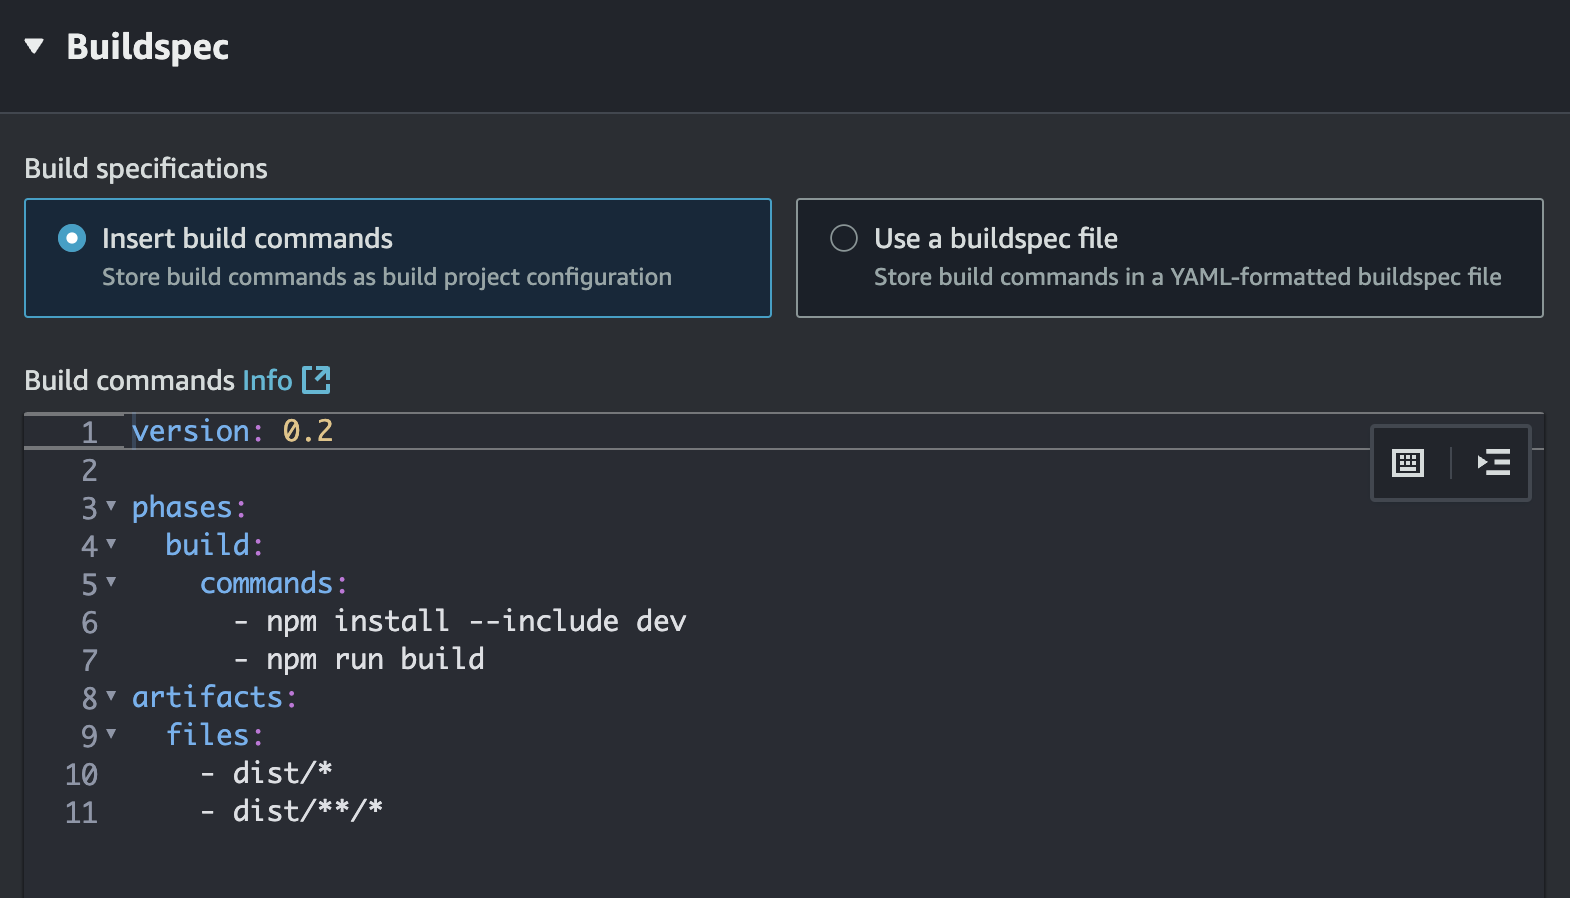
This will be a good opportunity to introduce artifacts. Think of CodeBuild as a temporary workshop; it gets completely cleaned out after we’re done. The artifacts are the finished products (files) you want to keep, store, or move to a safe place like Amazon S3.
This is crucial because when our build process creates files (like a dist folder), those files exist only inside that temporary workshop. If we do nothing, they are lost when the build ends and the workshop is cleaned. This is why we need an artifacts section—it’s the instruction for CodeBuild to save something for us.
We didn’t need this when we pushed an image to ECR because the docker push command is like shipping our product directly from the workshop. The act of pushing it already sent the artifact to its final destination.
After indicating what files we want to store, we also need to tell CodeBuild where to store them. For that, we can scroll down and select Amazon S3:
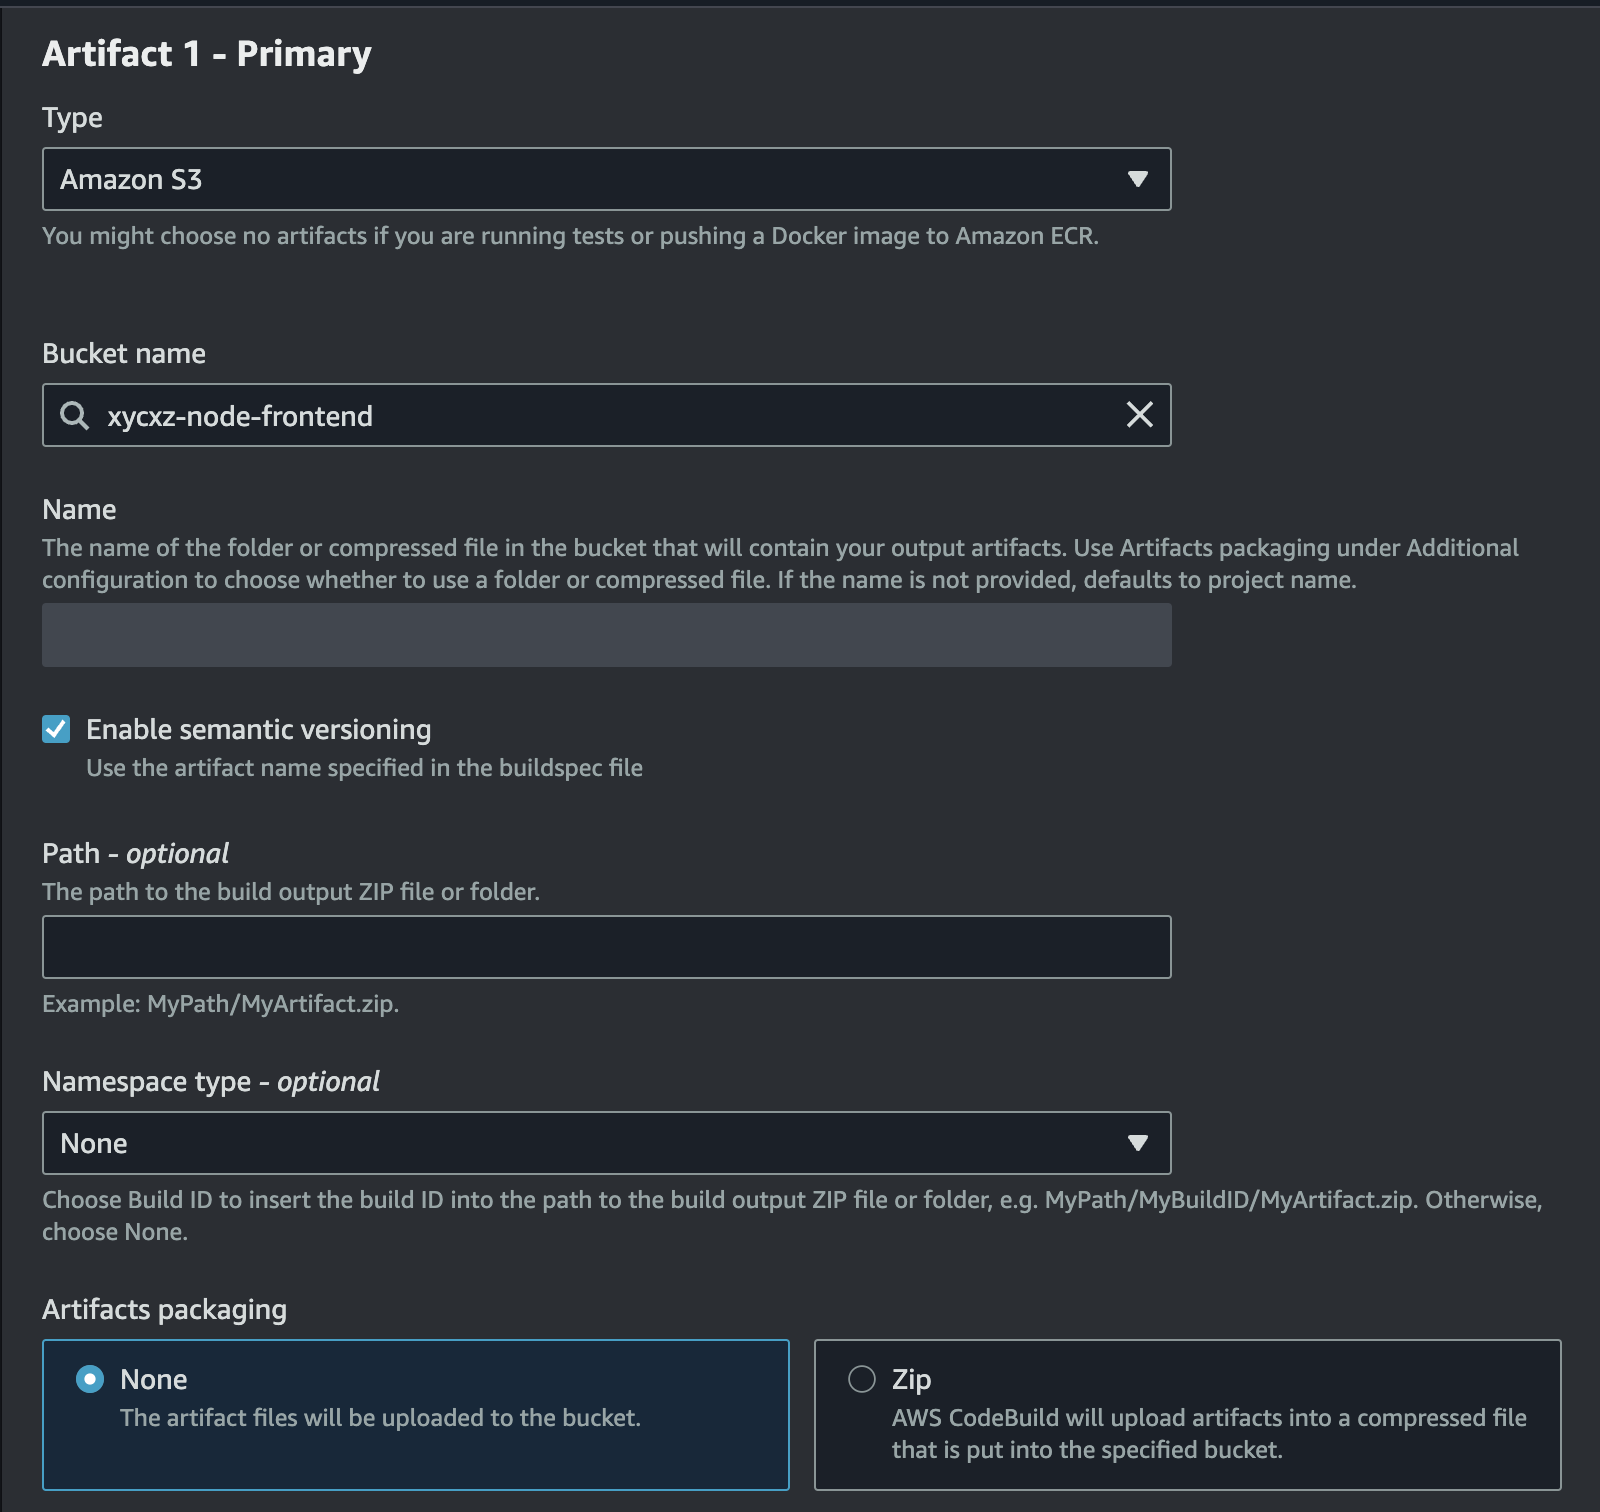
Note: We will check the Disable artifact encryption box. Otherwise, we will have issues with CloudFront trying to access the data. Don’t worry about encryption here because, in our case, the files here are supposed to be publicly accessible anyways. For any sensitive private data in S3, you would always enable encryption and then grant CloudFront access using an Origin Access Control (OAC), ensuring the bucket itself remains private.
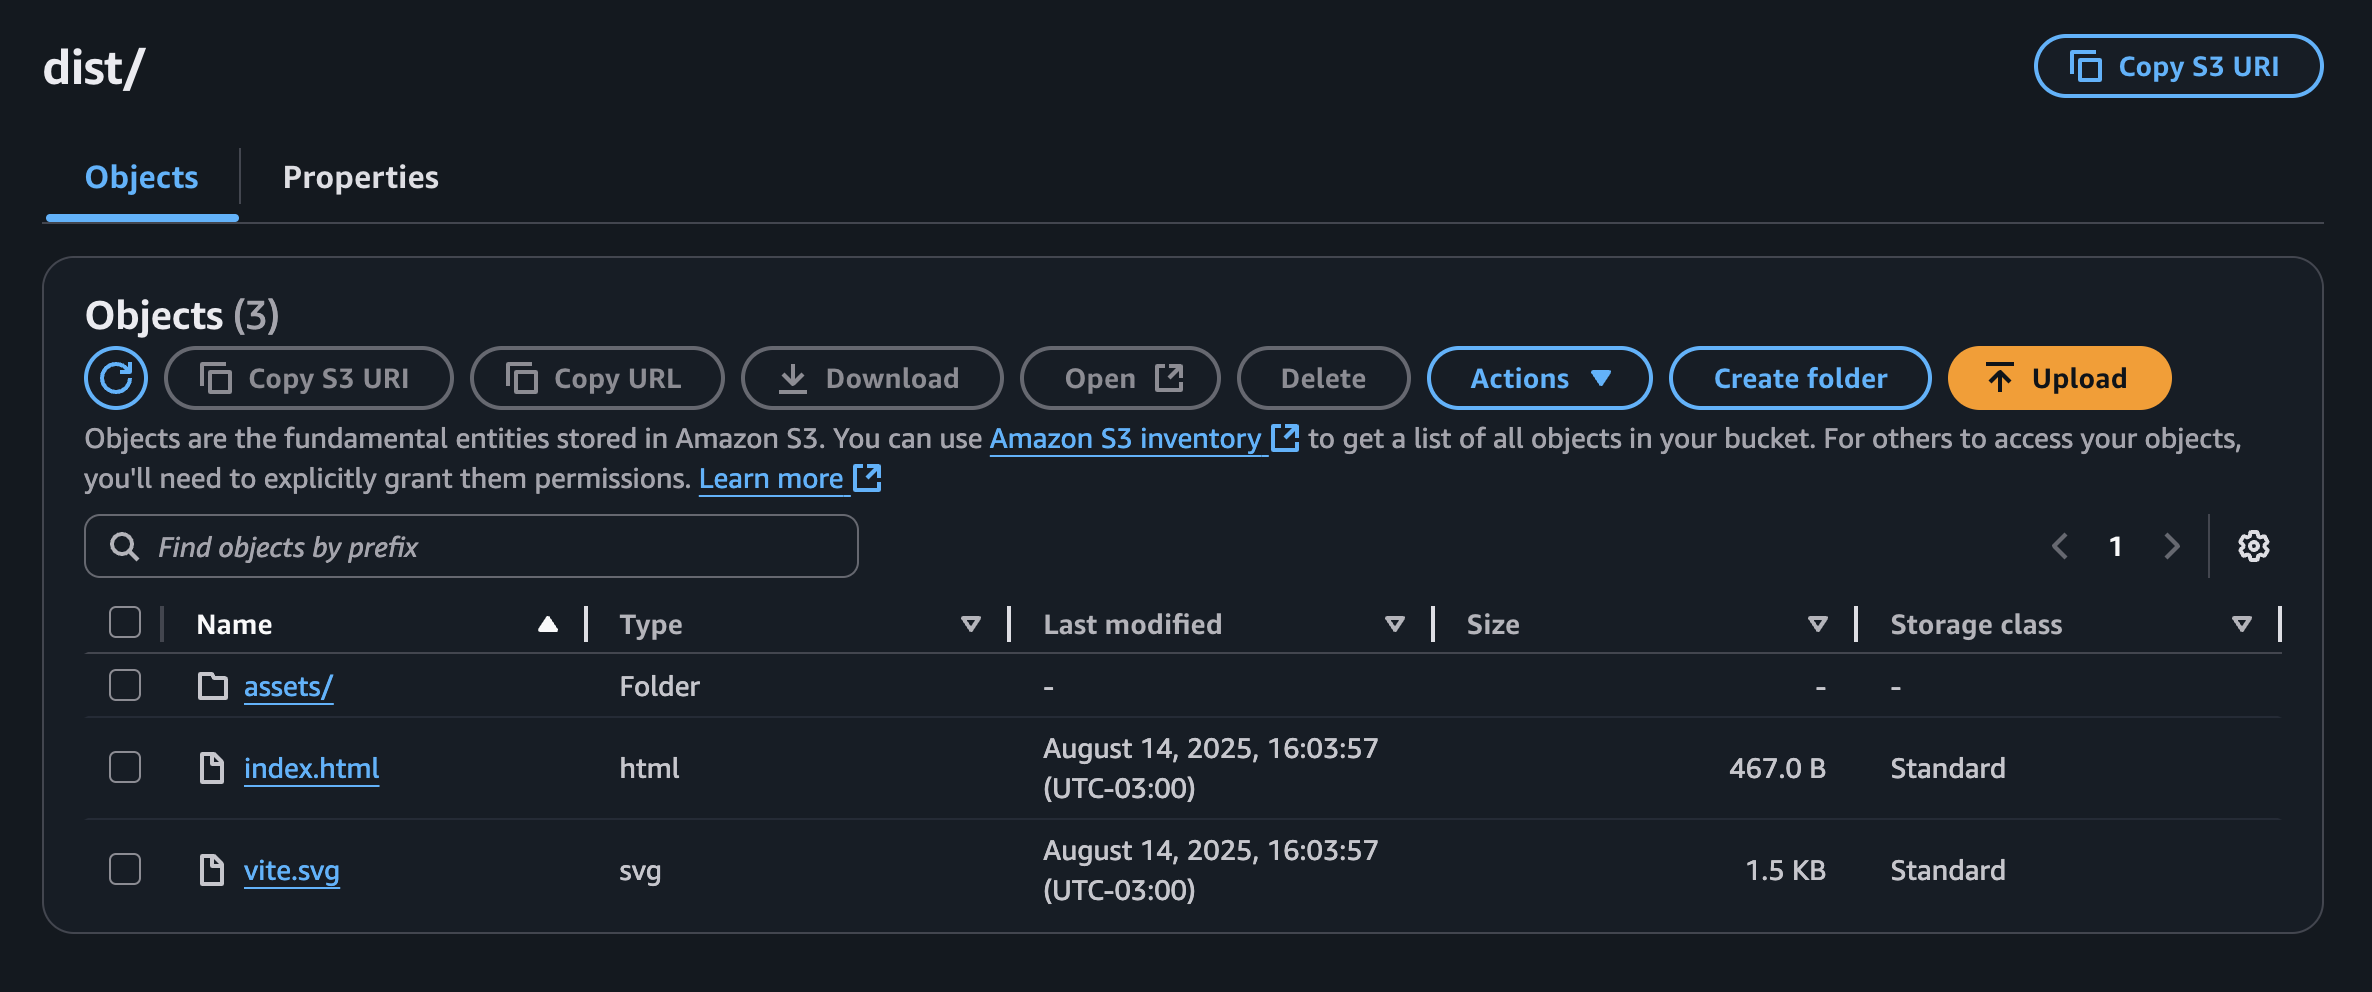
Once we finish that, we can just create our Build project and click on Start Build. Then, we can go back to our S3 bucket and we will see our files uploaded there:
Amazon CloudFront
Amazon CloudFront is a Content Delivery Network (CDN), which means that when a user requests an object, they are automatically routed to the nearest edge location (worldwide network of data centers). When “a user requests content that you’re serving with CloudFront, the request is routed to the edge location that provides the lowest latency (time delay), so that content is delivered with the best possible performance”.
Files can be cached and re-used to serve the next request from the same geographic region (this allows fast delivery of our assets). In addition, CloudFront allow us to connect our API to the same domain and even allow us to configure multiple domains that we can use to access the data. This is the reason to use CloudFront in our case.
Configuring CloudFront
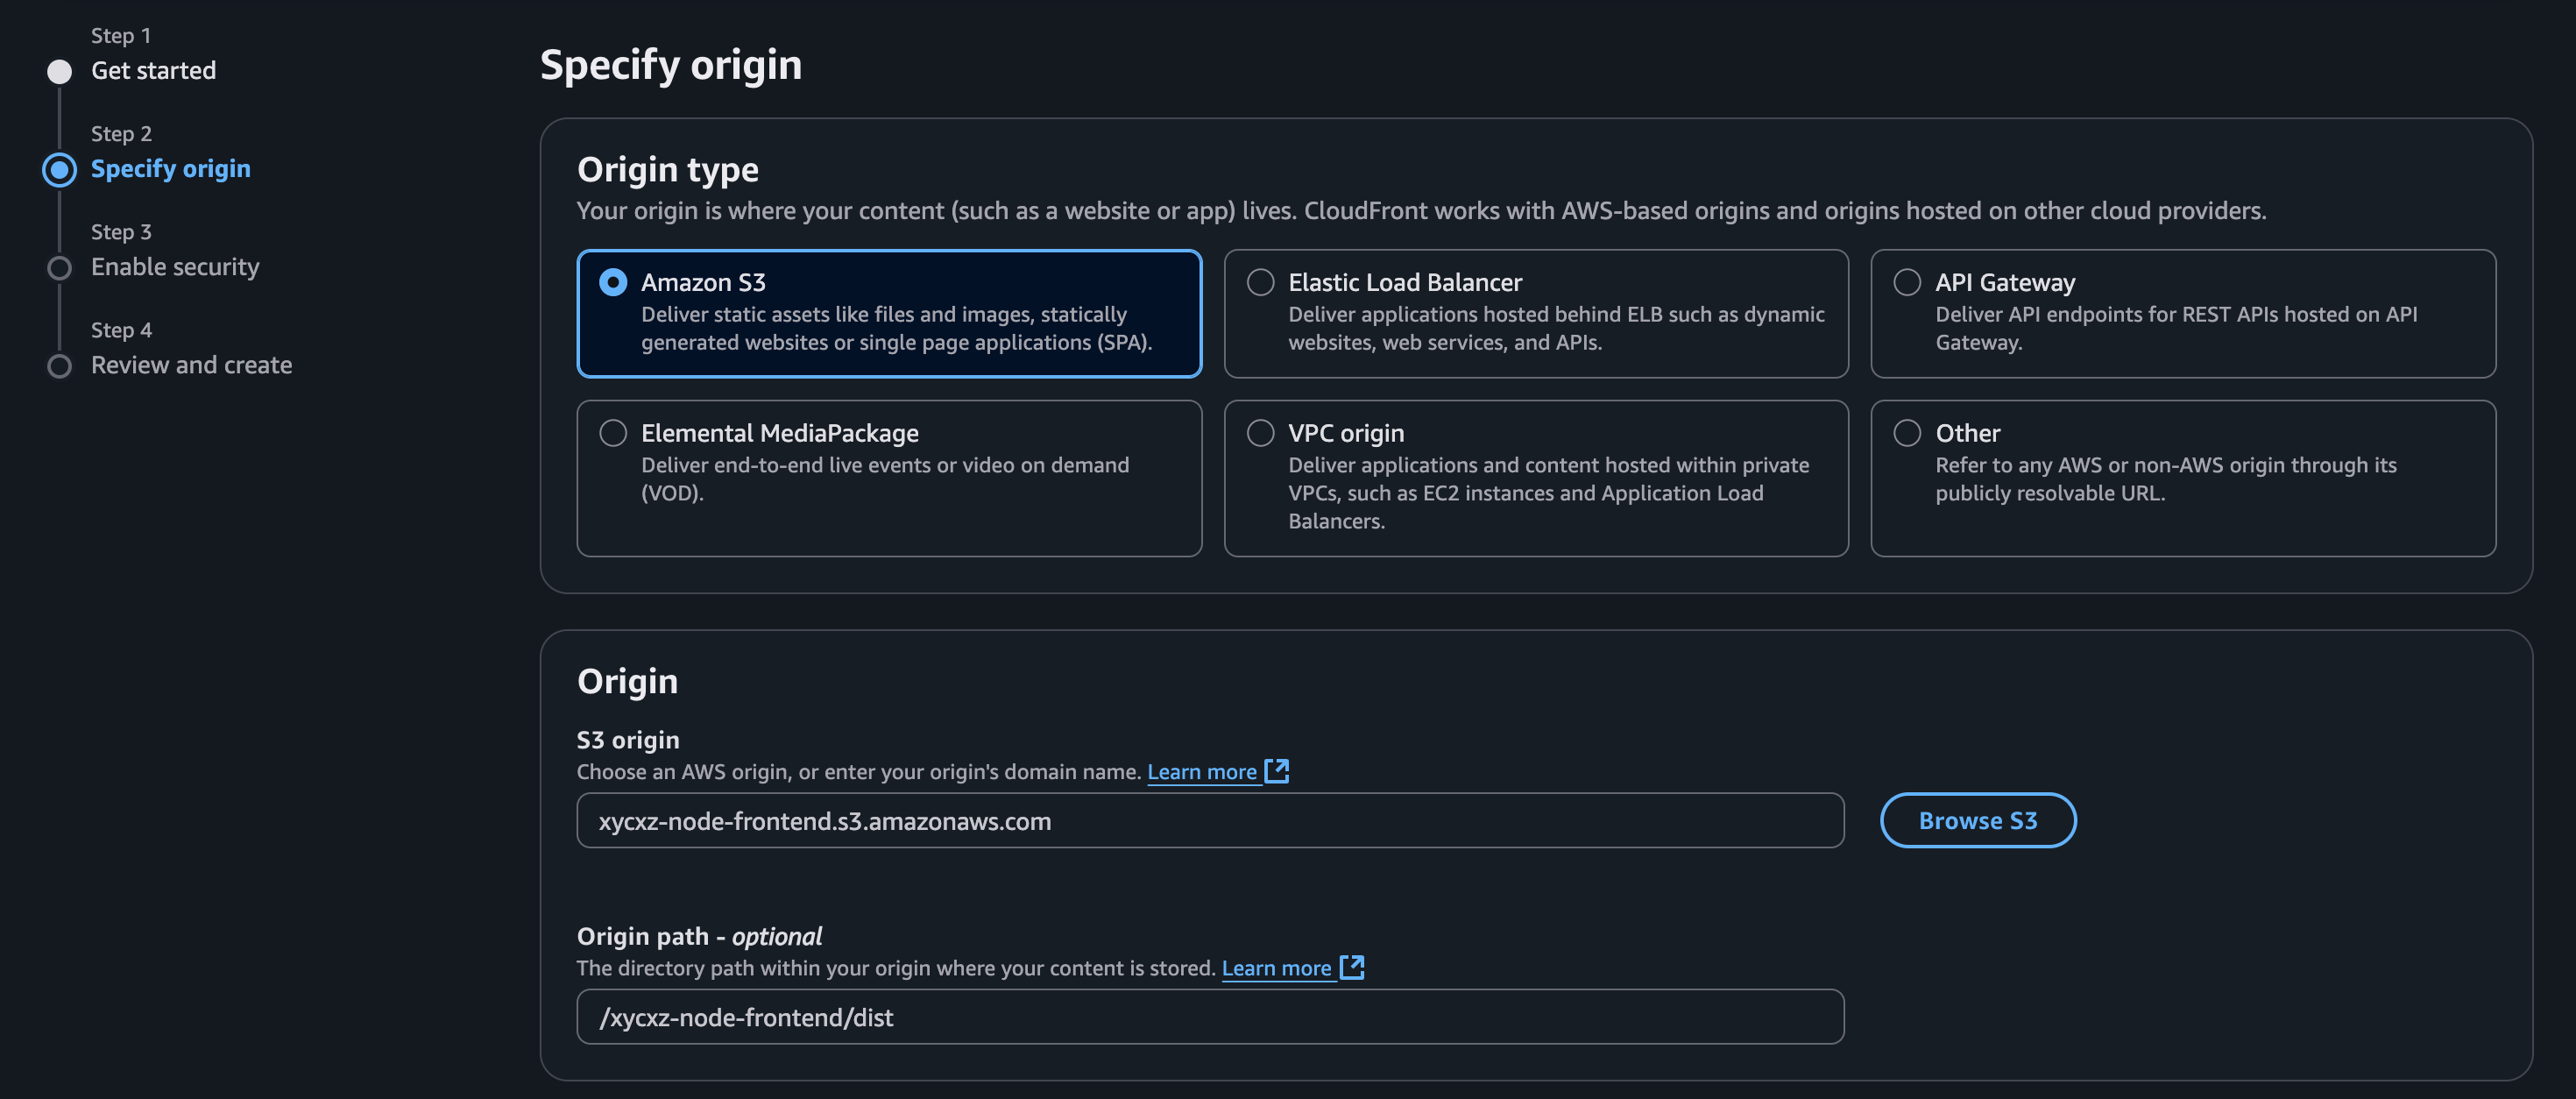
To start with CloudFront configuration, we can click on Create a CloudFront distribution. We can give it any name that we want. Next, we need to specify the origin of where our content lives (we can specify multiple after creating the distribution). In this case, it is a S3 bucket so we will select that one and also indicate where our files are located inside the bucket:
Note: I left all the settings on default and did not turn on WAF protection because it might charge additional costs. However, in a production environment, we should activate this.
After finishing configuring CloudFront, it will look something like the following:
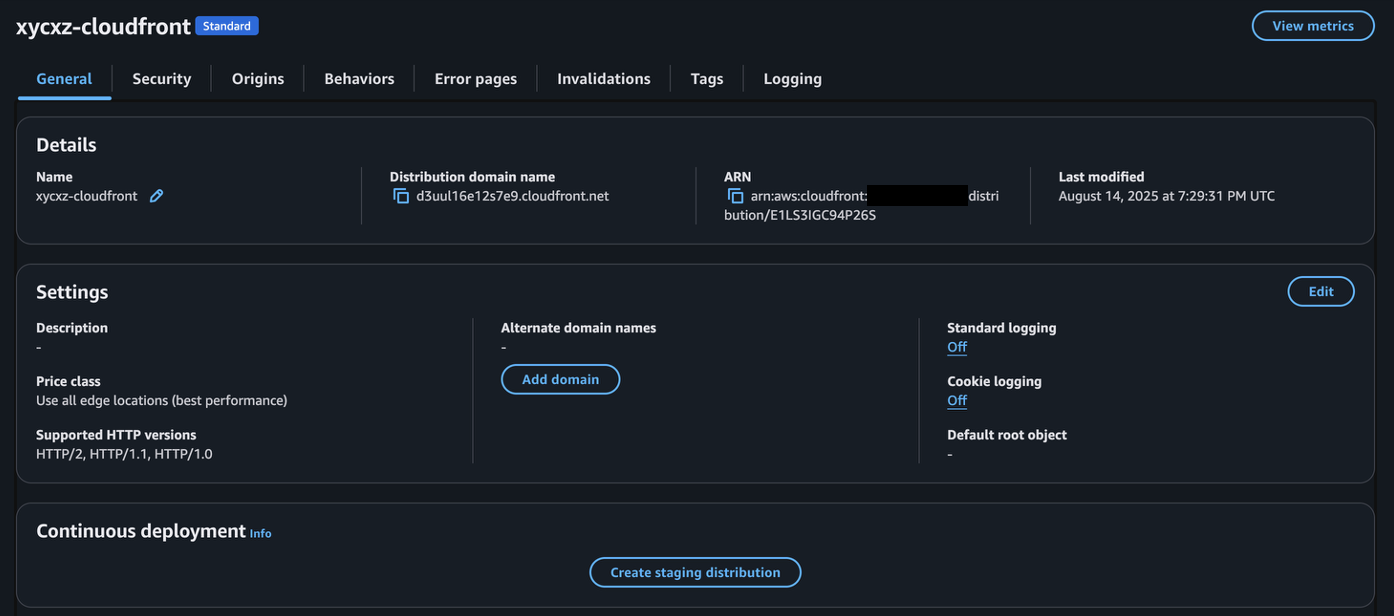
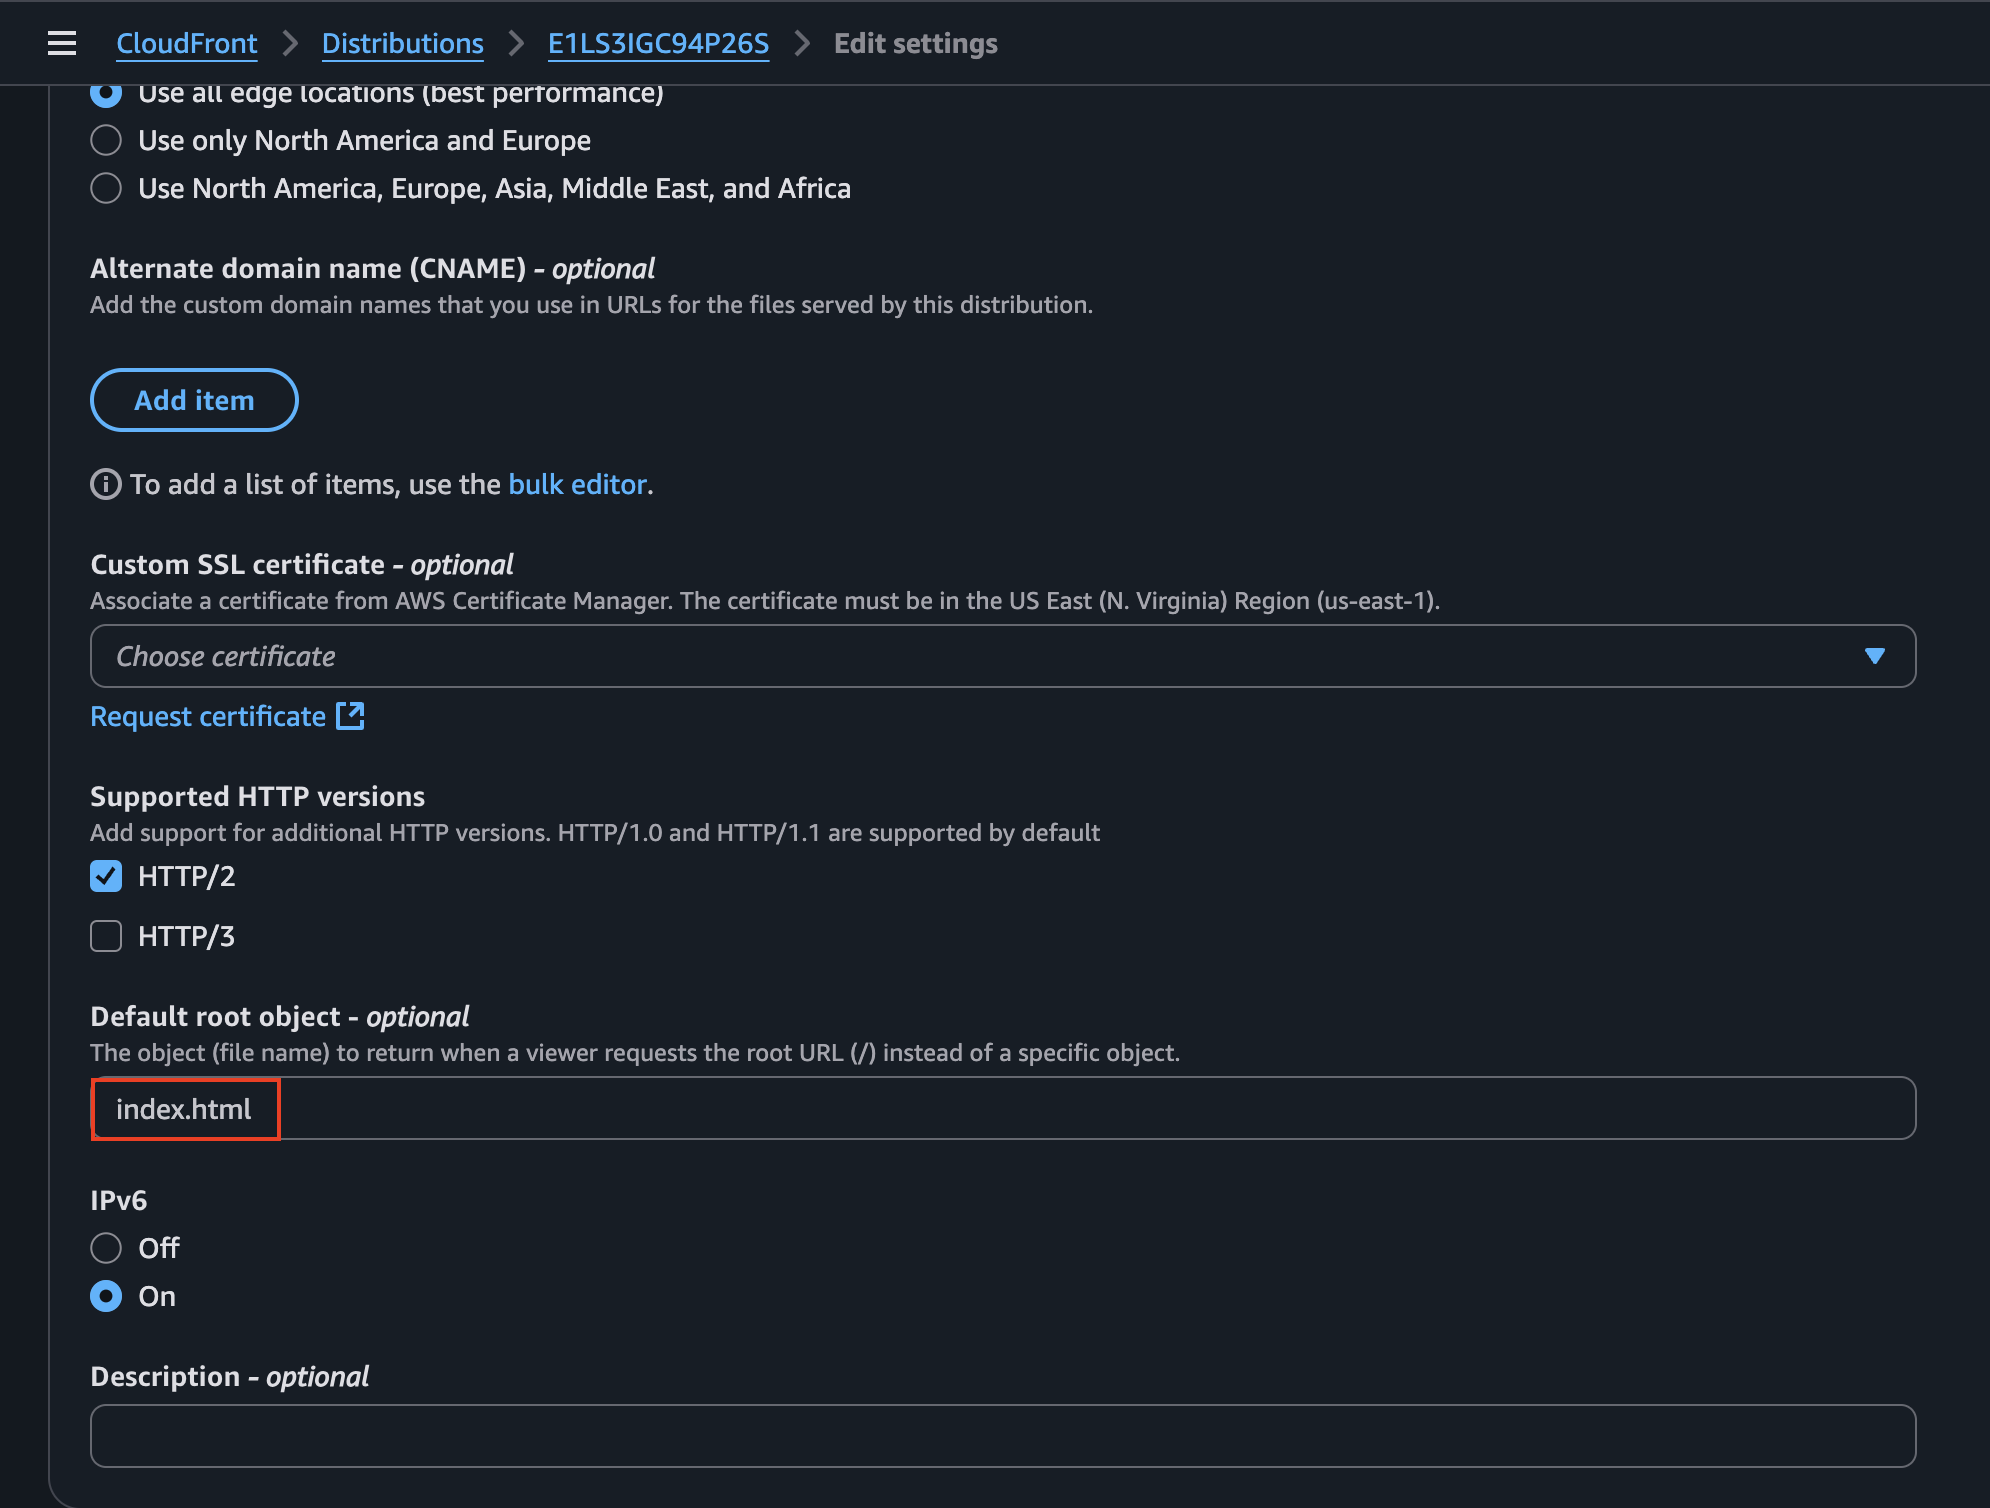
We will notice that when trying to navigate to this domain we get this:

This is because the application navigates to the root directory (/) by default instead of the file that is actually serving the frontend (index.html). We can either pass this into the URL to access the application frontend, or (better) configure the settings and add this file to be served as root directly.
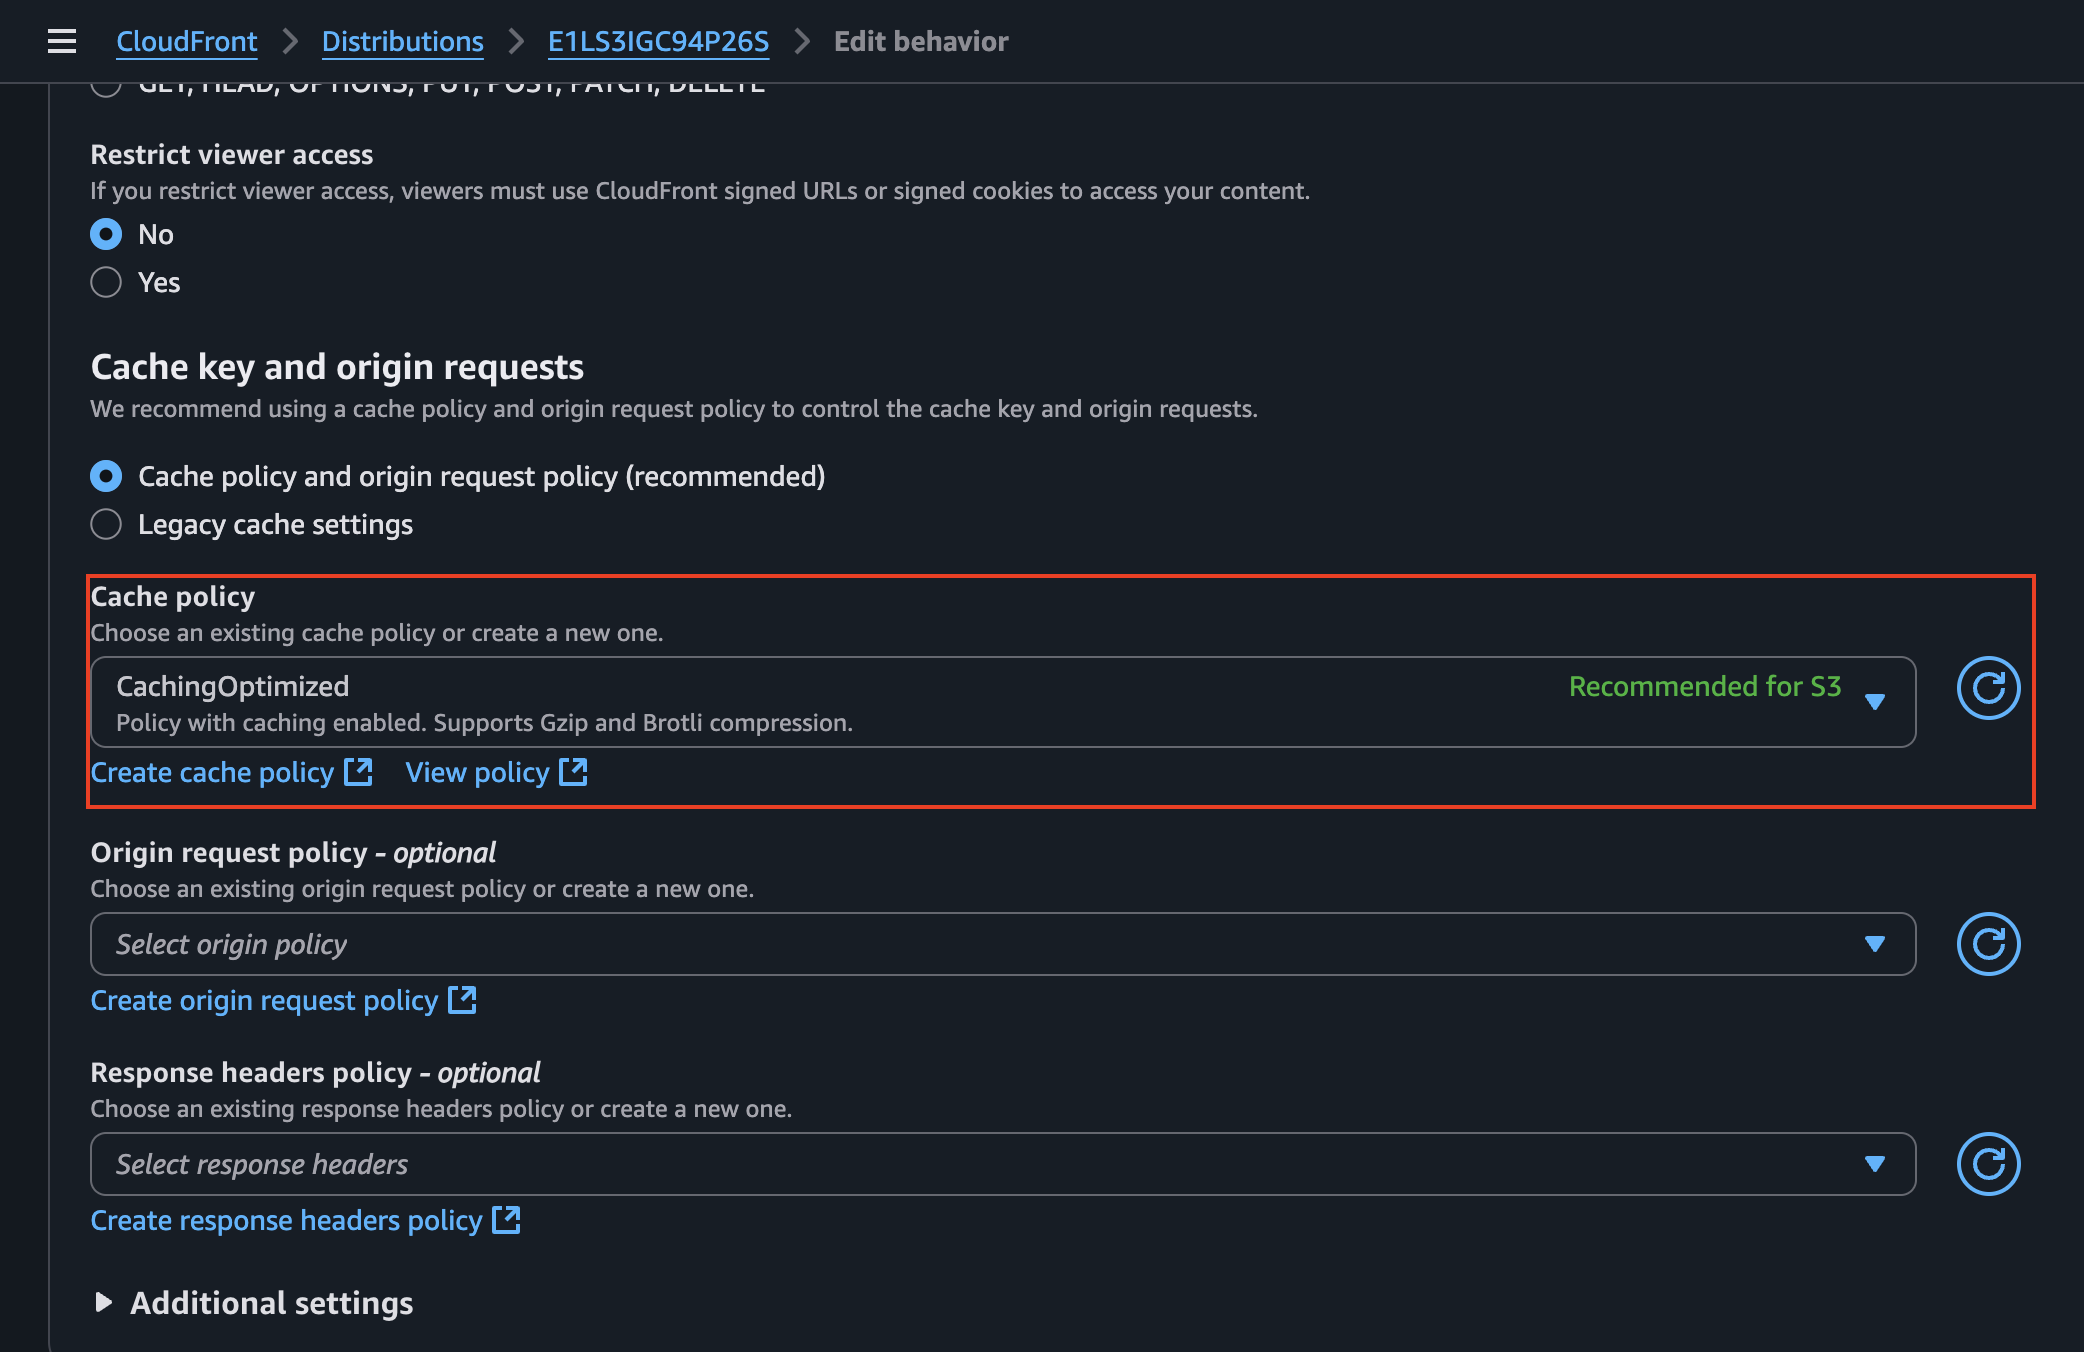
We also have the behaviors that control how CloudFront is going to serve the data that comes form the origin. Something important we can find within its configuration is the cached policy:
Because CloudFront will cache our data (with the current configuration), it might take a while to have the most recent version of the application when we update it. However, we can invalidate the cache by going to the Invalidations tab and selecting the files we want to invalidate:
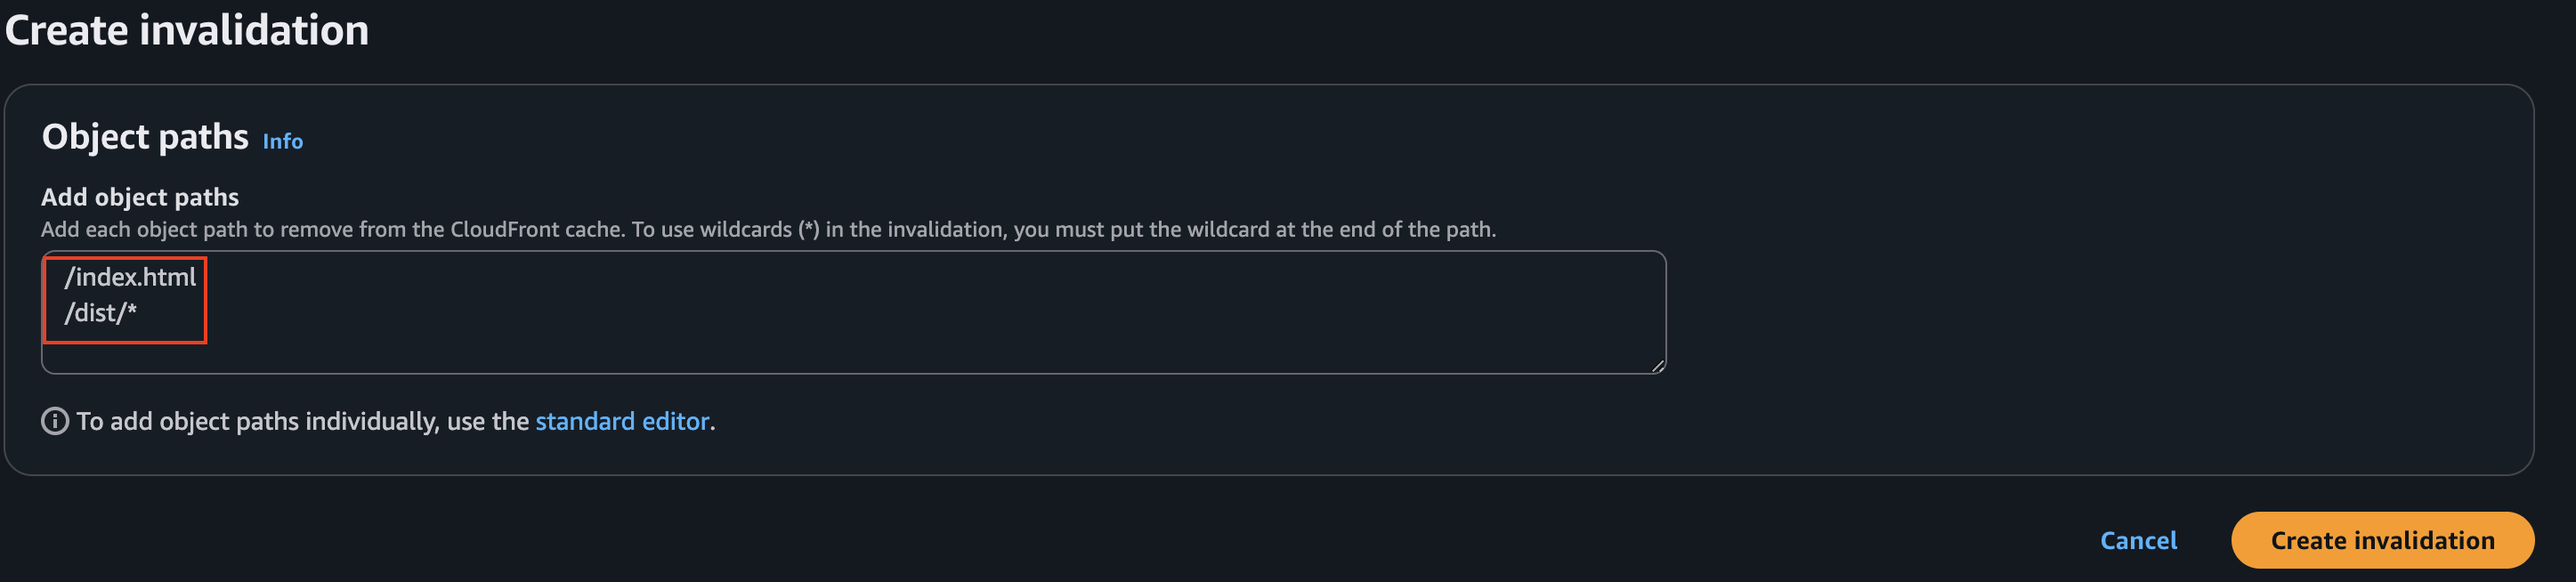
This will be the way to still updating our website and make sure our users get the latest update immediately.
We could also create a custom error page by adding one into the Error pages configuration tab in case we want our application to look more professional.
Fully Integration: Backend – Frontend
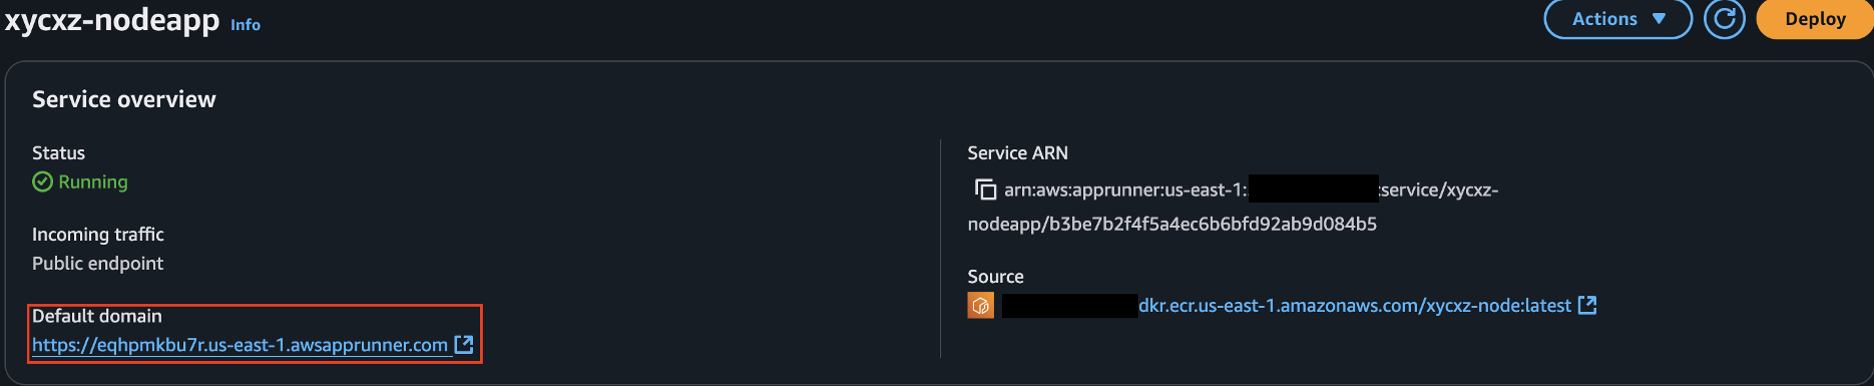
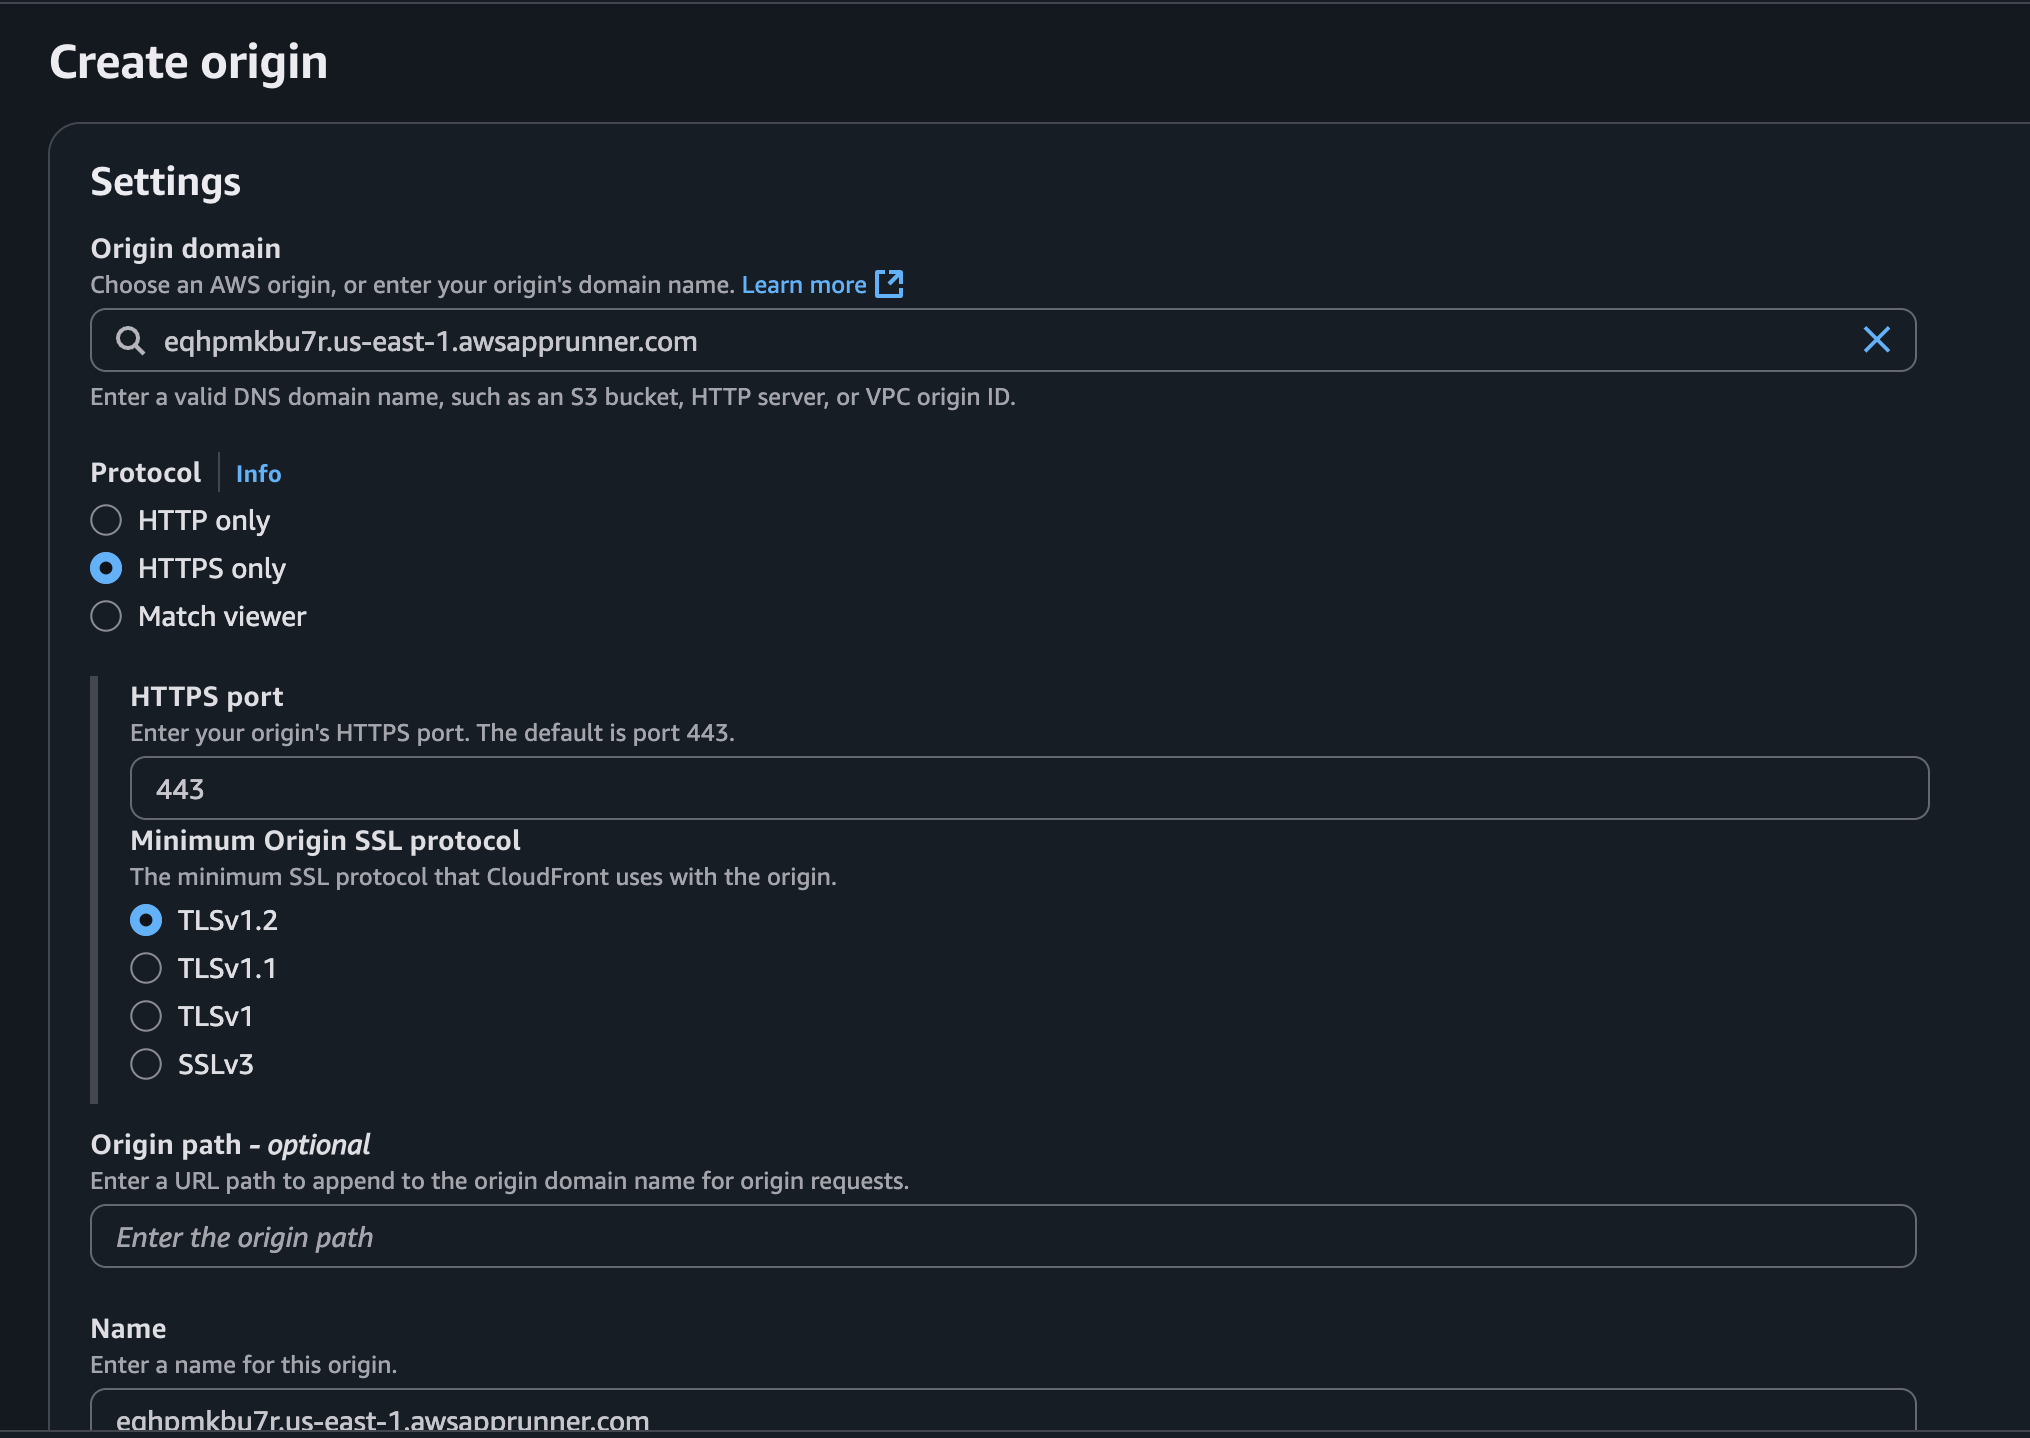
To start serving requests from our backend, we will add our App Runner service as another origin in CloudFront. We can click on Create origin and add the App Runner domain to the Origin domain field:
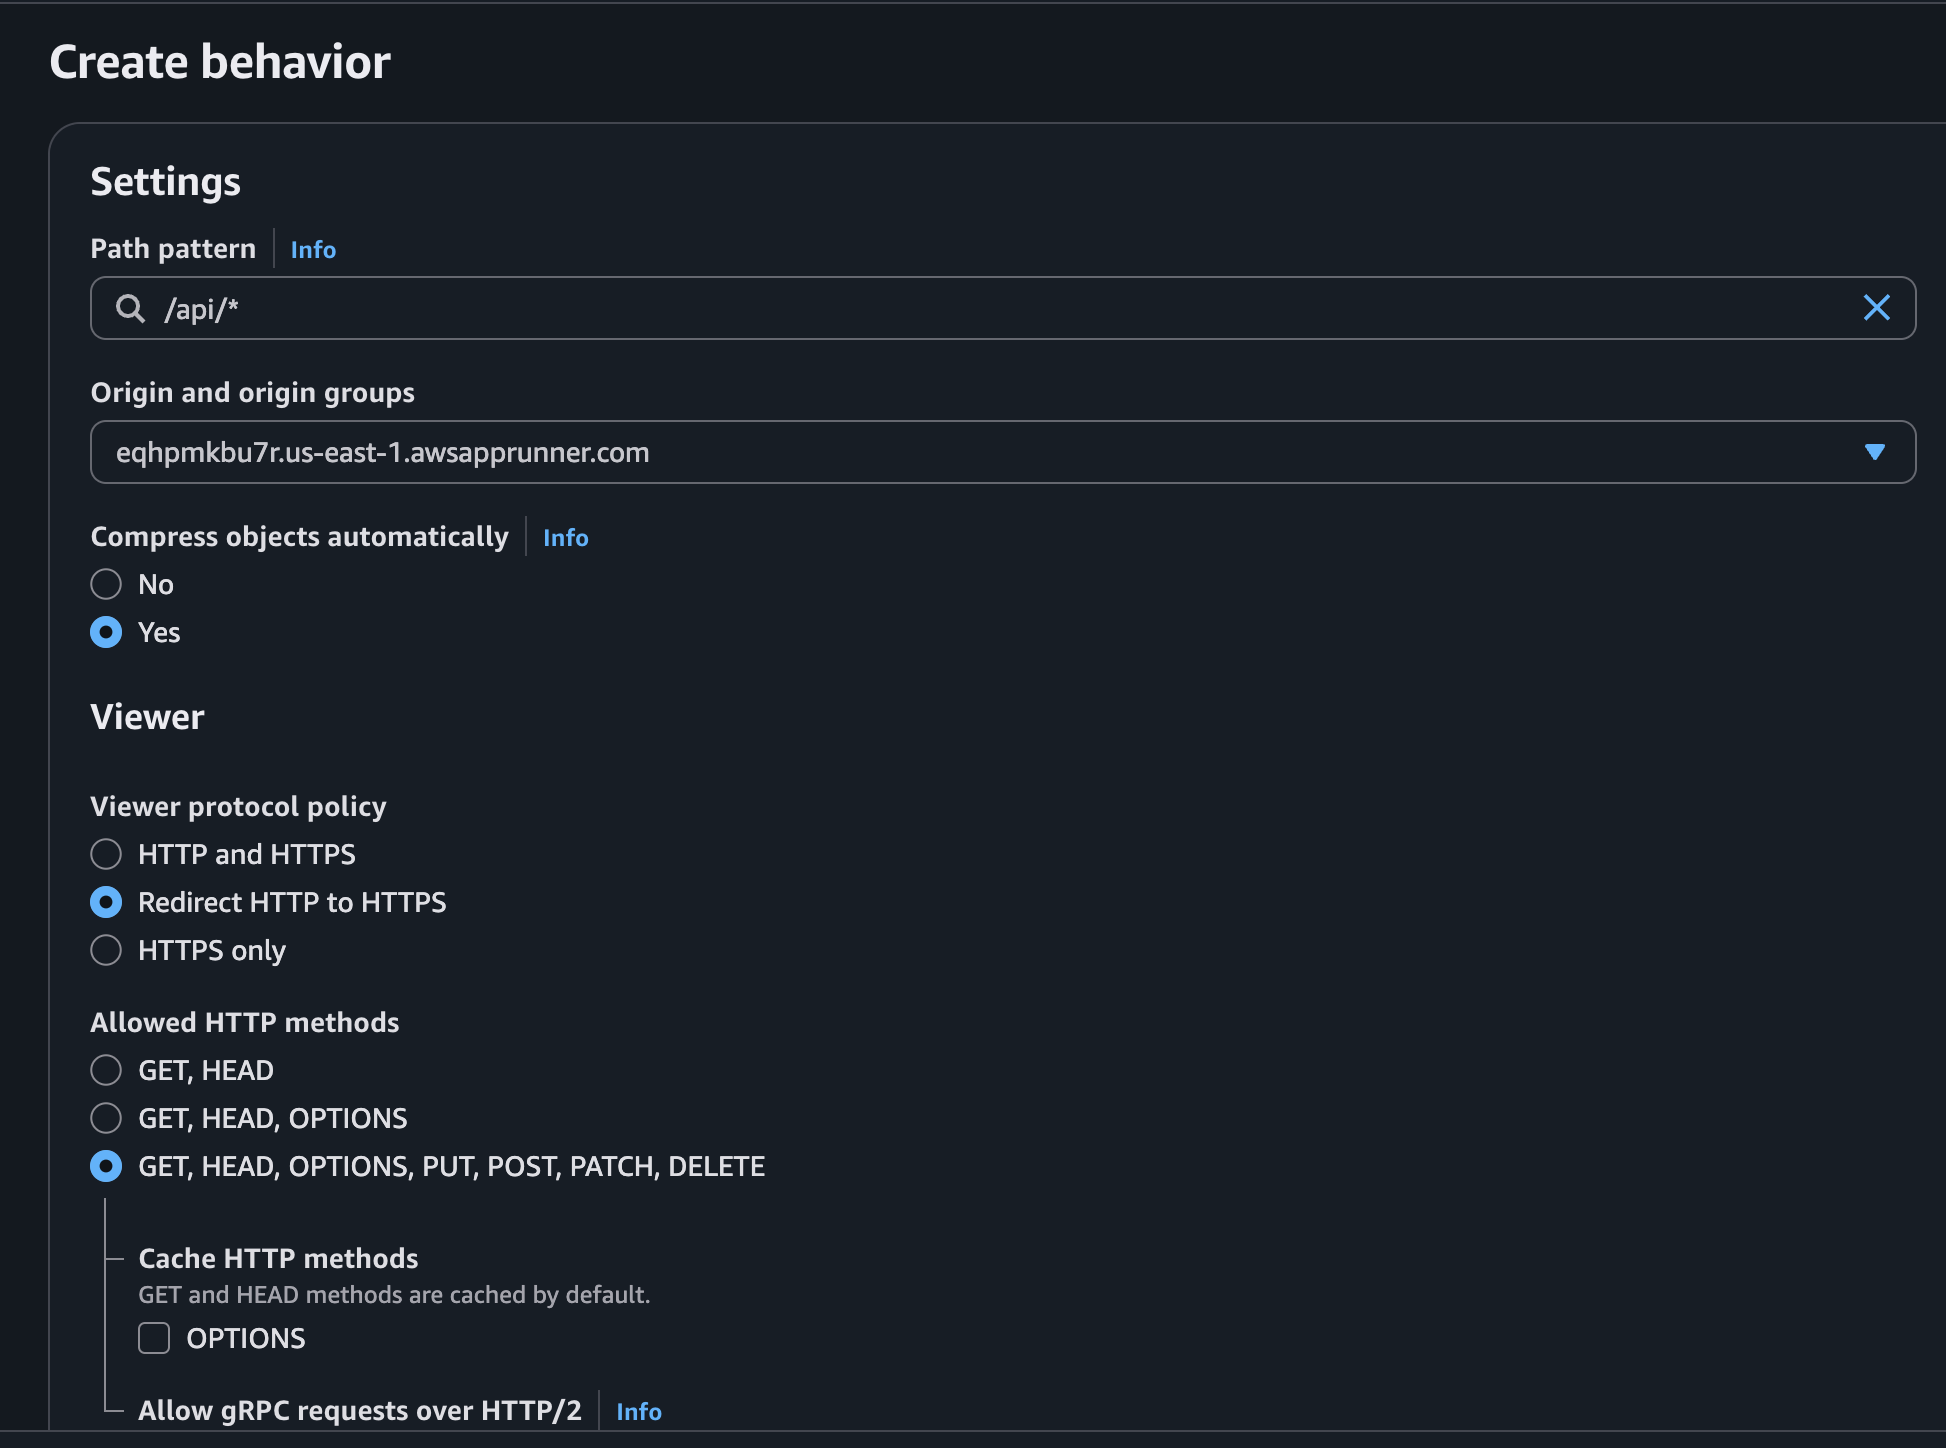
Now that CloudFront knows where our backend lives, we need to create a behavior, which acts as a routing rule. This rule will tell CloudFront when to send traffic to App Runner.
Our backend application is designed to respond to requests on paths that start with /api. To handle this, we’ll create a new behavior with the Path Pattern set to /api/*. The * is a wildcard, meaning any request like /api/users or /api/products will match this rule. We’ll also select our App Runner service as the origin for this behavior.
With this rule, we are telling CloudFront: “For any request whose path starts with /api/, forward it to our App Runner origin.”
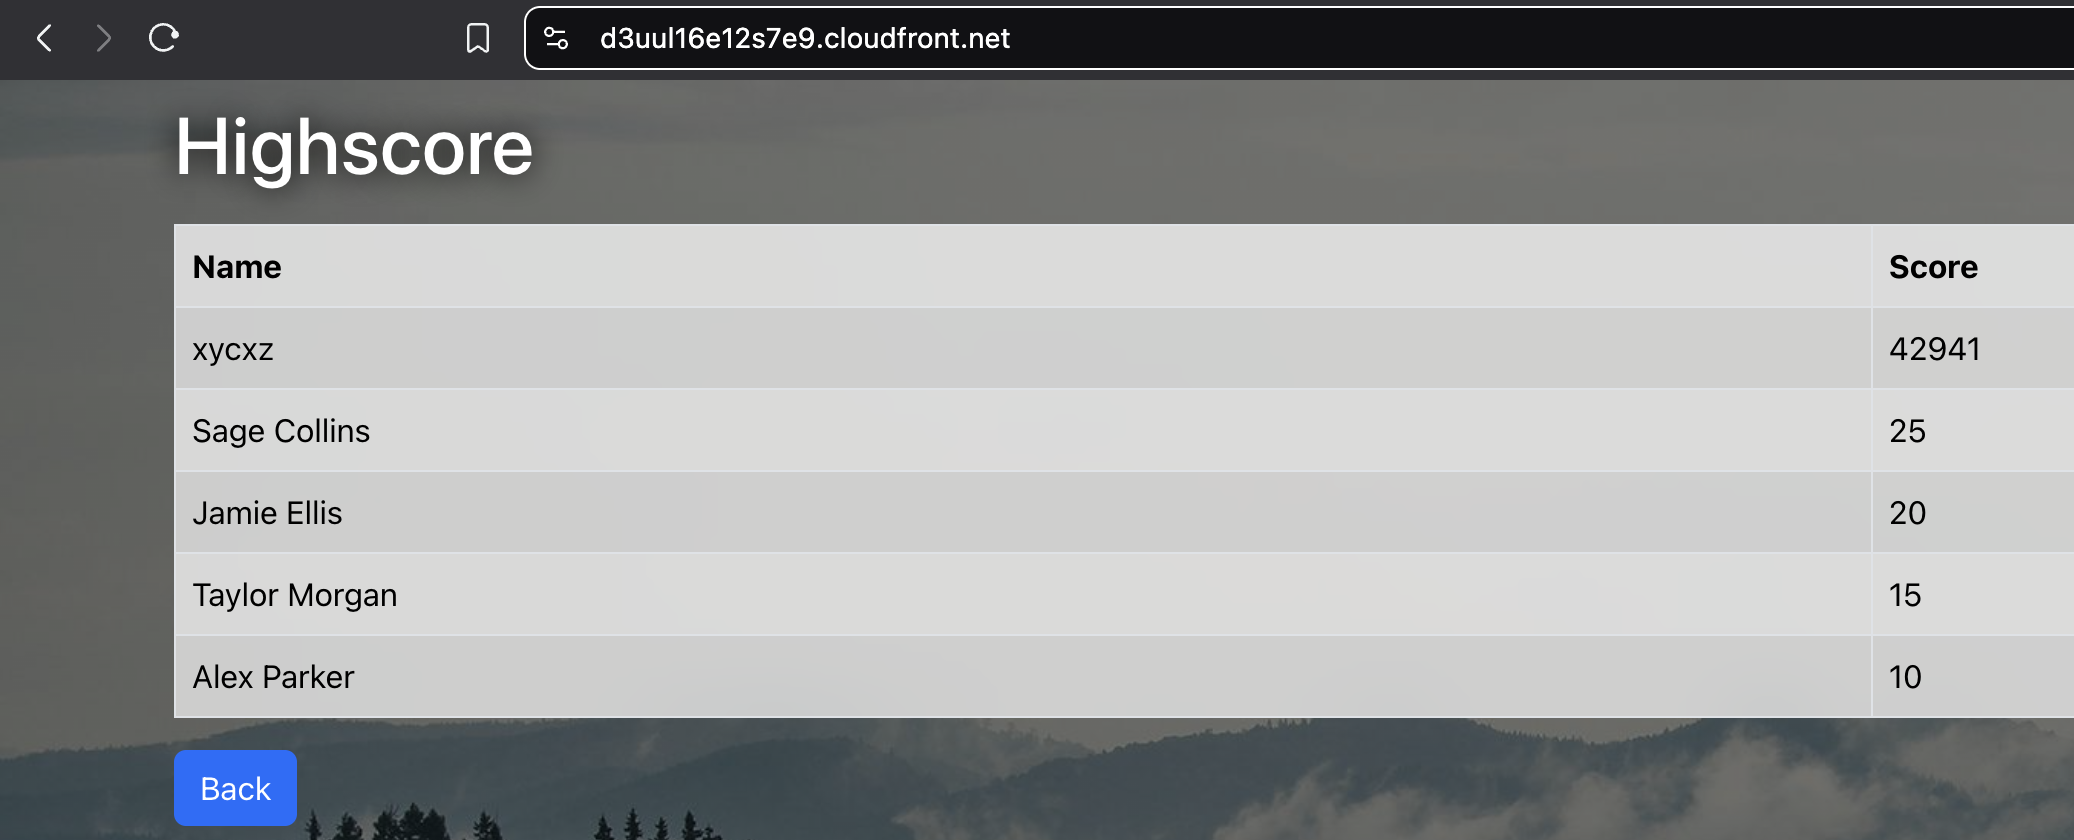
By creating this behaviour, we would have successfully connected both sides of our web application! Now, visiting our CloudFront domain will serve the frontend from S3, and any API calls made by the frontend will be correctly routed to our backend on App Runner.
Serving the Application in our Domain
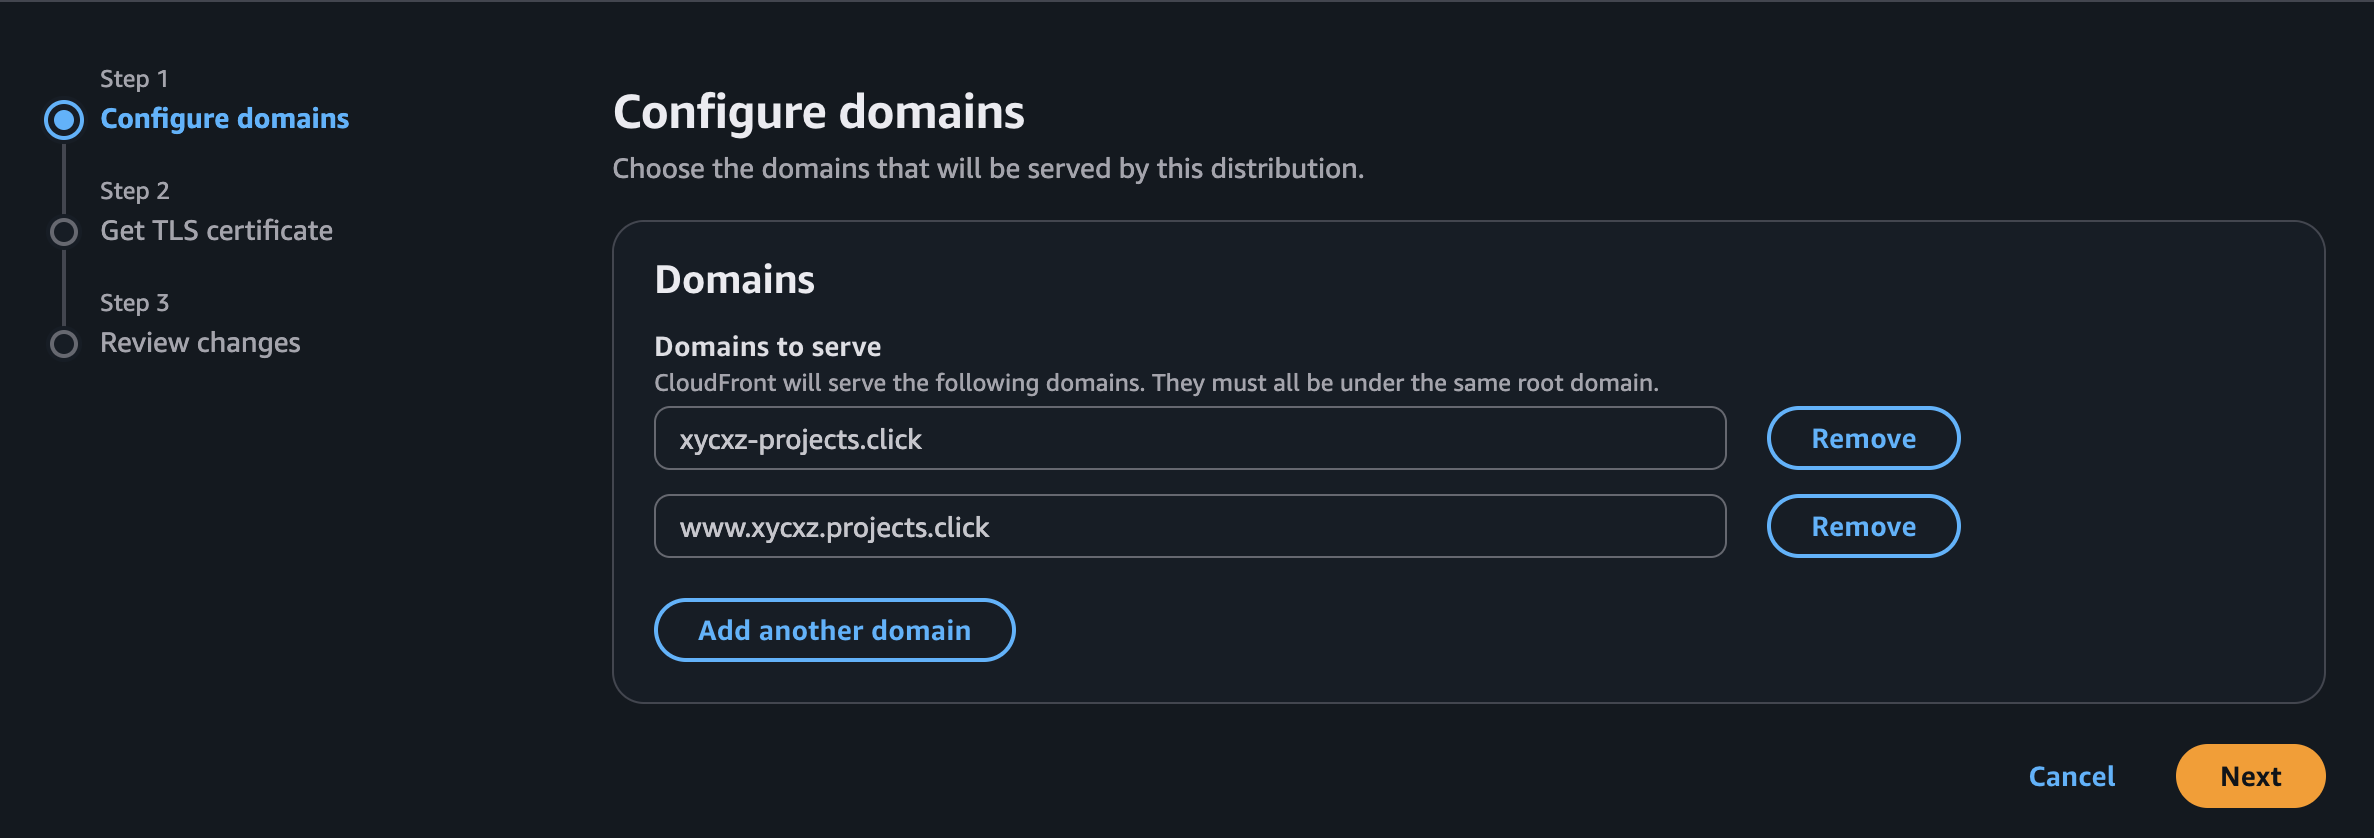
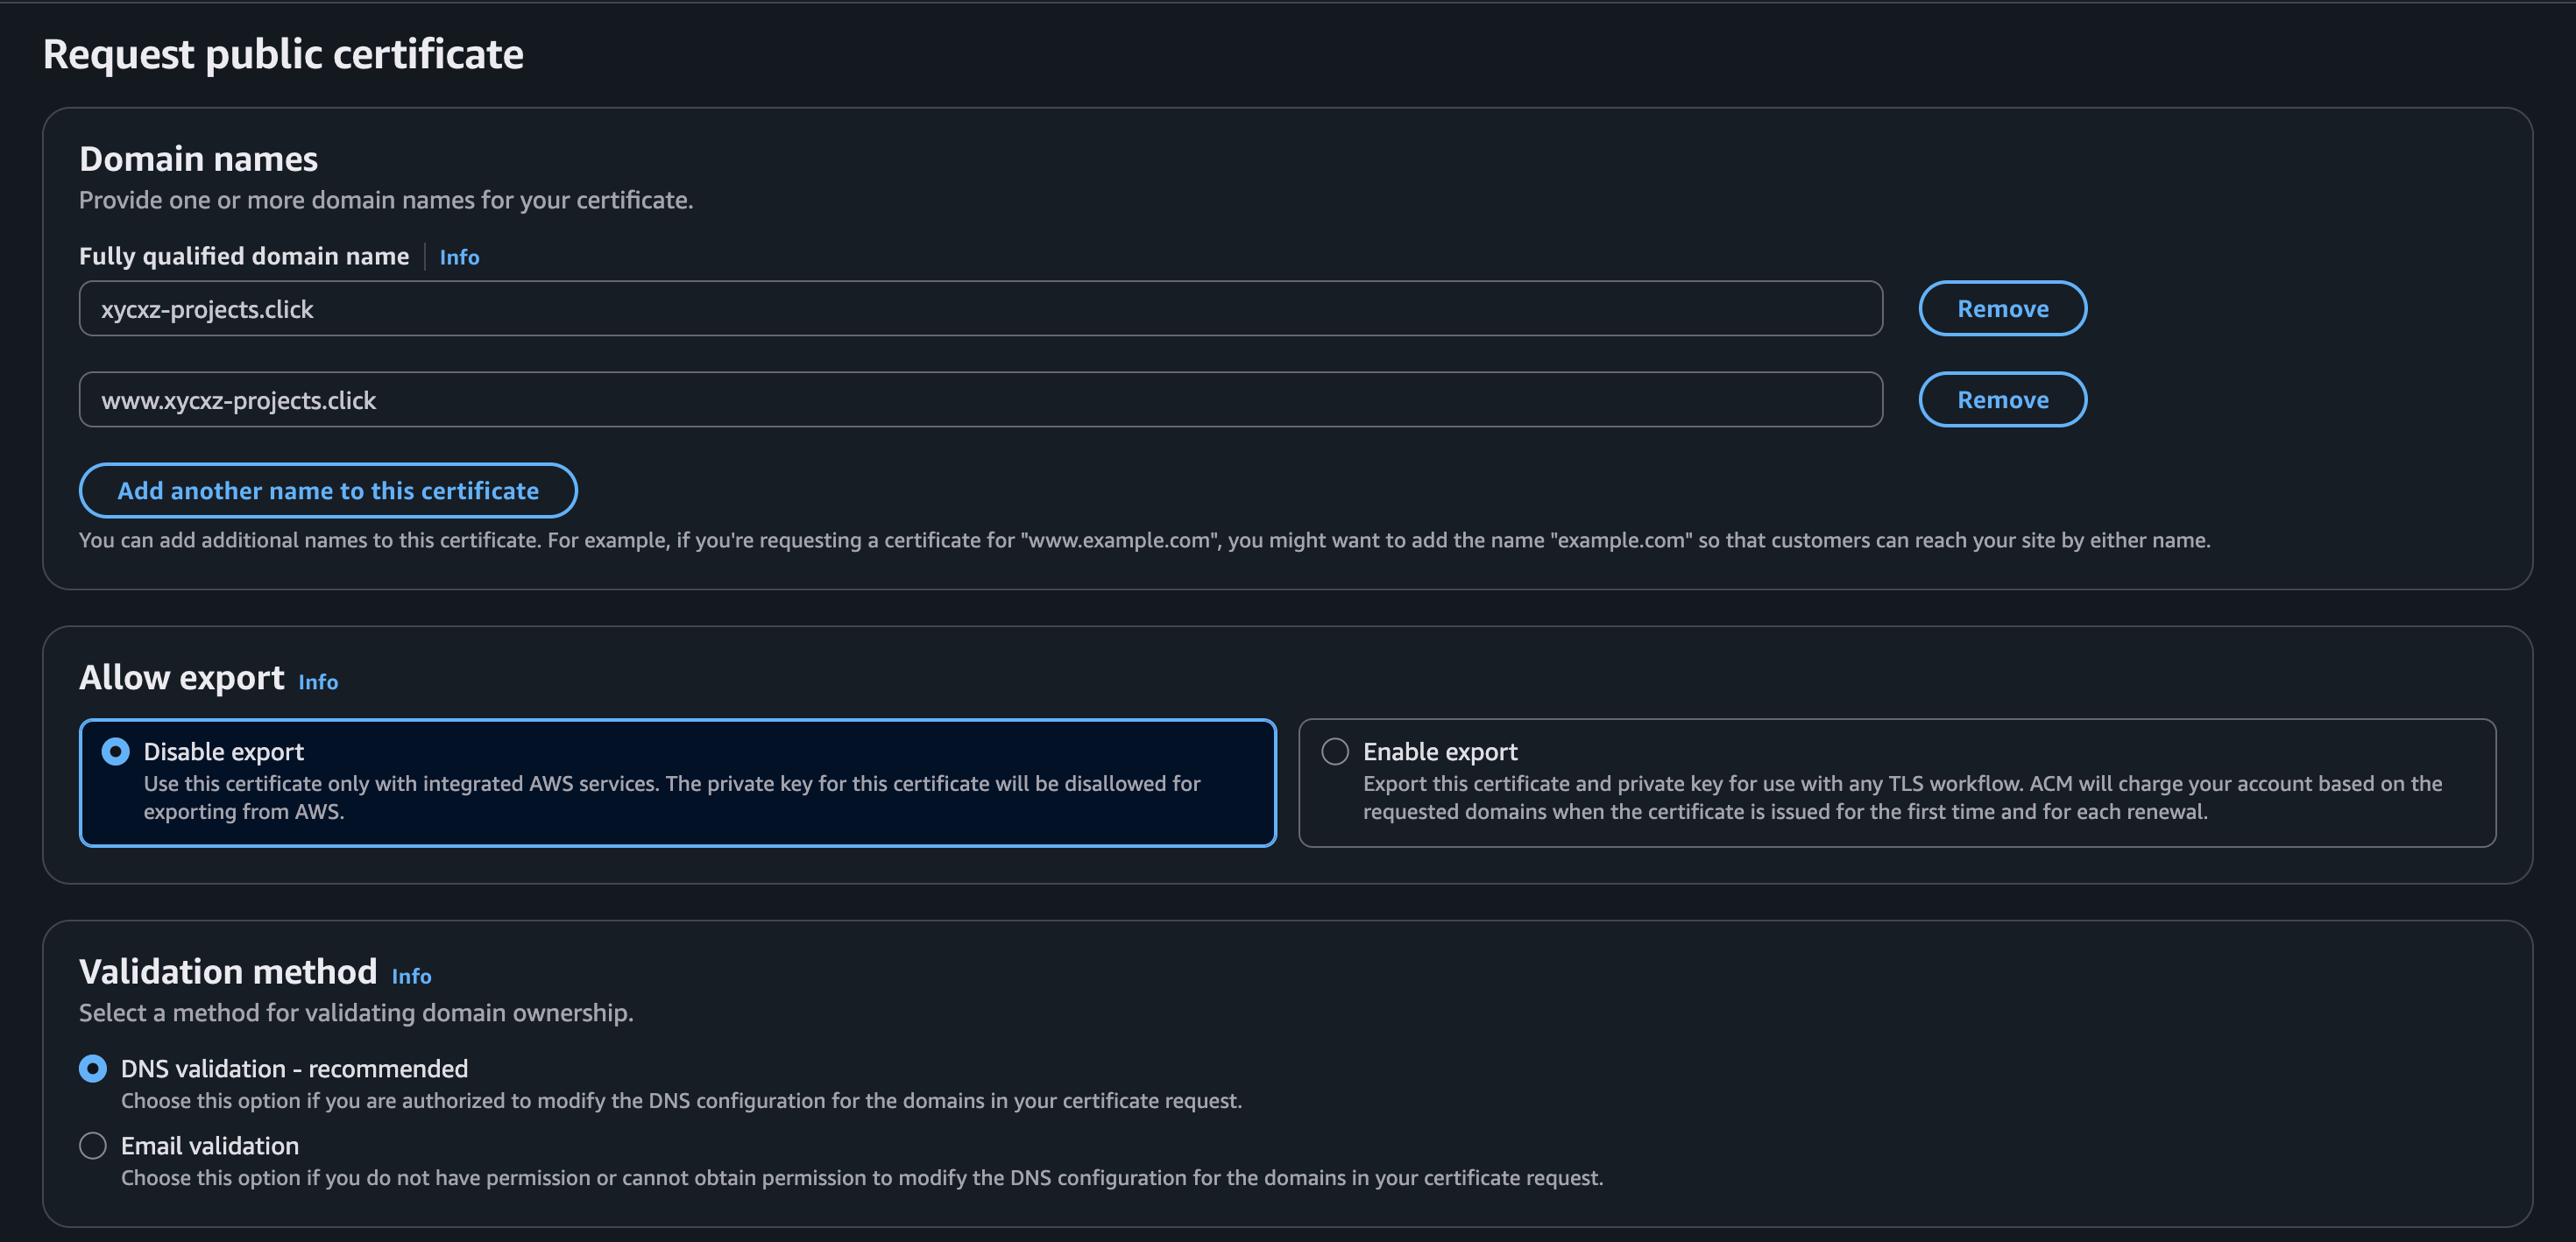
Finally, we will make sure to host this application under our purchased domain. When trying to add domains to our CloudFront, we will see that it will ask for a TLS certificate in order to use HTTPS traffic. So, we will create a certificate (if we don’t have one already) and then use it within CloudFront:
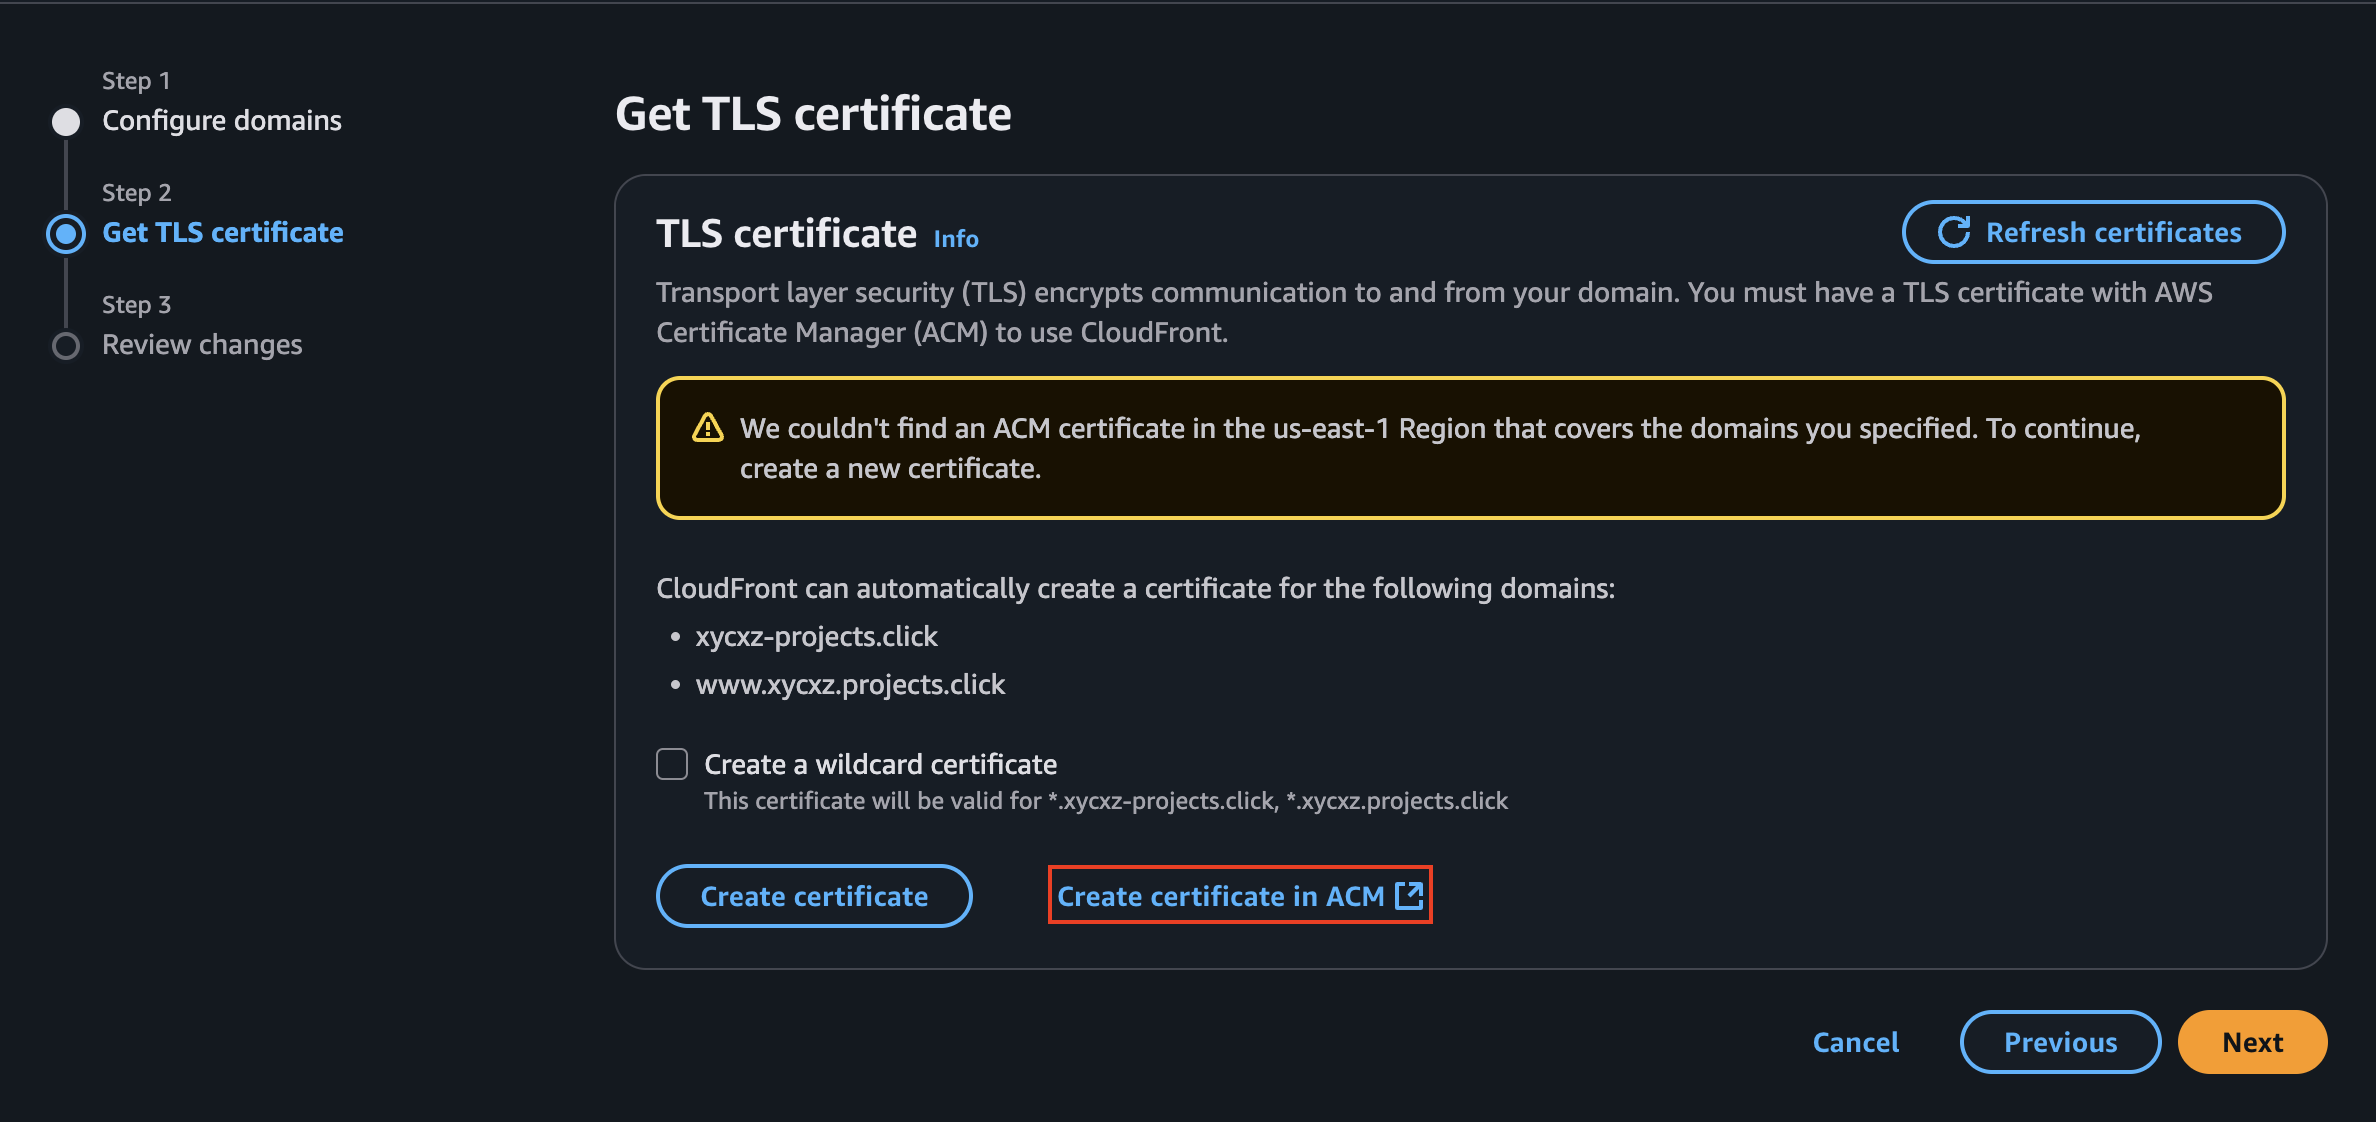
Note: Make sure you are on the correct region before requesting the certificate
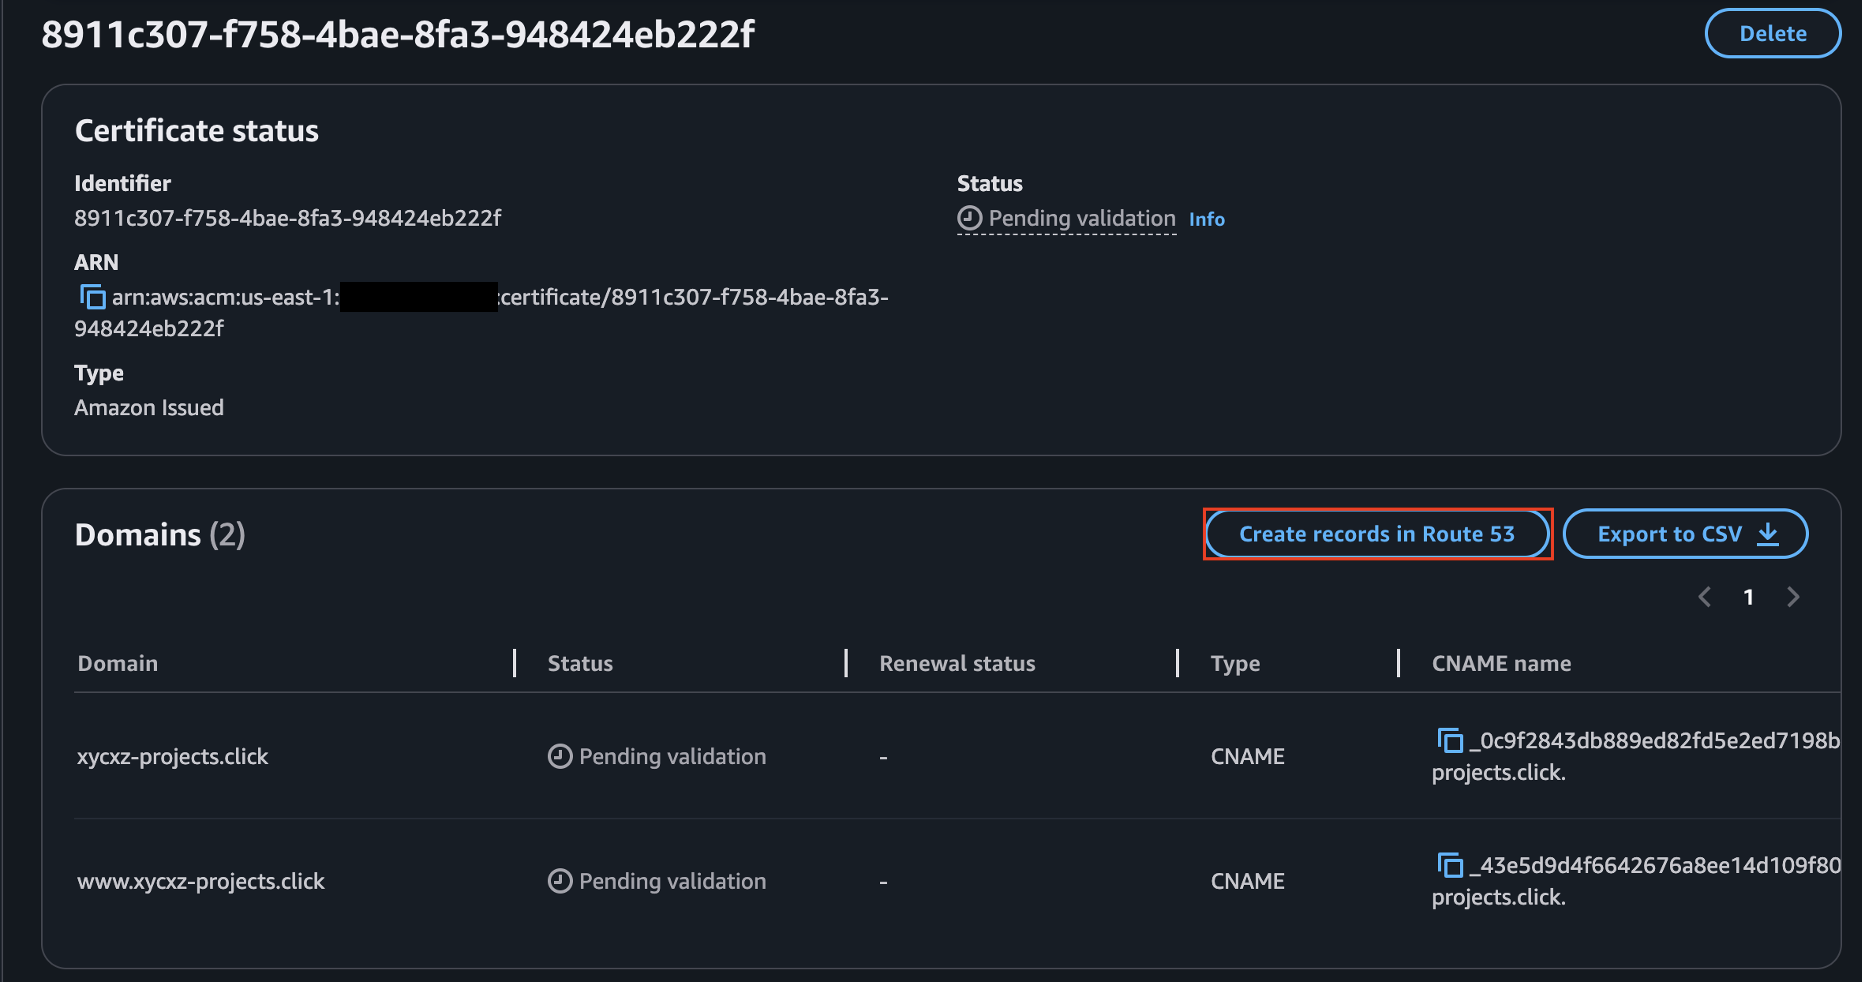
While the records are creating, we need to click on Create records in Route 53 to add the CNAME records to our domains. This will be the proof that we are the actual owners of the domains we claim:
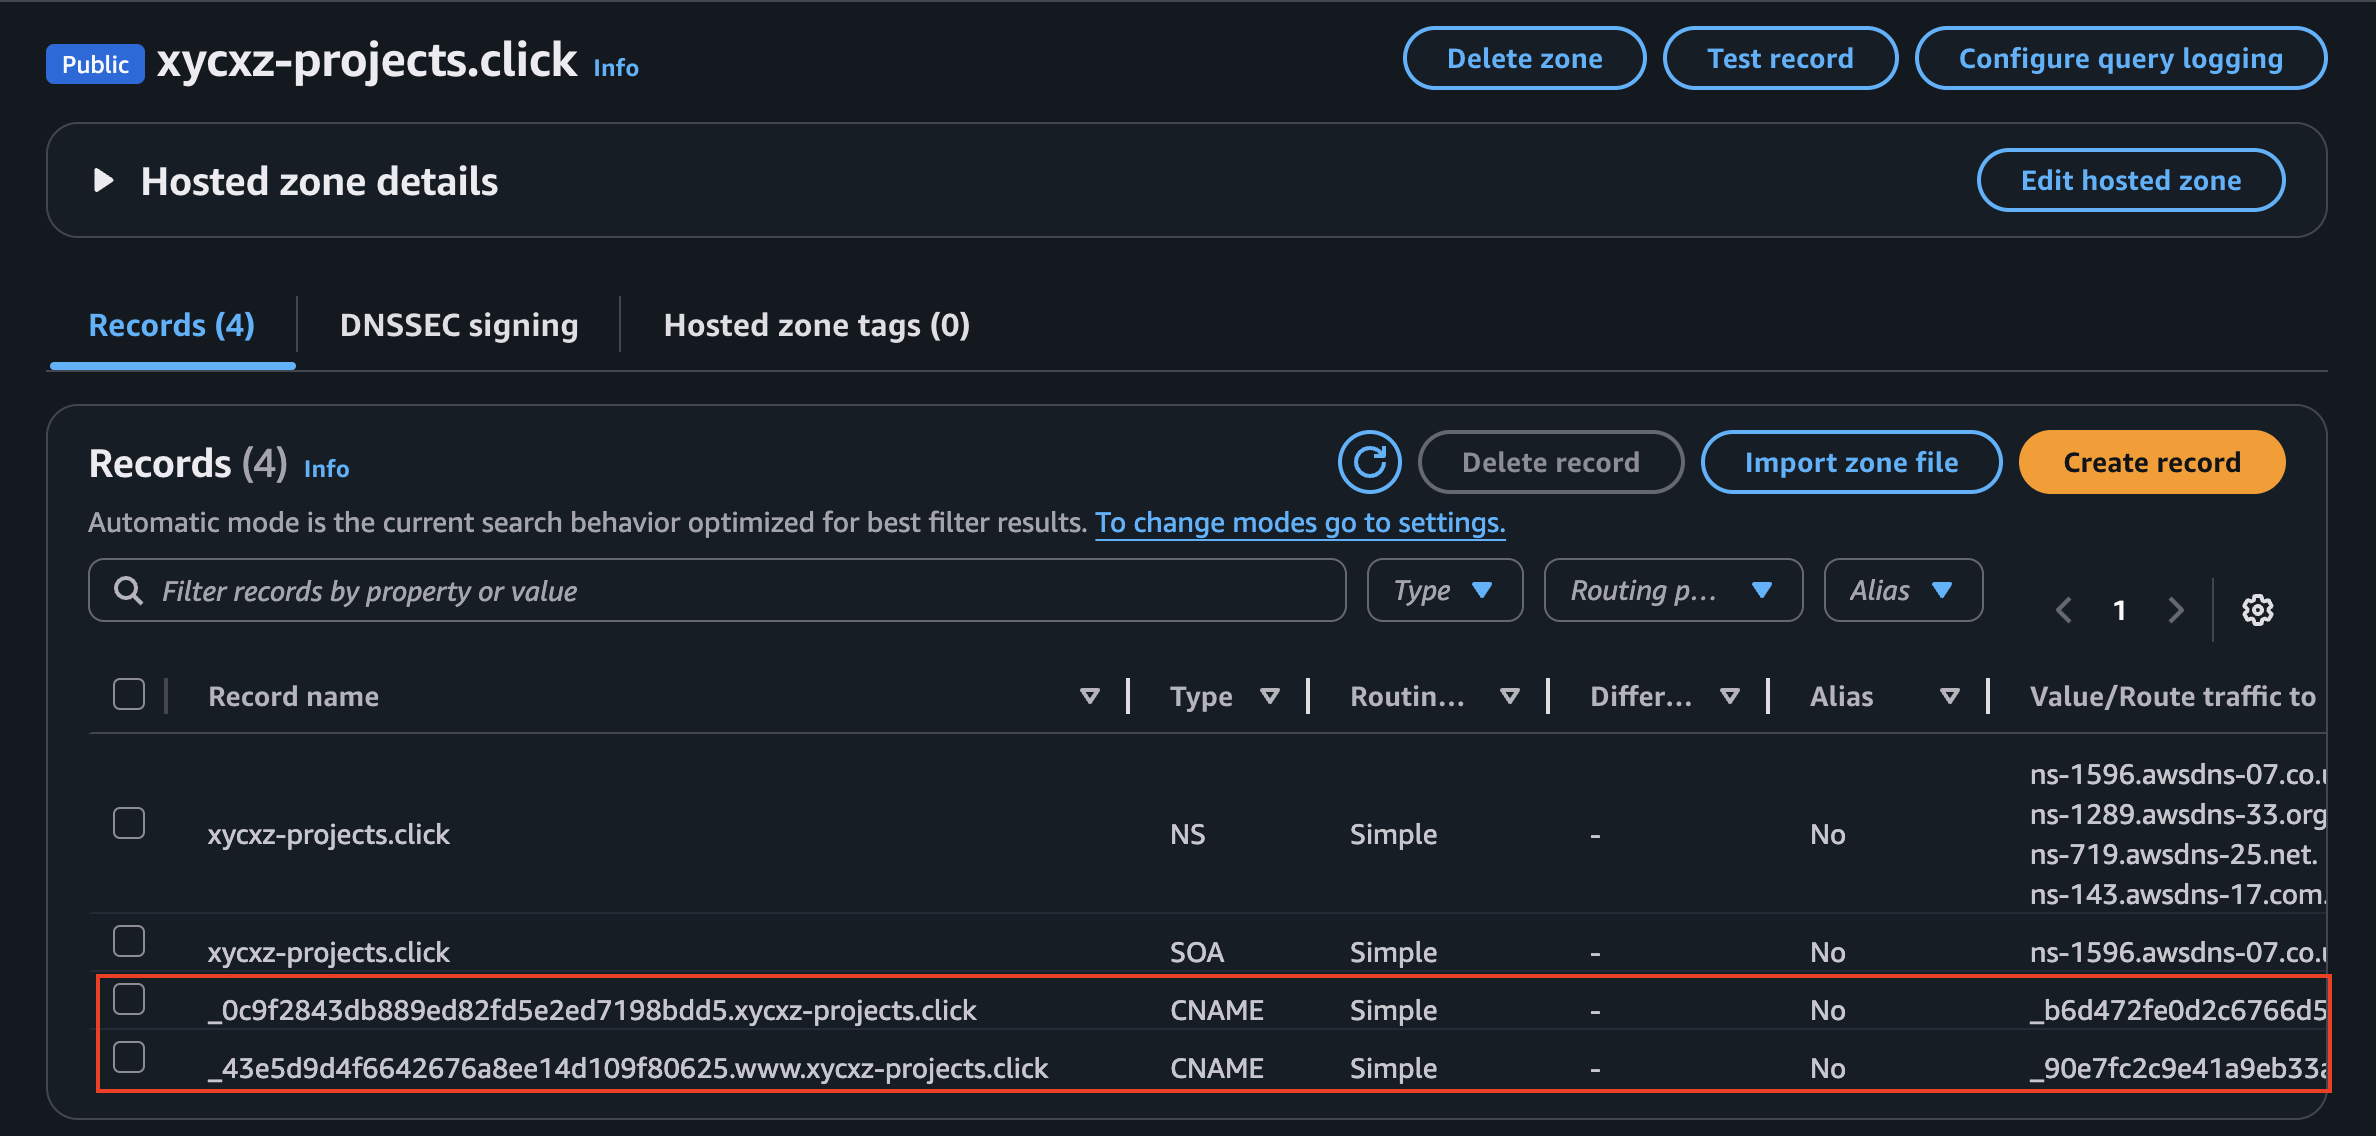
If we go back to Route 53, we will be the records already created:
Once that’s done, we can go back to CloudFront and continue with the configuration. So far, when we are adding our domain names, we are just configuring CloudFront to accept requests and use a SSL certificate for encrypted connection. However, we haven’t configured the DNS configuration of our domains to be served by CloudFront.
For that, we will copy the Distribution domain name of CloudFront and create new records on our domains to point to this. This way the browser will know where to connect to:
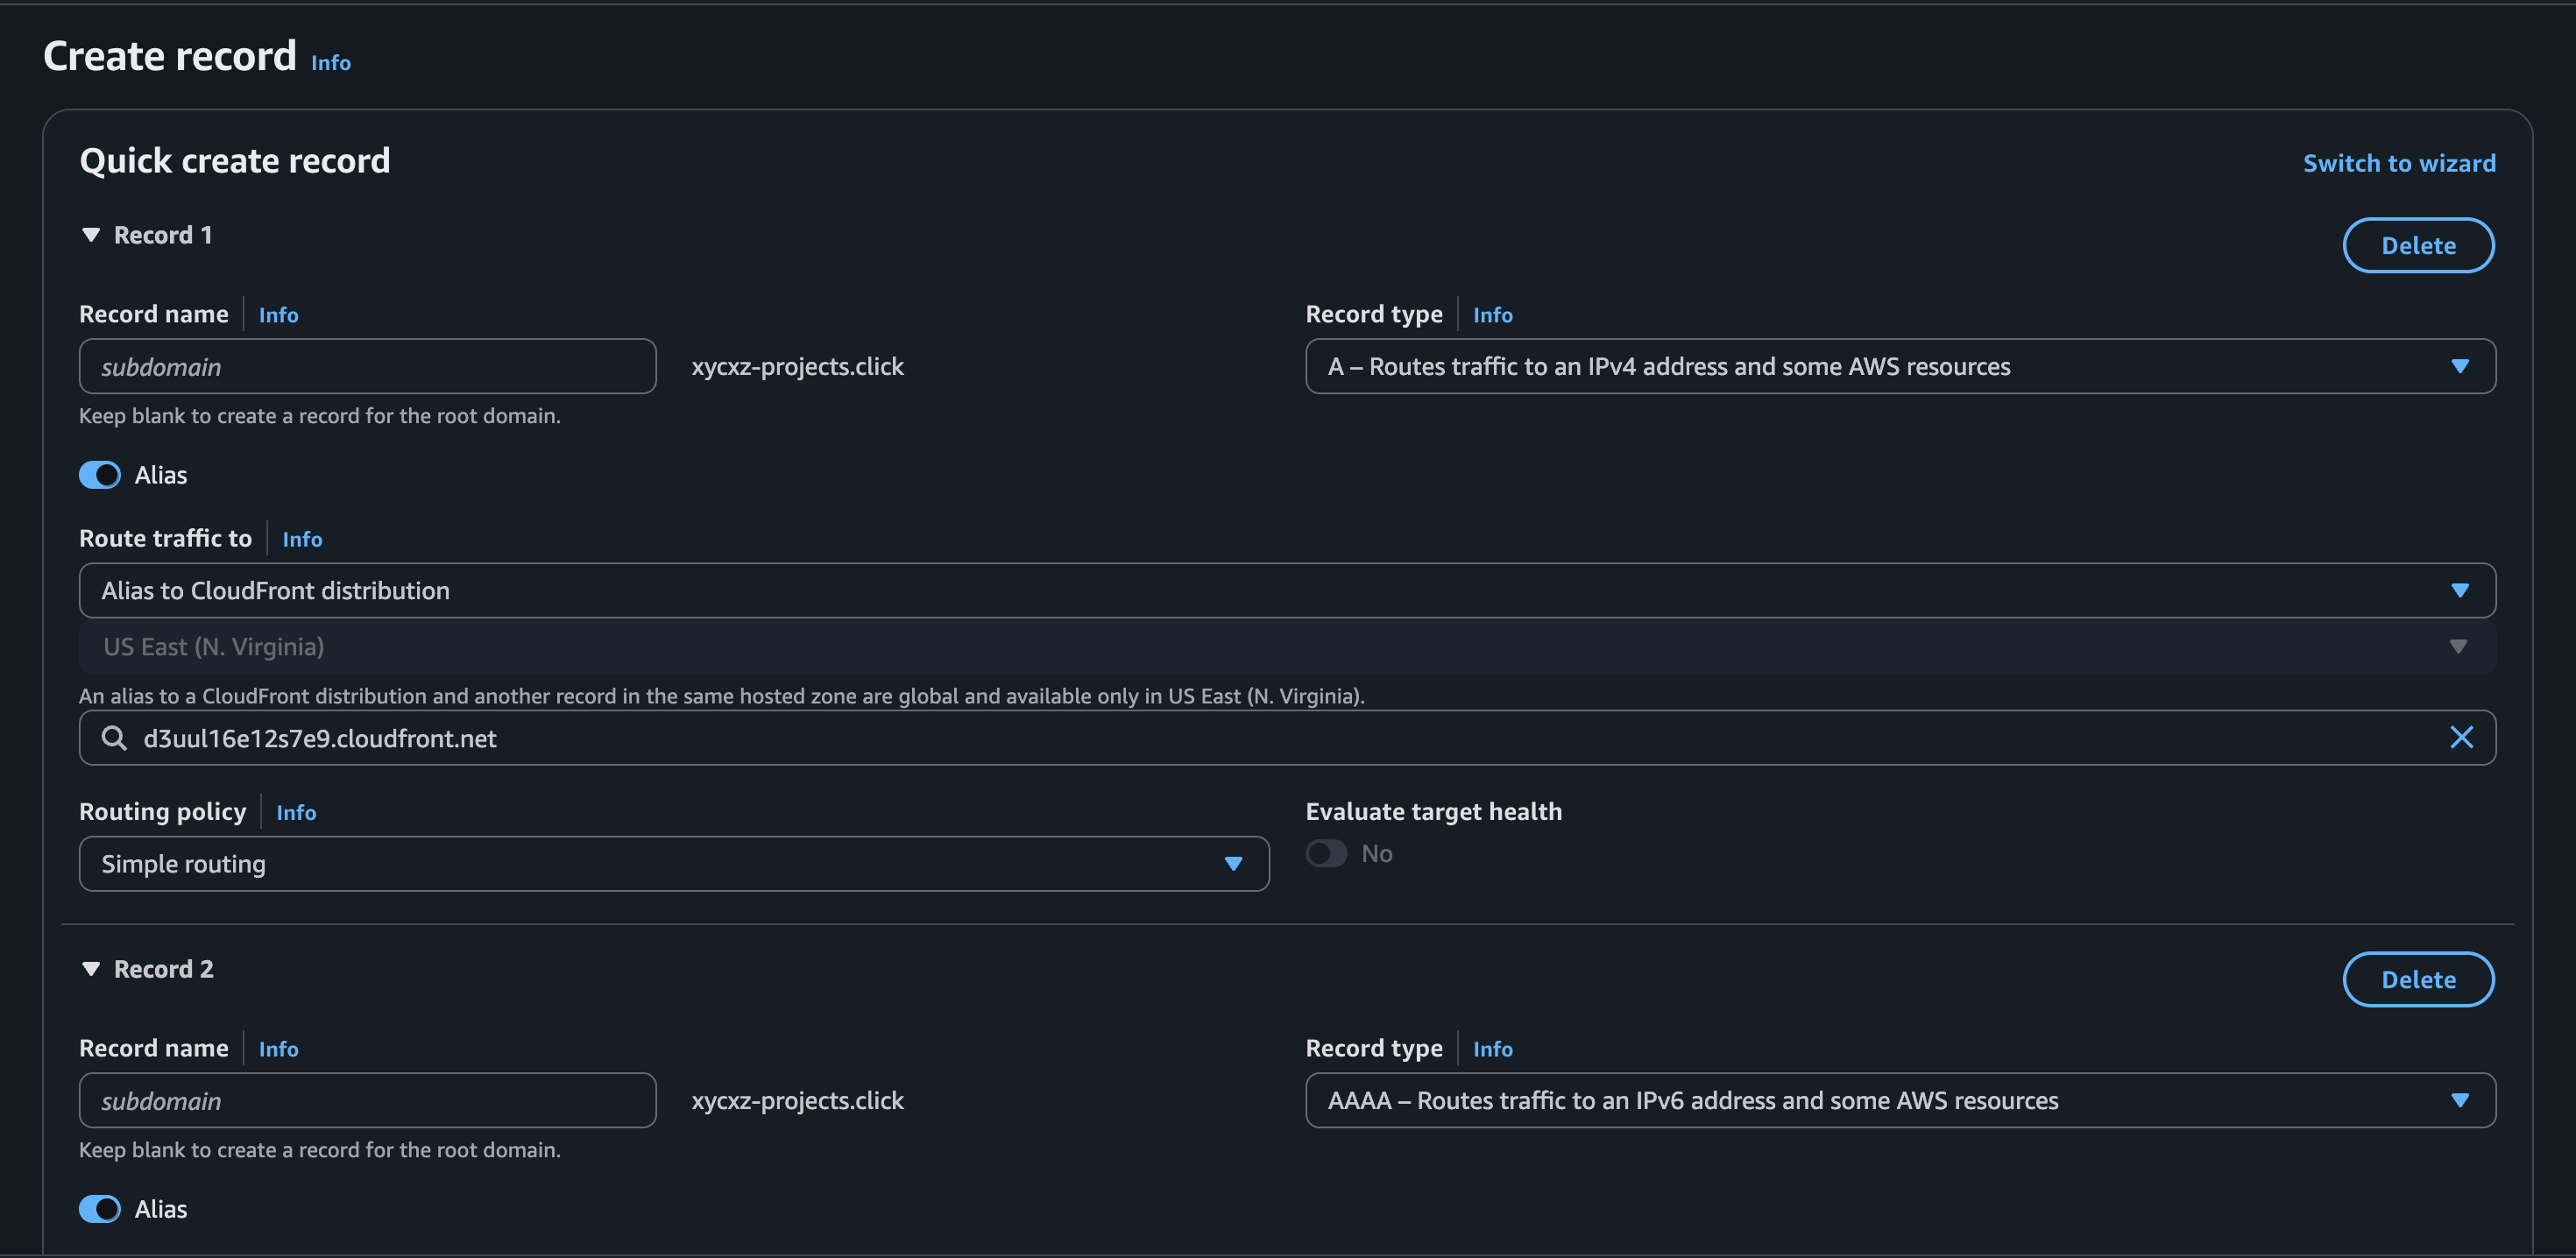
That should be enough to link our domain with the application!
Next Steps
During this side project, we could explore some interesting AWS services. This is the last post of this mini project, and we will continue with the main project in upcoming posts.