Registry - AWS

Objective
My objective in this post will be to create a registry on the server I previously purchased here. A registry can be useful for us because it can store the custom images we need for our projects. The biggest advantage of doing this using the cloud is that, because it is accessible from the internet, we can pull the images from any computer or location as long as we have internet access.
Launching the Registry
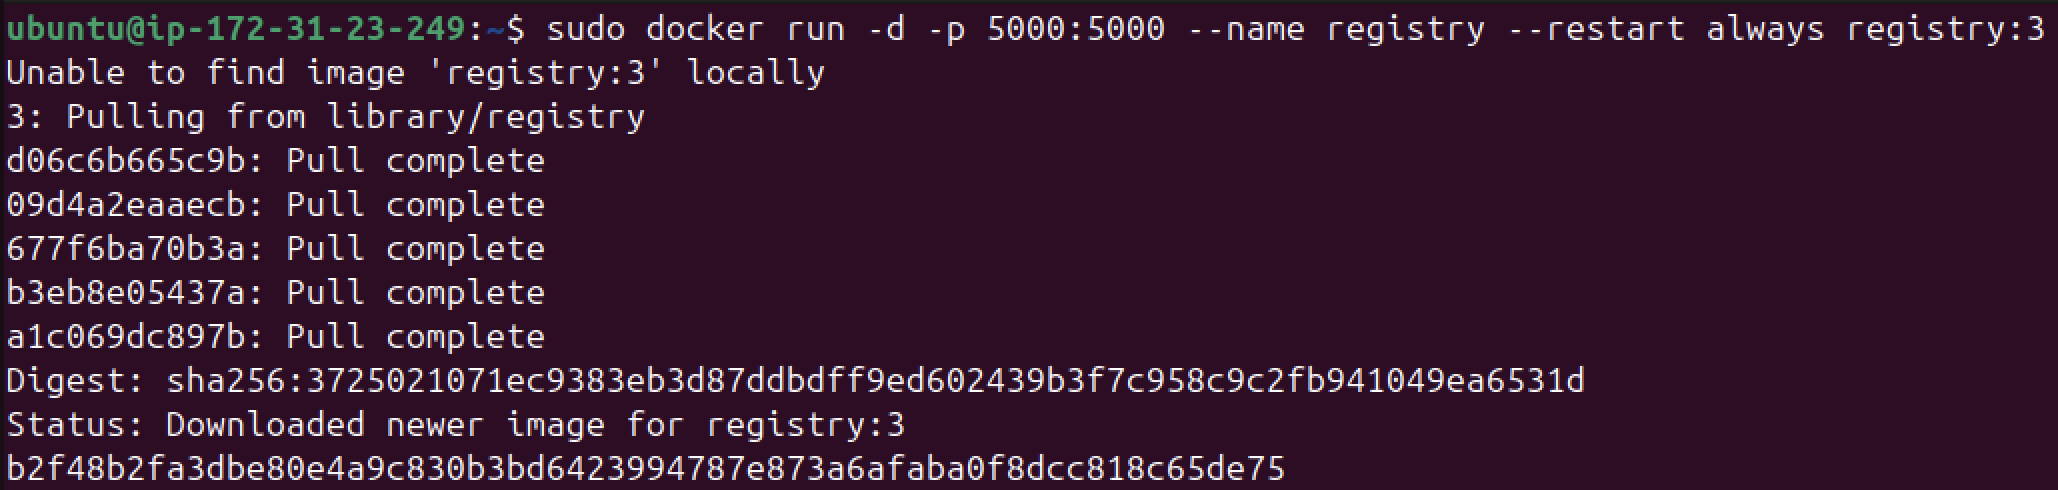
To launch a registry, we have to make use of the official Docker image. Once we located this, we will run the following command in our EC2 instance:
1
sudo docker run -d -p 5000:5000 --name registry --restart always registry:3
Note: Make sure to check my previous posts (FTP - Docker, Web Server - Docker, MySQL - Docker) to understand some of the flags shown in this command.
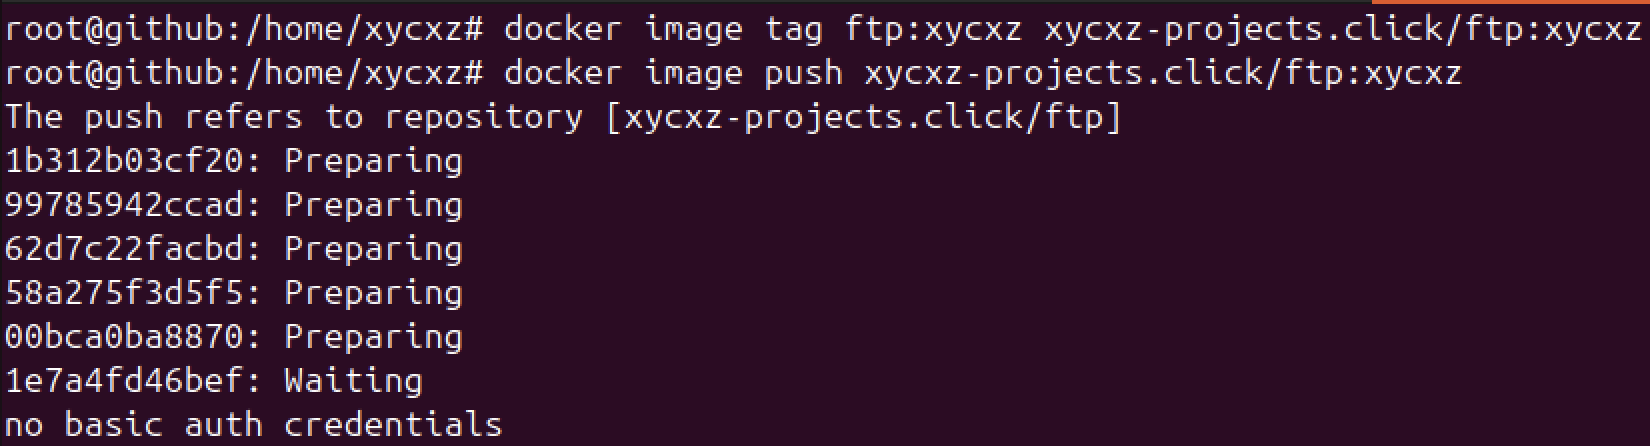
Now that we have our container registry up and running, let’s try to push an image into it. I will switch back to my ubuntu host and try to push the FTP image I created before here:
1
2
3
4
5
# This will prepare our image to push it into the registry. The "server" must match the domain we use for the registry!
docker image tag <image> <server>/<repository>

# This will push our image into the remote registry
docker image push <server>/<repository>
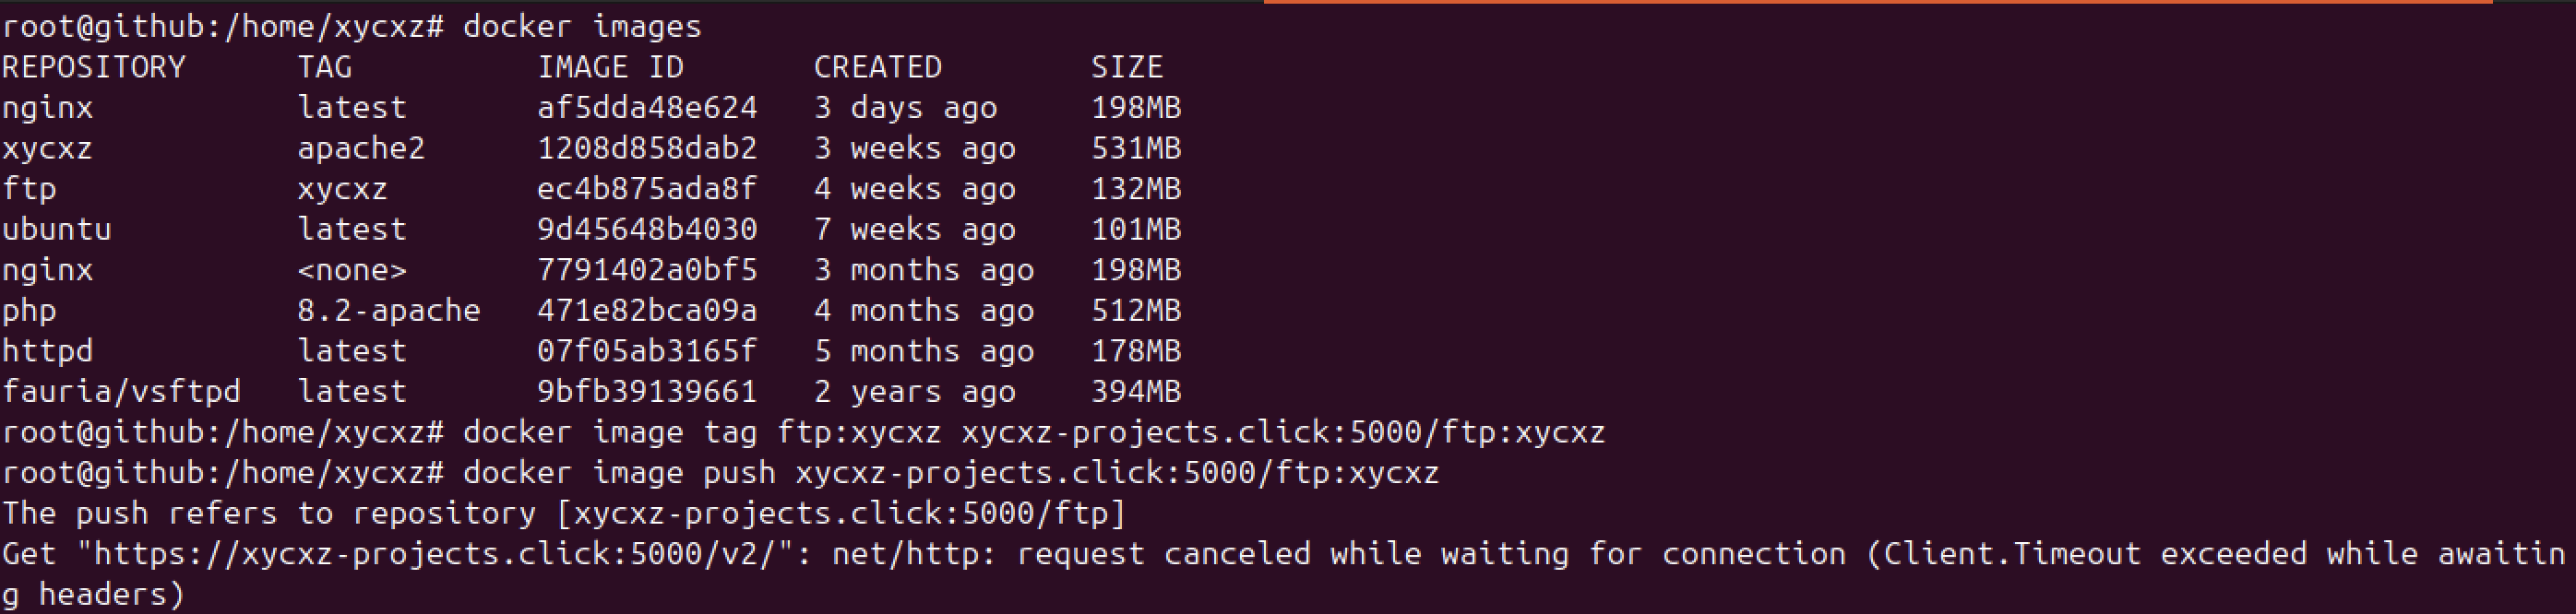
However, we can see that this did not work. This was expected because when we configured the network settings from our EC2 instance, we only opened 3 ports: 22, 80, and 443. Here, we are mapping the container registry to port 5000 on the localhost (EC2 instance), which DOES NOT have that port configured to listen on the public network.
There are two options that we can take in this situation: One would be to configure properly our Security Group in our instance EC2 settings; or we could just map the container port to a port that our instance is already configured to use.
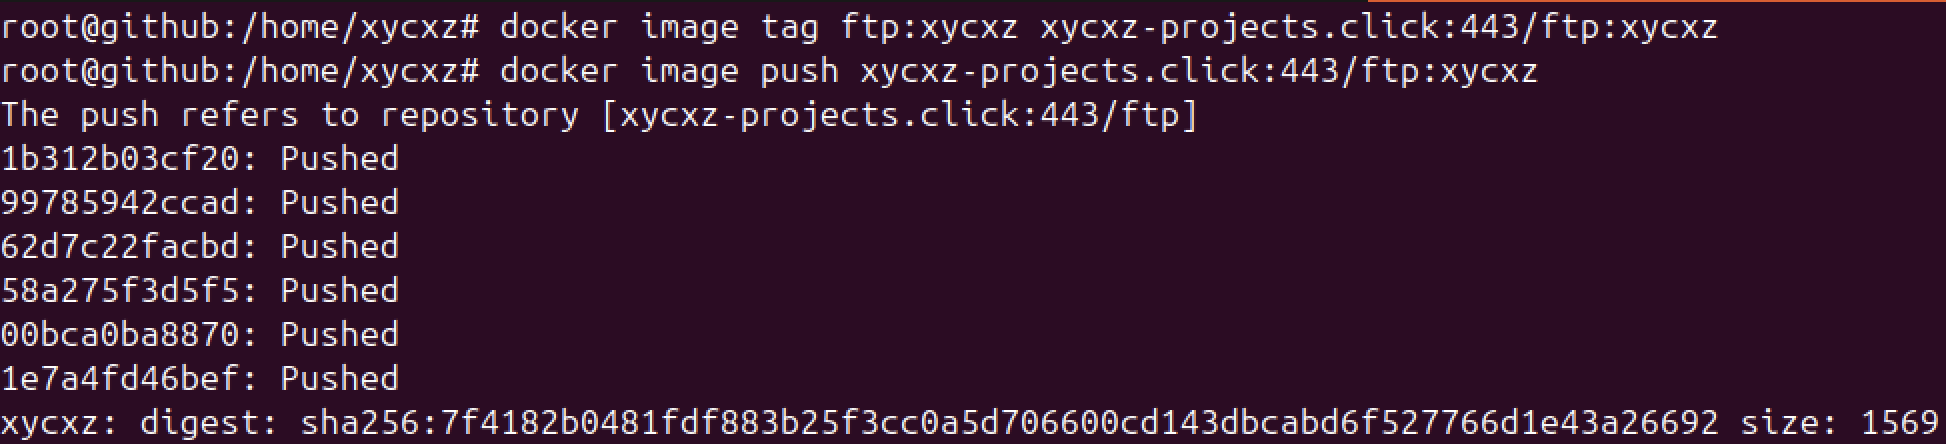
In this case, I will take the second approach because I would like to show what happens when we want to use for example port 80. So, let’s do the same as before but this time map the container to port 80 and try to push the image again (don’t forget to remove the container previously created if you are following along):

As we can see, this time once again we are getting an error, but a different one. You might be wondering, what does this error mean? Well, our Docker Daemon (engine), by default, always tries to communicate with a registry securely using HTTPS. The message simply means that when our Docker Engine tried to establish an HTTPS connection with the registry, this responded with the unencrypted version of the protocol (HTTP) causing the connection to fail because they are using different protocols, which would be like trying to communicate using different languages: it will fail immediately.
In this situation, we could try creating a /etc/docker/daemon.json file and add an insecure-registries entry to allow connections through port 80 with our registry. However, this will imply using a protocol that does not enforce encryption, meaning that someone in our network will be able to sniff the traffic and see everything on plain text.
Note: I will leave the documentation for this in case you try to do this locally on your machine. Please, never use this in production environments!
Because we would never want that (it would be a fatal security misconfiguration), we have to configure our registry to allow encrypted HTTP connection.
Enabling HTTPS in our Registry
To configure this properly, I will be consulting the documentation that can be found here. Before launching our registry, we have to configure Let’s Encrypt. Let’s check its configuration options:
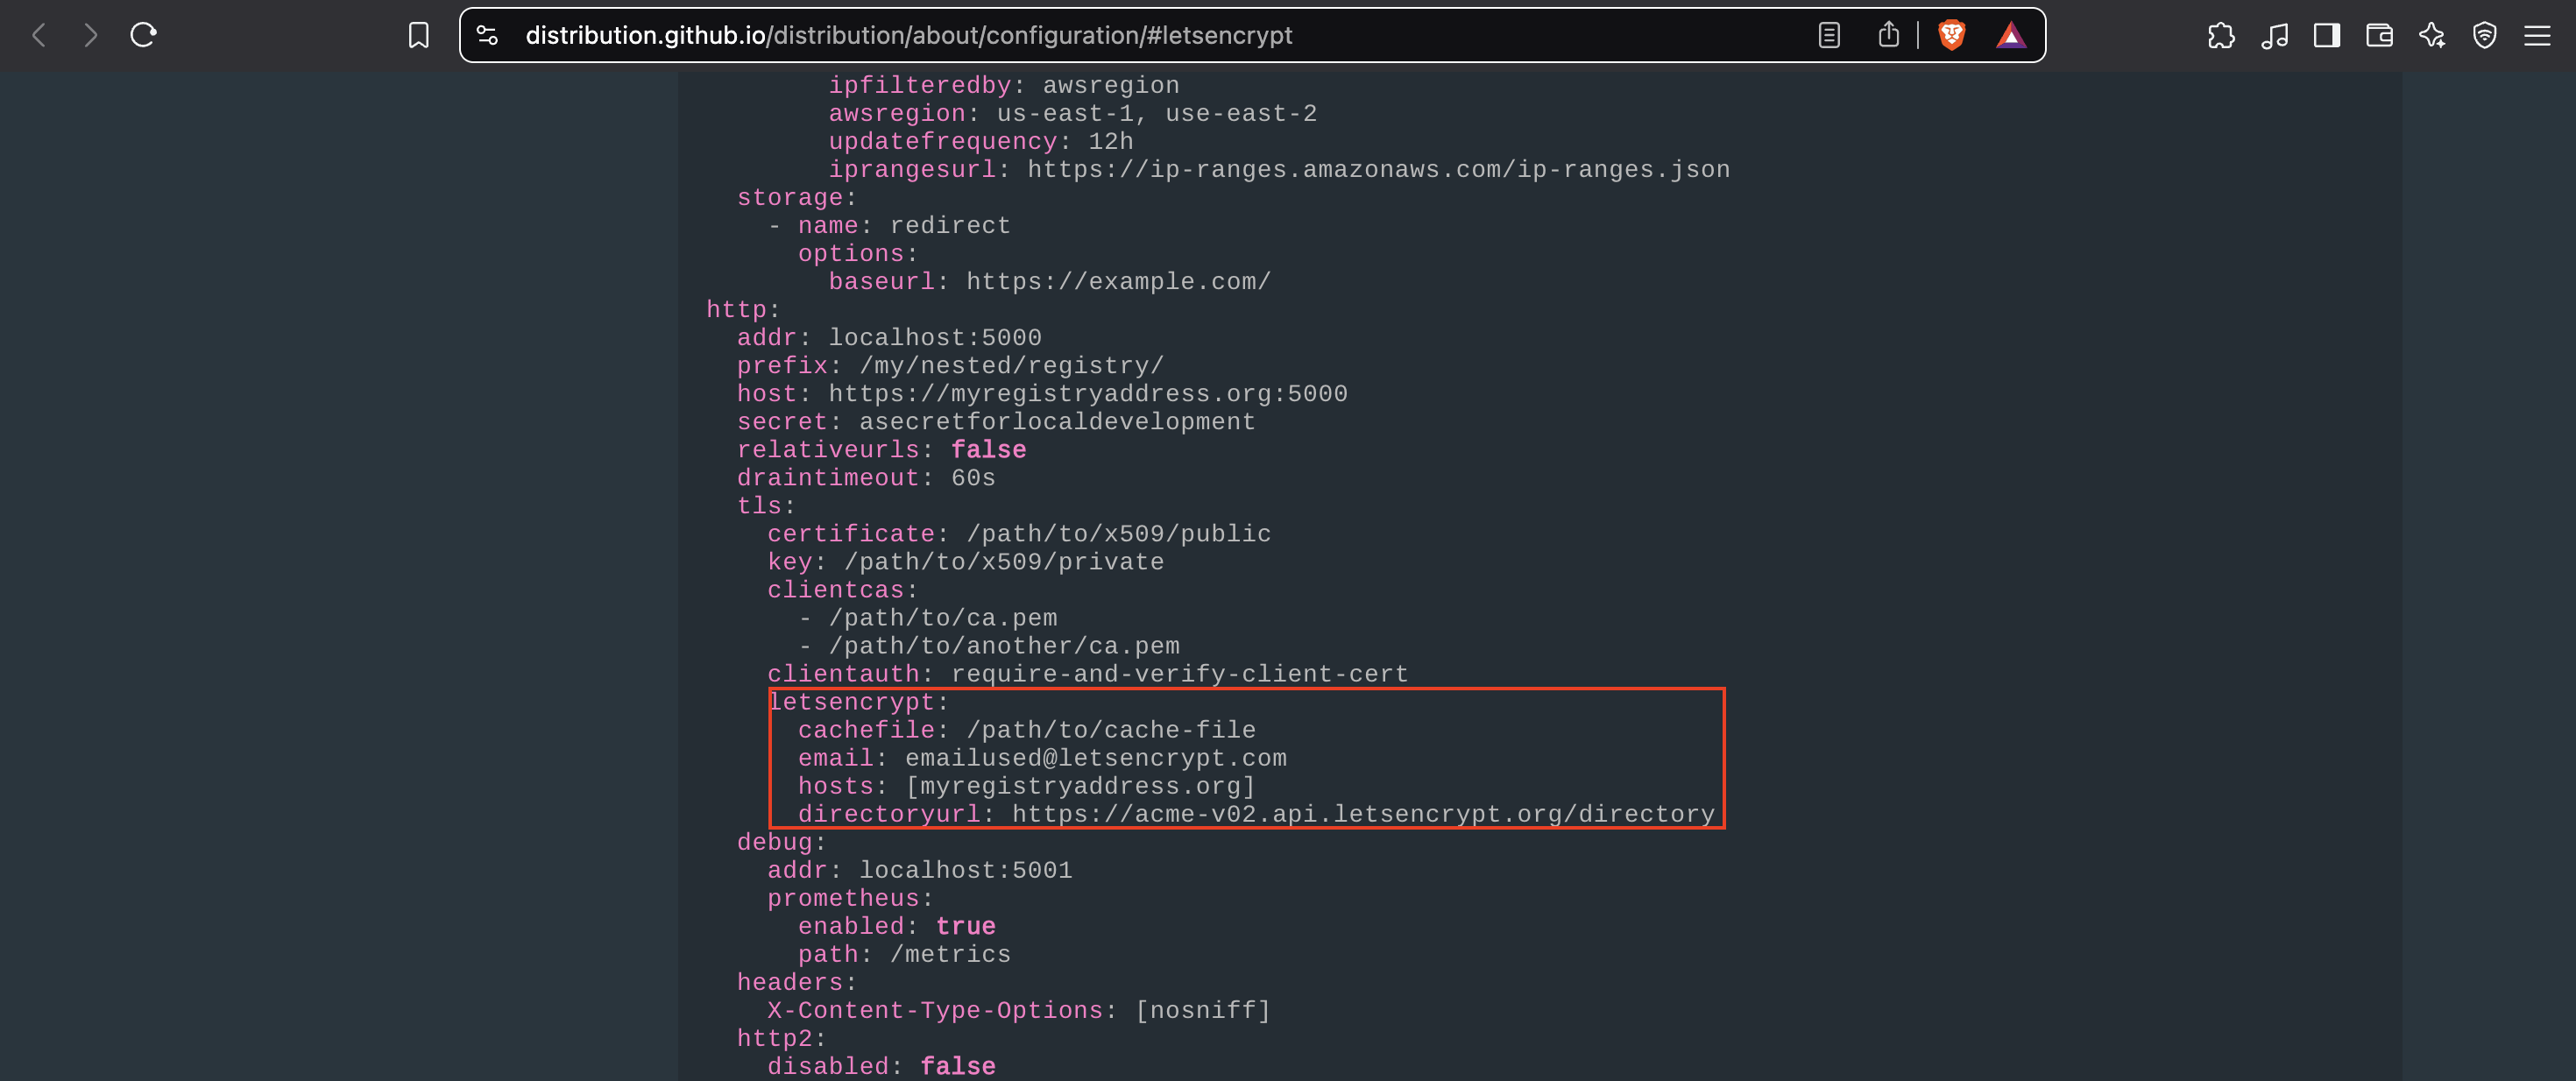
Note: This setup requires our domain already pointing to our EC2 instance’s public IP address and port 80 must be open in our security group because that’s the port Let's Encrypt uses to prove we own the domain before it gives us a security certificate for port 443 (HTTP-01 Challenge).
We will be setting up environmental variables using -e (you can check this section of the documentation to learn how this works).
1
2
3
4
5
sudo docker run -d -p 443:5000 --name registry --restart always \
-e REGISTRY_HTTP_TLS_LETSENCRYPT_CACHEFILE=/tmp/lets-encrypt \
-e REGISTRY_HTTP_TLS_LETSENCRYPT_EMAIL=<optional> \
-e REGISTRY_HTTP_TLS_LETSENCRYPT_HOSTS=[<our-domain>] \
registry:3

We have successfully deployed our own private registry that contains our custom images! To test this, we can switch to a different computer and see if we can run the container:
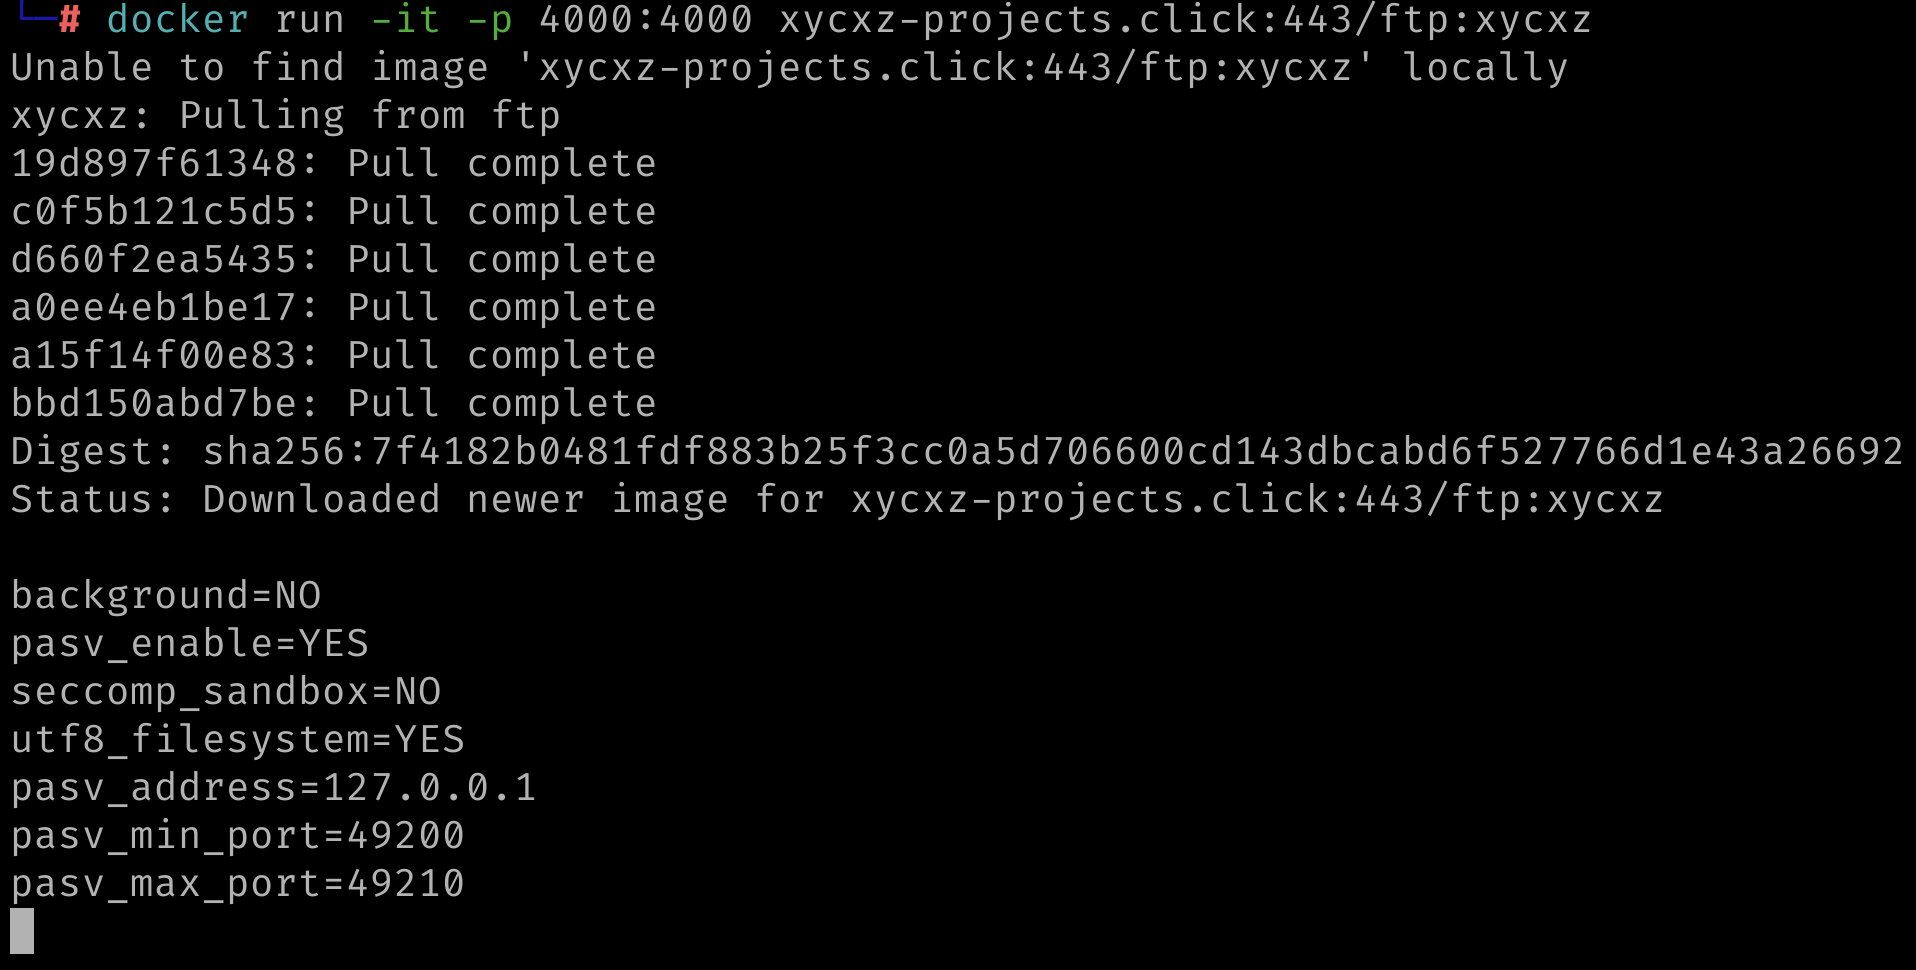
However, there is a small problem here. When we pushed our image to the registry, we did not have to provide any kind of password neither were prompted to a login. This implies that anybody that knows our repository location can upload any container they would like to. This is a security flaw that we must prevent in our registry.
Enabling Password Protection in our Registry
We will be implementing an easy password protection mechanism that already comes integrated into the HTTP standard, which is the HTTP Basic Authentication. Of course, in a real world production environment, we would be choosing a more robust password protection mechanism (e.g., OAuth, RBAC, or third-party identity providers); nevertheless, for our demonstration purposes this should be enough.
Let’s start by creating and configuring a .htpasswd file, which contains usernames and their encrypted passwords.
Creating the File
Lucky for us, we are using an Apache web server that has an available tool called htpasswd that we can use to encrypt the password we want to use. The good thing of using Docker is that we can run the command immediately to create our user record:
1
sudo docker run -it --rm <image> htpasswd -Bn <user>
-B: forces bcrypt hashing of the password-n: don’t update file; display results on stdout
Note: Remember that the custom image I am using is a modified version of the official Apache image (httpd). We can use the official image to run this command or just simply install the apache2-utils package.

Note: I did not use a strong password on purpose, but you should!
Now we can store our credentials in a new file (we can call this file whatever we want).
Configure the Container to Implement Authentication Mechanism
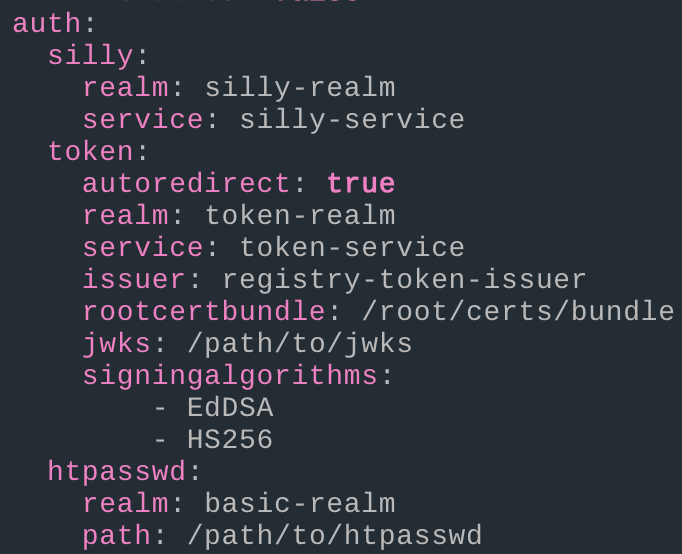
With our file ready, we can launch our registry container once again but this time configuring it to require authentication for anyone who tries to push an image. Let’s consult the documentation to see what we need to do to implement what we just did:
1
2
3
4
5
6
7
8
sudo docker run -d -p 443:5000 --name registry --restart always \
-e REGISTRY_HTTP_TLS_LETSENCRYPT_CACHEFILE=/tmp/lets-encrypt \
-e REGISTRY_HTTP_TLS_LETSENCRYPT_EMAIL=<optional> \
-e REGISTRY_HTTP_TLS_LETSENCRYPT_HOSTS=[<our-domain>] \
-e REGISTRY_AUTH_HTPASSWD_REALM='Login' \
-e REGISTRY_AUTH_HTPASSWD_PATH=<path-to-file> \
-v $(pwd)/<file>:/<path-to-file>:ro \
registry:3

Note: As we can see, this command is becoming quite long and difficult to manage. This is a perfect example of where Docker Compose shines. In a compose.yaml file, each of these flags and environment variables would be a clean, readable line of configuration, making the service much easier to manage and version control. I explained how this works on a previous post.
Now that our authentication mechanism is set, let’s try pushing our image once again:
Now our registry is password protected! However, how can we login to push our images? For that, we can use the docker login command:
1
docker login <domain>
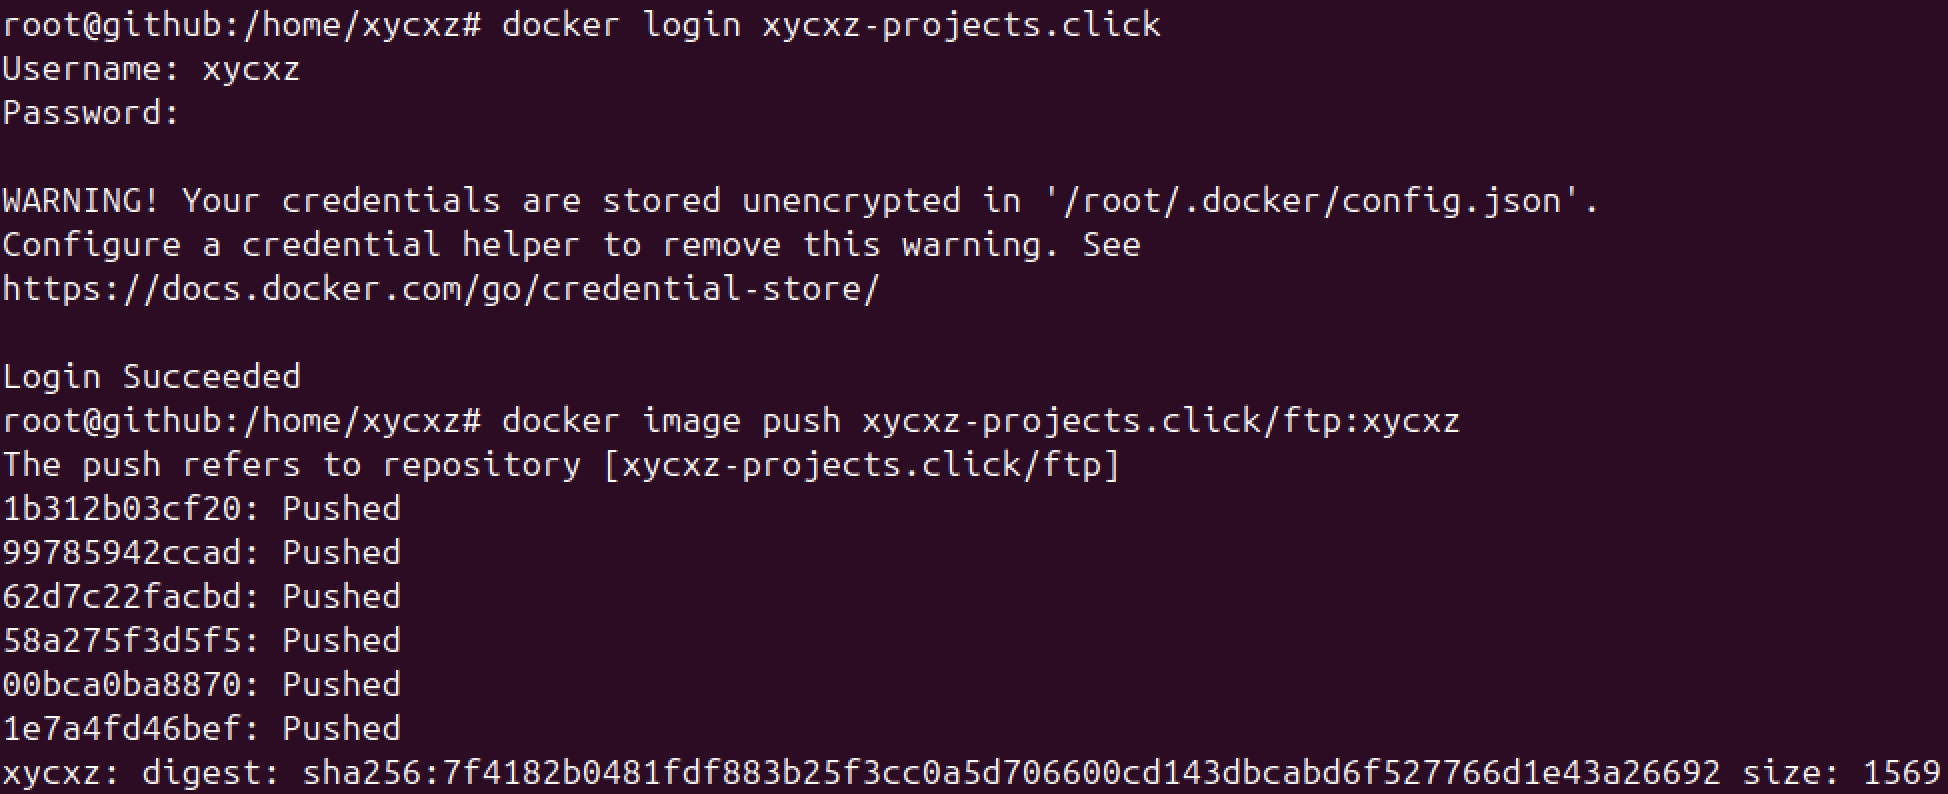
Notice how I got a WARNING error. This happens because I am not using any kind of credential helper and my credentials are being stored in my Docker configuration file. Since this is definitely not a good security practice, especially because the password is stored in base64 (as per the documentation indicates).
In the next optional section, I’ll explain how to fix this.
Optional: Configure a Credential Helper
We will consult the official Docker documentation for this matter. The credential helper we will use is called pass and we can install it with the following command (if you are using Debian/Ubuntu Linux Distro):
1
sudo apt-get install pass -y
We also need to logout from our current session:
1
sudo docker logout <domain>
It is required to add the helper program to the client’s host $PATH. For that, we will download an executable (make sure to choose the one that matches your computer architecture).
1
2
chmod +x <executable>
mv <executable> /usr/local/bin/
Then we have to create a GPG key to encrypt our credentials (if we don’t have one already).
Note: The pass utility is essentially a secure wrapper that uses our GPG key to encrypt and decrypt our Docker password. The GPG key acts as the master key for your credential store.
Once we are done with that, we can use this key with the pass command. If we are not sure what is our key, we can run the gpg --list-keys command:
1
gpg --full-generate-key
Note: We need to follow the prompts and create the type of key pair we want! (I used RSA)
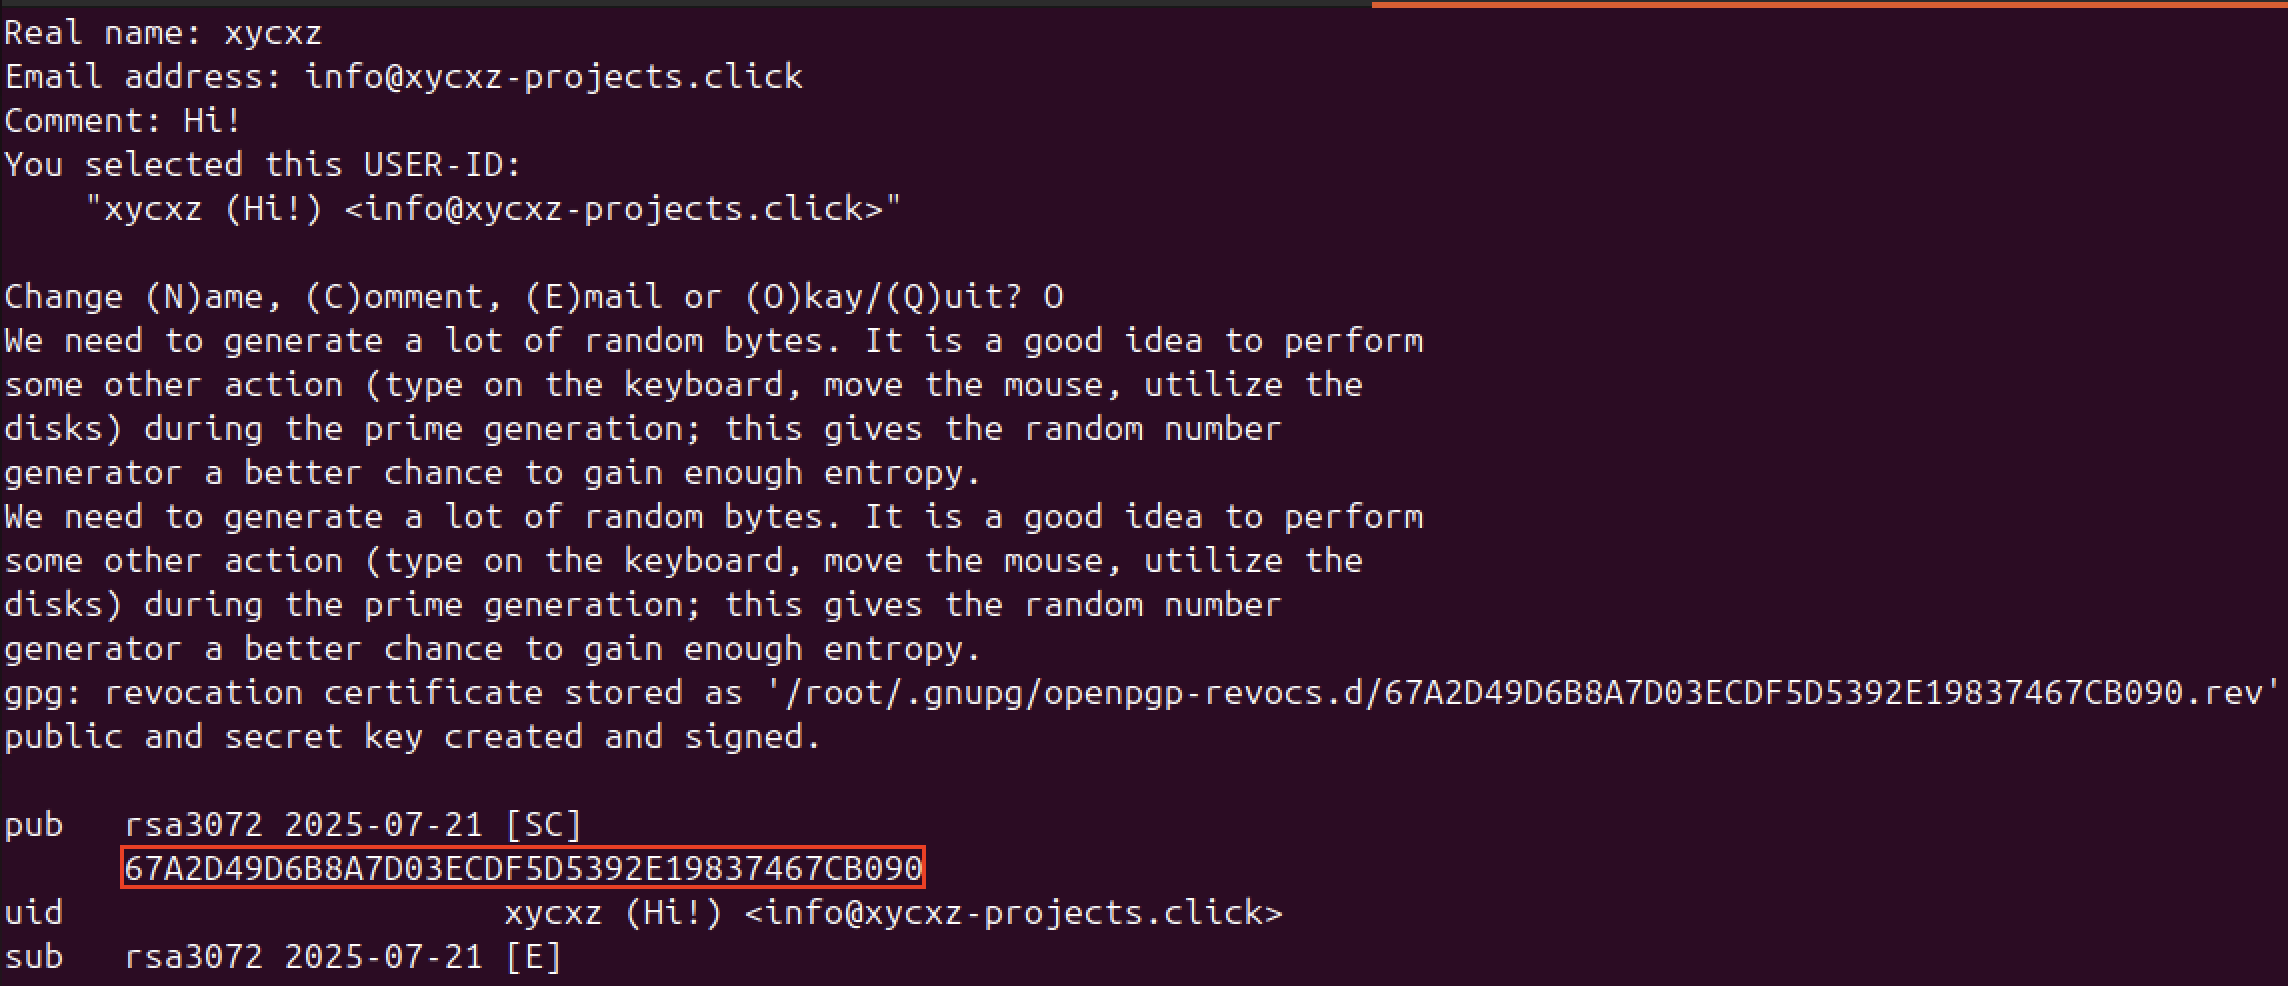
1
pass init <gpg-key-id> # Mine is 67A2D4...
Now, we need to specify the credential helper of our choosing in our config.json file:
1
2
3
4
5
6
{
  "auths": {
    "<domain>": {}
  },
  "credsStore": "pass" # Here!
}
Finally, let’s try to login again and push another image to the registry. I will use the official nginx Docker image for demonstration, but of course we can use any other image:
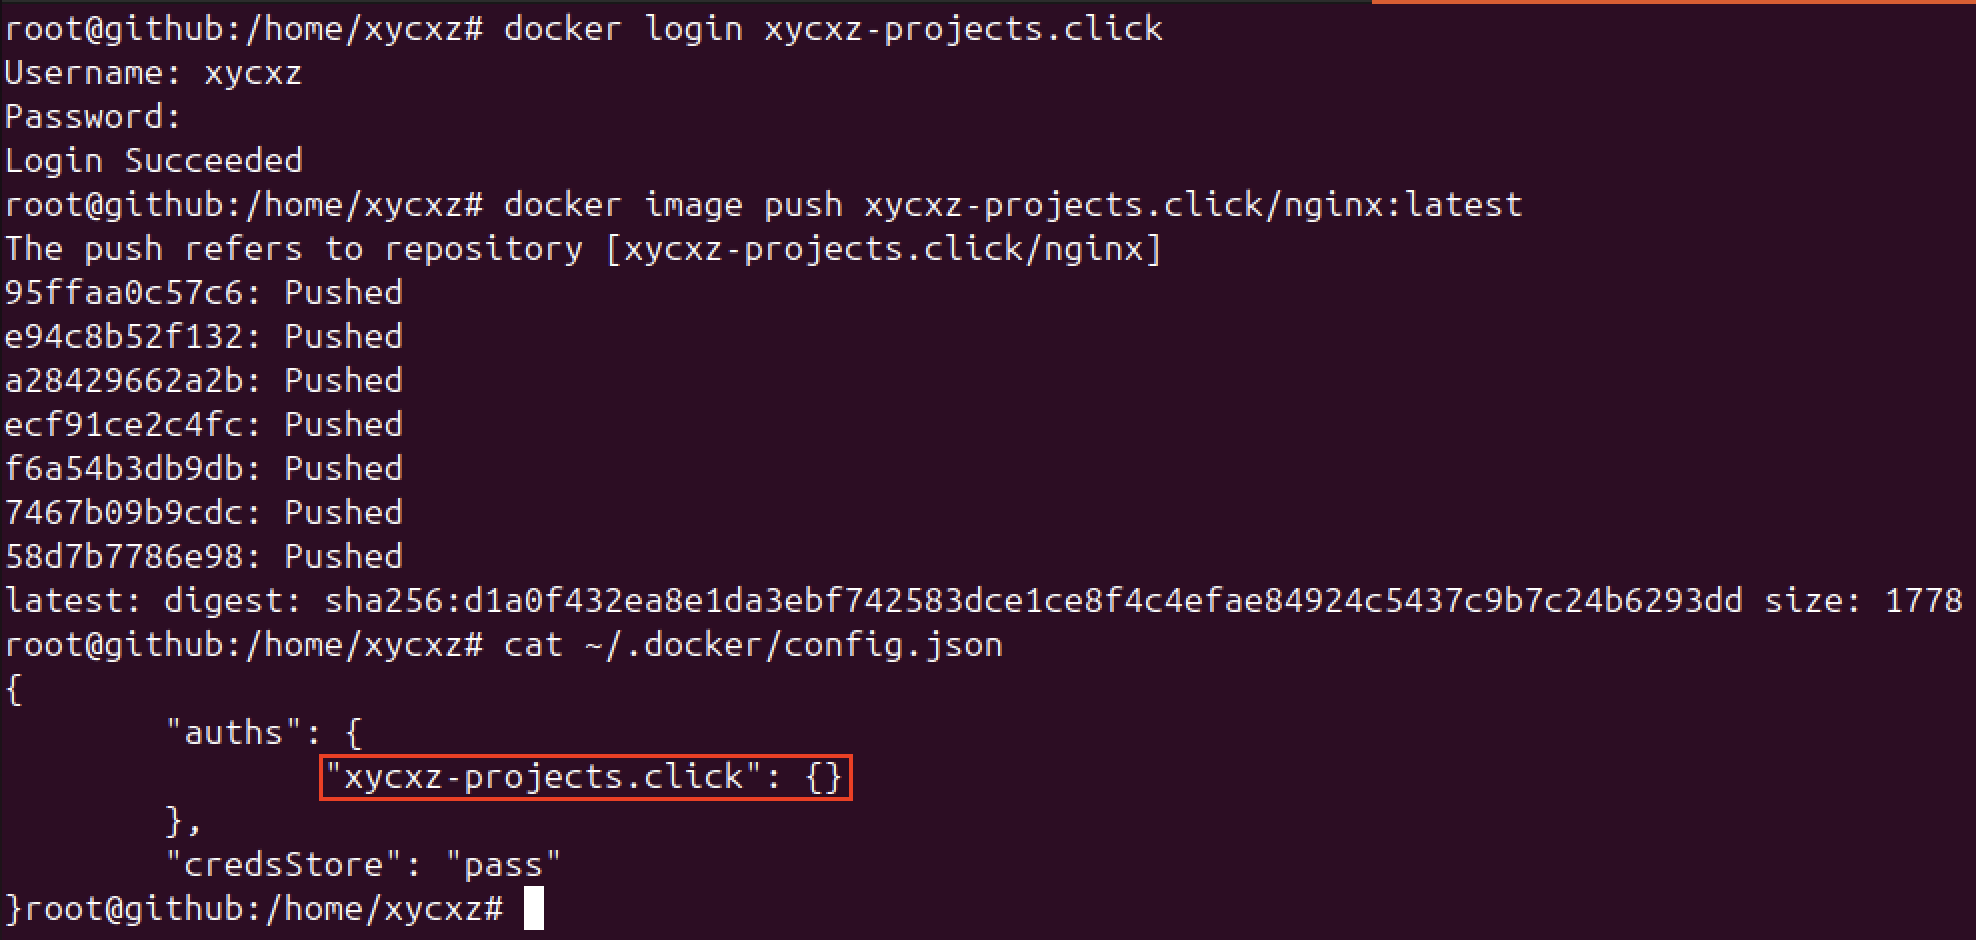
As we can see, we no longer receive the warning and our credentials are not being stored in base64 in our configuration file. This is definitely a security measure we MUST implement in a real world production environment.
Next Steps
Up until this point, all we have seen so far included deploying an EC2 instance, configure DNS on the cloud, buying a domain, and also utilising Docker within this specific environment. To keep moving with the project, first we will have to explore some concepts of AWS Identity and Access Management (IAM). This will make sure you can follow along what I am showing throughout this journey!