Networking - AWS
Objective
It is time to introduce what I consider the most important topic when it comes to the AWS cloud: Networking. Here we will explore fundamental concepts, such as VPCs, Subnets, Gateways, Network ACLs, and Security Groups.
Additionally, I’ll be providing a checklist that you can use for connectivity troubleshooting. This post can be a bit tedious to read, but I promise you won’t regret once you comprehend these topics. It will not just save you countless hours when having networking issues, but also set you apart from other people that did not put the time to learn the theory behind it.
Virtual Private Cloud (VPC)
Virtual Private Cloud (VPC) is a software defined network (or virtual network) that is in the cloud. Resources in this network (such as EC2 servers) can communicate directly to each other without using the internet, similar to what we have in a home network, but with some nuances that I’ll talk about later.
Because it is virtual, there are NOT physical wires connected. Everything happens on the software layer from the AWS cloud, although we can just treat it as our own network running in the cloud. Of course, we already know that the hardware needed for virtualisation is within the Amazon data centres.
By default AWS creates a VPC for each region even though we can also create additional ones. The whole networking is emulated by AWS and, to us, it behaves like an individual network just for our resources (servers).
It is called private because our instances are in a separate network that cannot be accessed by other people.
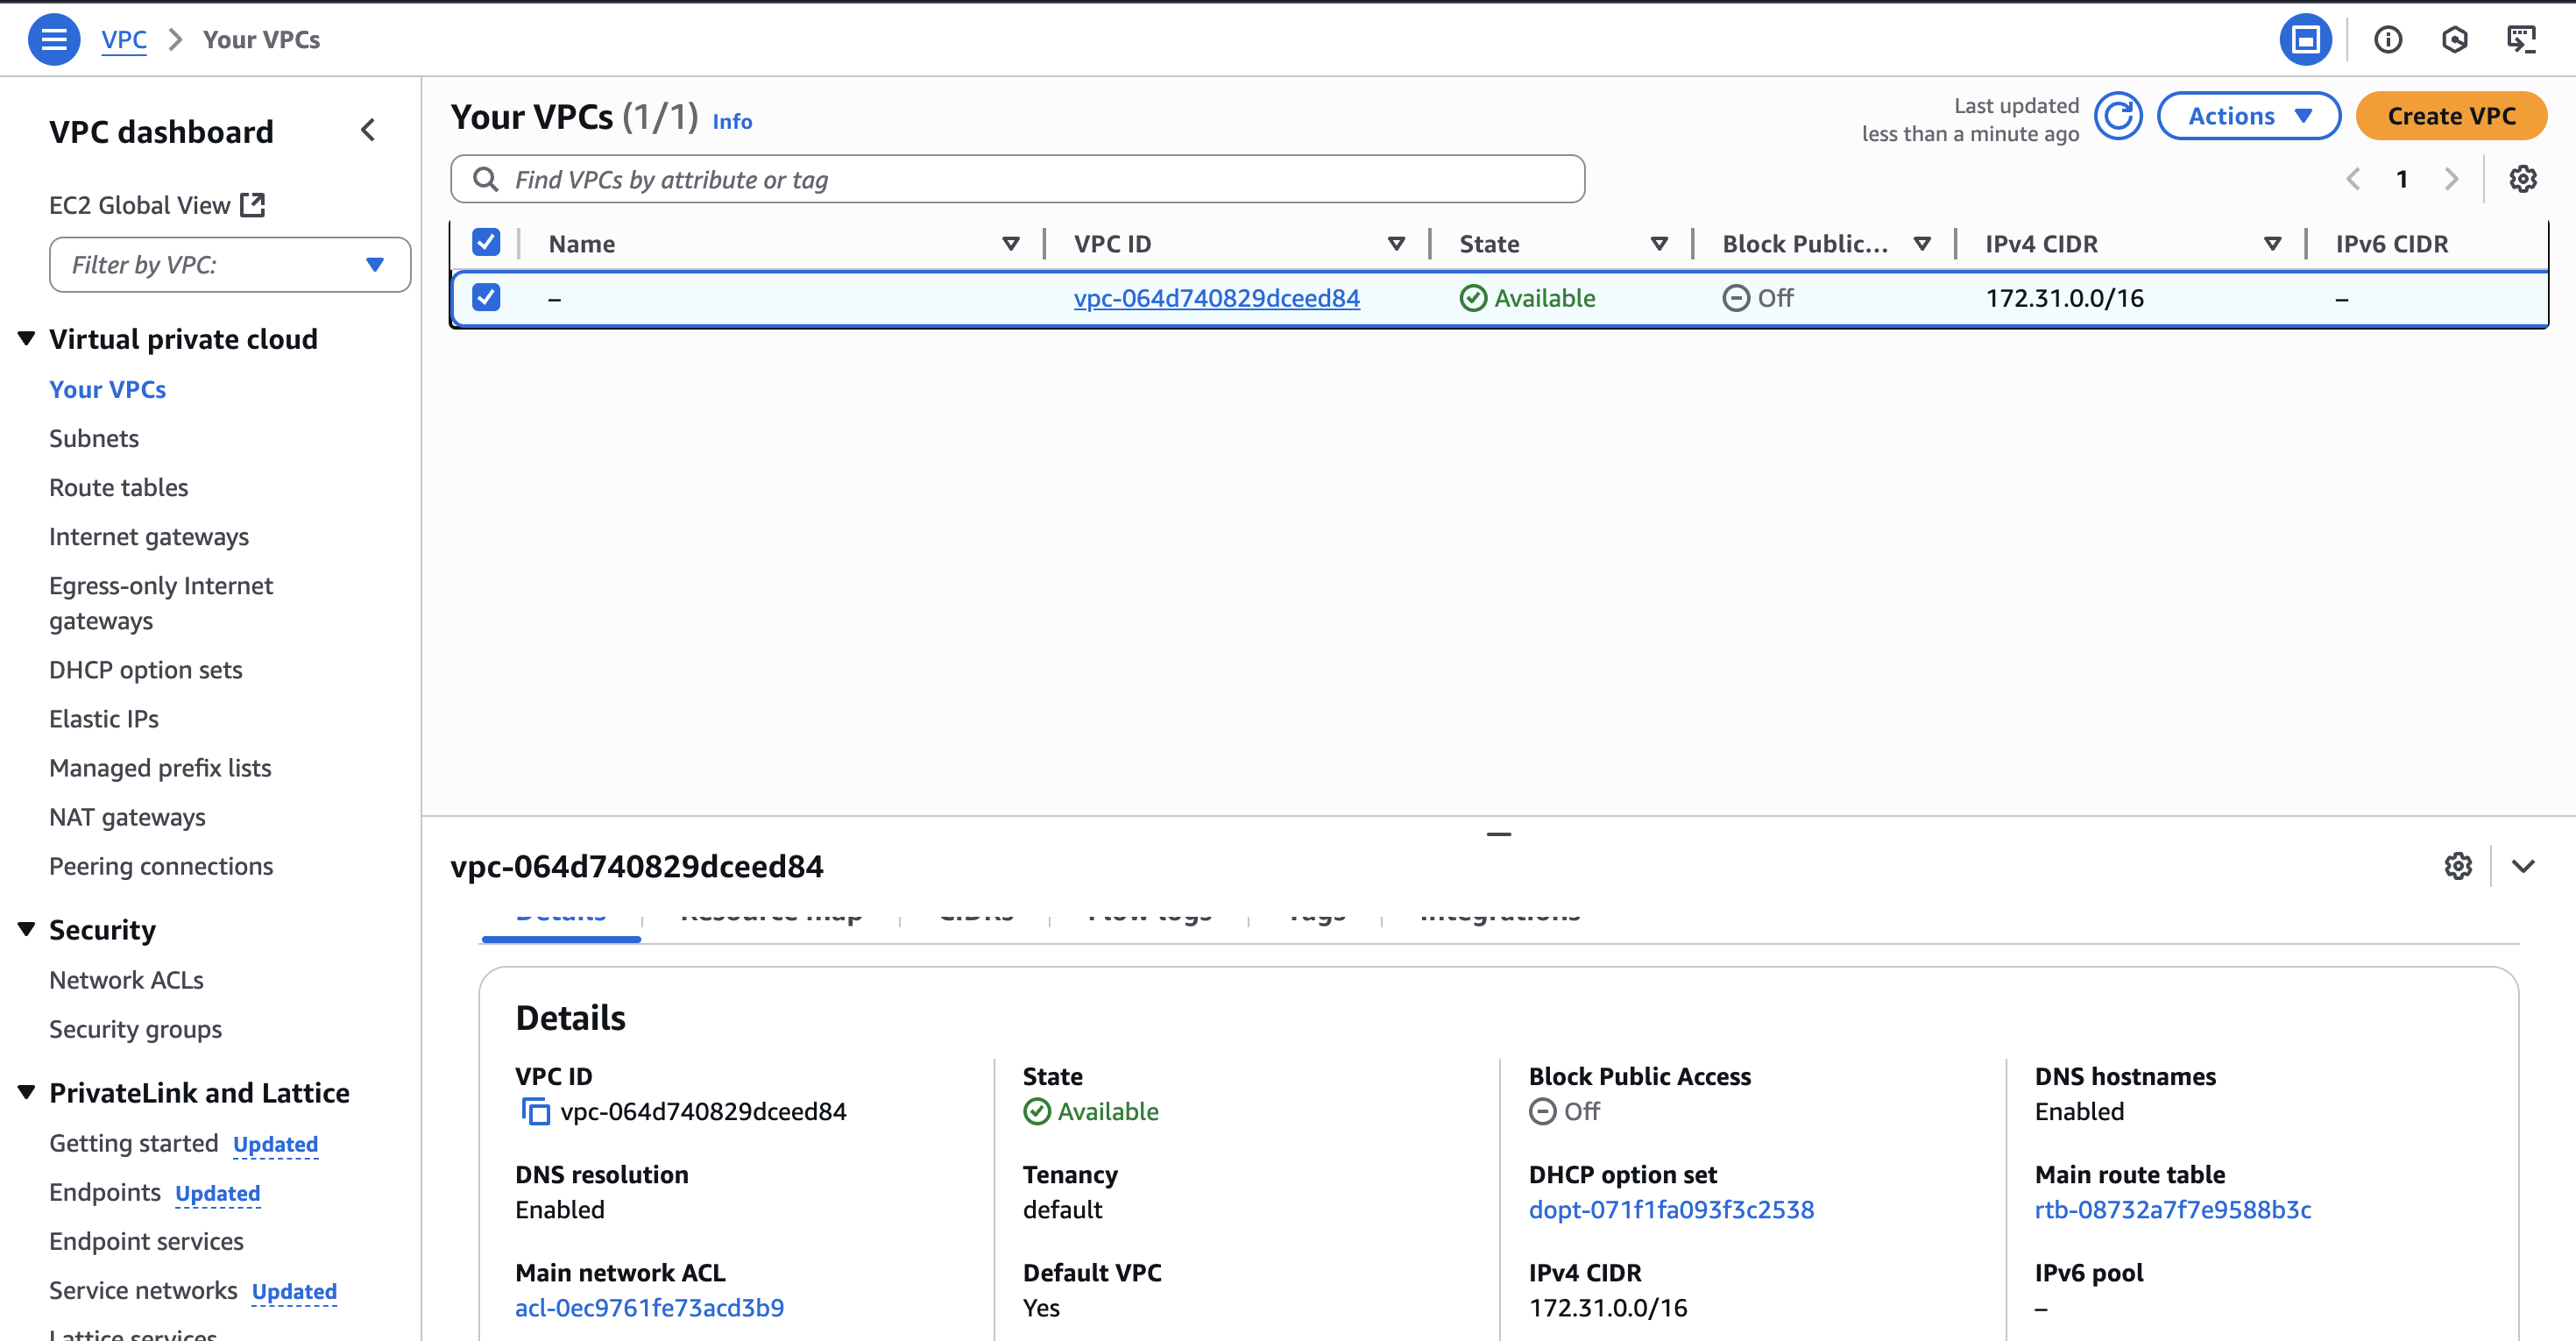
Let’s go to the VPC dashboard and take a look at the default network created by Amazon:
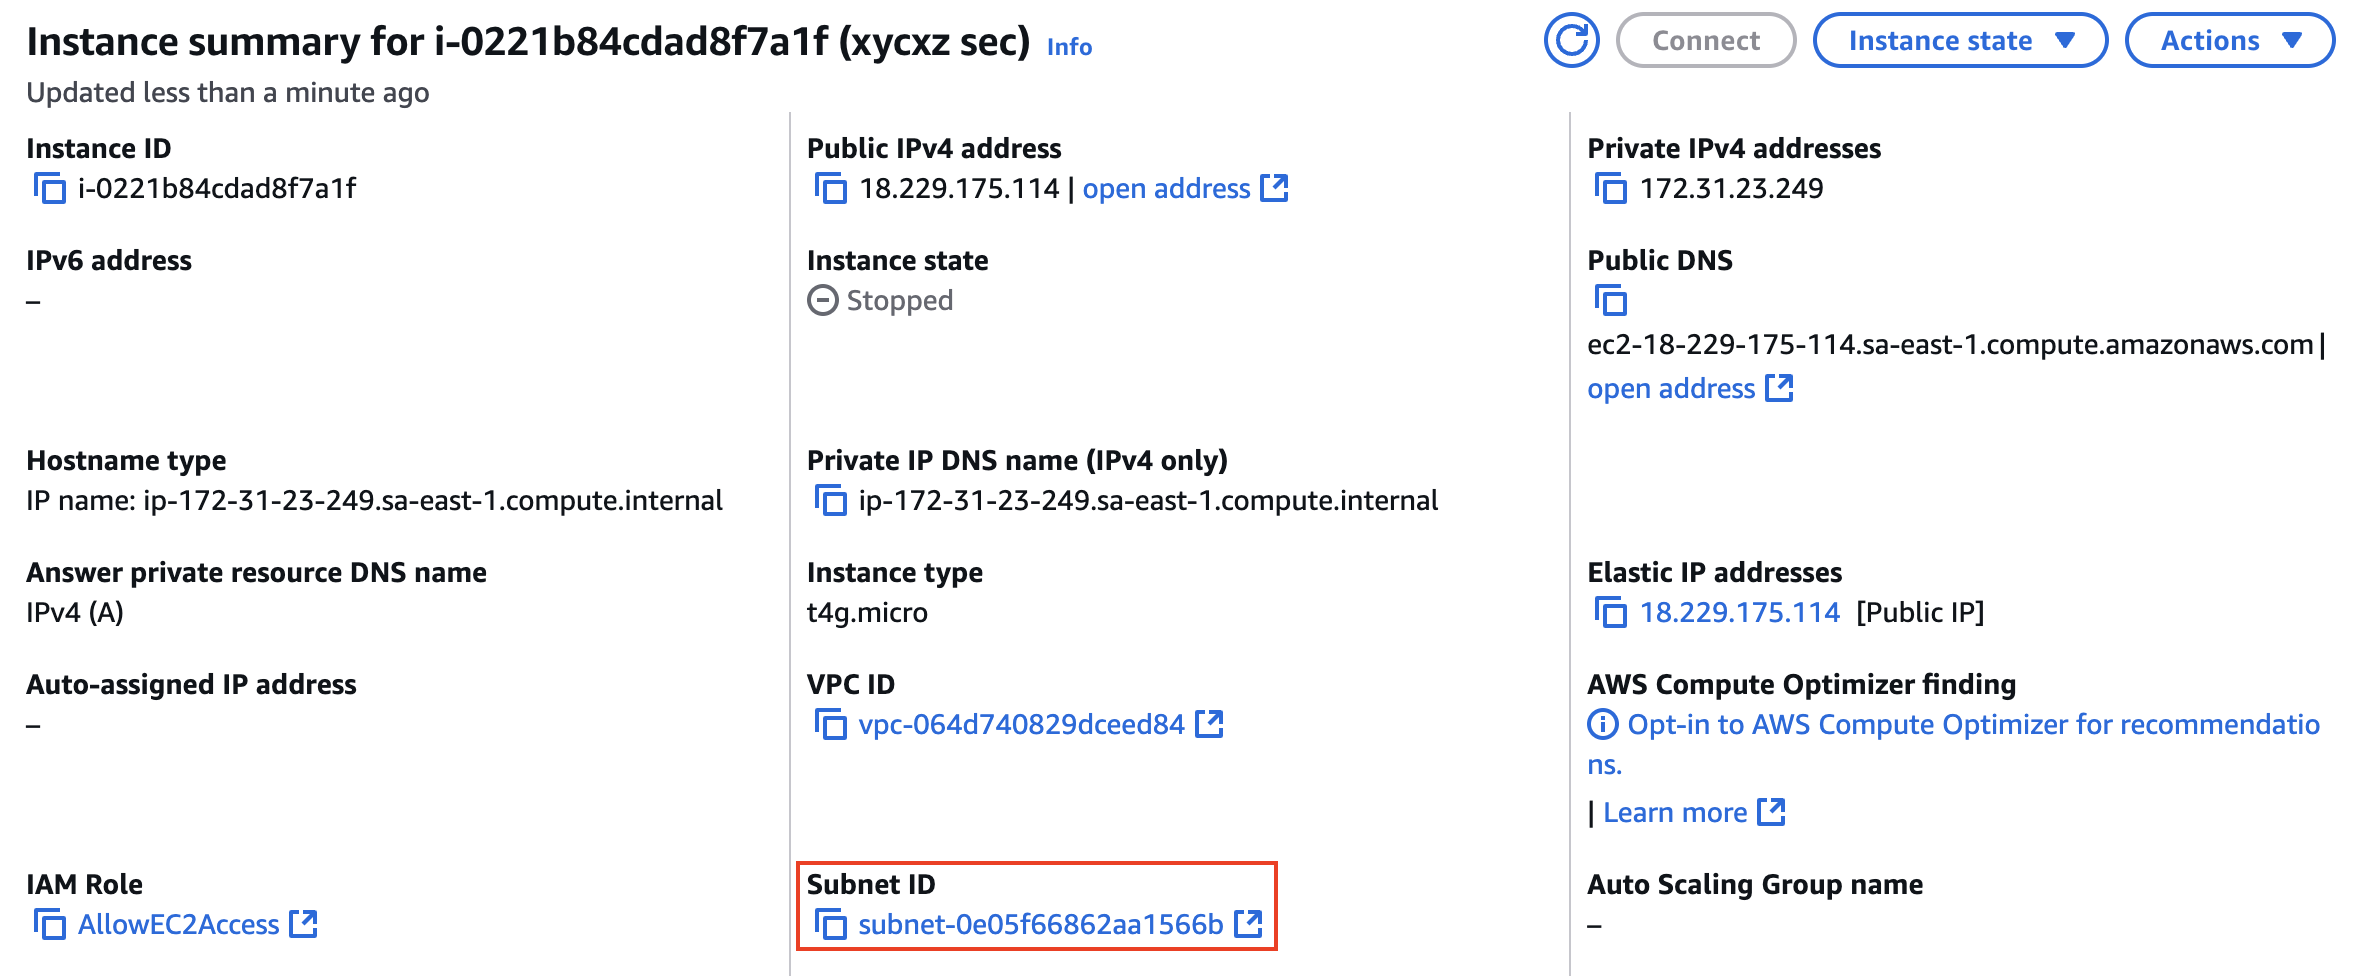
This VPC is the one used by our EC2 instance, as we can see in the below image:
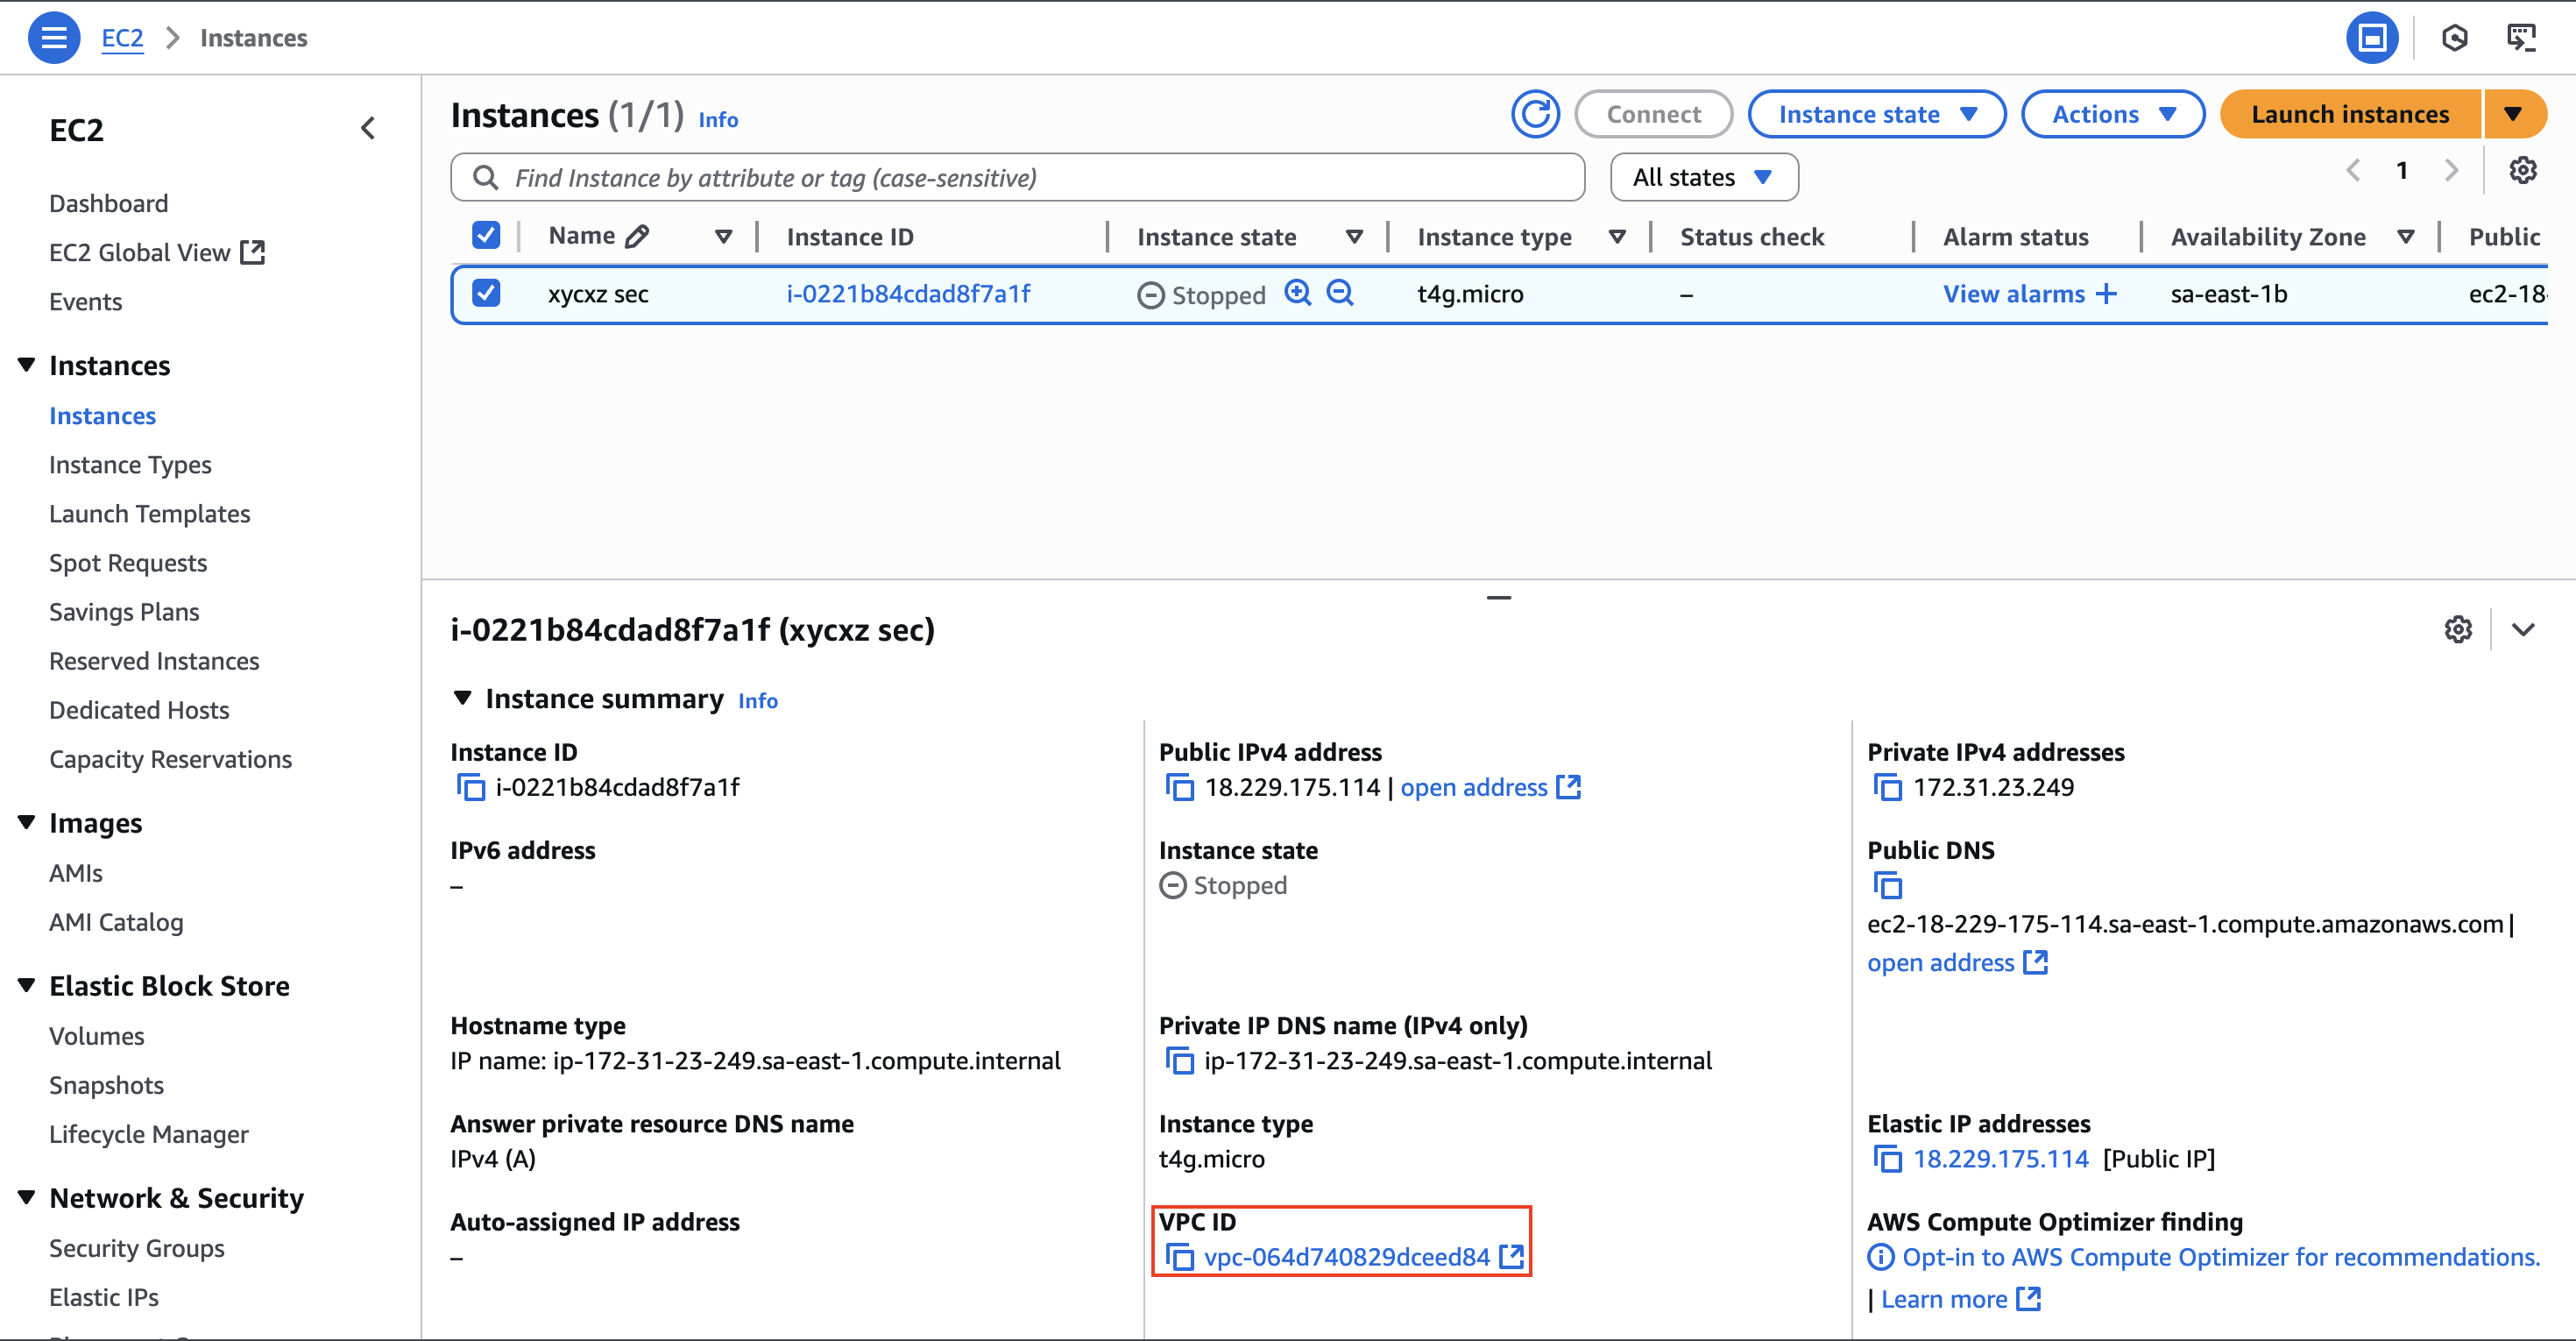
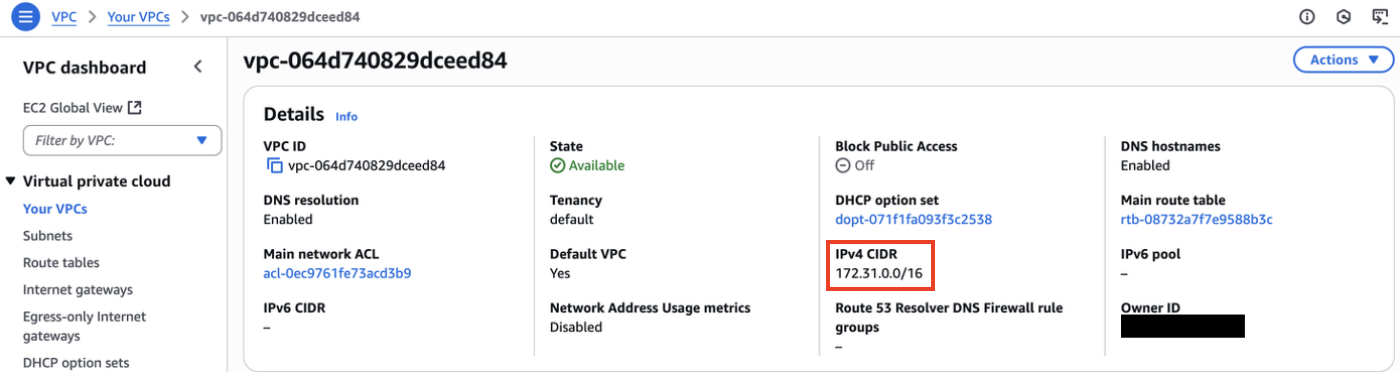
Notice how the instance has a private IP address of 172.31.23.249 which is only available from within the VPC. We can check the IP range by inspecting the VPC, which tell us the IP addresses a device can take to be inside the network (unless it is a reserved address, like the broadcast or gateway):
From VPC to Subnets
A subnet is a segment of the IP address range in which we can place our servers or other resources in the AWS cloud. While VPCs can span a complete region, subnets can only span a single availability zone (AZ).
By default, the VPC is configured so that all subnets can communicate to nodes (instances here) in other subnets. However, we can change that by modifying the route table. Let’s explore the subnets that come by default:
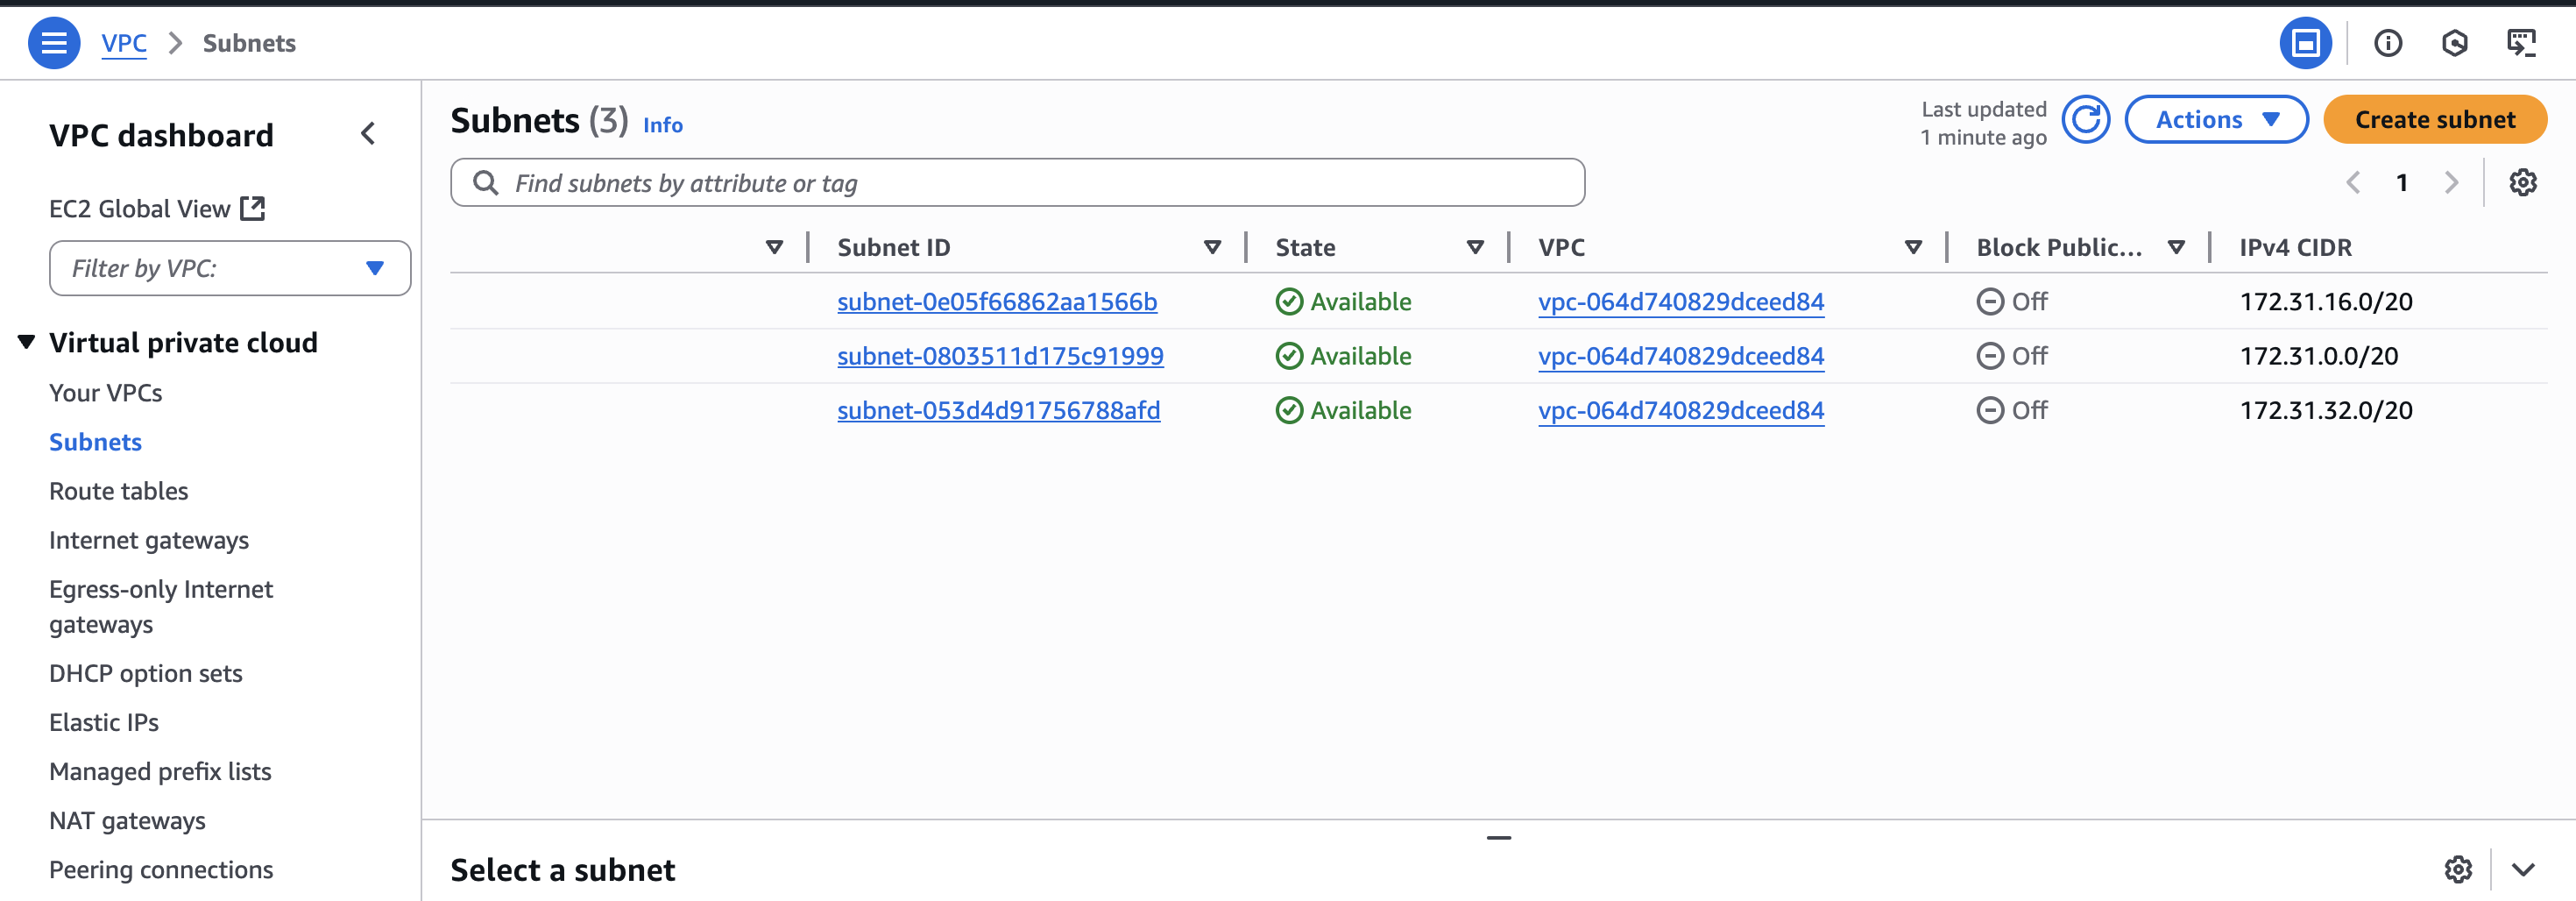
As we can see, we have three subnets in which each of them is in a different availability zone (sae1-az1, sae1-az2, sae1-az3 in my case).
Note: Notice how the IP range of each subnet is different. We should always take notes of these because it could be useful when facing networking problems. Remember that the CIDR notation indicates the bits that are fixed and can’t change!
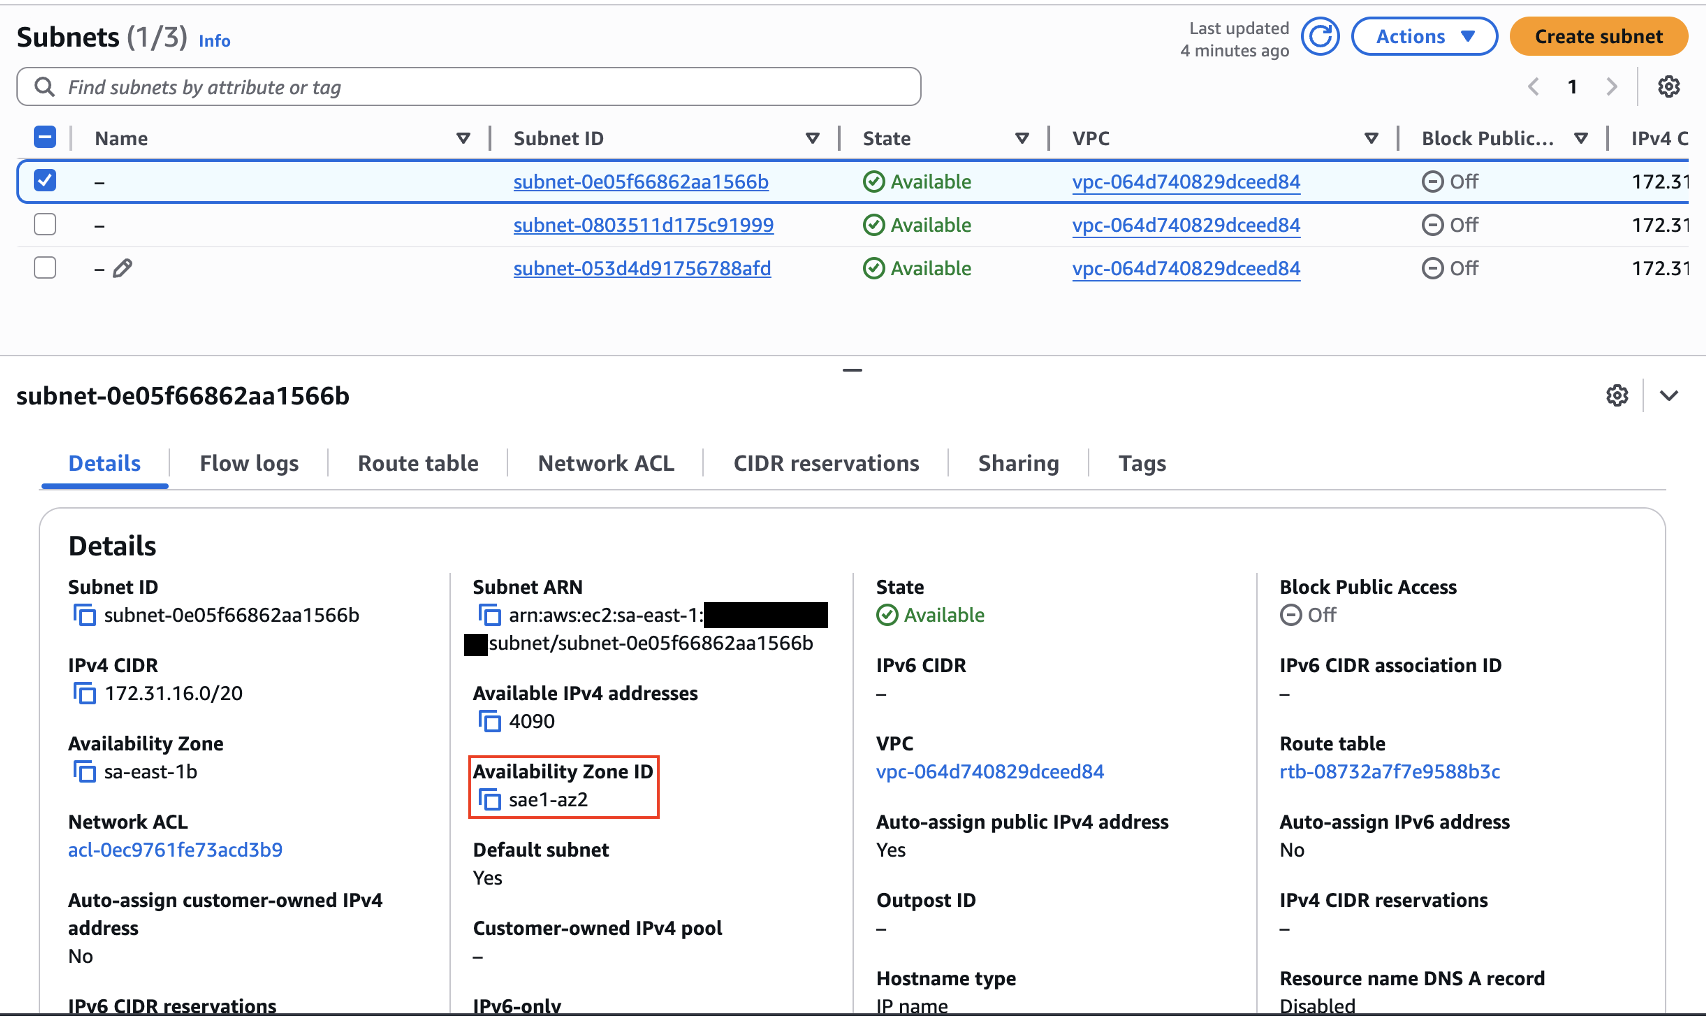
The availability zone can be seen by inspecting the subnet details:
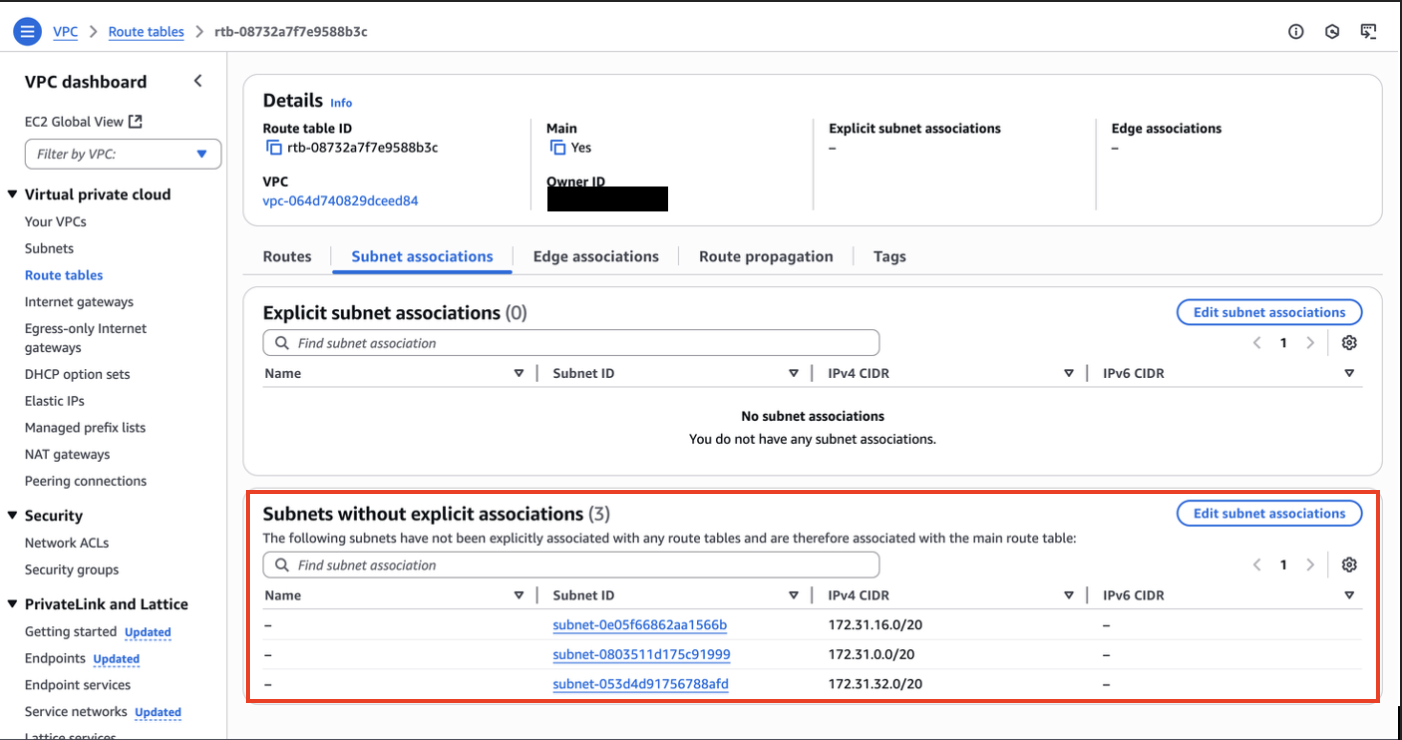
If we’re just launching an instance, we usually don’t want to worry about these subnets and have the instance be able to communicate with all the other nodes inside the VPC. This is the purpose of routing tables, which come automatically configured for us so every node in its subnet can communicate to other ones in a different subnet:
Even though we usually don’t have to worry about this, it is still important to know the concepts for debugging purposes, especially since sometimes services can't be in a different availability zone, for example (we will get to that later).
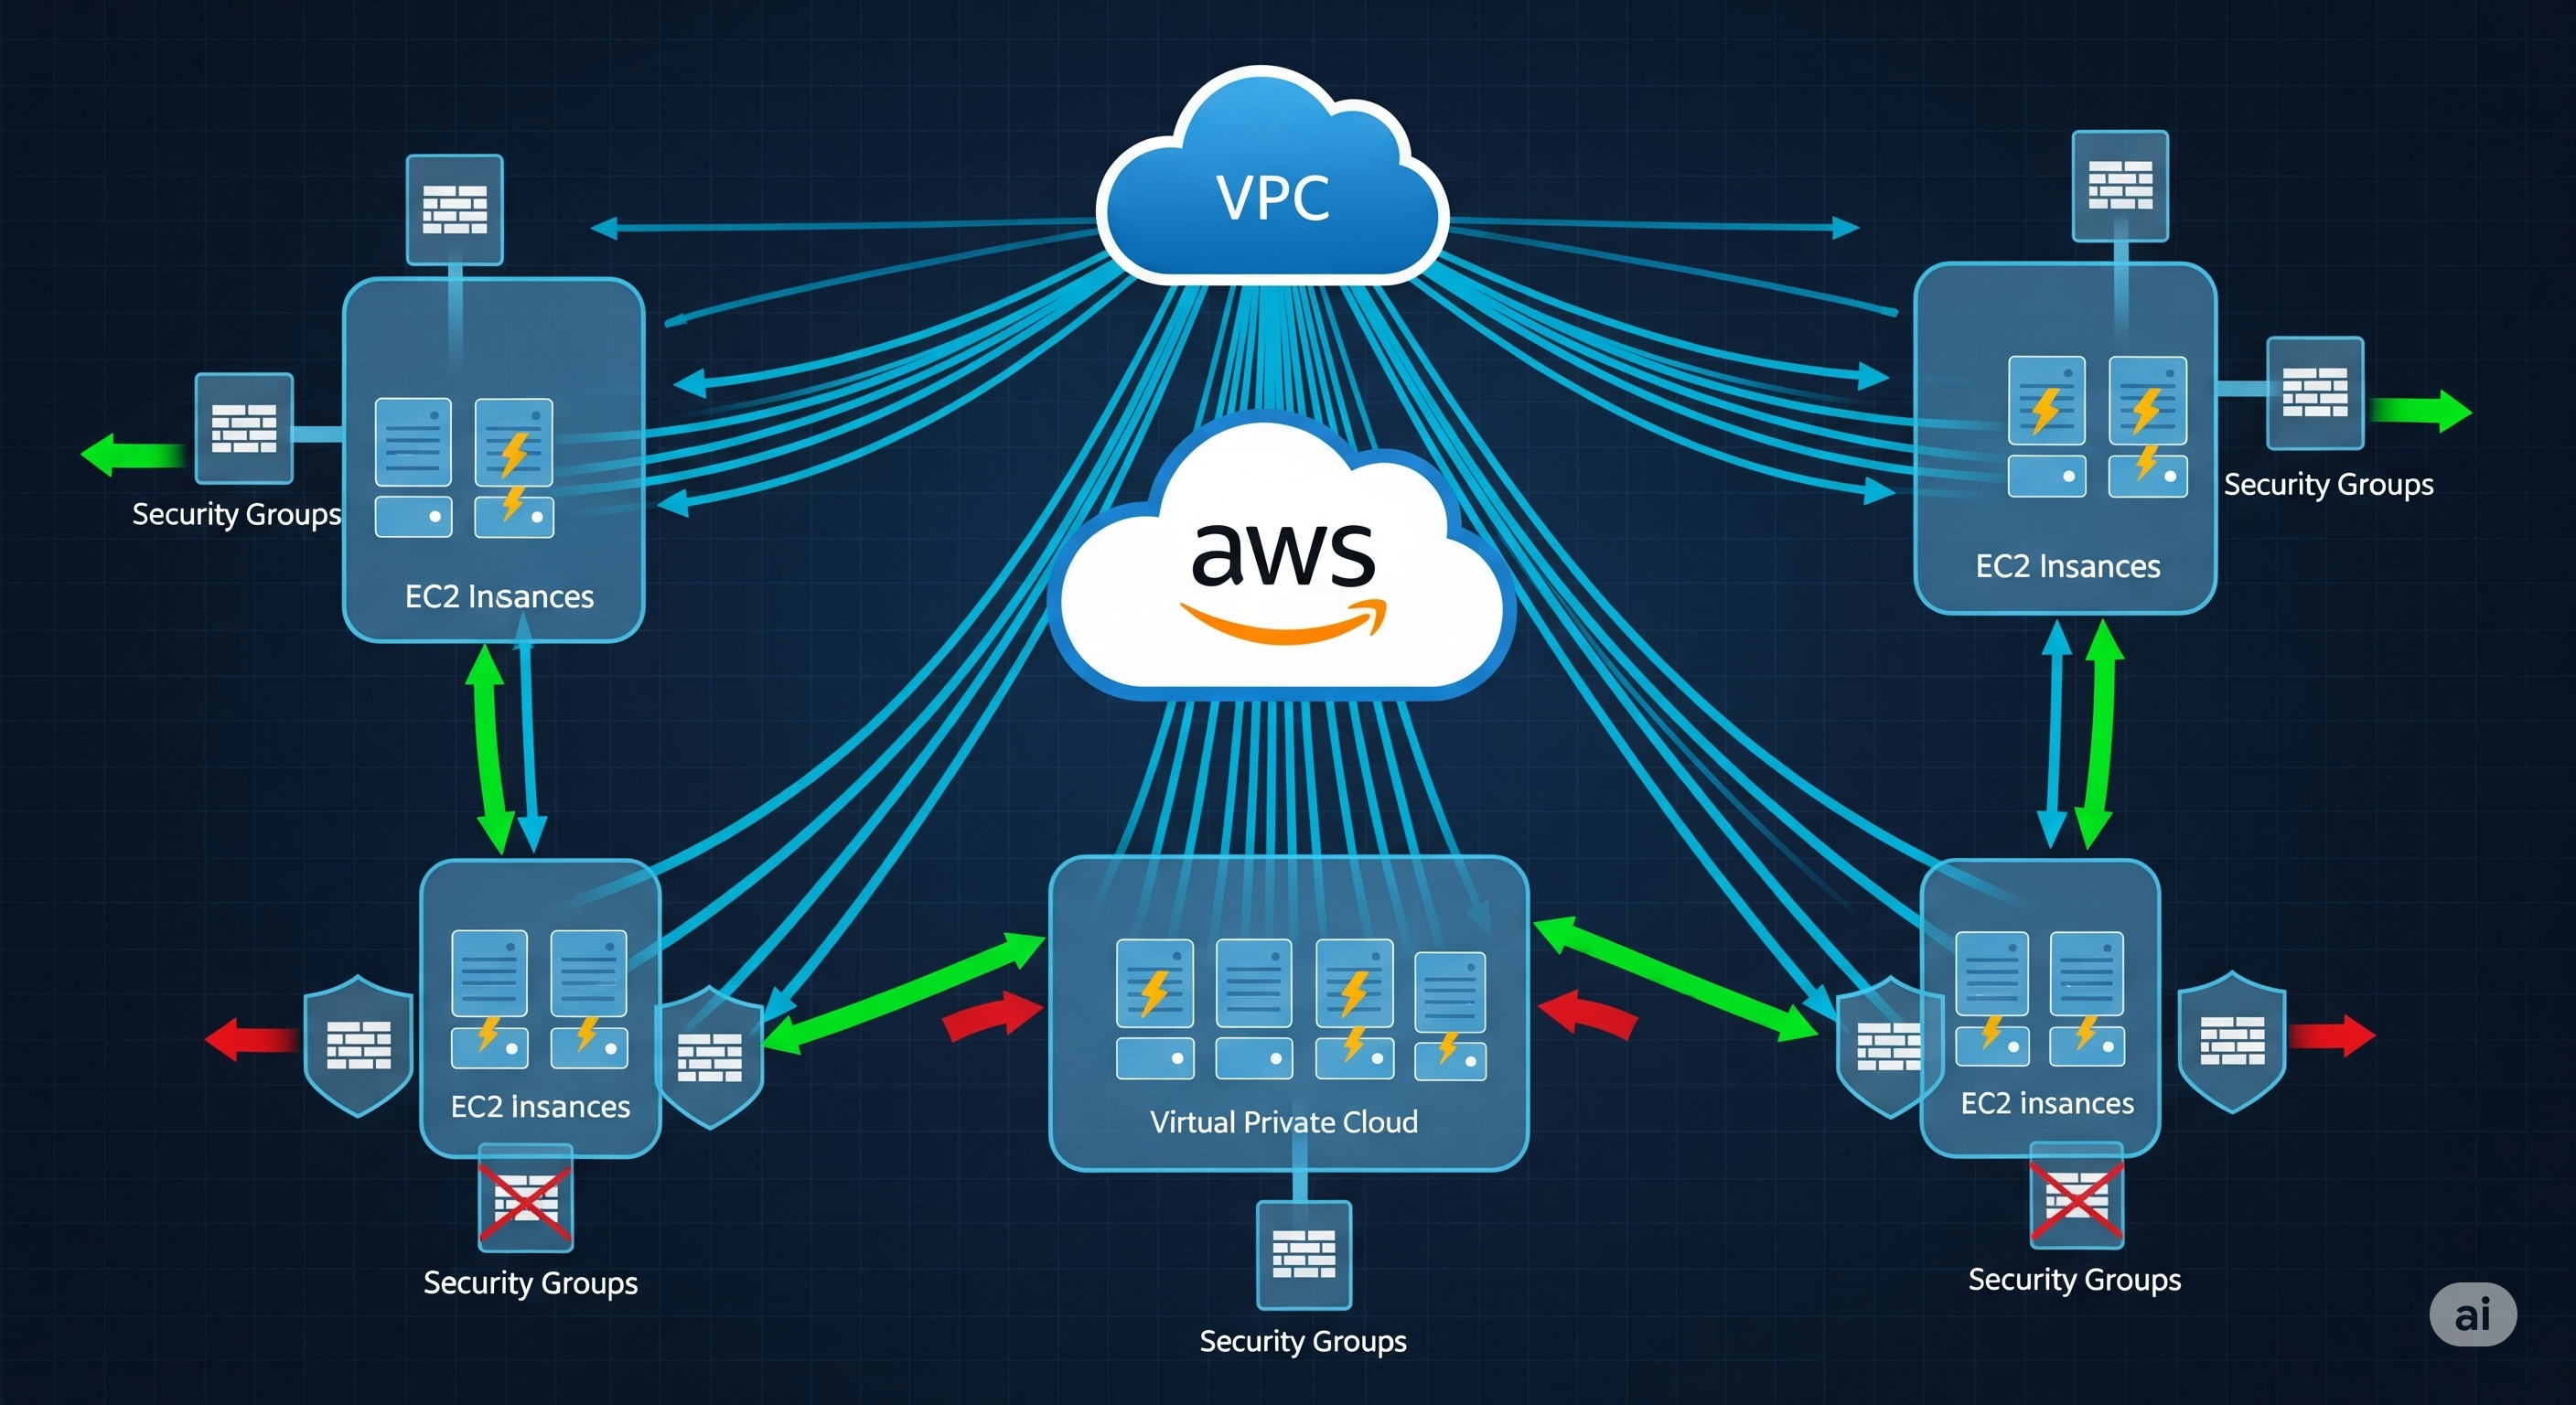
Here is a simplified diagram to visually understand a bit more the concepts:
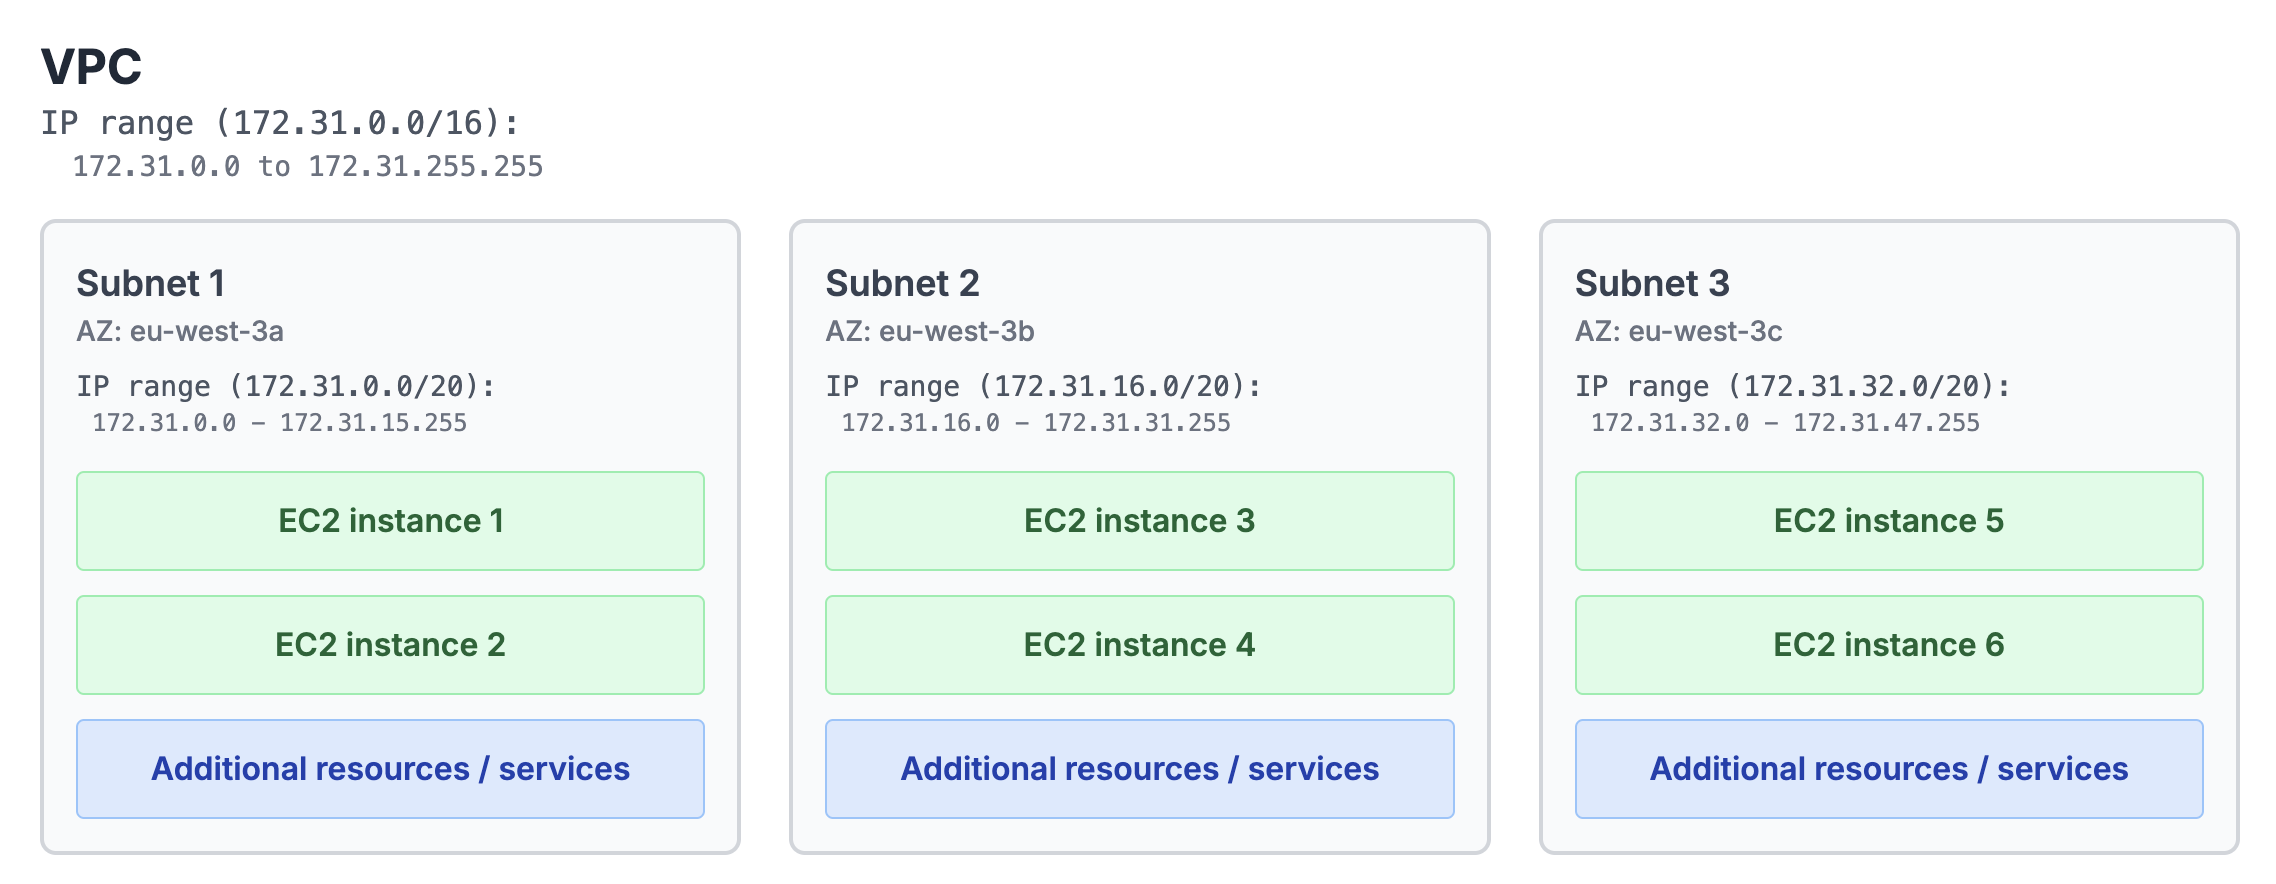
Note: A single AZ could also host multiple subnets and a single EC2 instance could have multiple network interfaces, and through that, be part in multiple subnets at the same time (like a dual-home machine).
Let’s confirm the statement that an EC2 instance is part of a subnet in our VPC
Creating a Custom VPC
Let’s go through the process of creating a custom VPC. First, we have to navigate to the VPC dashboard and click on Your VPCs -> Create VPC. We will choose the VPC and more option so we don’t have to manually configure all the subnets or routing tables, for example:
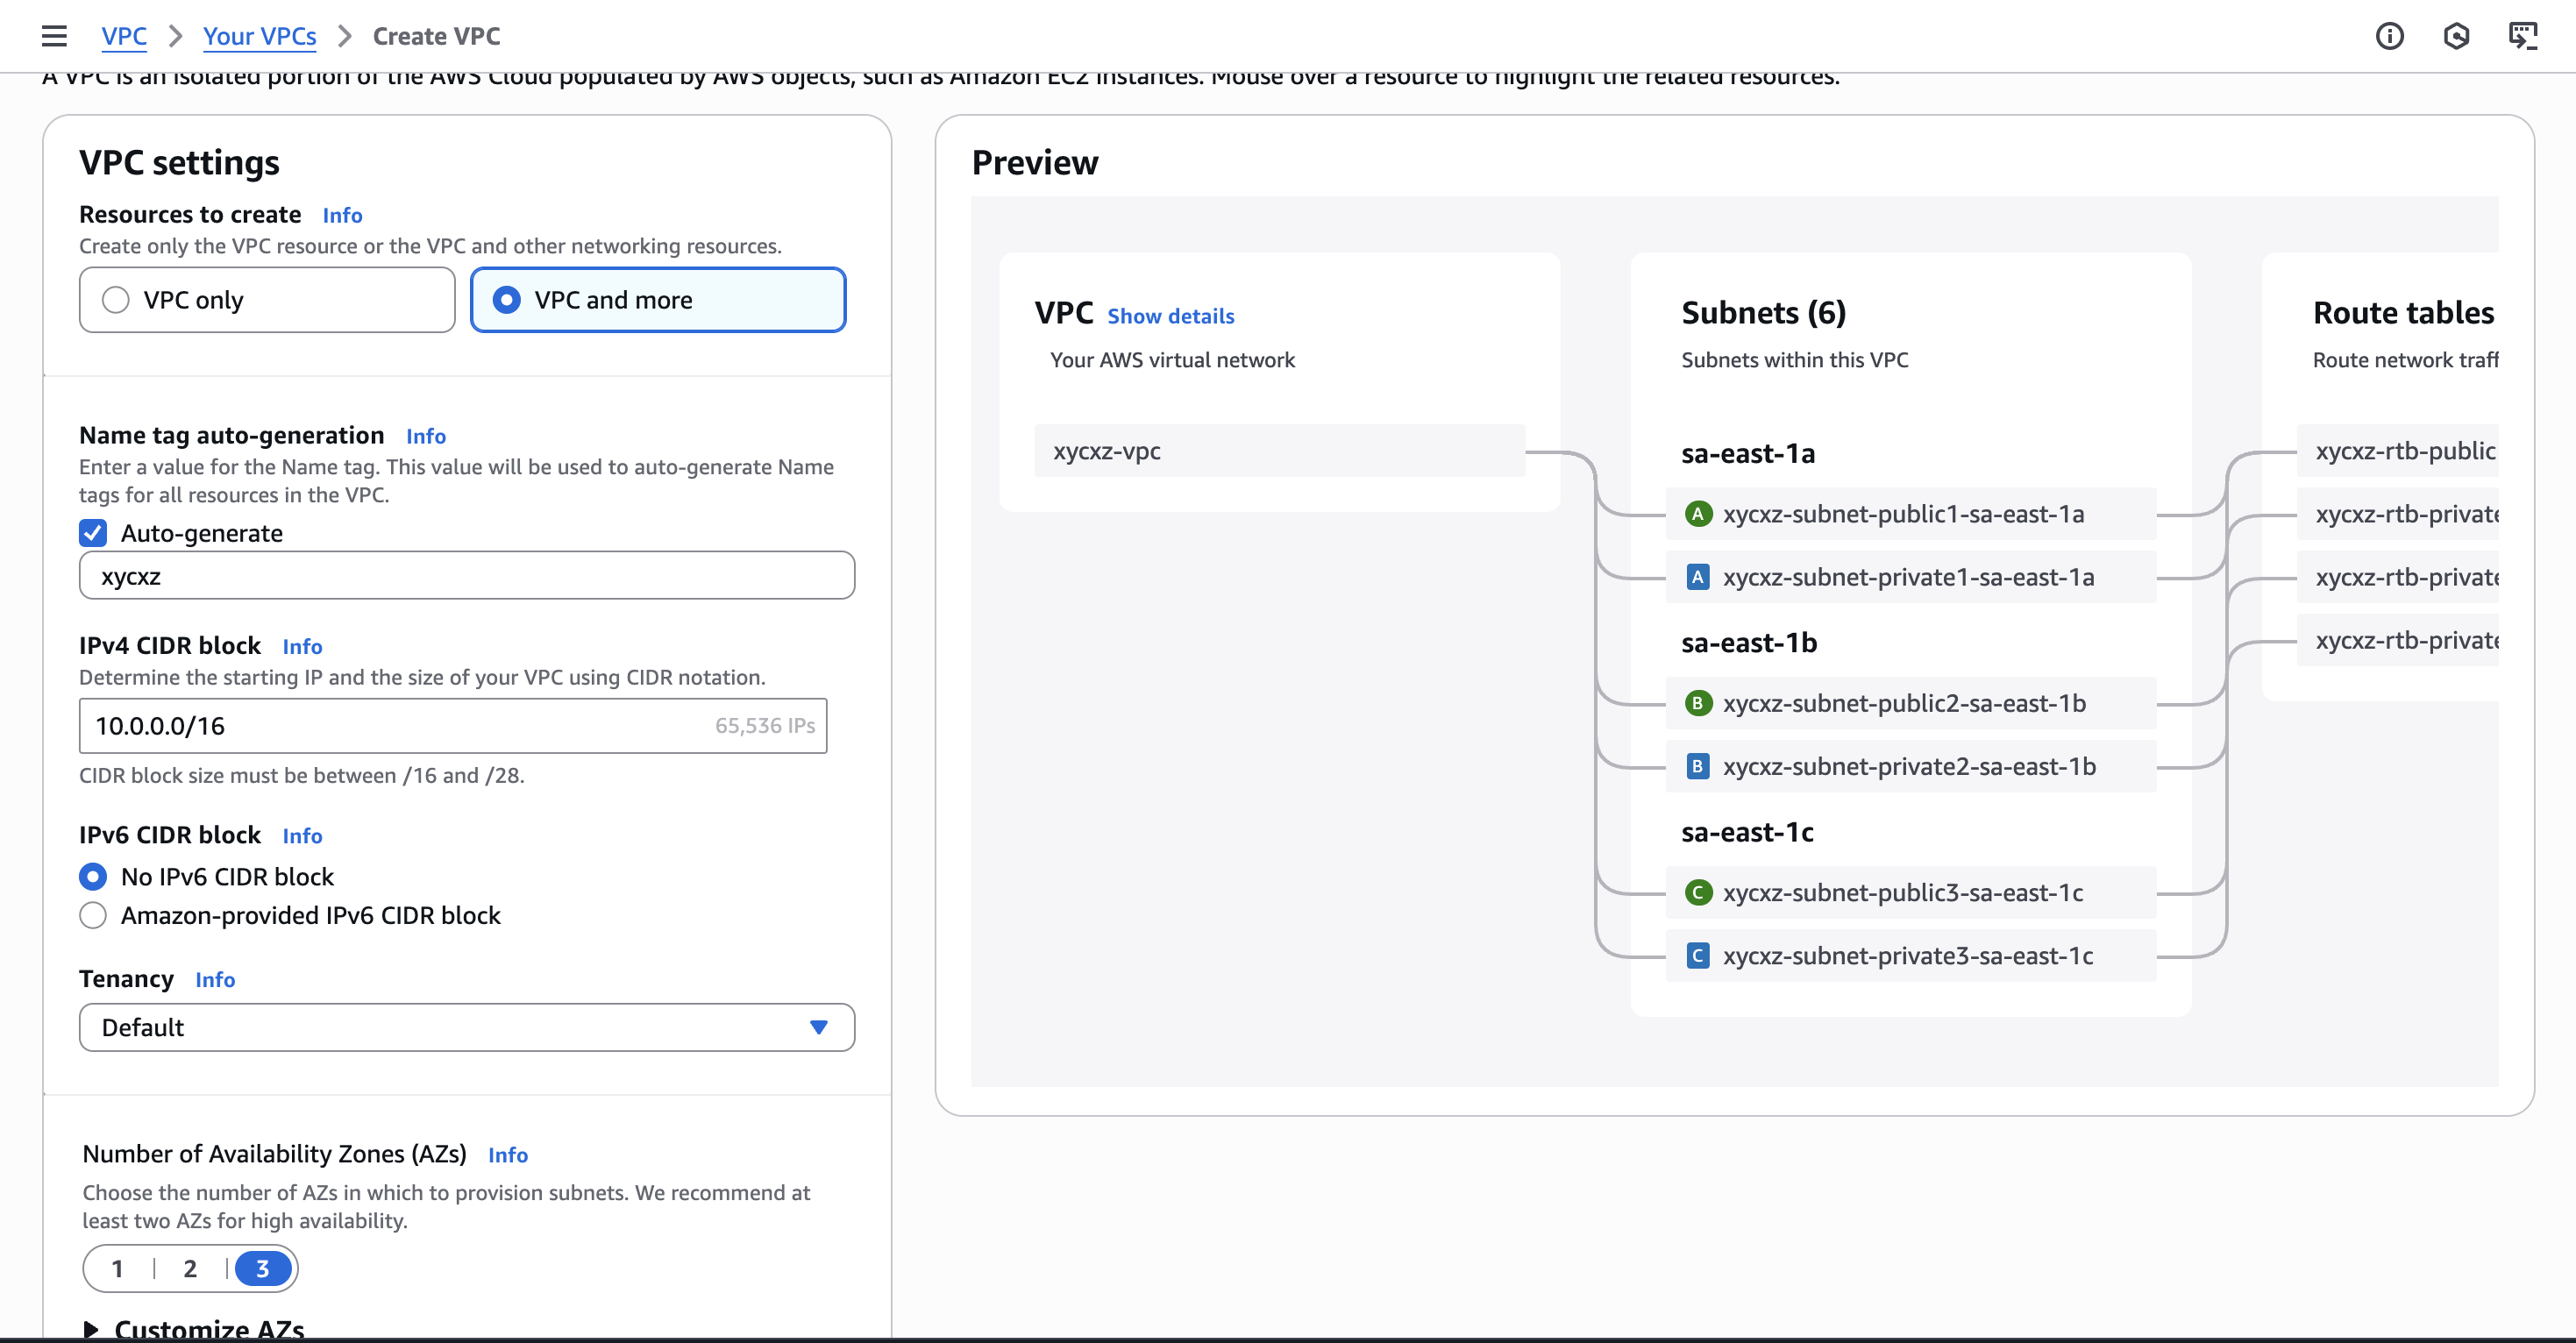
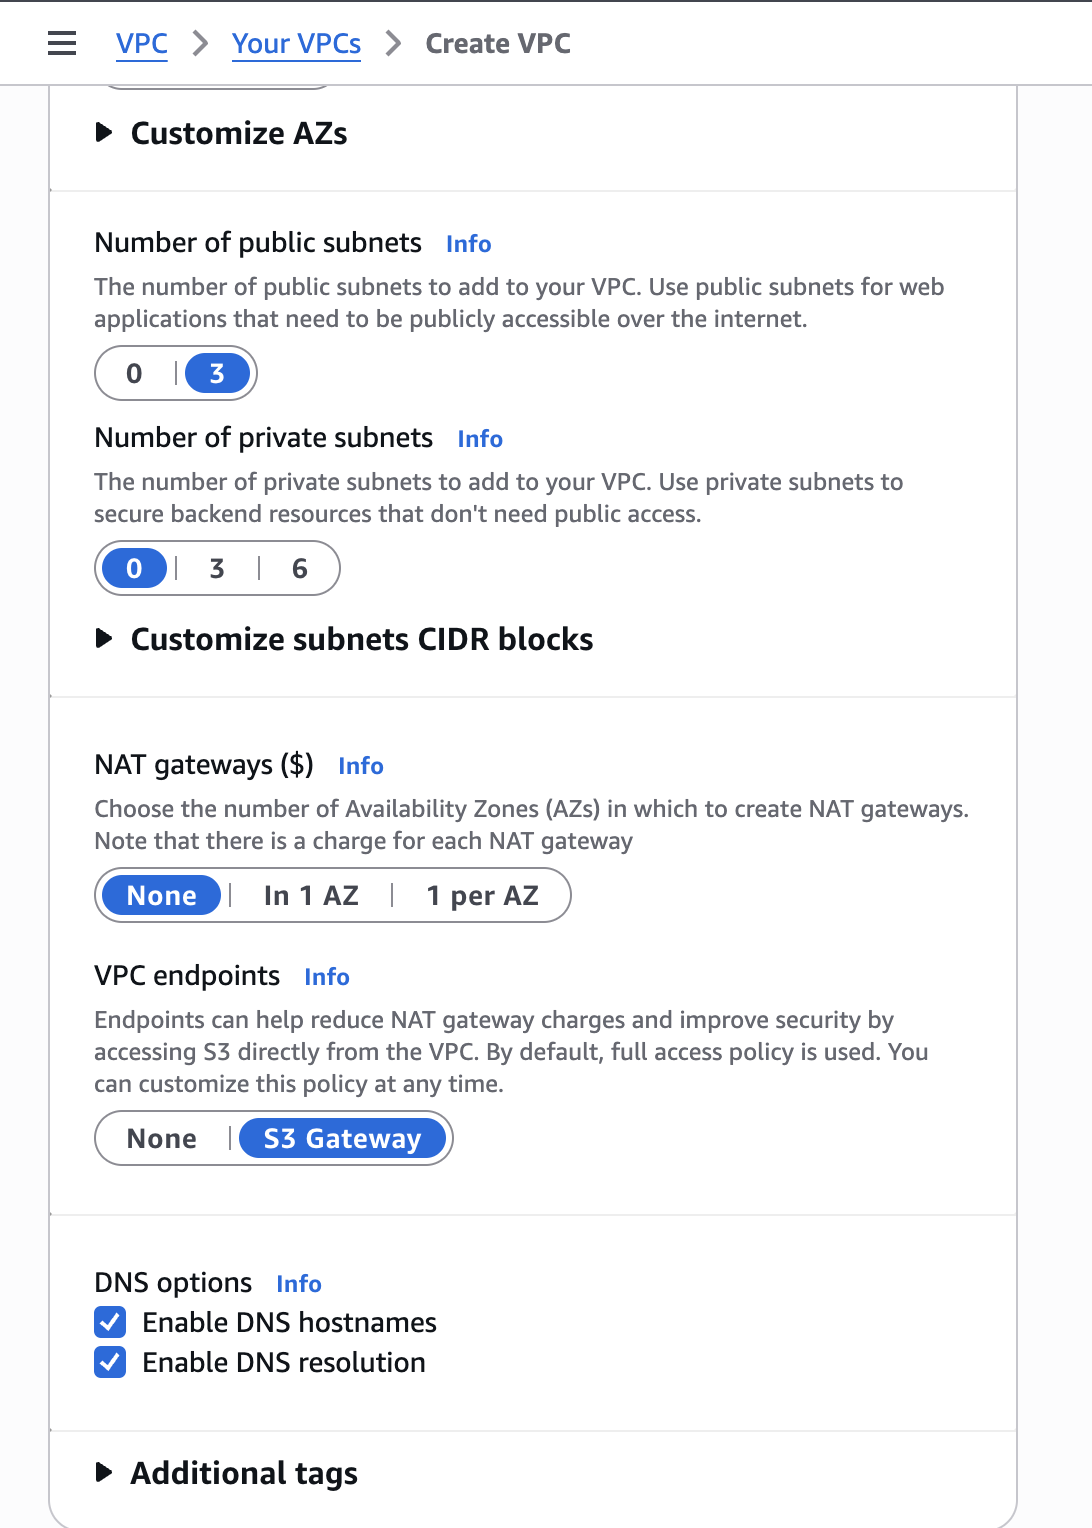
Scrolling down, we have the option to customise the AZs by selecting the number of public and private subnets of each zone. However, what is the difference between those?
1) A public subnet has a route to an Internet Gateway which allows resources (EC2,…) to access or be accessed from the internet.
2) A private subnet does not have a direct route to the Internet Gateway. Resources are private even if they have a public IP address. To allow resources in a private subnet to access the internet, we would need an intermediary like a NAT Gateway. To allow an administrator to securely connect to and manage those private resources, they would use a bastion host, which is a dedicated server placed in a public subnet that acts as a secure gateway or ‘jump box’; the administrator connects from the internet to the bastion host, and from there can ‘jump’ to the private instances (using SSH or RDP, for example), which remain safely isolated from direct external access.
Private subnets may be great for back-end services (like databases). Everything will be more difficult if a resource is launched only in a private subnet because, for example, we can’t directly SSH to an instance and we would need to put a SSH gateway in between.
For the sake of simplicity, we will only work with public subnets. We still can isolate resources there through other mechanisms like a firewall, for example (we will get into that later):
Now we can start launching instances on this VPC. I’ll launch two in total to see whether those instances are able to communicate directly to each other. Make sure to check my EC2 post if you don’t know how to launch an instance. Nevertheless, this time we need to make sure to configure network settings properly:
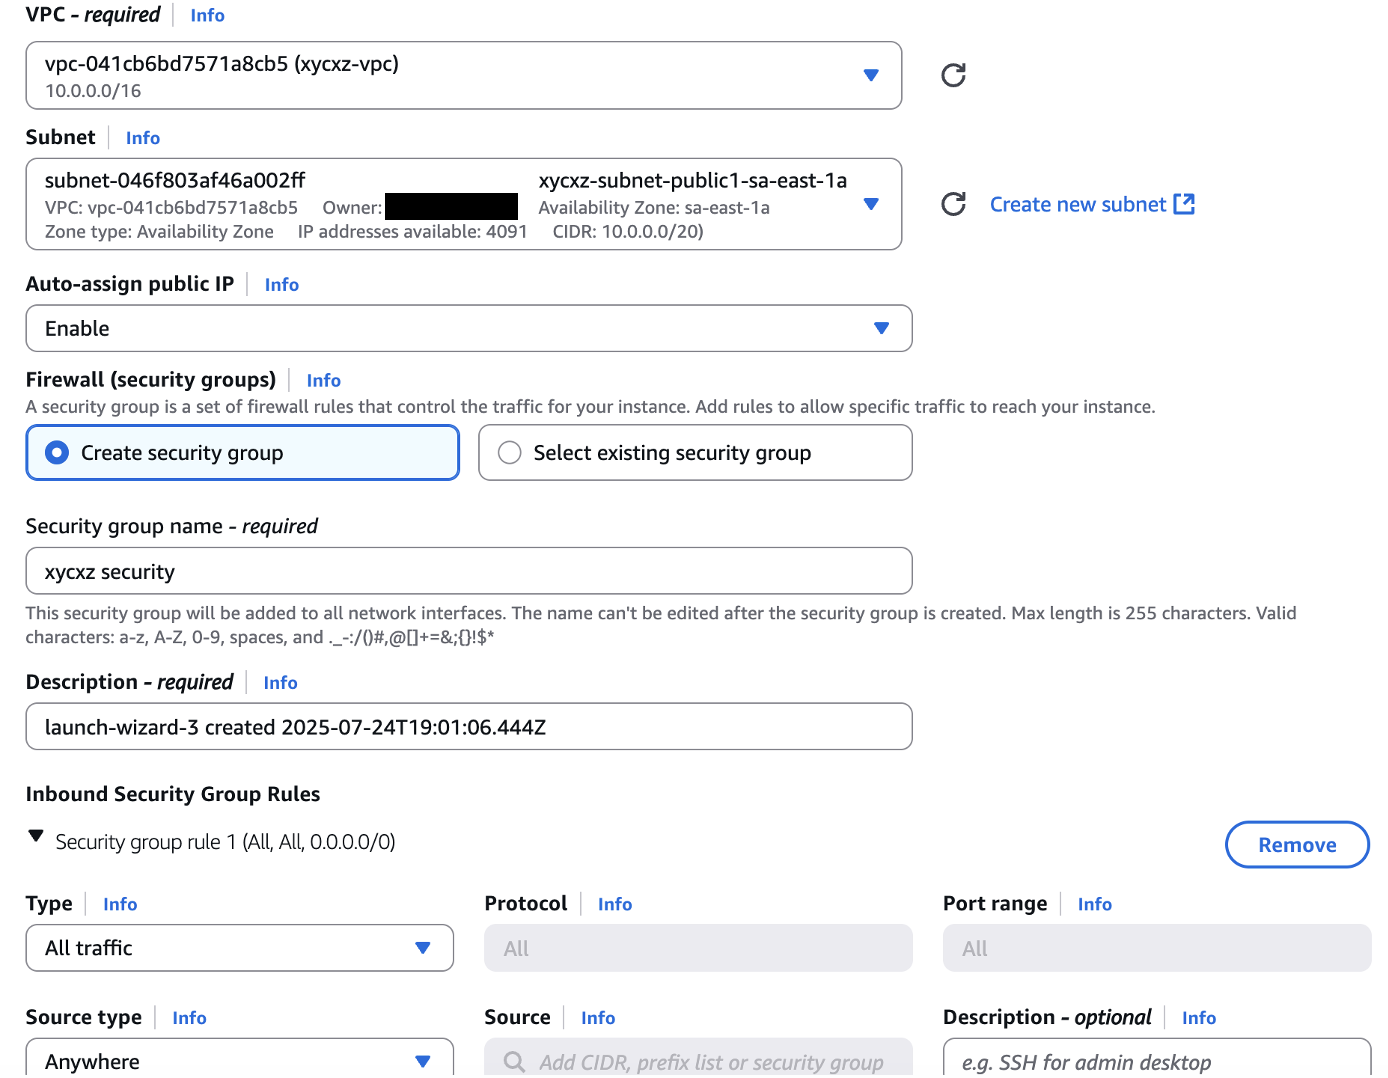
Note: I am disabling the firewall (Inbound Security Group Rules) just because I am not planning to use this for more than a couple of minutes. This is something you should never do for production. We will talk about security groups later!
That’s all the configuration we need to launch our instances. We now want to see if both instances are able to privately communicate to each other through their private IPv4 address (these are the ones we want to use for cluster internal communication).
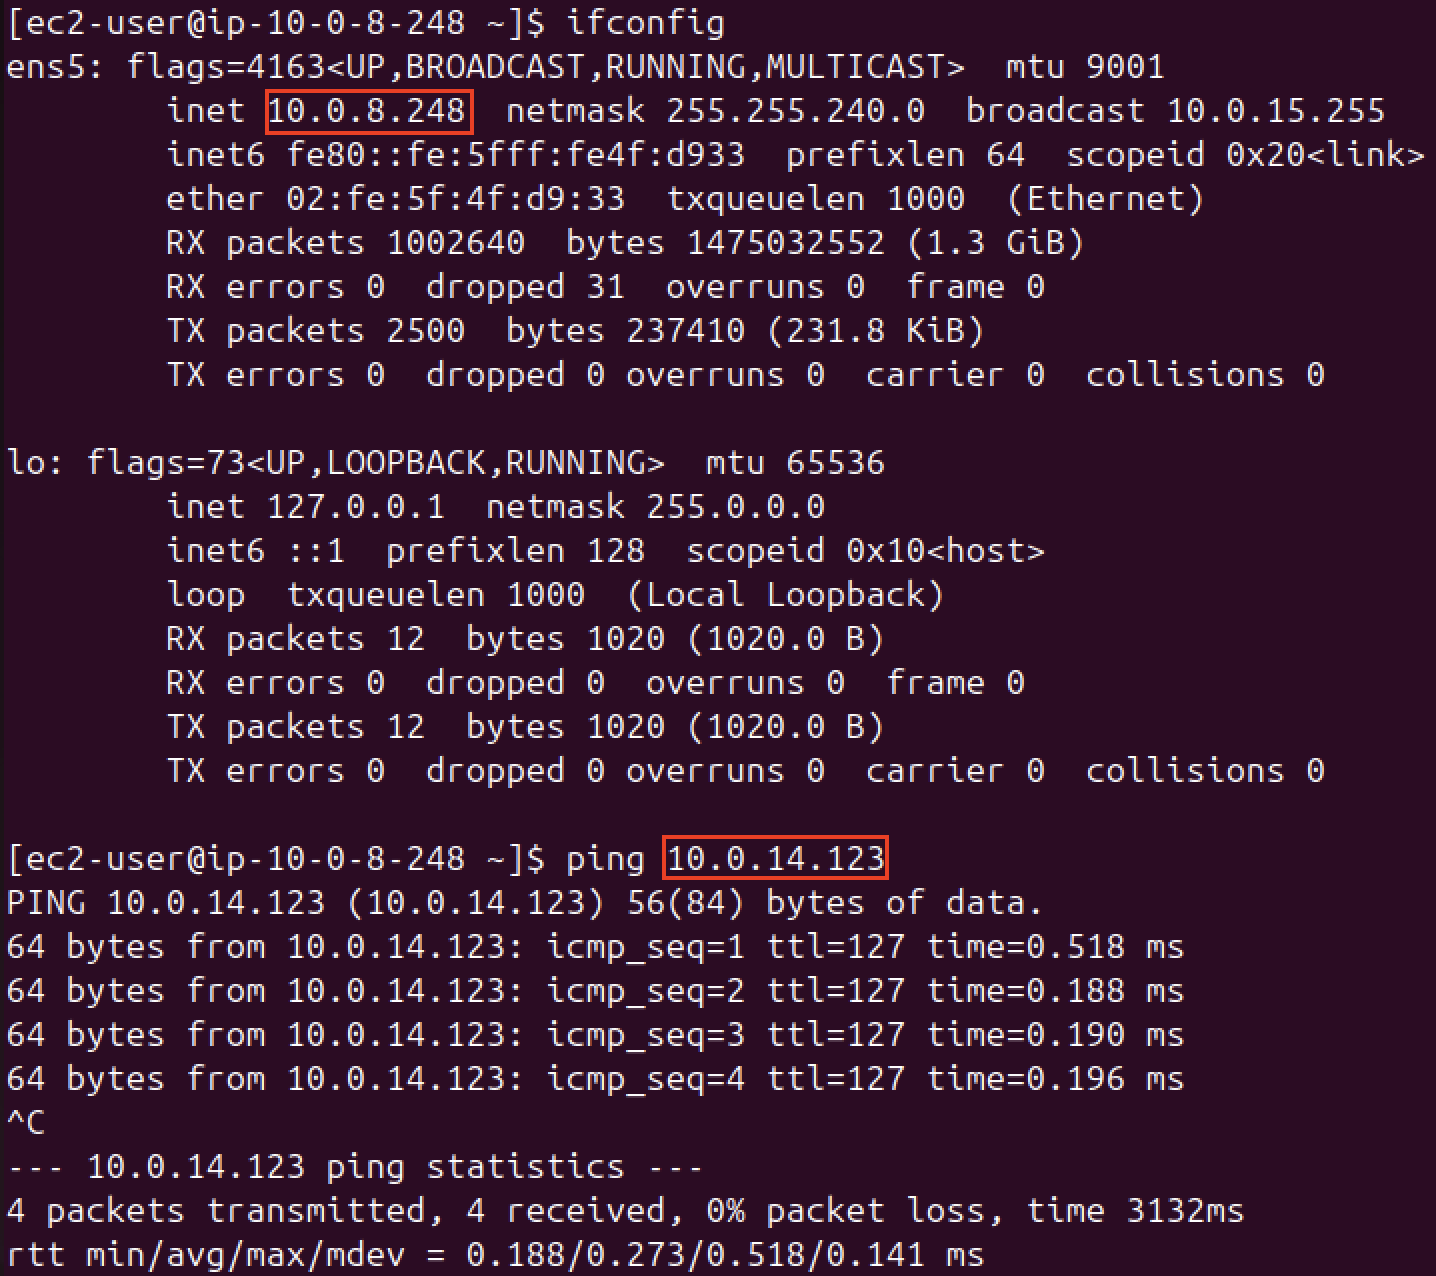
I’ll connect to one of the instances and try to ping the other one from there:
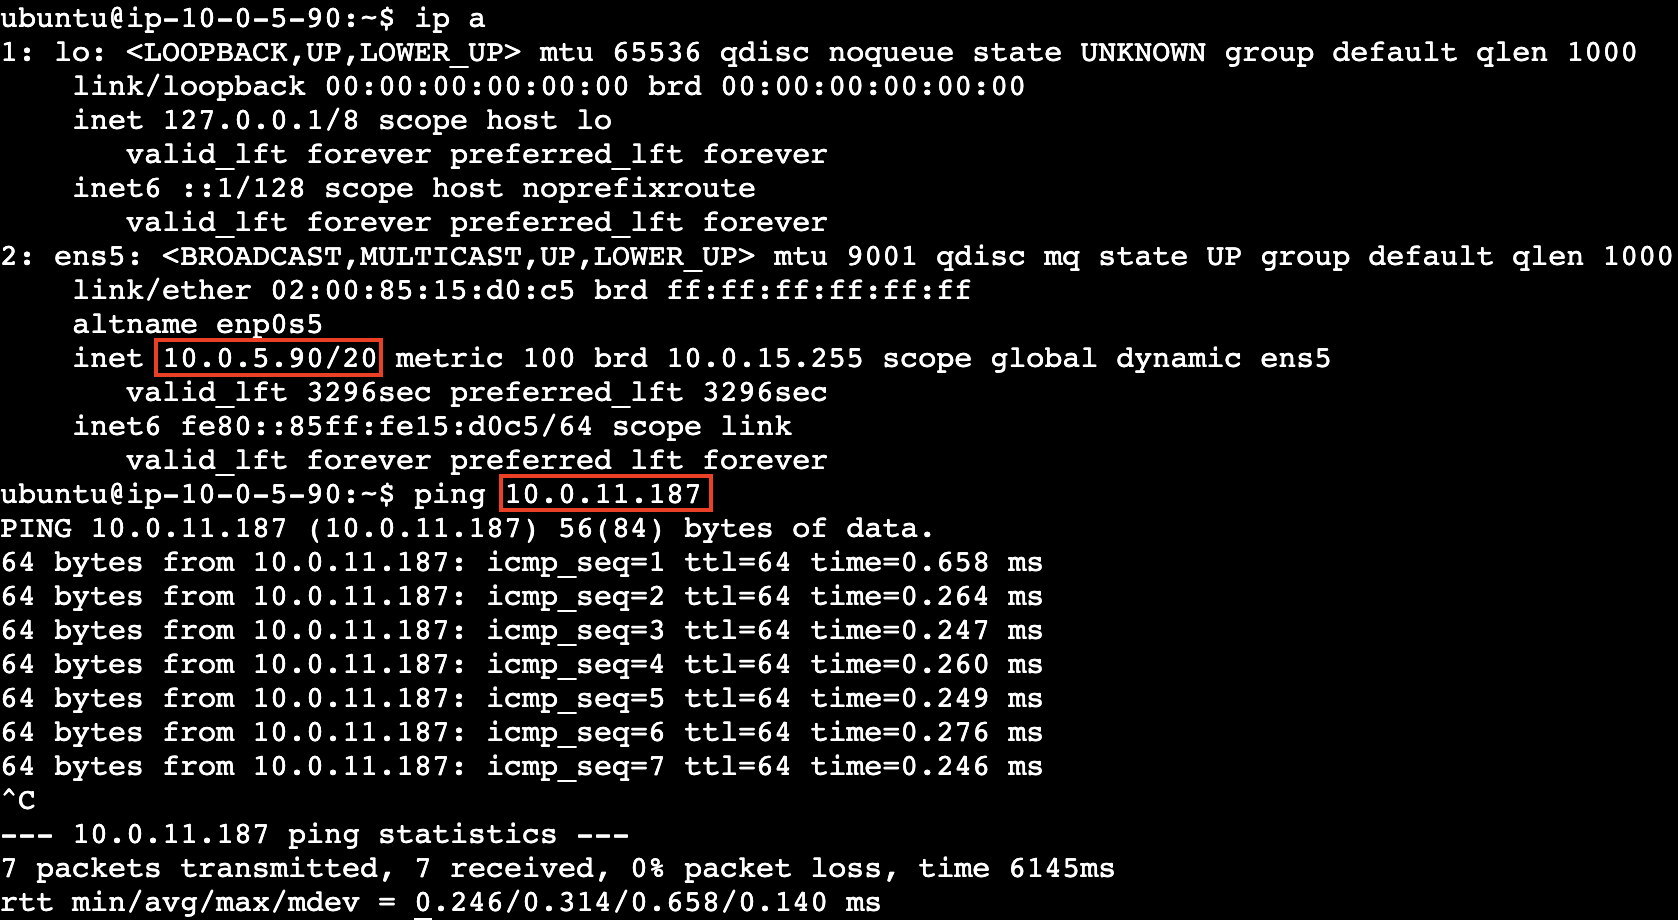
We’ve successfully configured our VPC so two different nodes can talk to each other while being on a different subnet!
Internet Gateways
How do Instances Connect to the Public Internet?
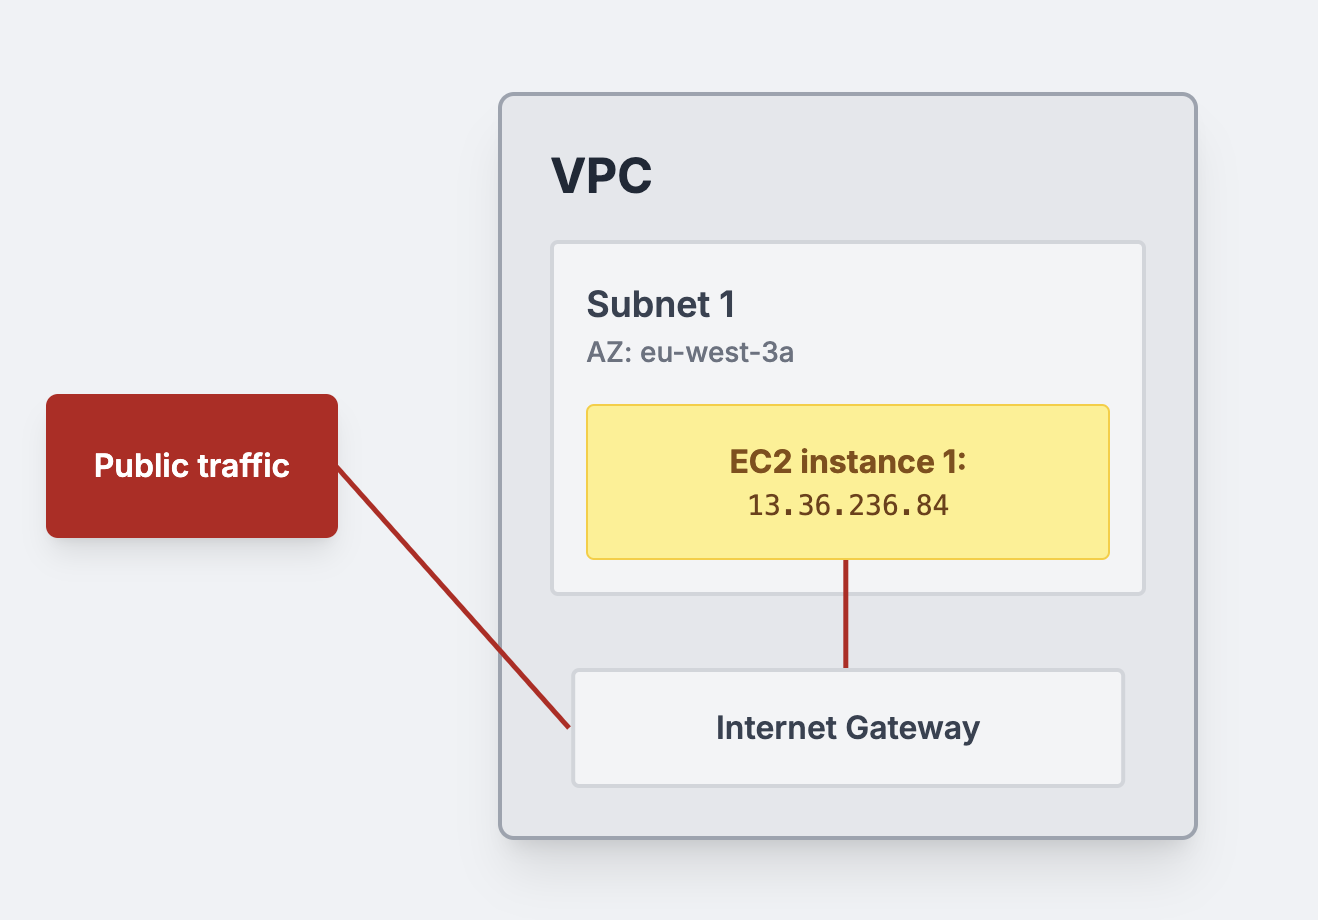
There is an internet gateway that is attached to our VPC. This gateway is the one in charge of routing the public traffic into the VPC and finally the subnet. It also performs the same process the other way around.
When it comes to EC2 instances, the public IP address assigned to them is the one that talks to the gateway and then the latter sends the traffic to the public internet. This is why the internet gateway requires that our EC2 instances are publicly accessible or, in other words, they must have a public IP address.
Note: The subnet must be configured in a way that knows where the internet gateway is for this process to work!
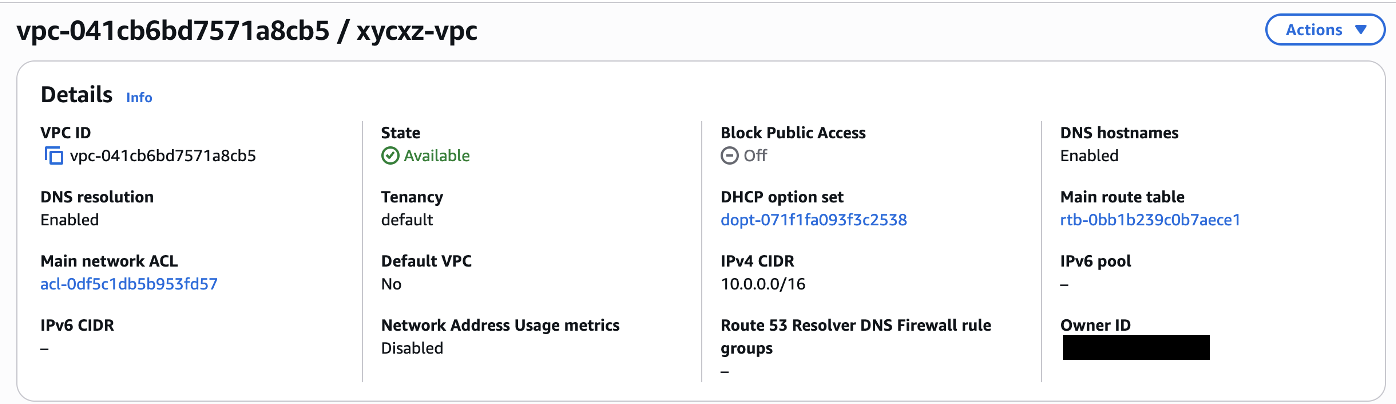
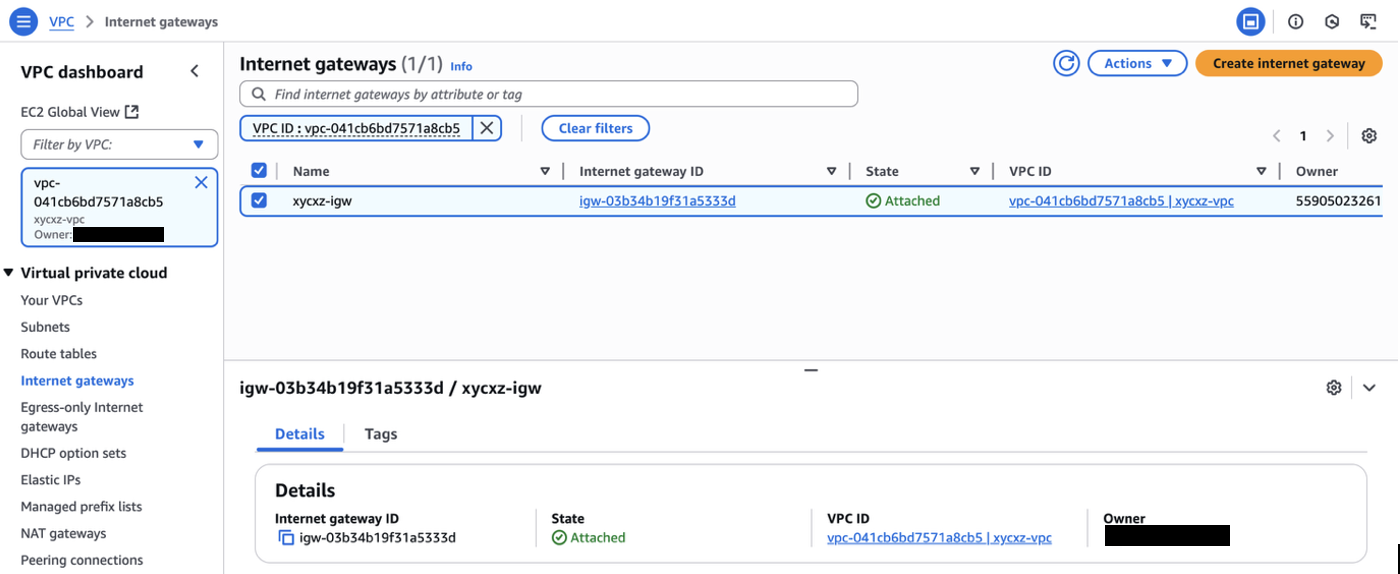
The custom VPC earlier created has an internet gateway attached to it automatically:
We will see that the created public subnets have an internet gateway attached to them by looking at their route table:
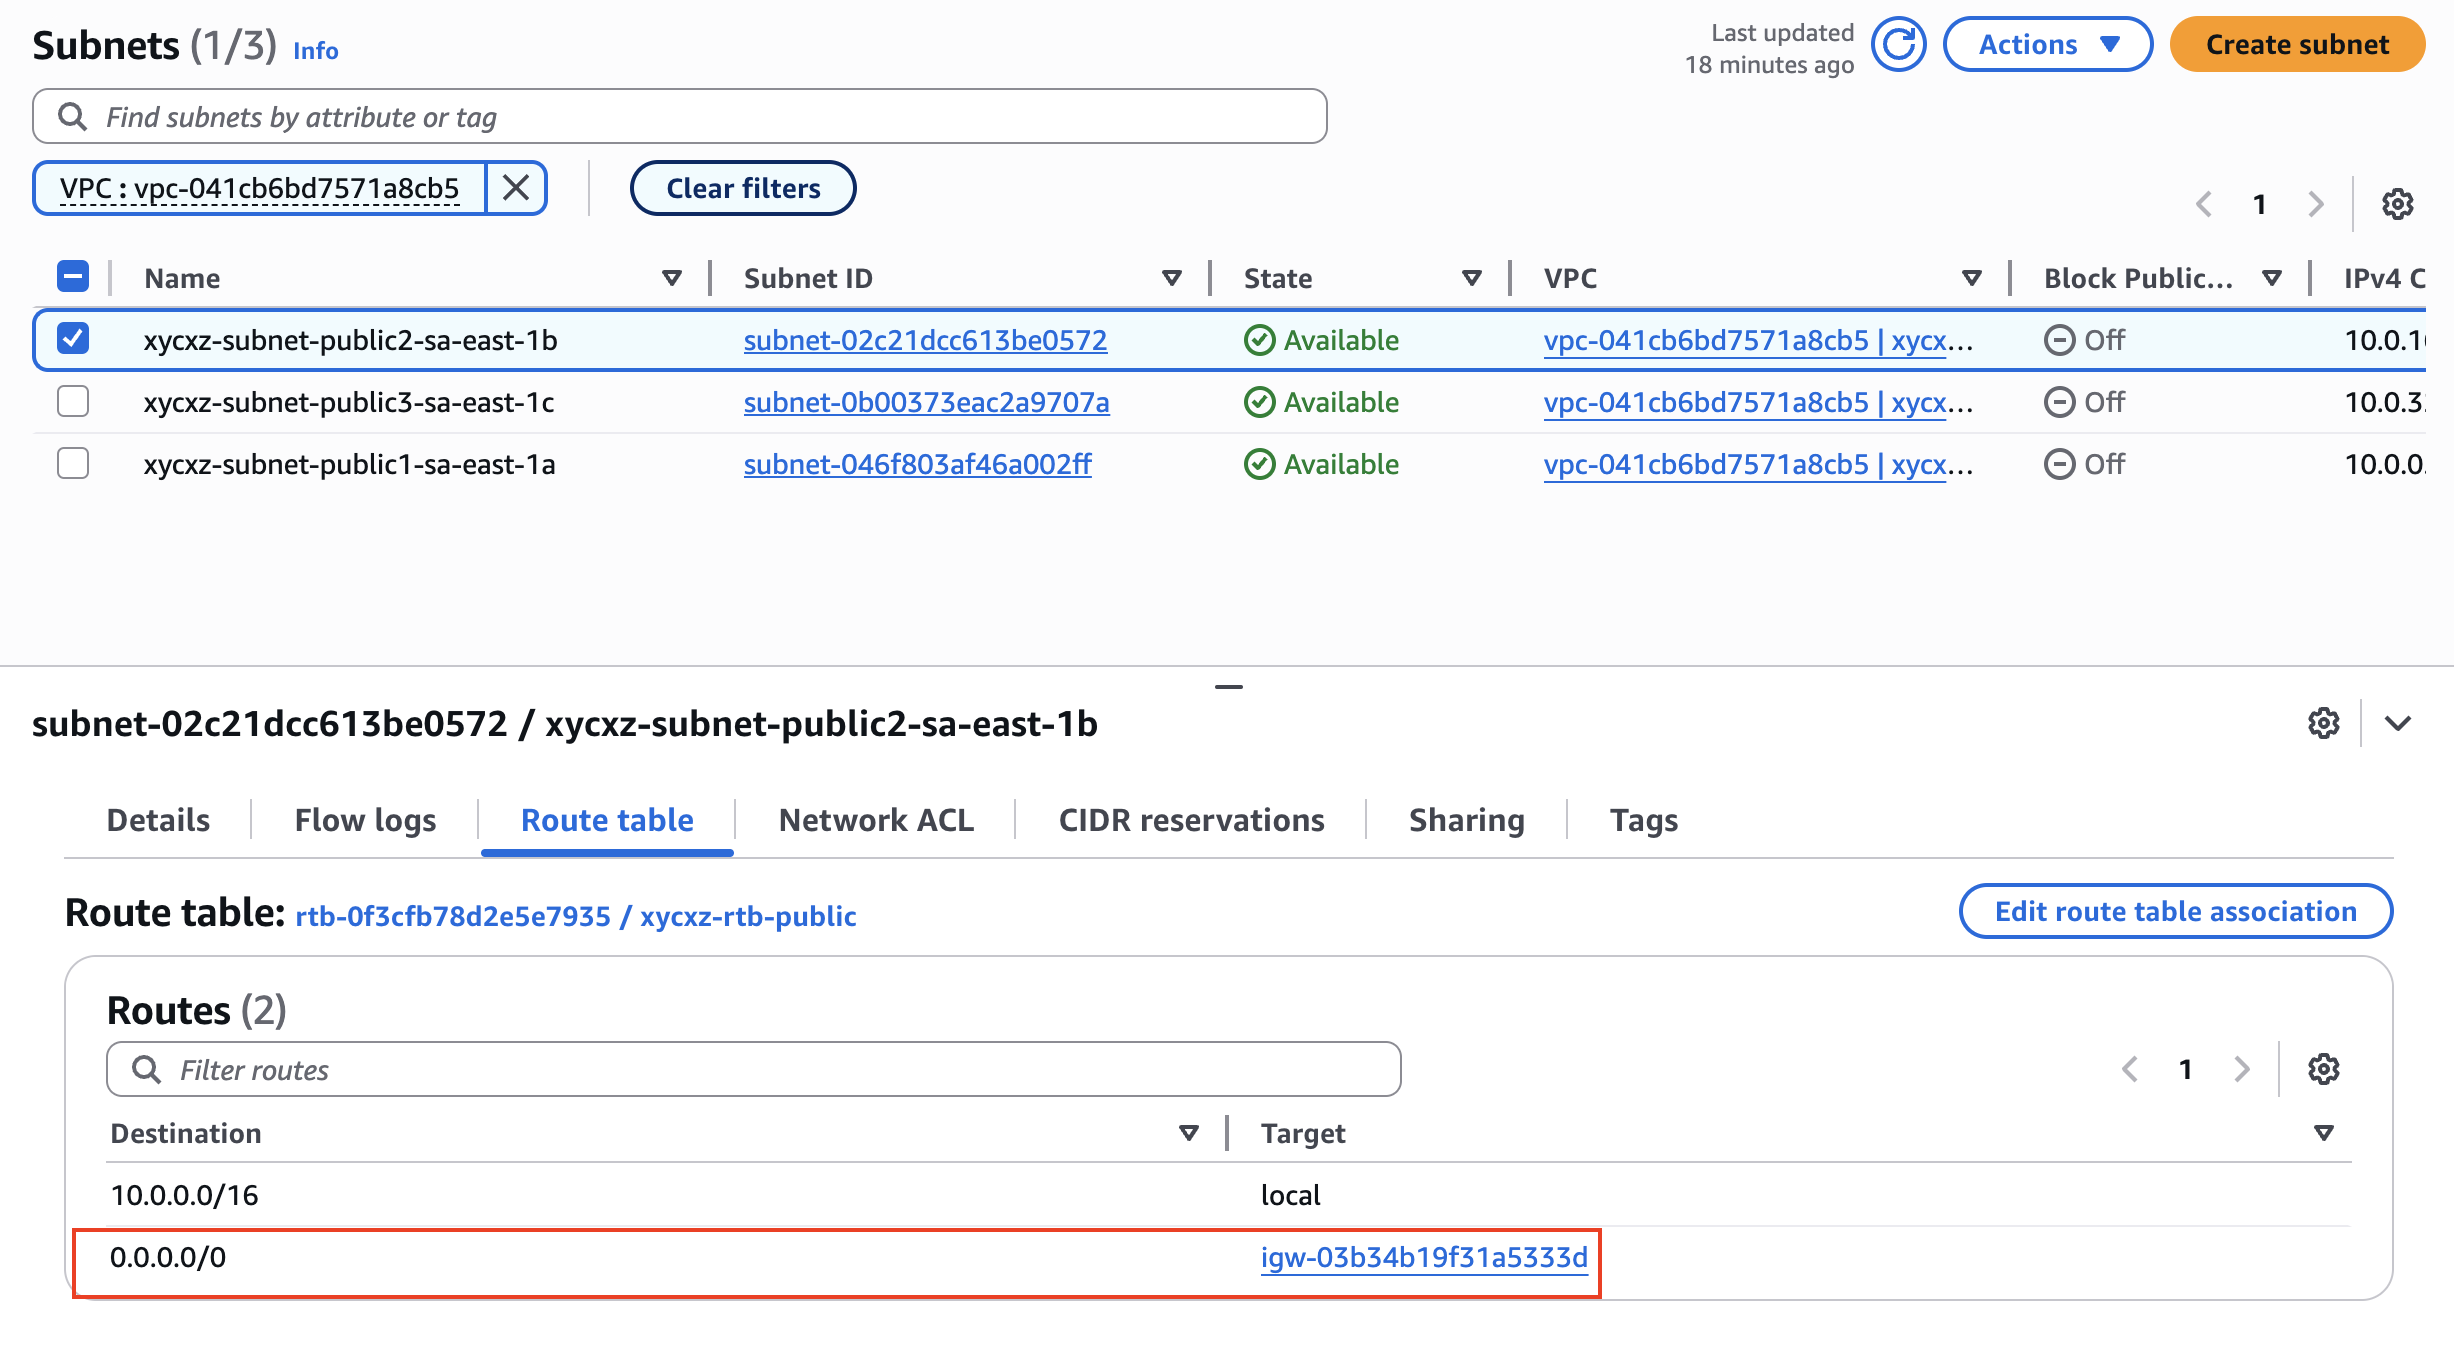
All of this is important because if one of the nuances presented is not correct like, for example, we deleted the internet gateway, entries in the route table are not correct, or our EC2 instance does not have a public IP address, then suddenly internet won’t work and we need to know this to troubleshoot the problem.
Network ACLs
Network Access Control Lists (Network ACLs) are an optional firewall feature that allows us to define rules on a subnet level. We can set inbound rules to configure which traffic can enter a subnet and outbound rules to configure which traffic can leave the subnet.
Network ACLs are stateless, which means if we want to allow inbound connection (for example, our computer browser allowed to communicate with an EC2 instance) we must explicitly allow the return traffic with an outbound rule. Not doing this will cause a request to come in but not be able to reply to it or the reply will be dropped.
By default, Network ACLs are configured to allow all traffic in both directions, but we can switch this:
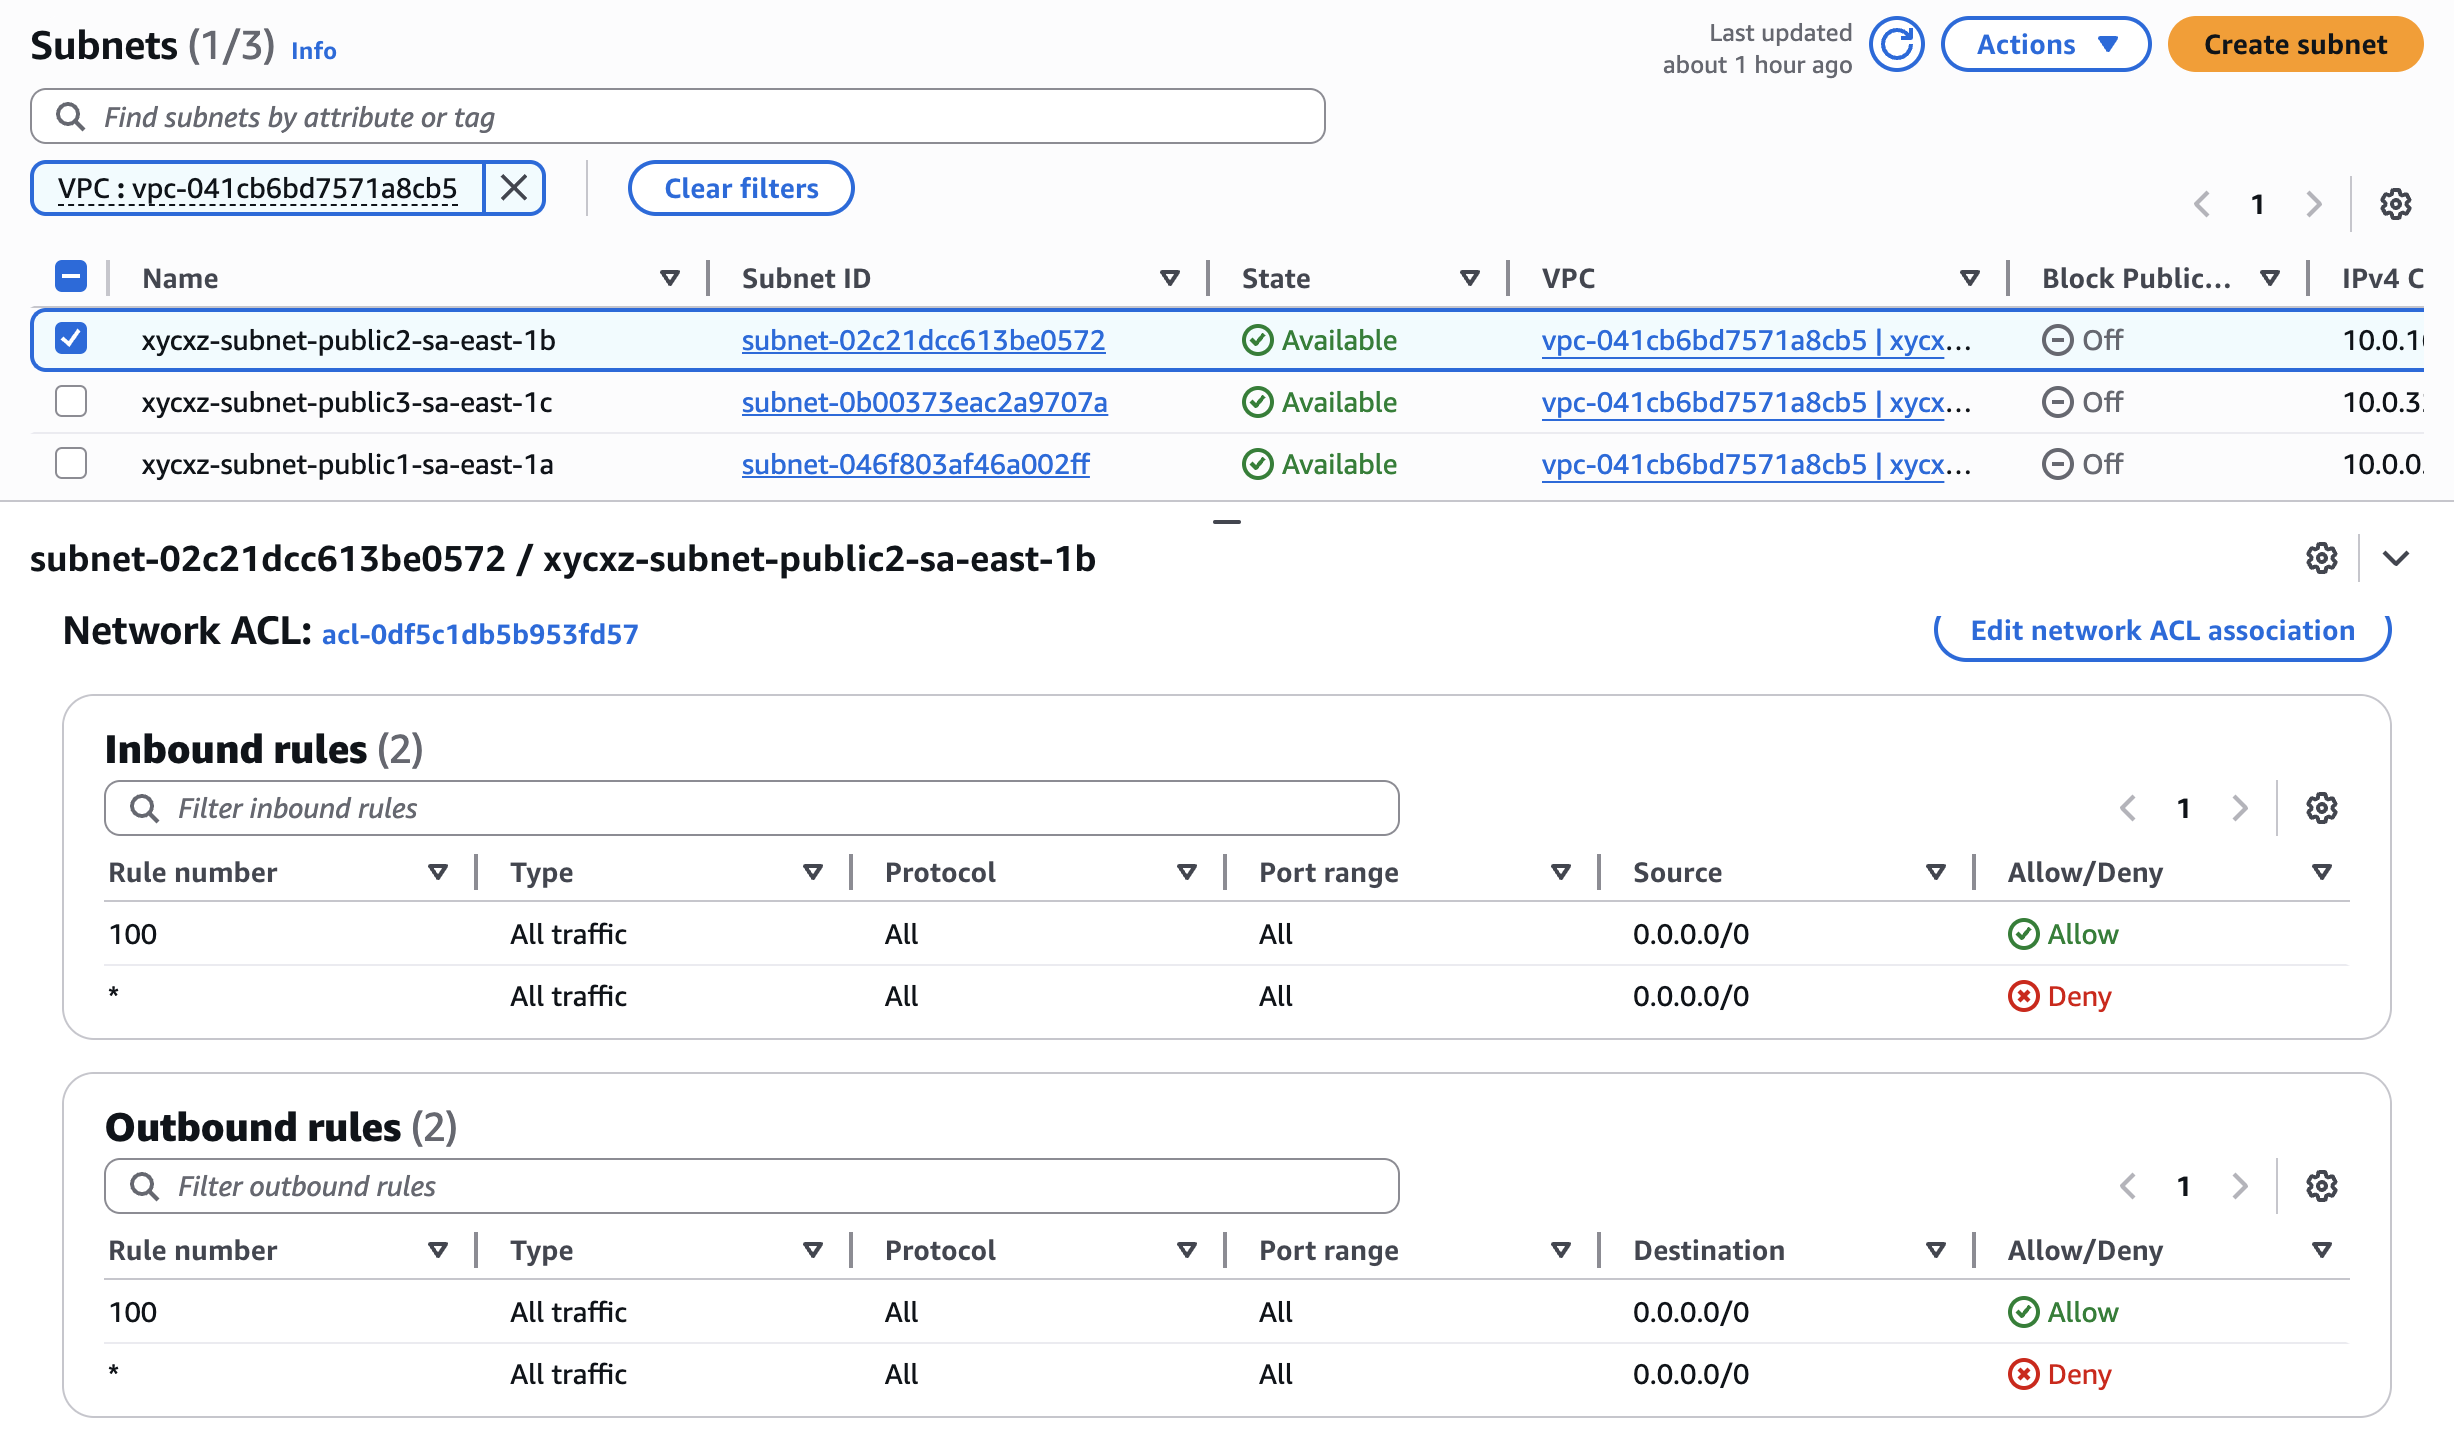
The * in both rules ensure that if a packet doesn’t match any of the other numbered rules, it’s denied. Rules are evaluated starting from the lowest number. The first rule that matches the traffic is applied, regardless of any higher-numbered rules that might also match.
This is important because if this was any different, we would suddenly not be able to connect to our machine. We can confirm this by modifying the outbound rules (send traffic to the outer internet) and check if we can connect to our instance after that:
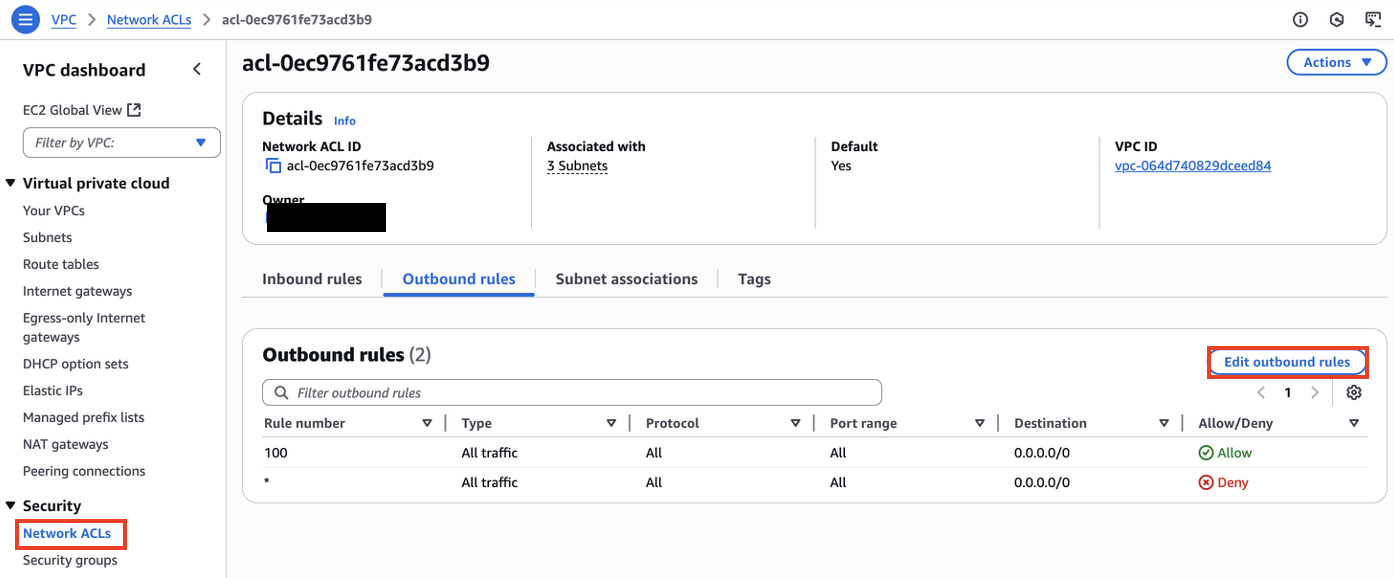
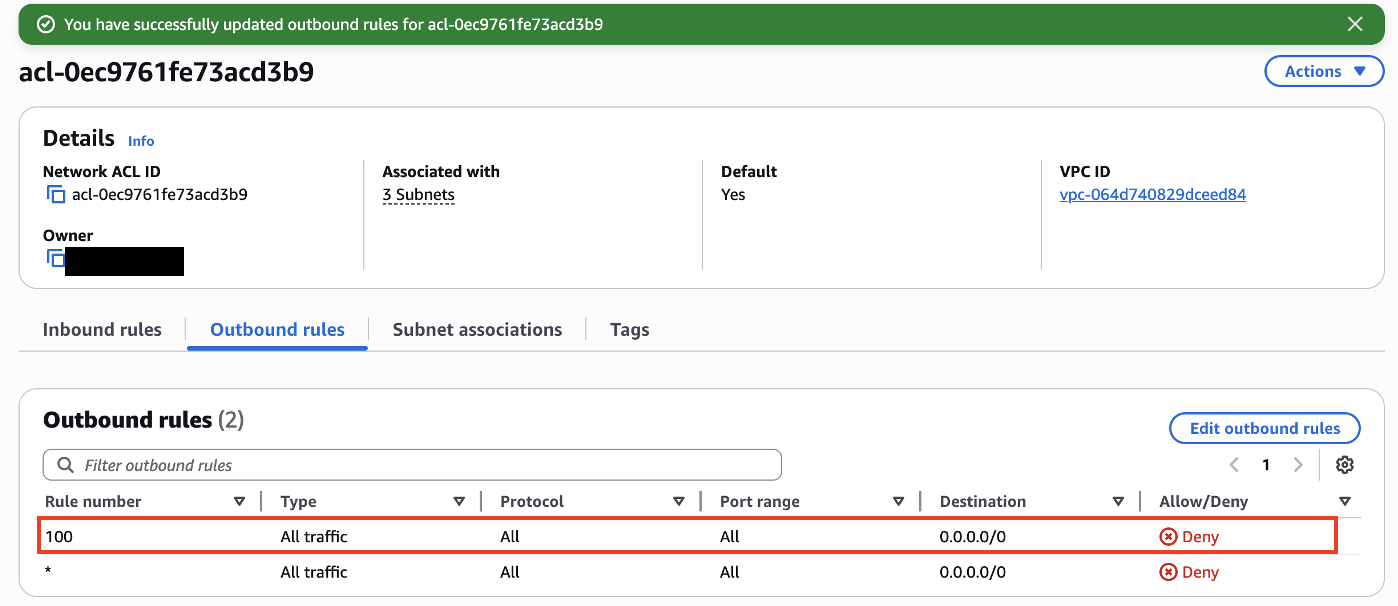
Trying to connect back to our instance, we will see that it does not work:
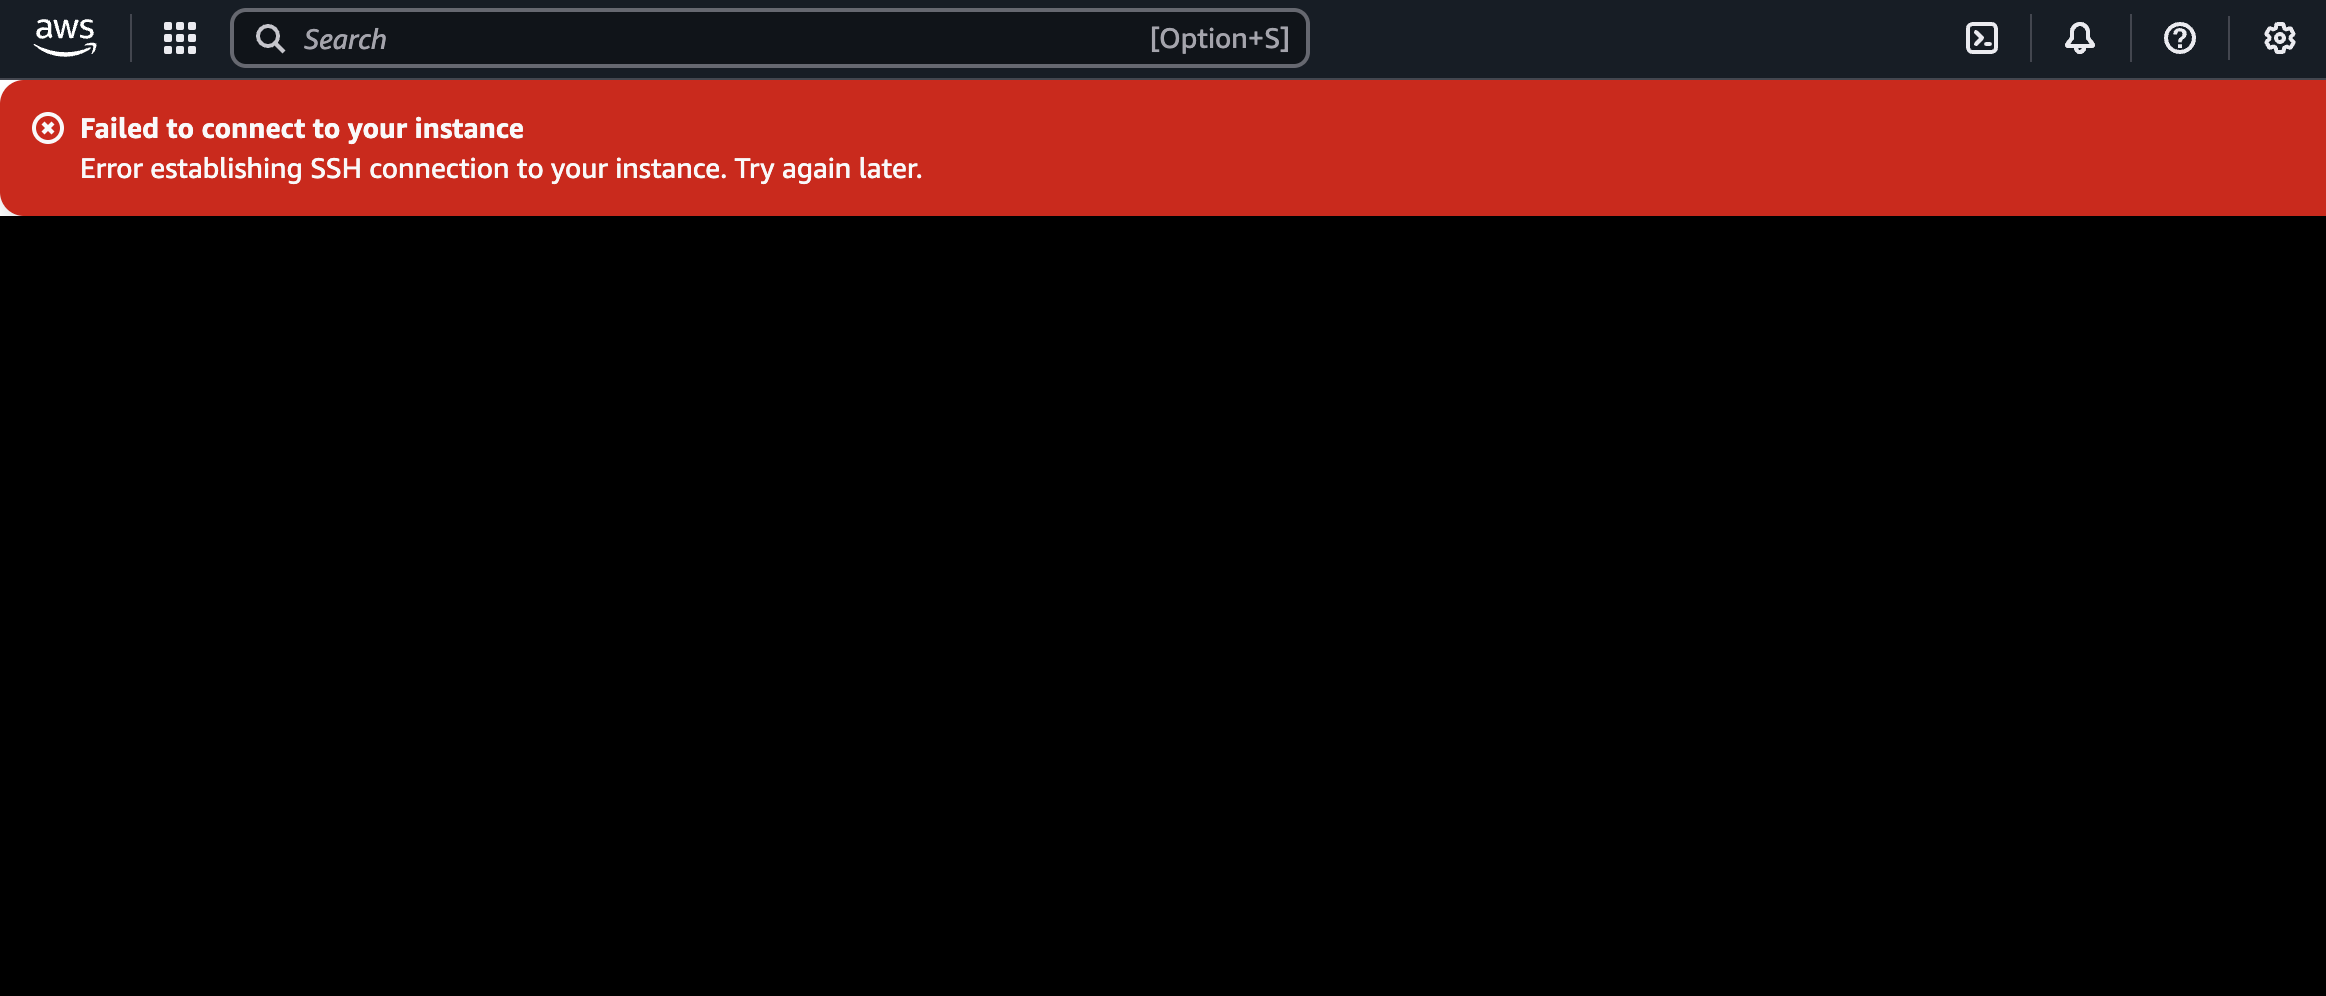
The reason is that incoming traffic is allowed, which means the packets transmitted to connect to the instance are probably going to reach it, but the response packets needed to complete the three way handshake are blocked by the outbound rules. This is another checkpoint we should pay attention in case of connectivity issues.
Security Groups
A security group is like a virtual firewall that controls inbound and outbound traffic to and from AWS resources (such as EC2 instances). Important to mention (in our case) is that a security group is always attached to an individual instance. They can also be attached to multiple security groups and the rules from all associated security groups are aggregated.
By default everything is blocked, but then the security group can allow traffic. So we can say that a security group can only allow traffic and can never deny traffic. Security groups are stateful, which means if we allow inbound traffic to an instance the associated response traffic (outbound communication) is automatically allowed back out (regardless of outbound rules!).
Let’s confirm what we are saying by checking our instance configuration:
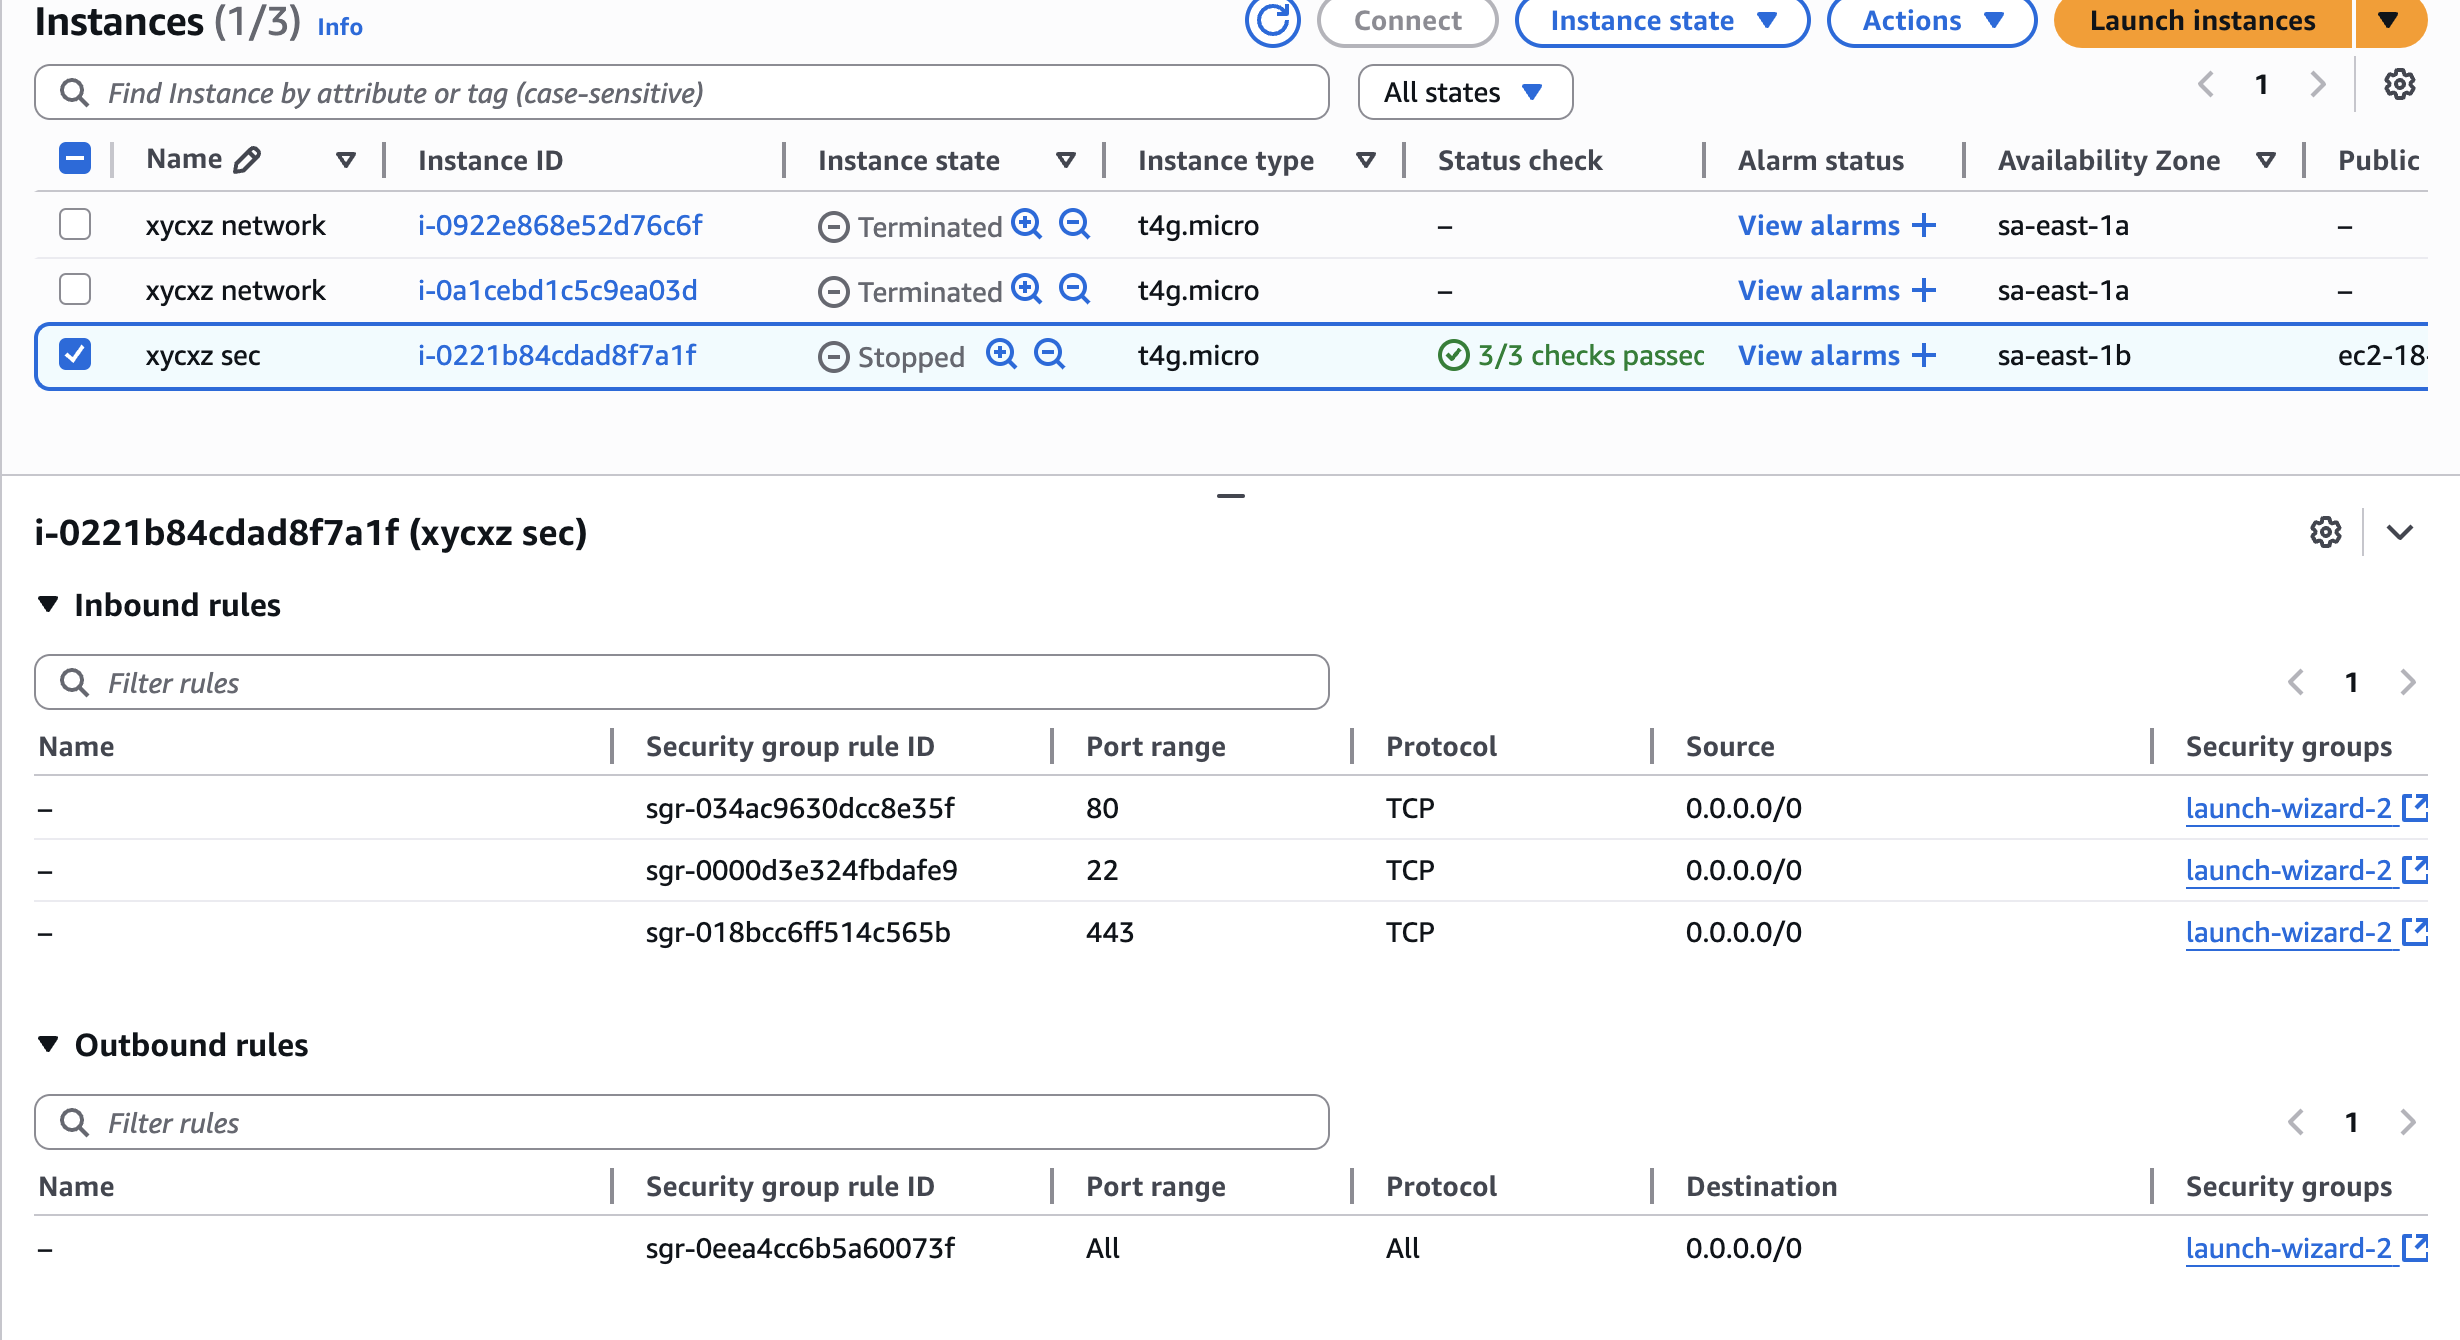
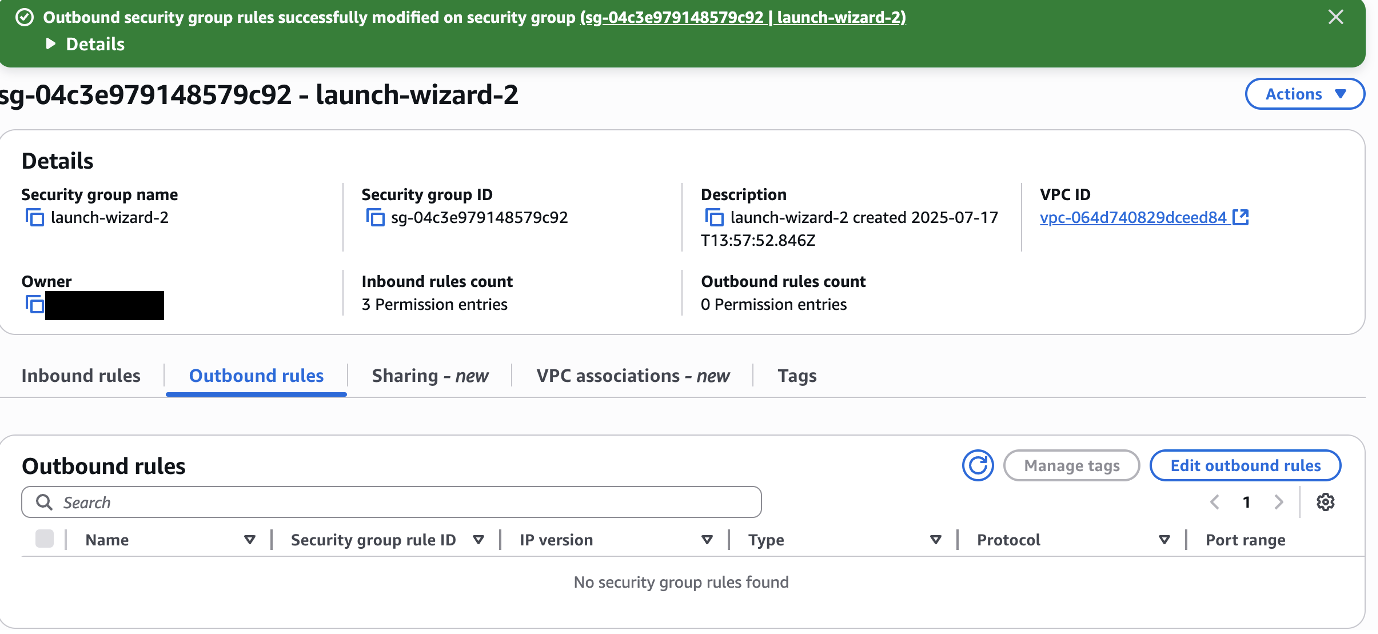
We can modify the security group rules to cut internet access from our instance:
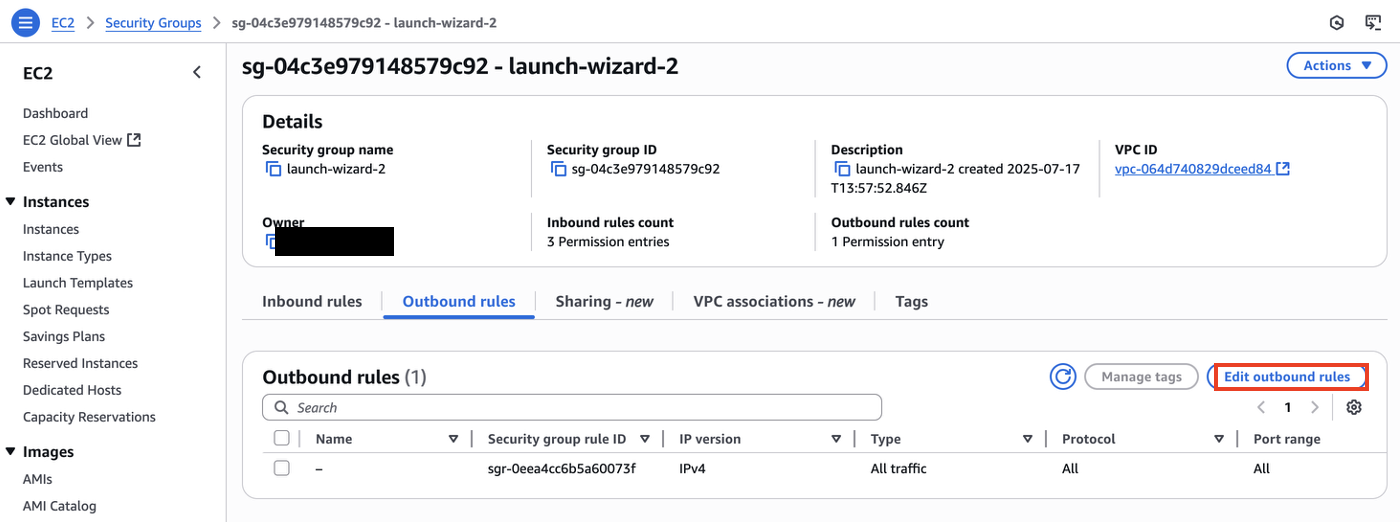
Because the ping command would count as outbound traffic, we will modify outbound rules in the security group of our instance:
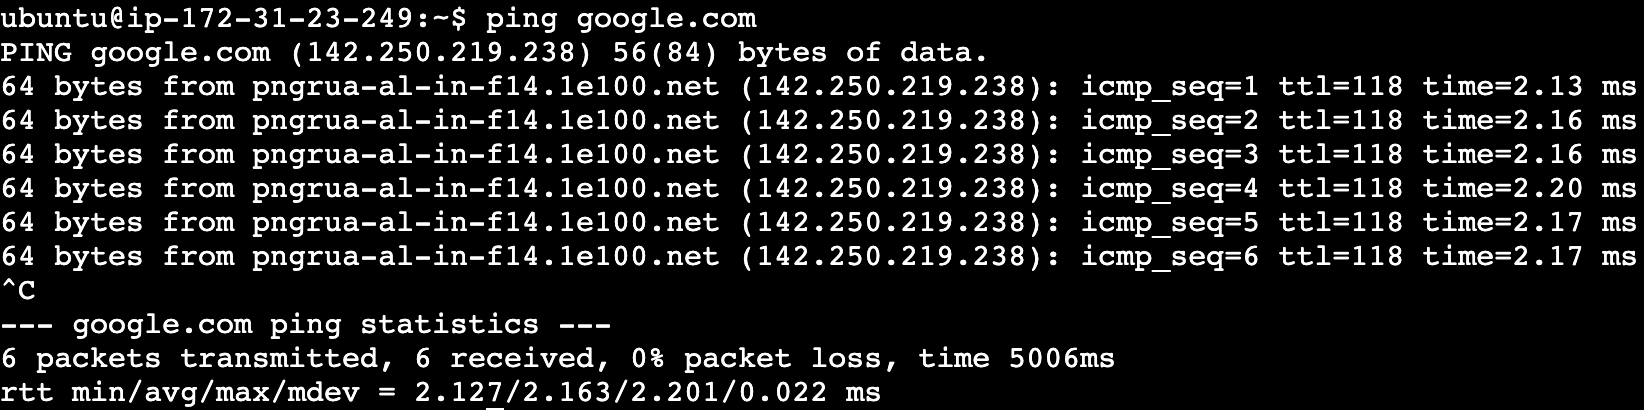
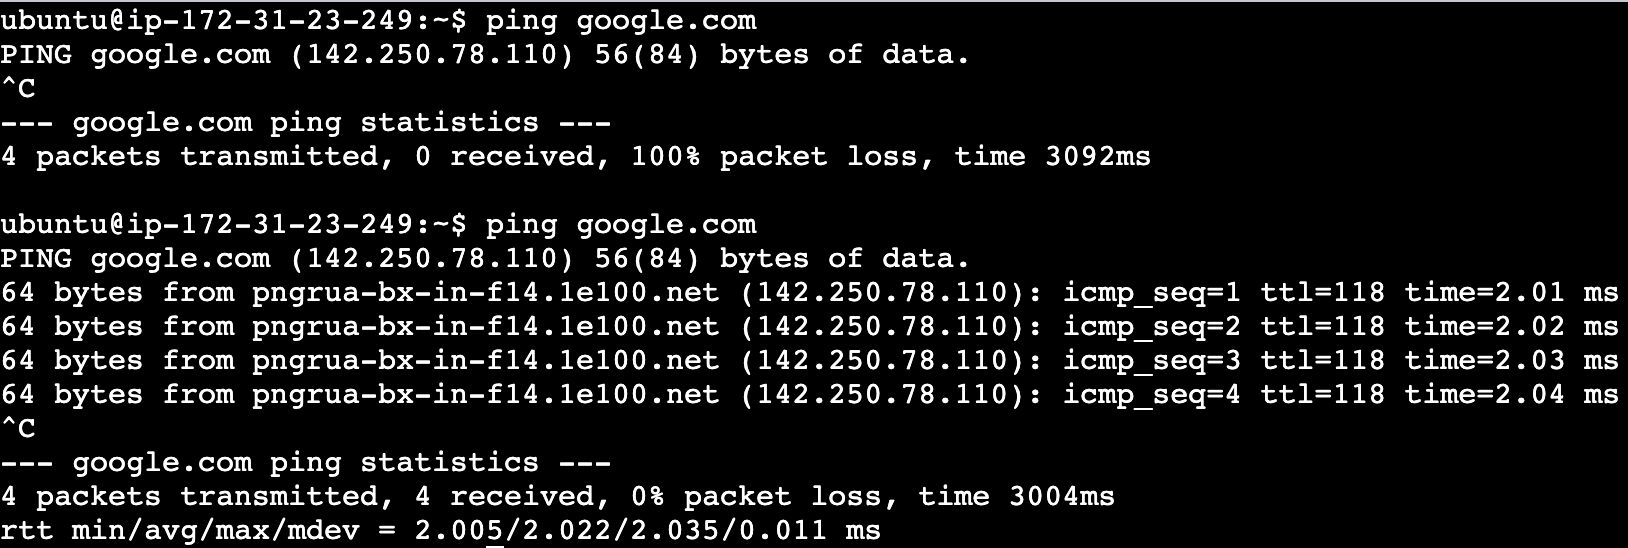
Let’s try to ping Google one again:

Note: Notice what we said in the beginning about security groups being stateful. Even though we deleted all the outbound traffic rules, we still have shell access to the instance!
We can also set a specific outbound rule to only allow ping requests as well:

This demonstrates how highly customisable security groups are and how important it is to know about them because they gives us a lot of control over the network.
Common Scenario
One thing that we often want to allow is that instances can communicate with each other but, from the outside world, only be able to use SSH (for example) to access these servers. This would be a secure way to not expose anything sensitive to the public network, unless we are serving a website which in any case should be properly tested to avoid exploitation.
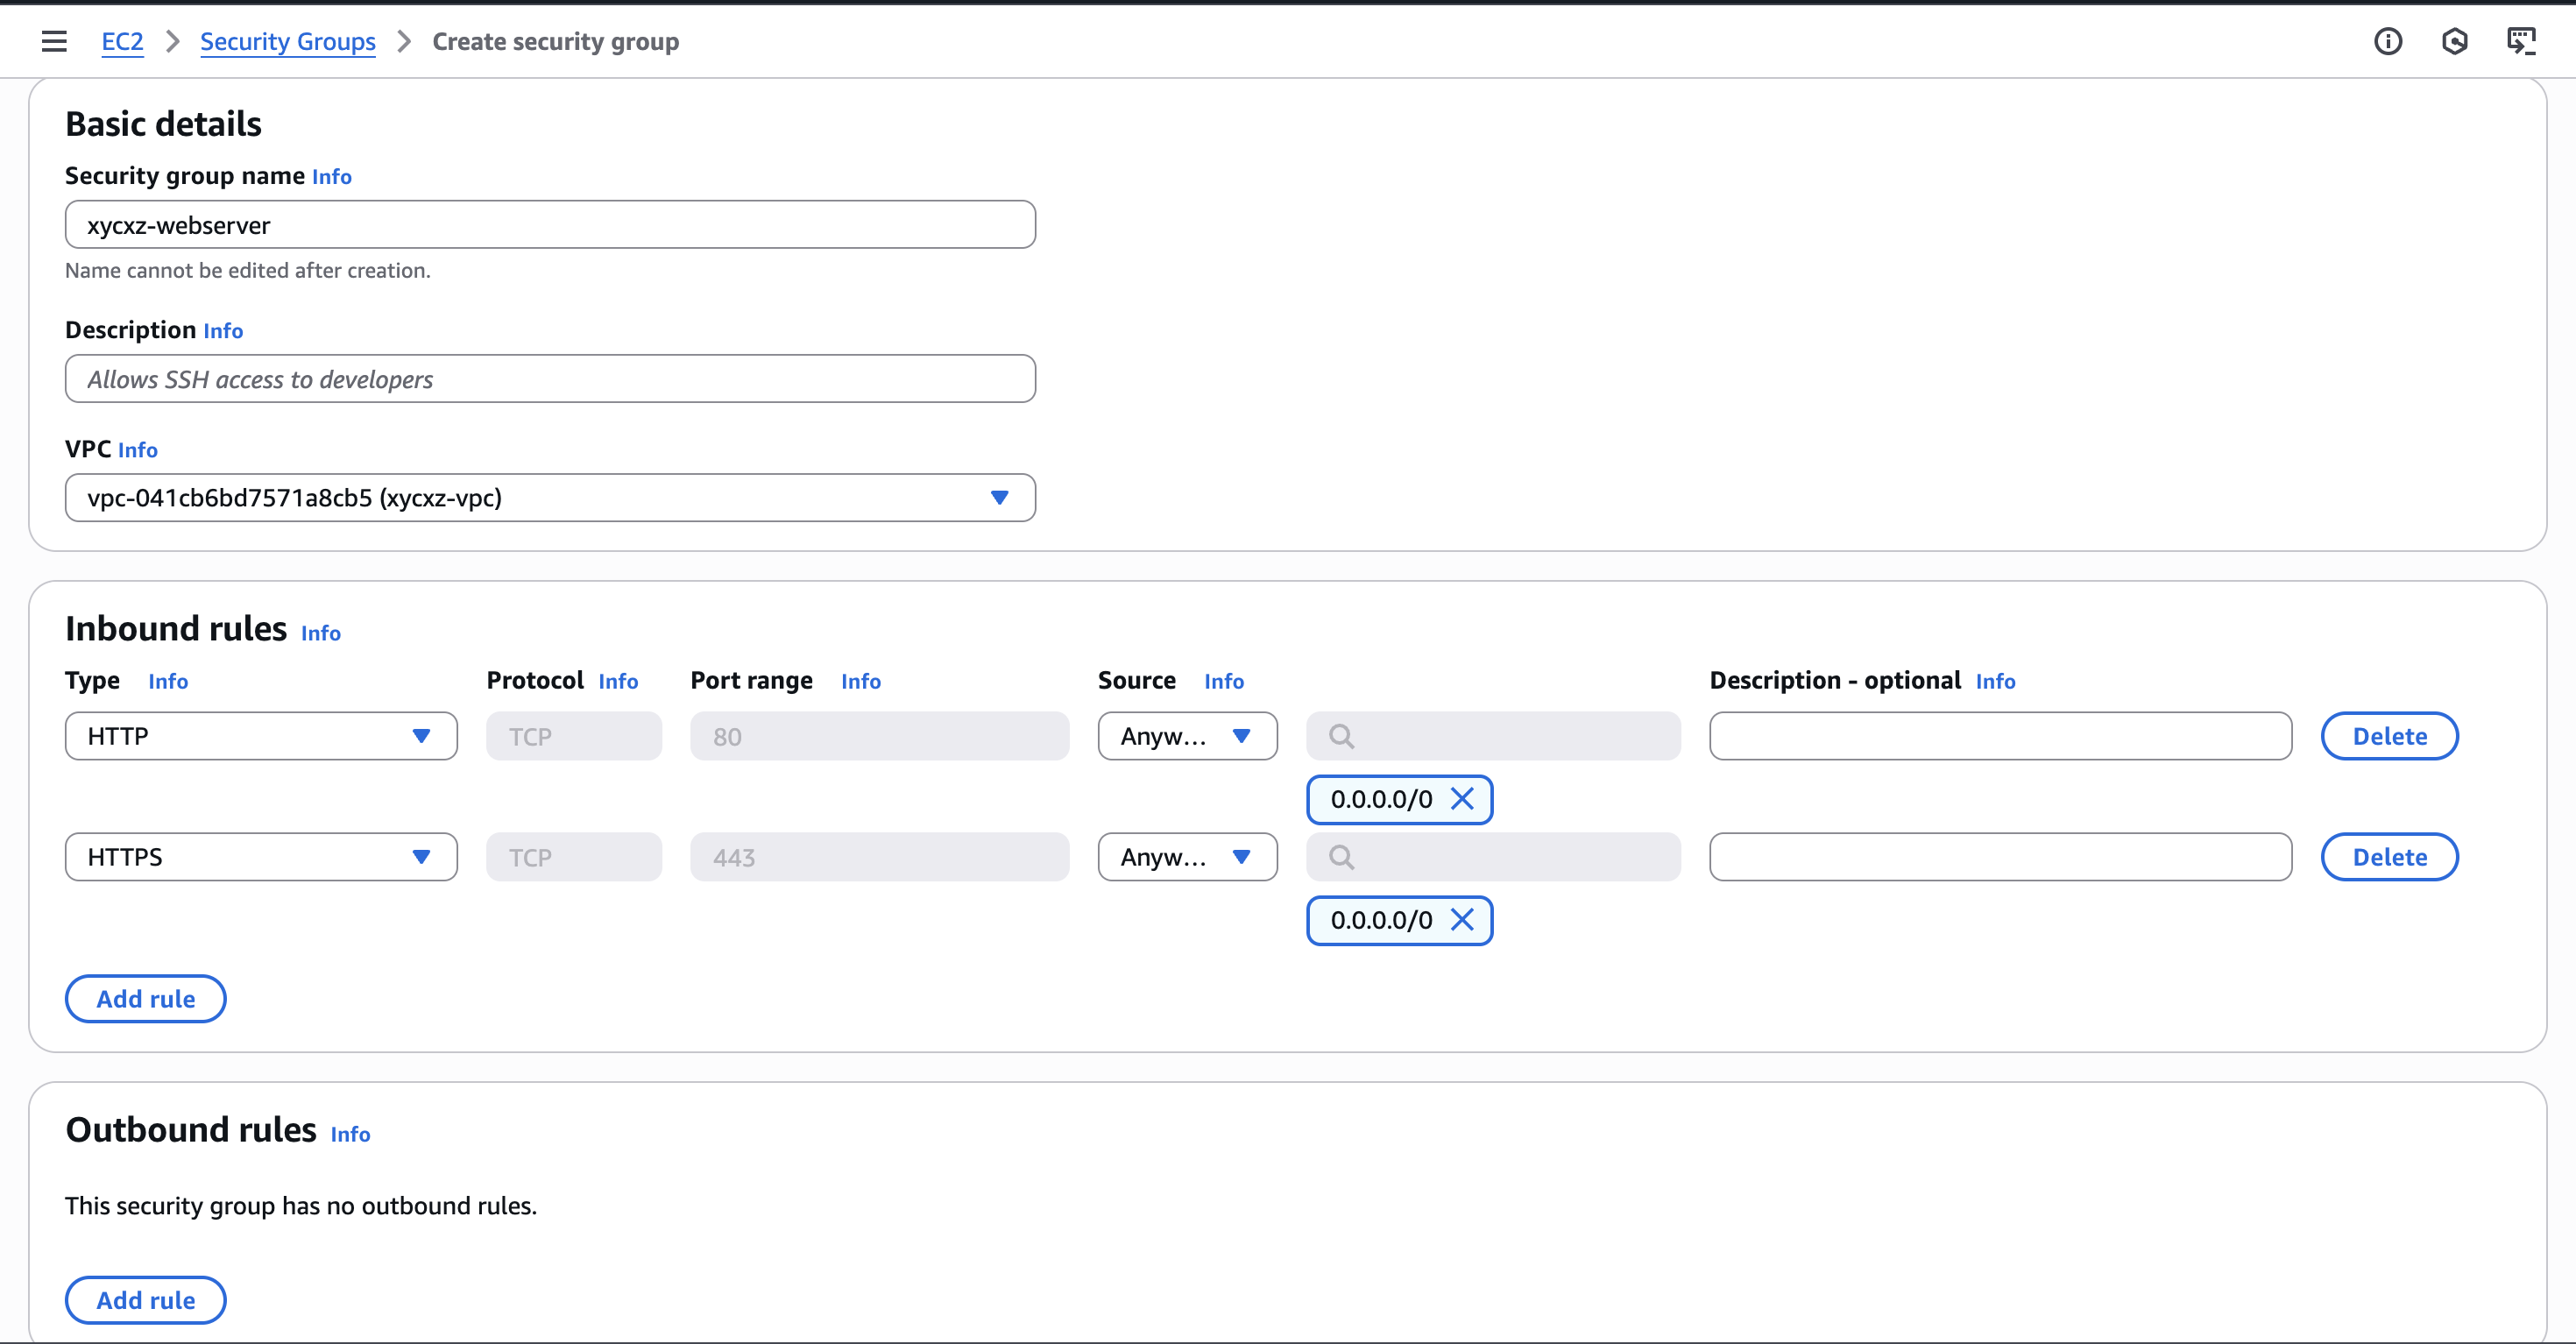
Let’s explore how we can do what I just said with security groups. First, we will go to our security group configuration and edit the inbound rules to allow SSH traffic on the public interface only, and also accept any kind of traffic within the internal network:
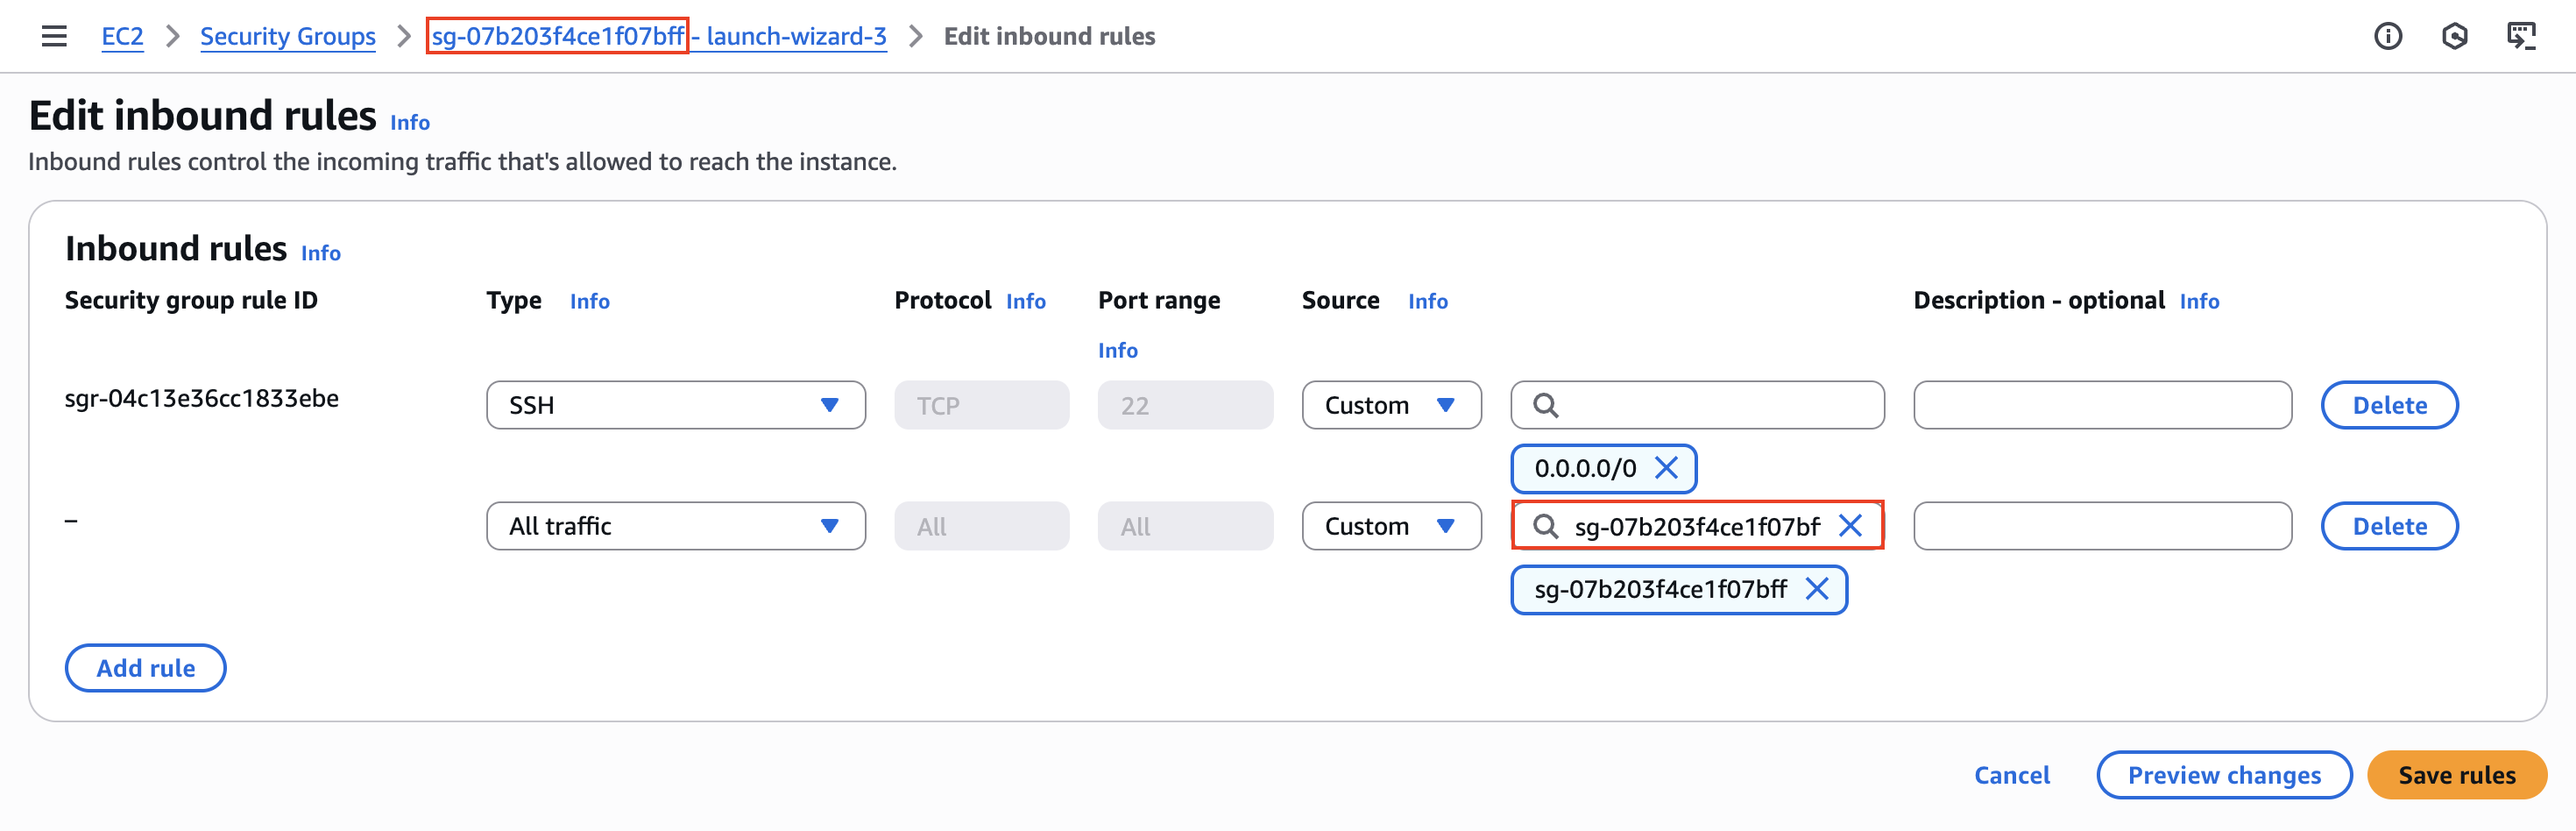
Pay attention at what I selected as the source when it comes to accepting all traffic. This means that any instance that has this security group attached will be able to communicate with another one that holds the same security group.
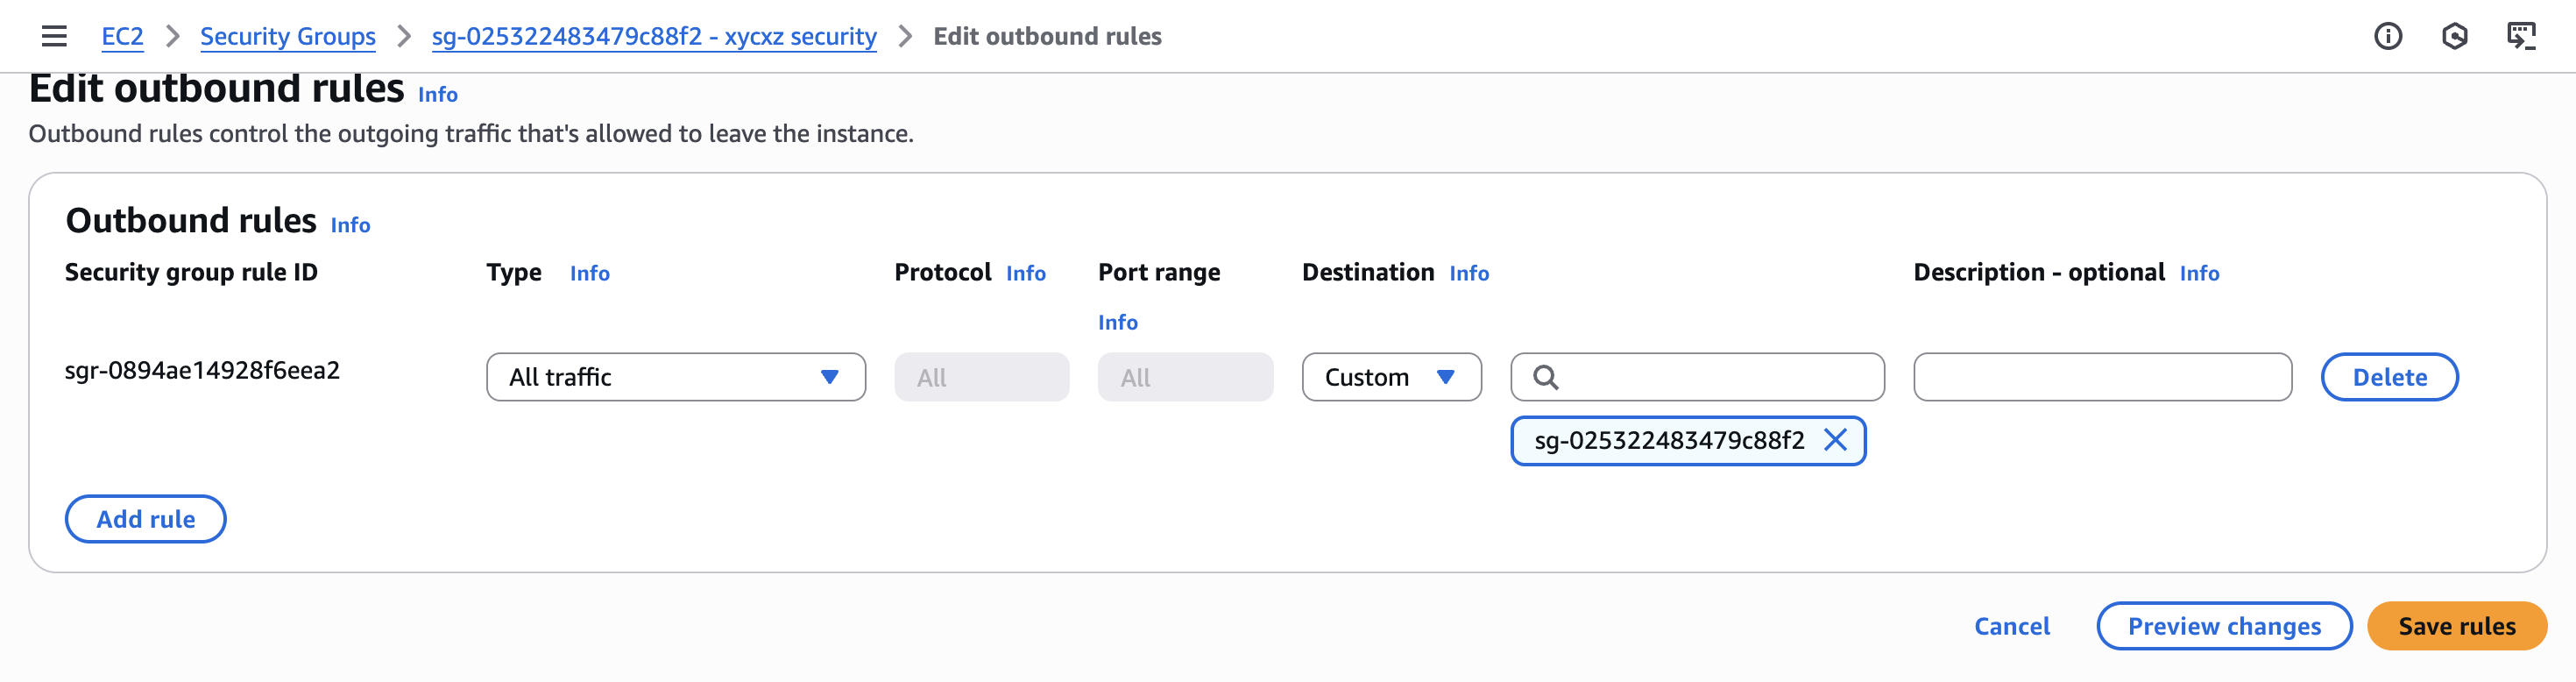
We can also specify an outbound rule because we just want machines inside the current security group to get replies:
I’ll connect to an instance through SSH and try to ping the private IP address of the other to demonstrate this:
Attaching Multiple Security Groups
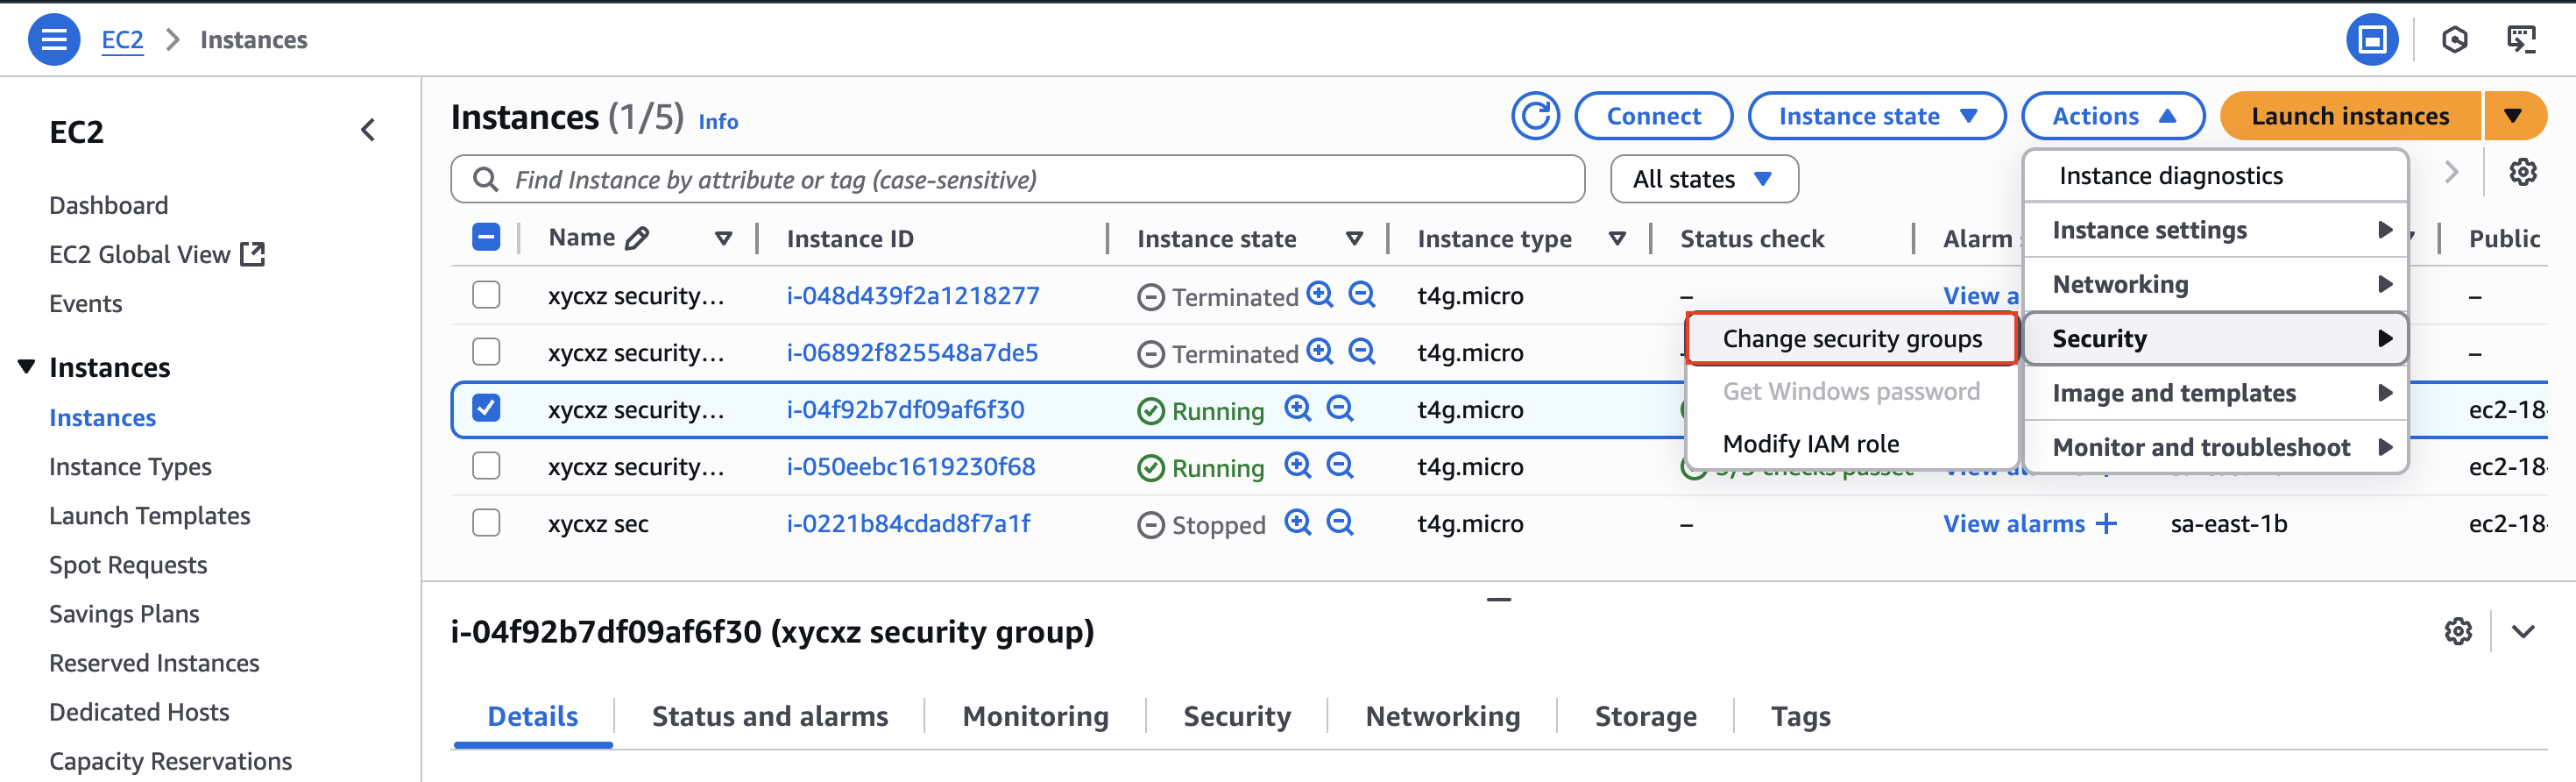
Previously, I said that a single instance can have multiple security groups attached to it. Let’s say we wanted to run a web server in one instance that should be accessible from the internet but we don’t want the other instance to have the same behaviour. To achieve that, we could create a new security group:
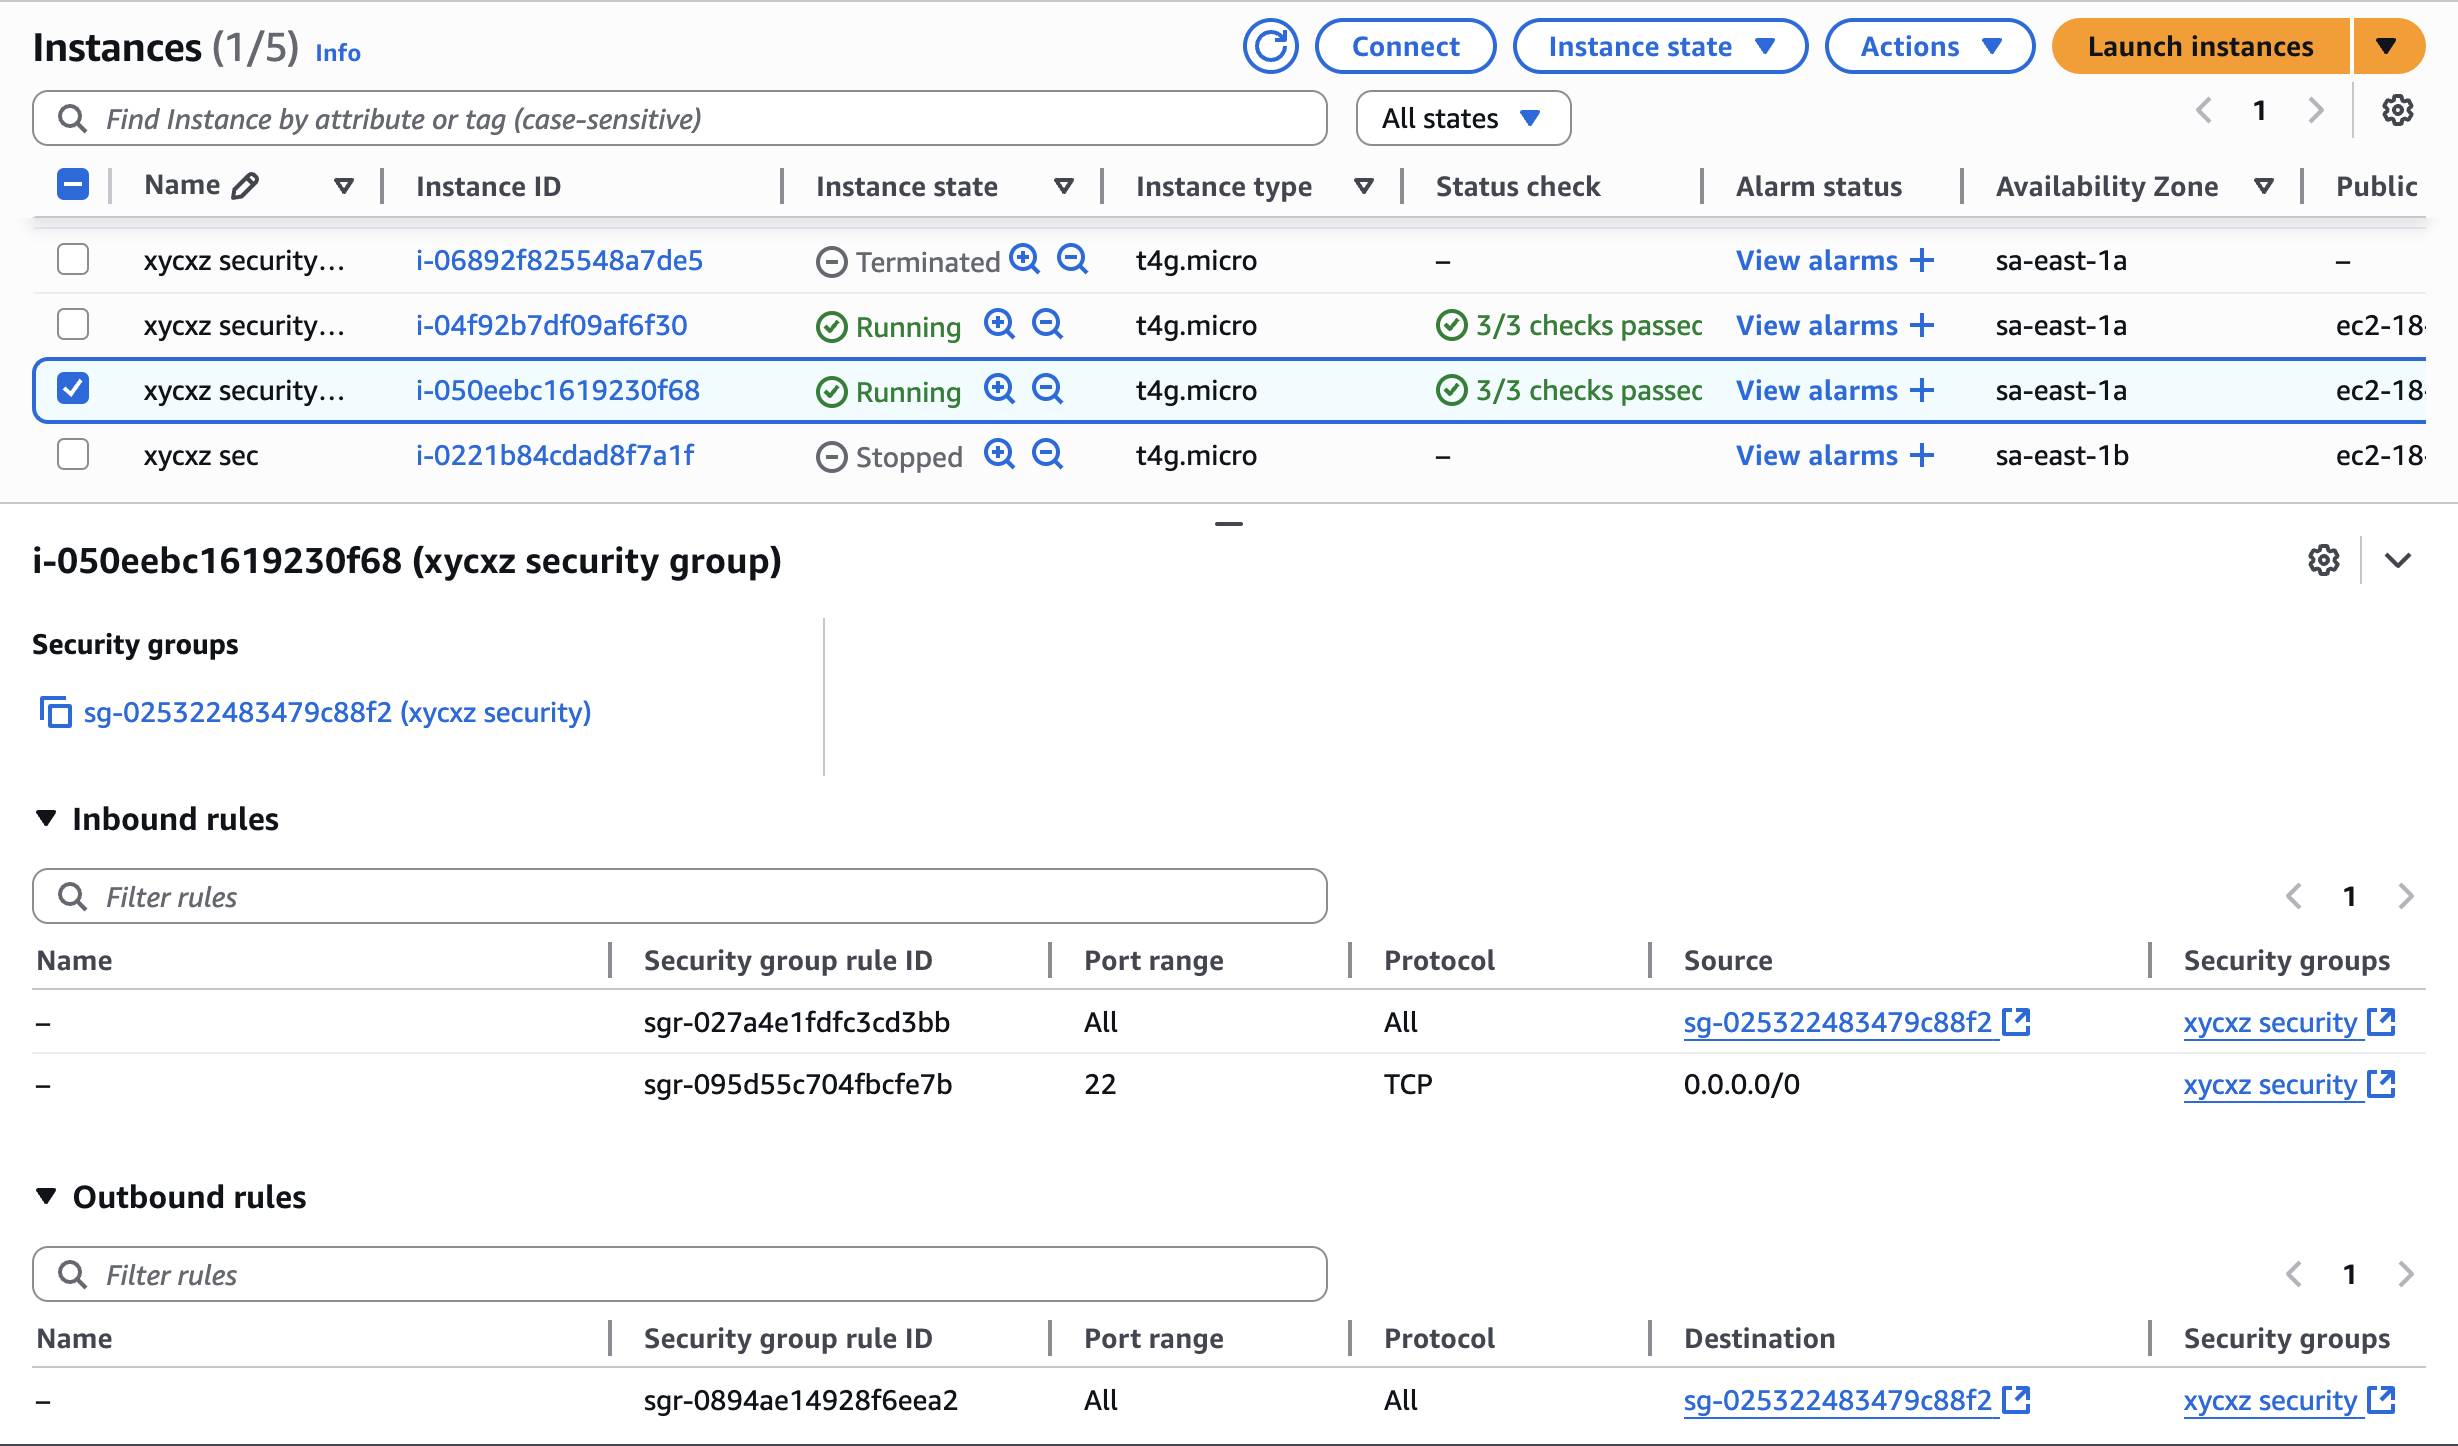
Now we can attach this to one of the two instances we created:
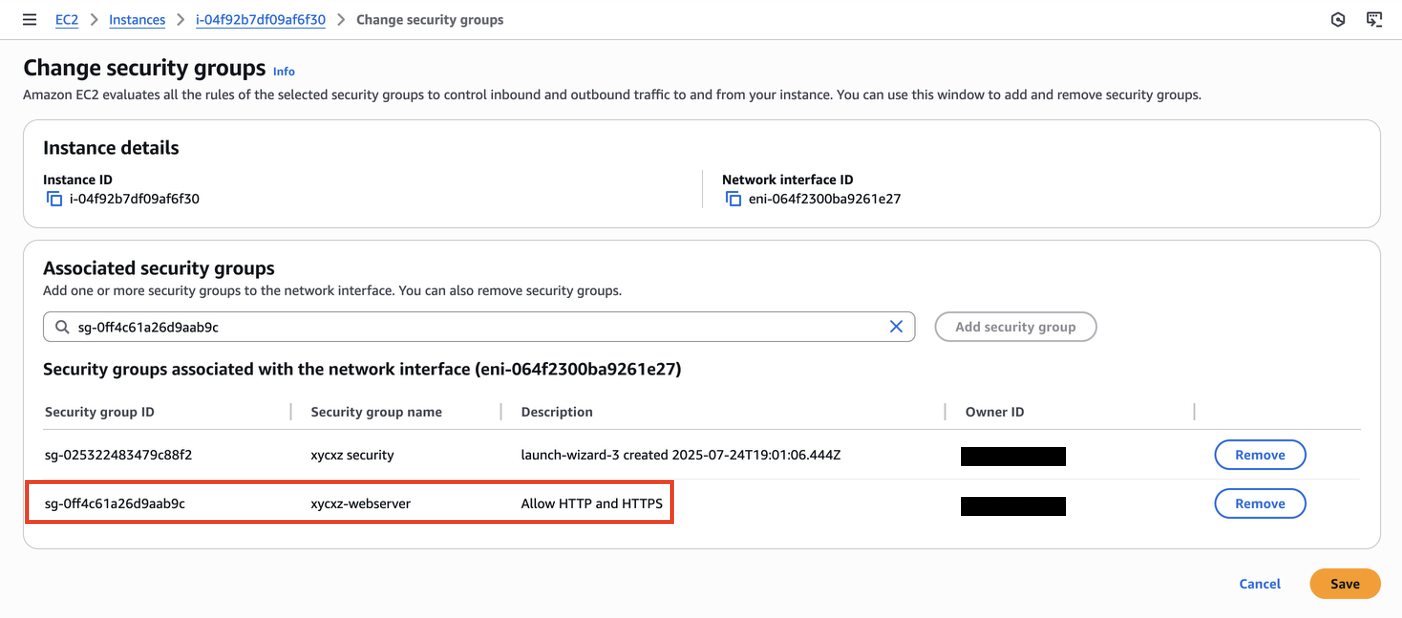
The inbound rules will get merged:
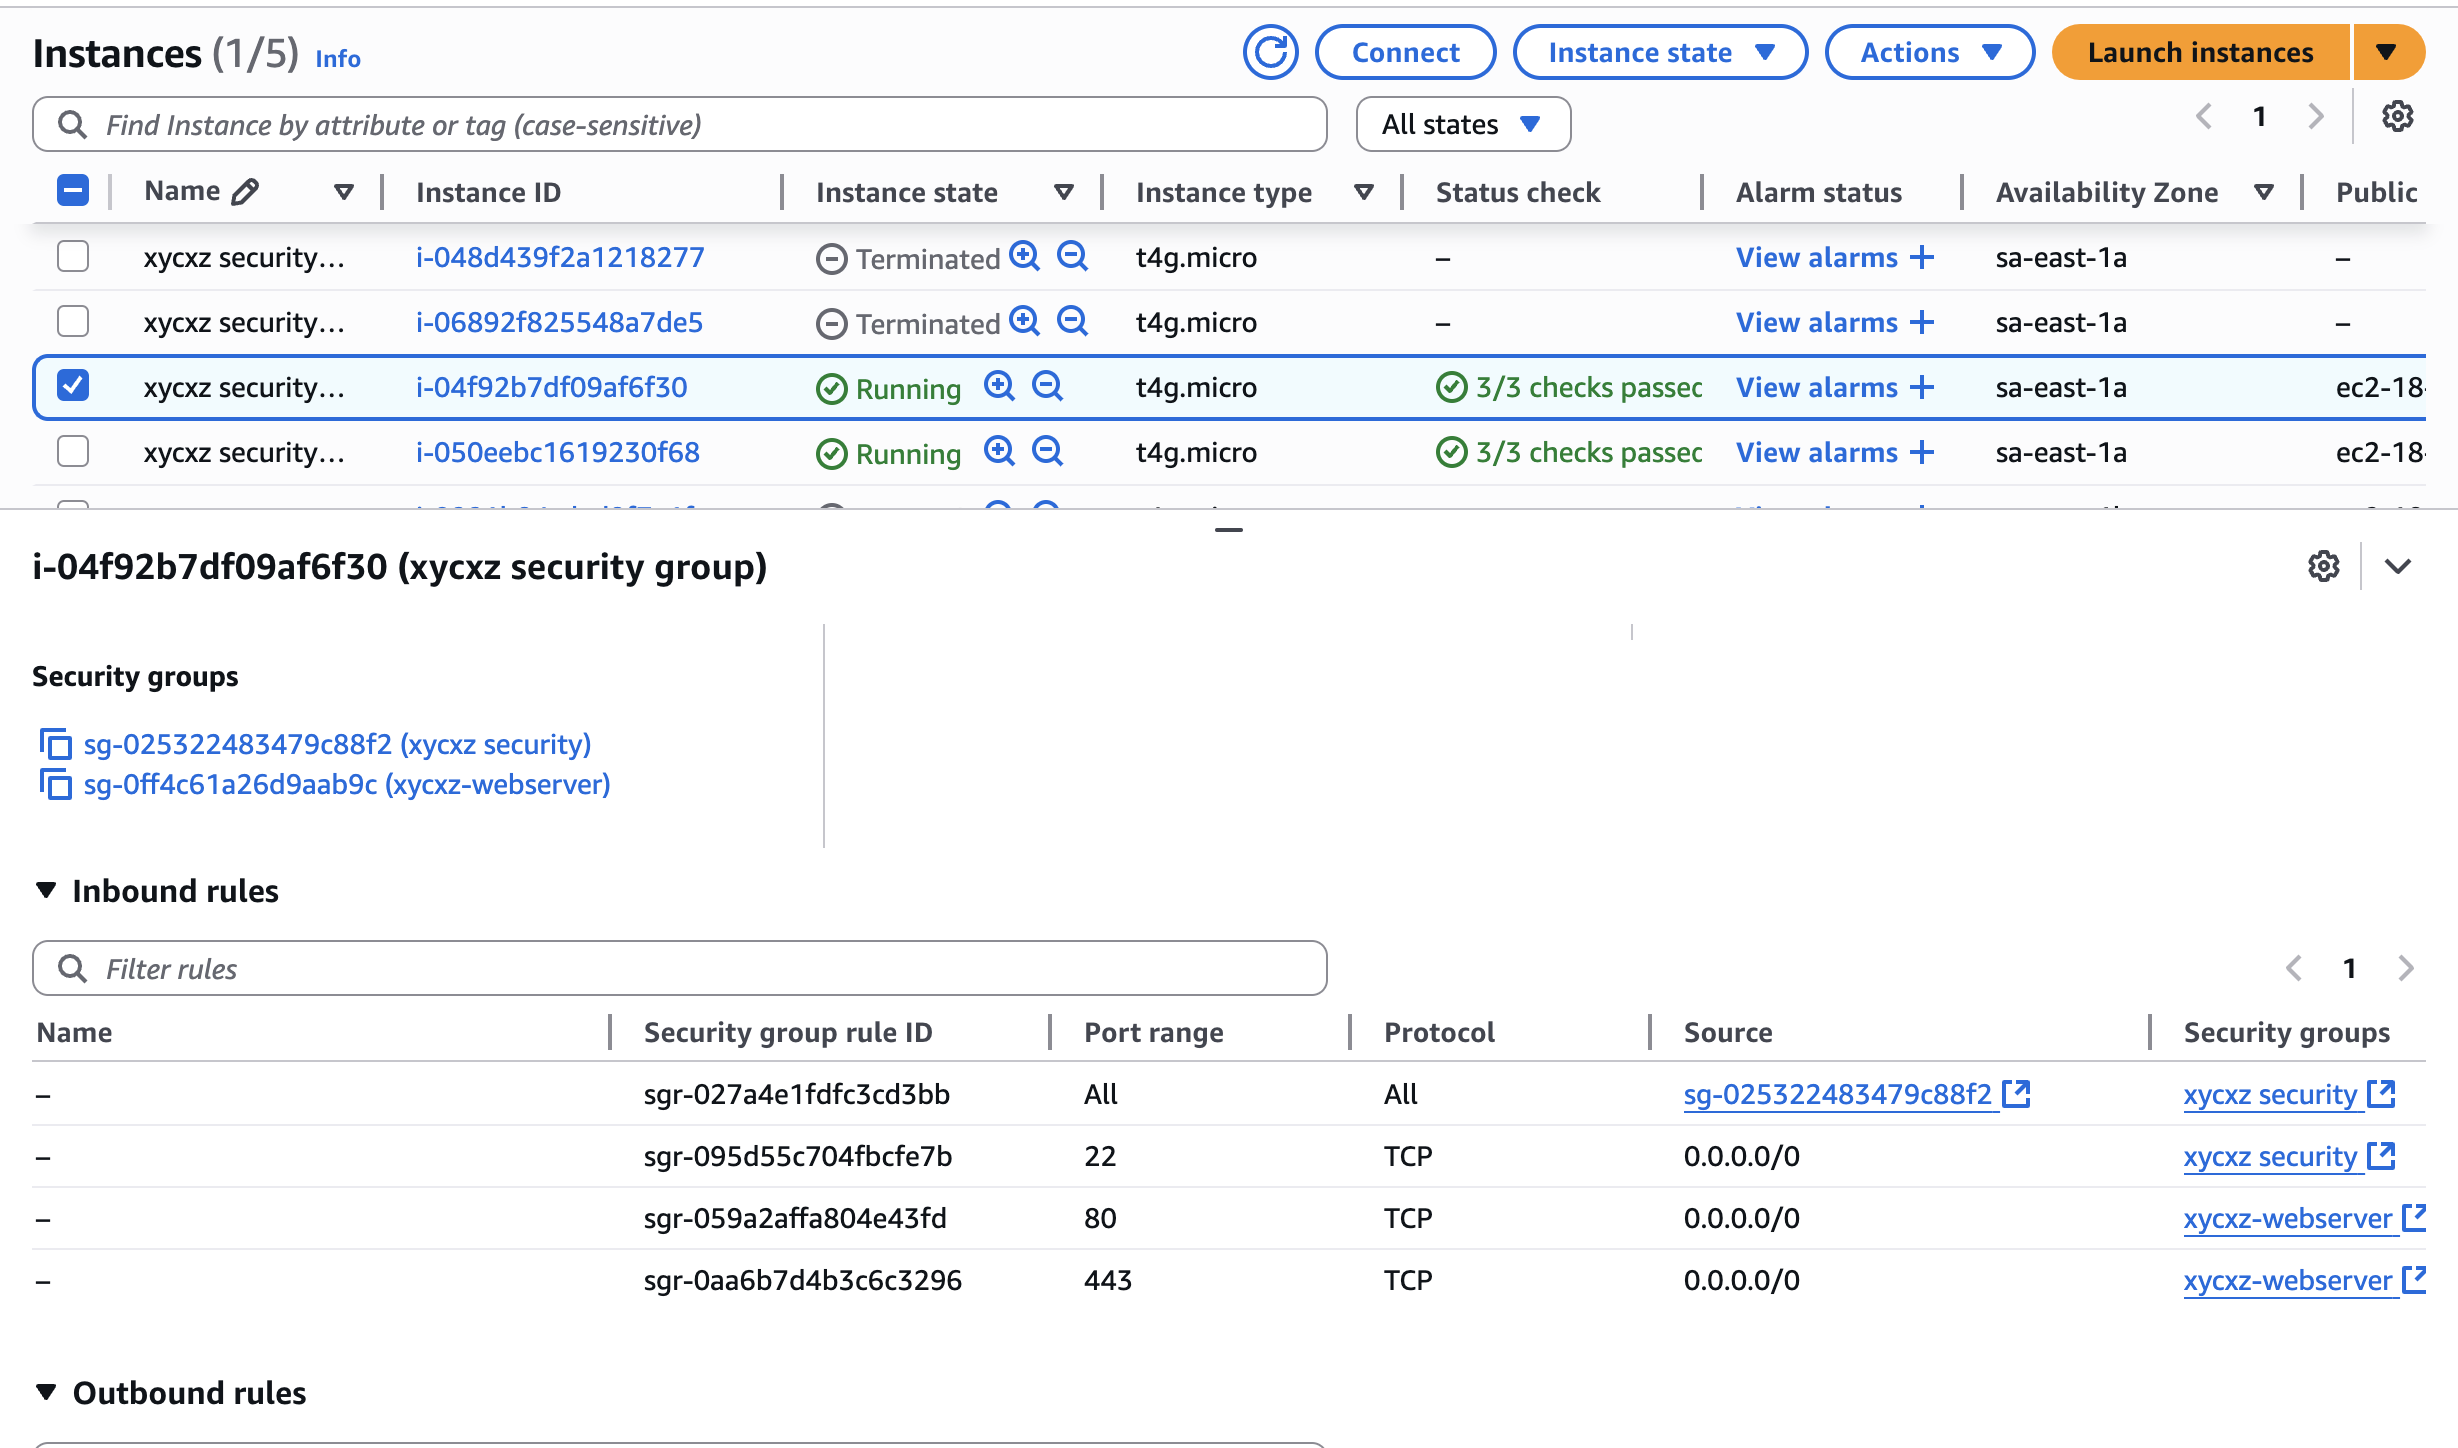
The other instance will not have these ports open:
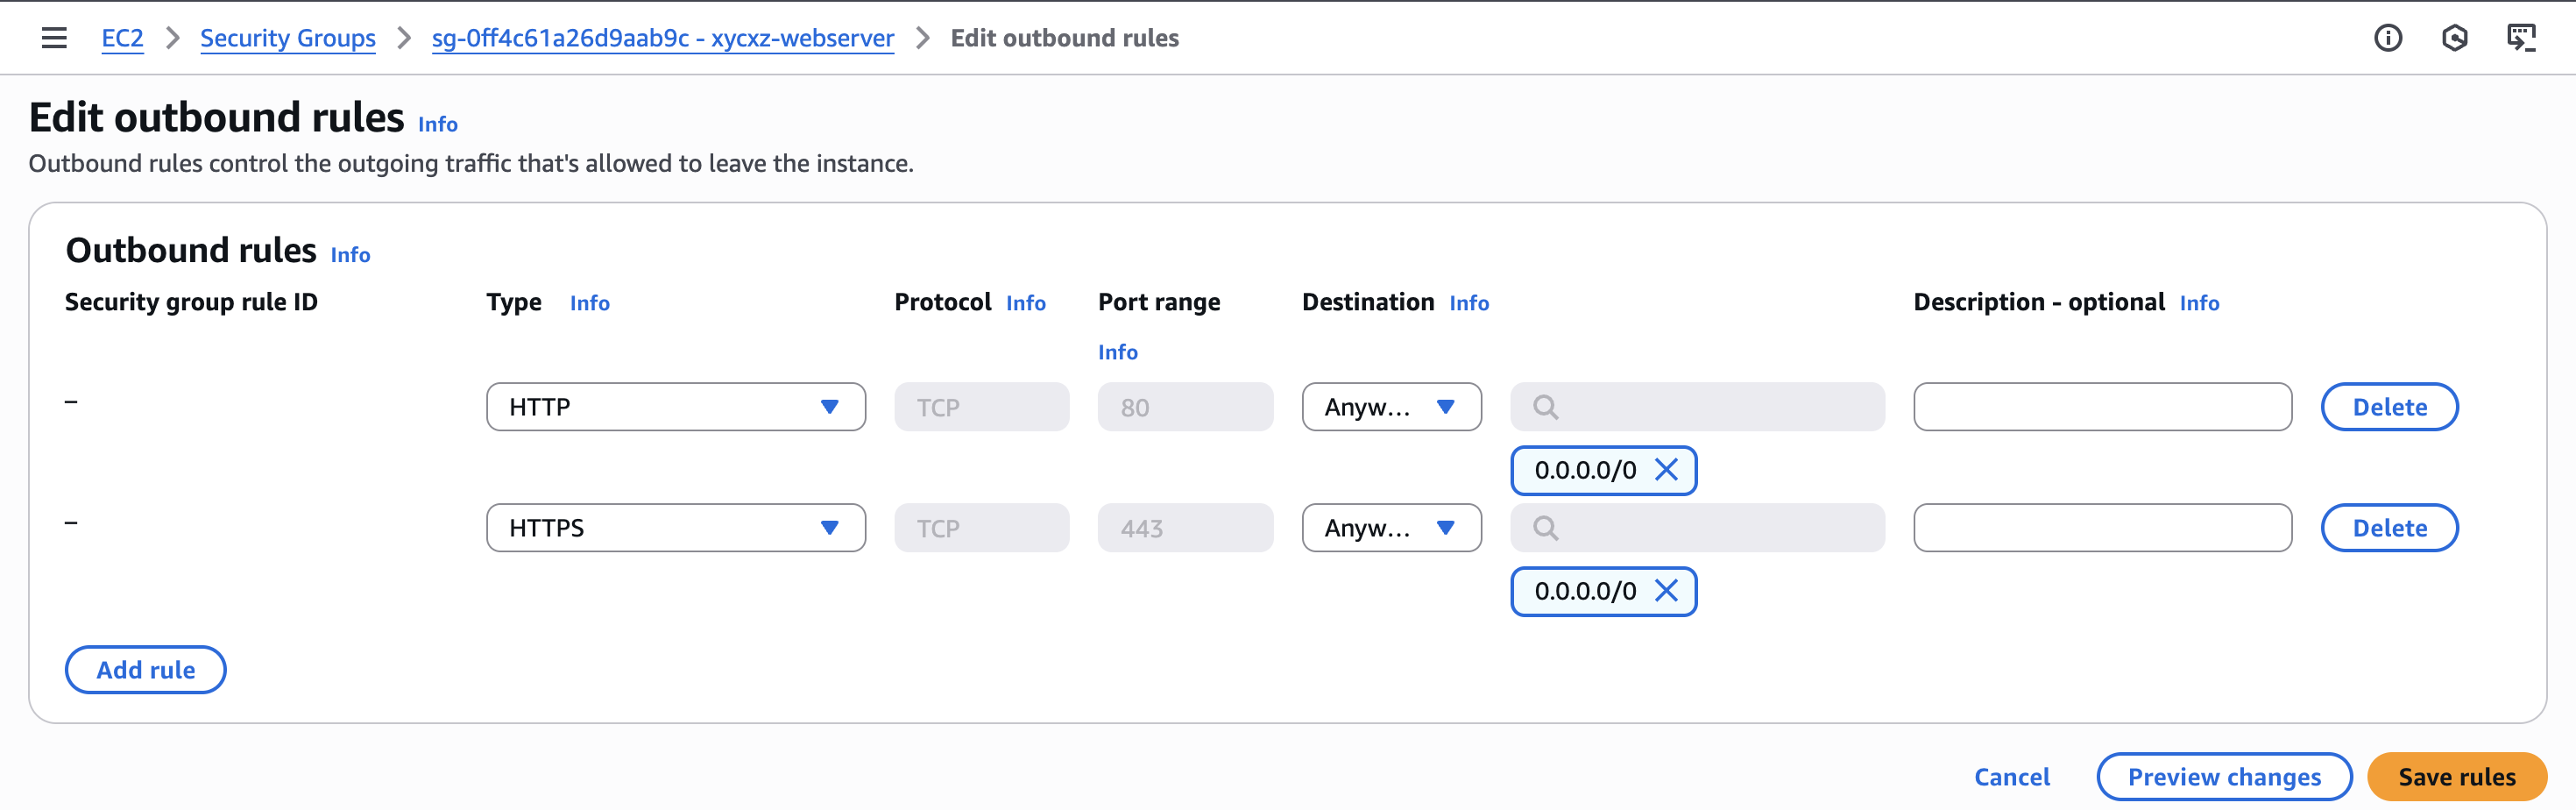
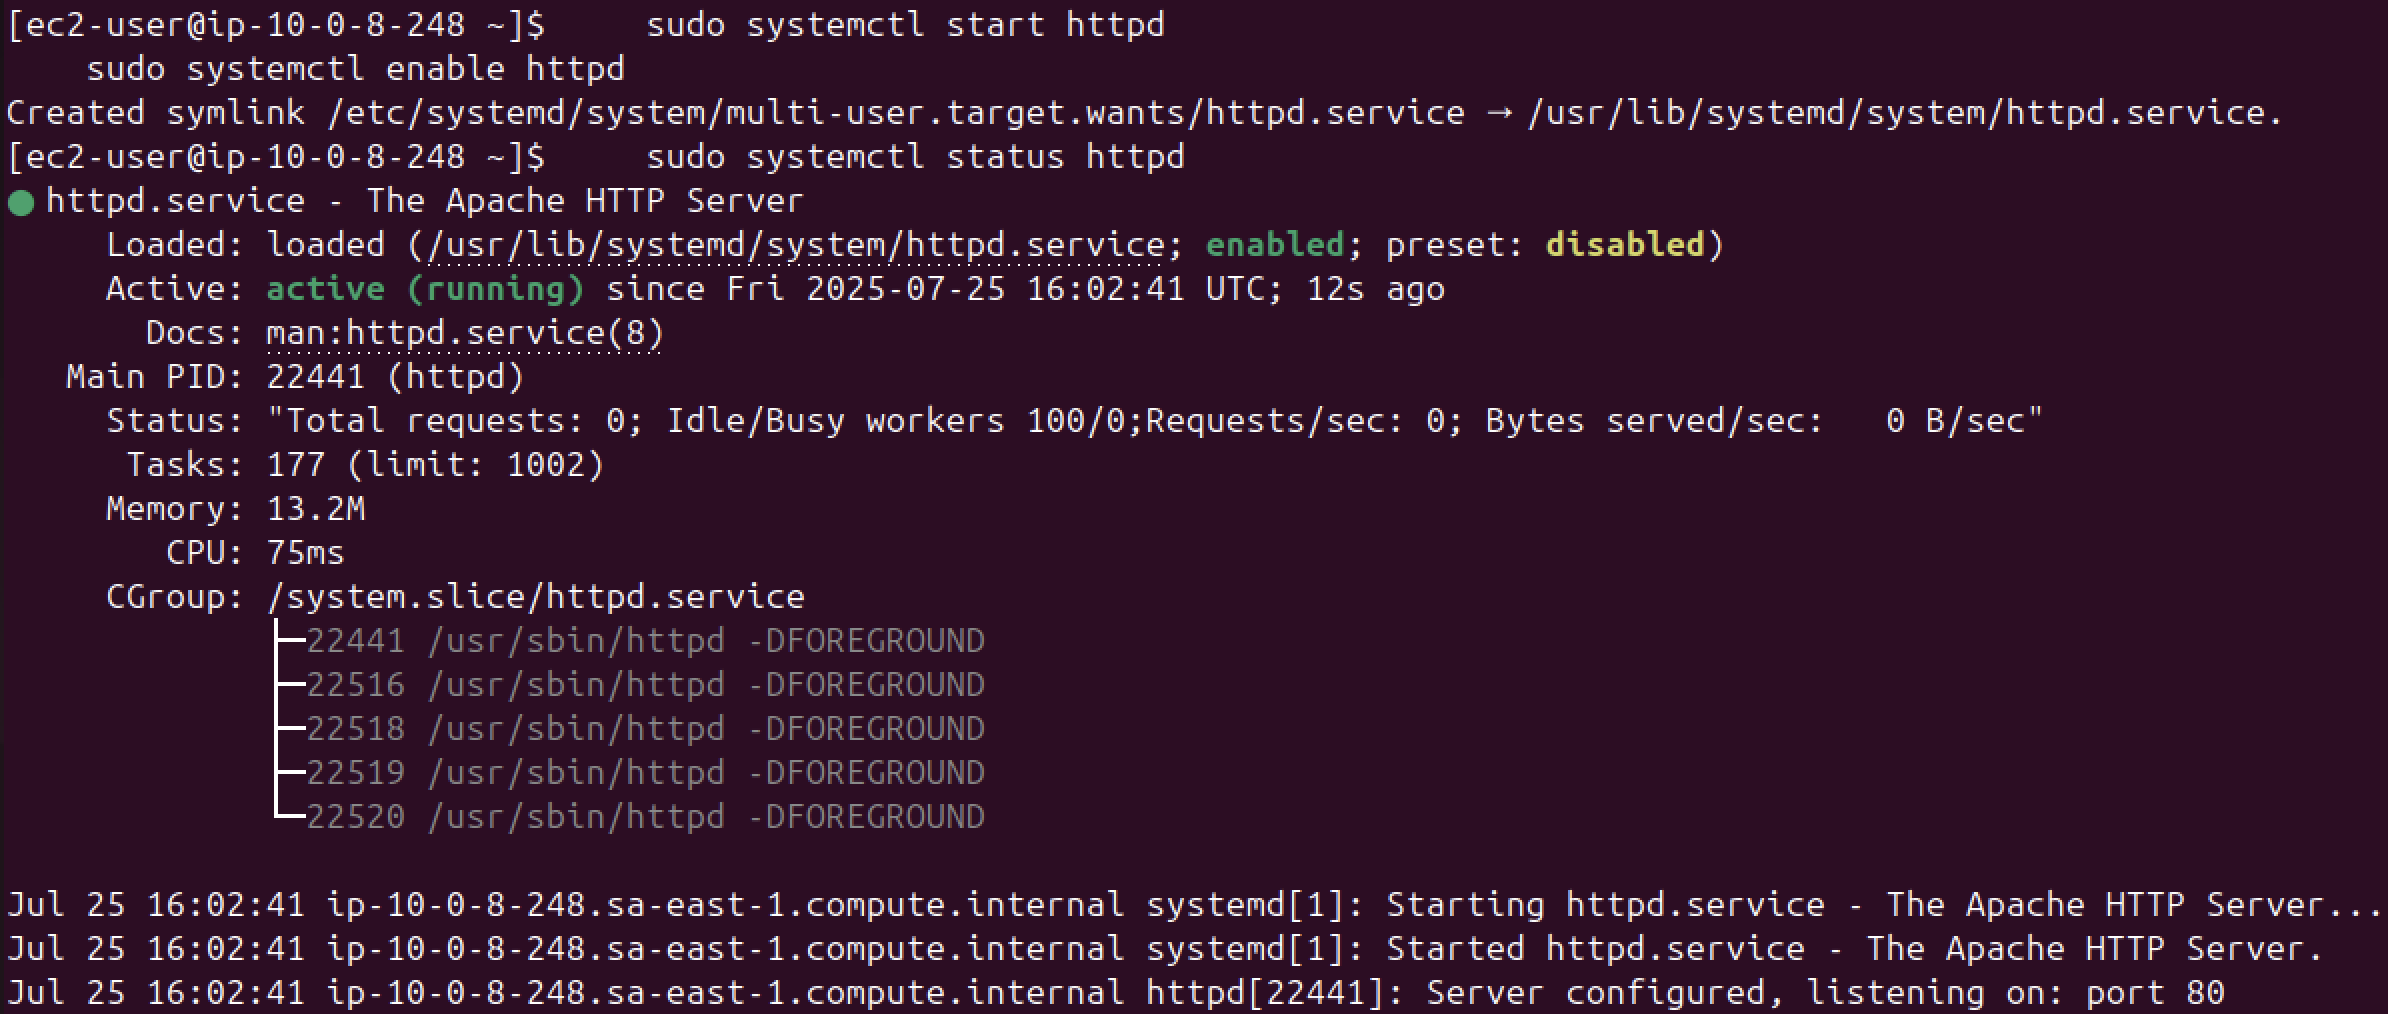
We can try installing an Apache web server to prove the point. However, with the rules we have so far we won’t be able to connect to the internet because the first security group’s rules are still in effect.
To fix this, we can edit a security group and allow outgoing traffic using HTTP and HTTPS. We will set this to the newly created security group so we don’t cause any security issue and keep the first instance private:
Debugging Networking Issues in AWS
I’ll provide a checklist to follow in case you run into networking issues when working with the AWS cloud.
To access another instance or resource in AWS, several conditions must be fulfilled:
- Security Groups (both inbound on the destination and outbound on the source).
- Network ACLs (both inbound and outbound).
- Route Tables (ensuring a route exists between subnets or to an Internet Gateway).
- Instance/VPC placement (are they in the same VPC, etc.).
For internet access, you can follow this checklist:
- Public IP + Subnet needs to have an Internet Gateway + Internet Gateway is in Route Table associated to the subnet
- Configure a NAT Gateway if we don’t want our instance to have a public IP address
For permissions:
Up until this point, there are a lot of things we have done and we should take a moment to digest everything and make sure to fully understand it.
We will continue building our knowledge and start implementing new technologies. Stay tuned for upcoming posts!