Amazon ECS - AWS
Objective
Today, we will be continuing with my main project setting up a more complex deployment utilising several new services available in Amazon AWS.
I’m writing the last few blog posts before starting to dive into Kubernetes and more modern deployment techniques inside the cloud. I would say that you should first study and internalise the concepts we’ve been exploring so far before continuing.
For now, stay with me here and let’s continue building up our project to make it even more realistic step by step.
Amazon Elastic Container Service (ECS)
Amazon Elastic Container Service (ECS) is a managed solution that allows us to deploy, manage, and scale containerised applications. ECS offers more features than AppRunner because we have more control over the configuration and deployment of our application.
Even though it can be more difficult to configure compared to AppRunner, we’re getting way more flexibility. We can deploy multi-container services, connect containers to each other, mount external file systems, etc. ECS is better suited for managing large and complex applications.
To deploy our application in Amazon ECS, we need to follow some steps that I will describe right away.
ECS Task Definition
It is the blueprint of the application. It’s a detailed set of instructions (written in JSON format) that tell AWS exactly how to build and run a single instance of our application, which we call a task. This task is immutable, so once we create one we can’t change it anymore, but we can create a new revision of it and do some changes there. For a task definition, we need to configure on which hardware the task can be run (AWS Fargate, EC2) and also what should get executed.
Note: We can think of a Task Definition like the docker run command. Think about all the flags we add to docker run to specify how a container should behave. The Task Definition is just a structured, JSON version of that command.
A task can consist of multiple containers. For example, let’s say we had a task that needed a local Redis instance, but this Redis would not need to be shared with other tasks or other replicas of the same task. In this case, this task would consist of 2 containers: one running PHP and one running Redis.
They are going to be bundled together into one task. When scaling, this whole task is scaled horizontally, which means that if we get more traffic, our single ECS Service would create 3 replicas of this task. This would be the way to go if our task consist out of multiple containers.
To create a task definition, we will navigate to Amazon ECS dashboard and click on Task definitions -> Create new task definition. Before defining the containers we want to run on this service, we have to choose the infrastructure for them:
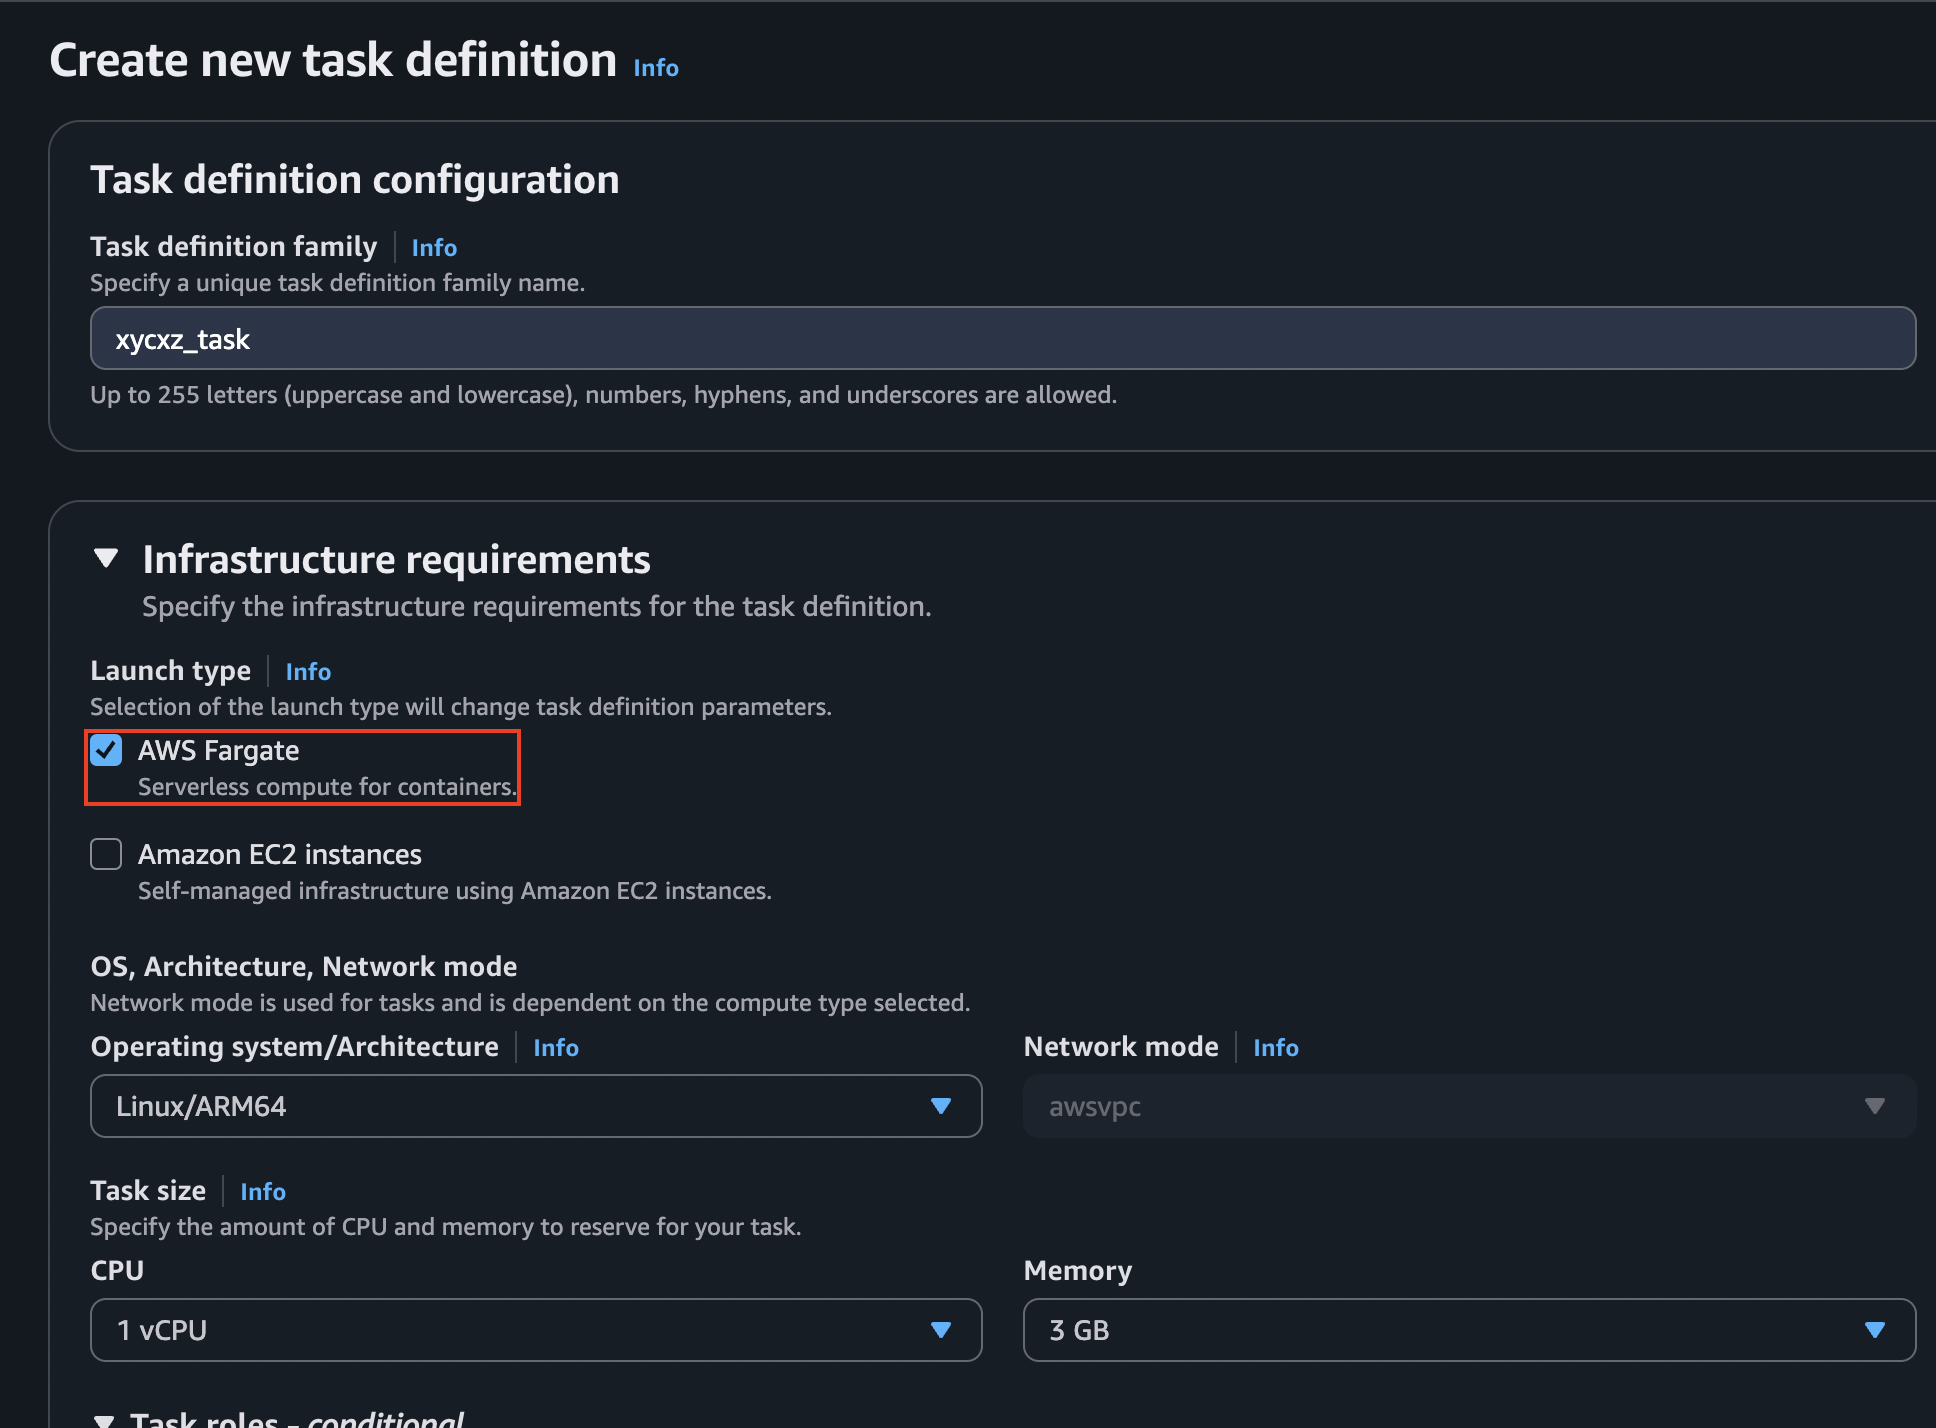
Note: I selected AWS Fargate, which is a serverless compute engine for containers. Because it is serverless, it allows us to run containers without having to manage the underlying infrastructure, such as servers or clusters (we will talk about those later). “Each Fargate task has its own isolation boundary and does not share the underlying kernel, CPU resources, memory resources, or elastic network interface with another task”.
Next, we will select the containers we want this service to manage. Similar to AppRunner, ECS is not intended to run stateful services (like a database); by default, any data written inside a container is lost forever when that container stops or is replaced. If our database container crashes or is updated, our entire database could be wiped out. This is why we will use a different service later on to configure our database container. For now, we will focus on our Web Server container.
Note: We explored what a stateless and a stateful services are here. Check it out!
We will be required to pull the container images from a container registry. We can use ECR to upload our Docker images and then select them in this configuration stage, or simply choose any public image that can be found here.
Note: To learn how to upload and pull images from AWS, check this post.
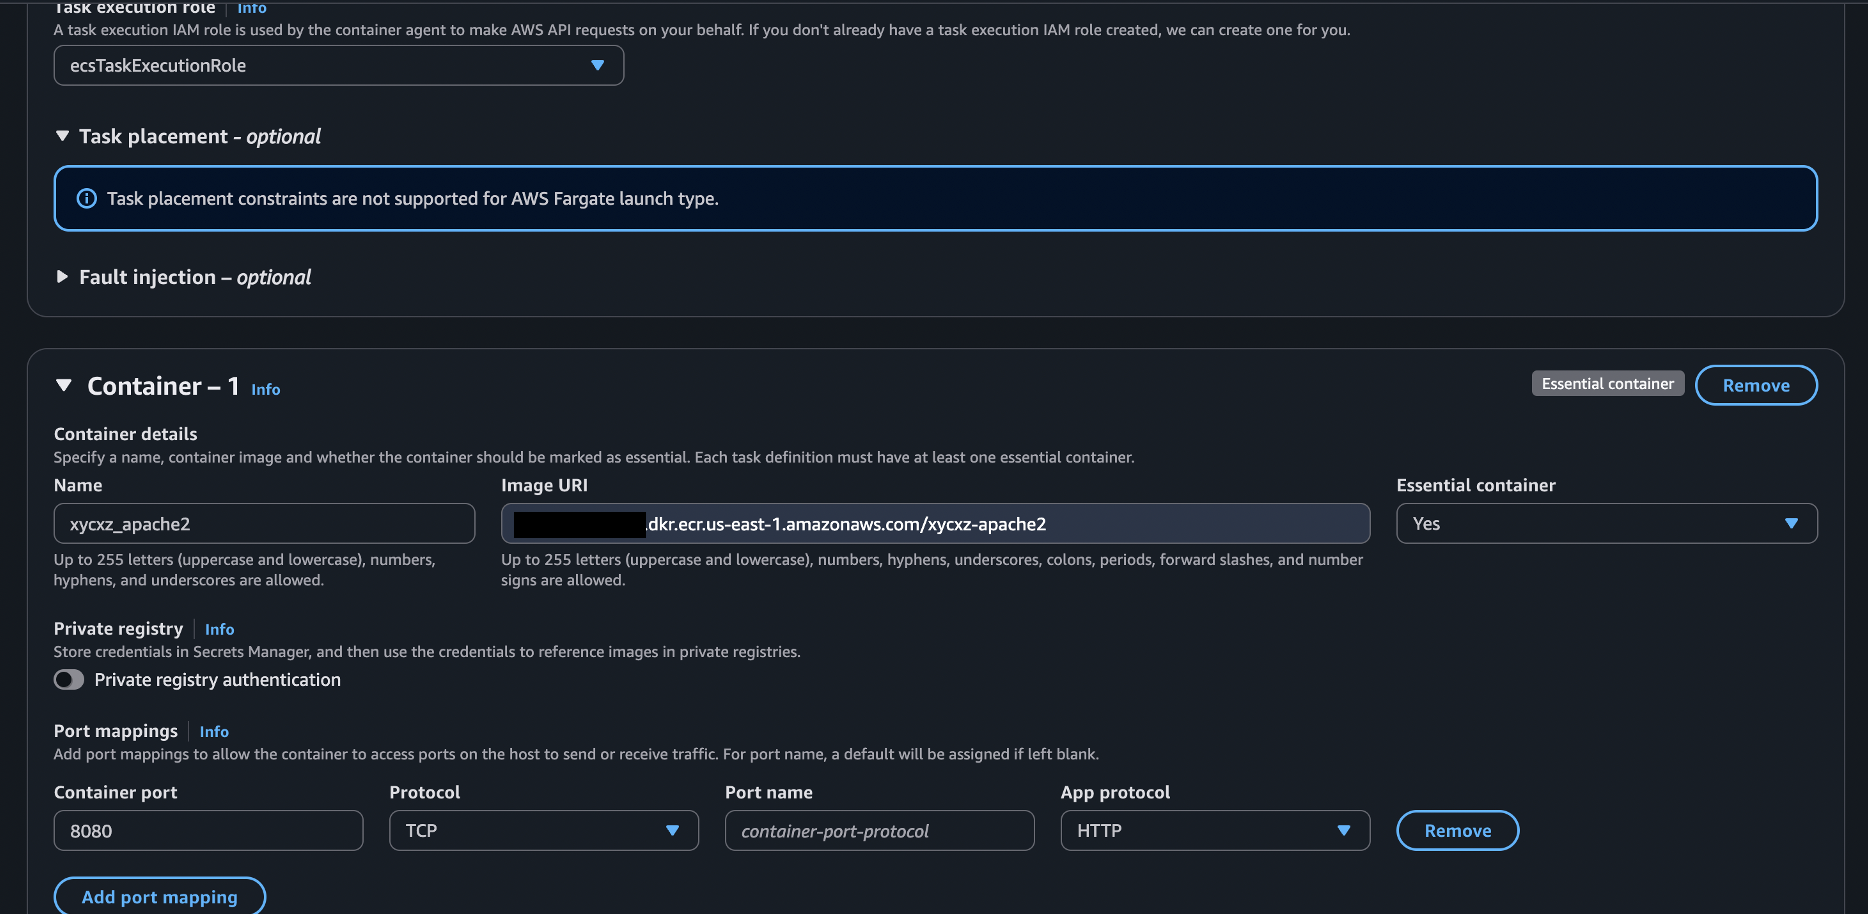
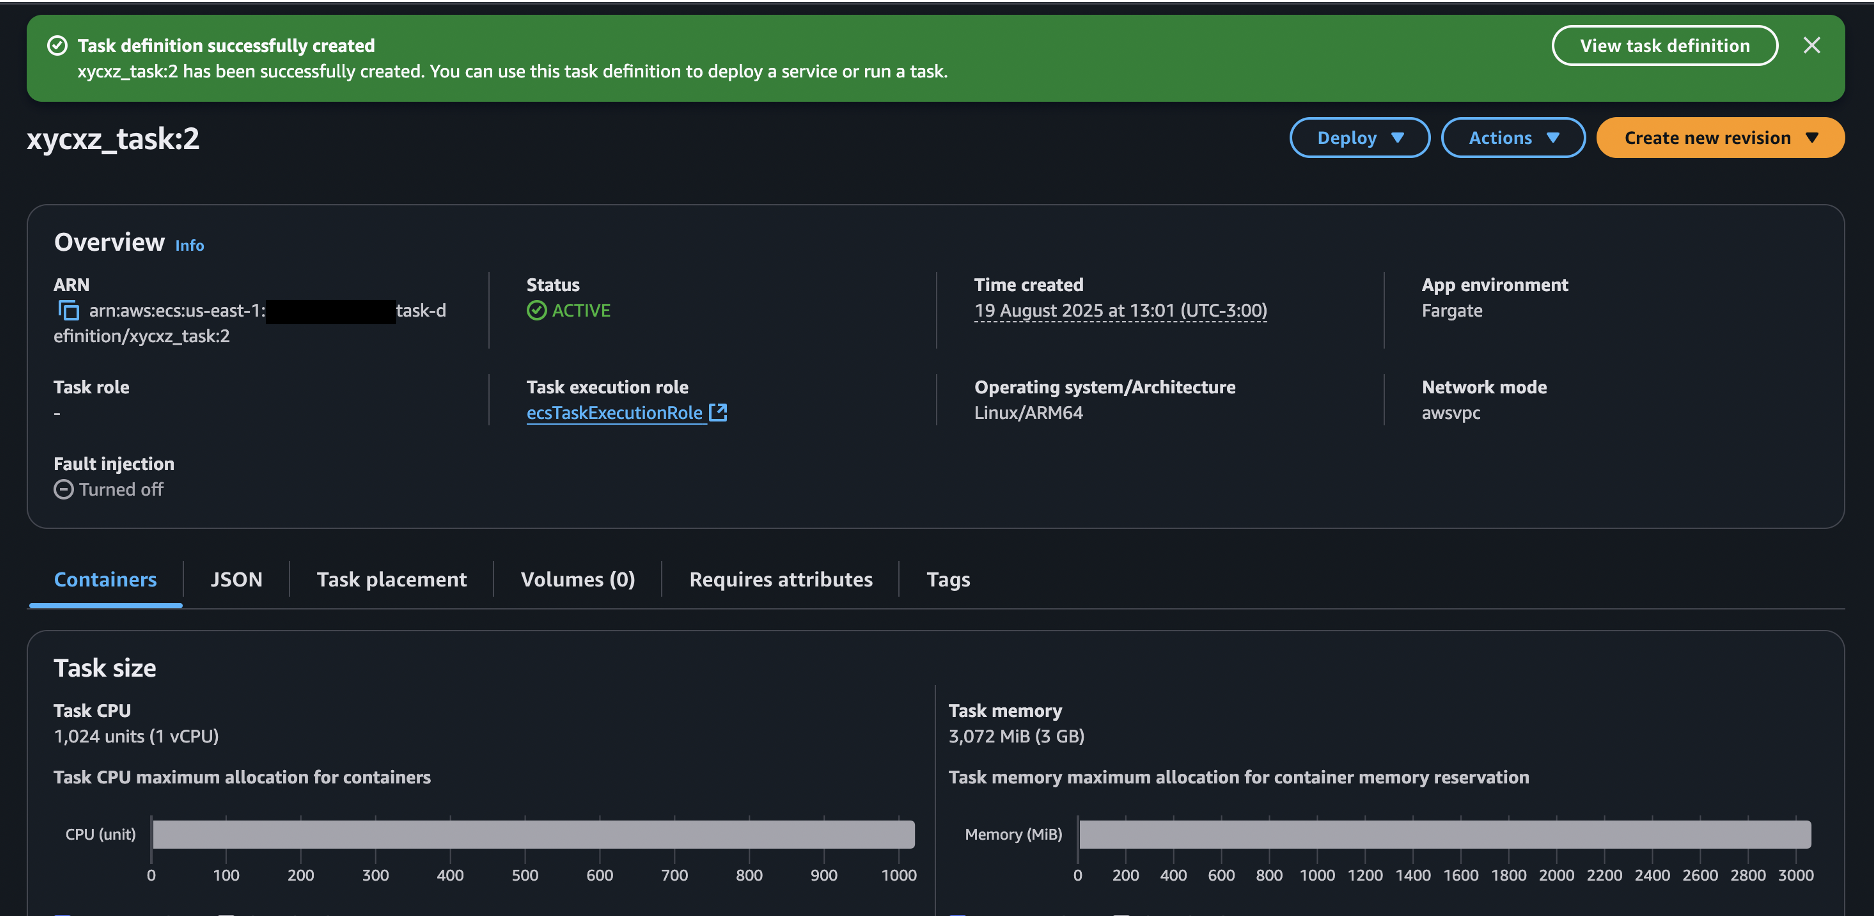
There are many configuration options we can select. Nevertheless, I will keep this one simple and just leave everything by default except what you see in the screenshots. Once we finish with this, we can click on Create:
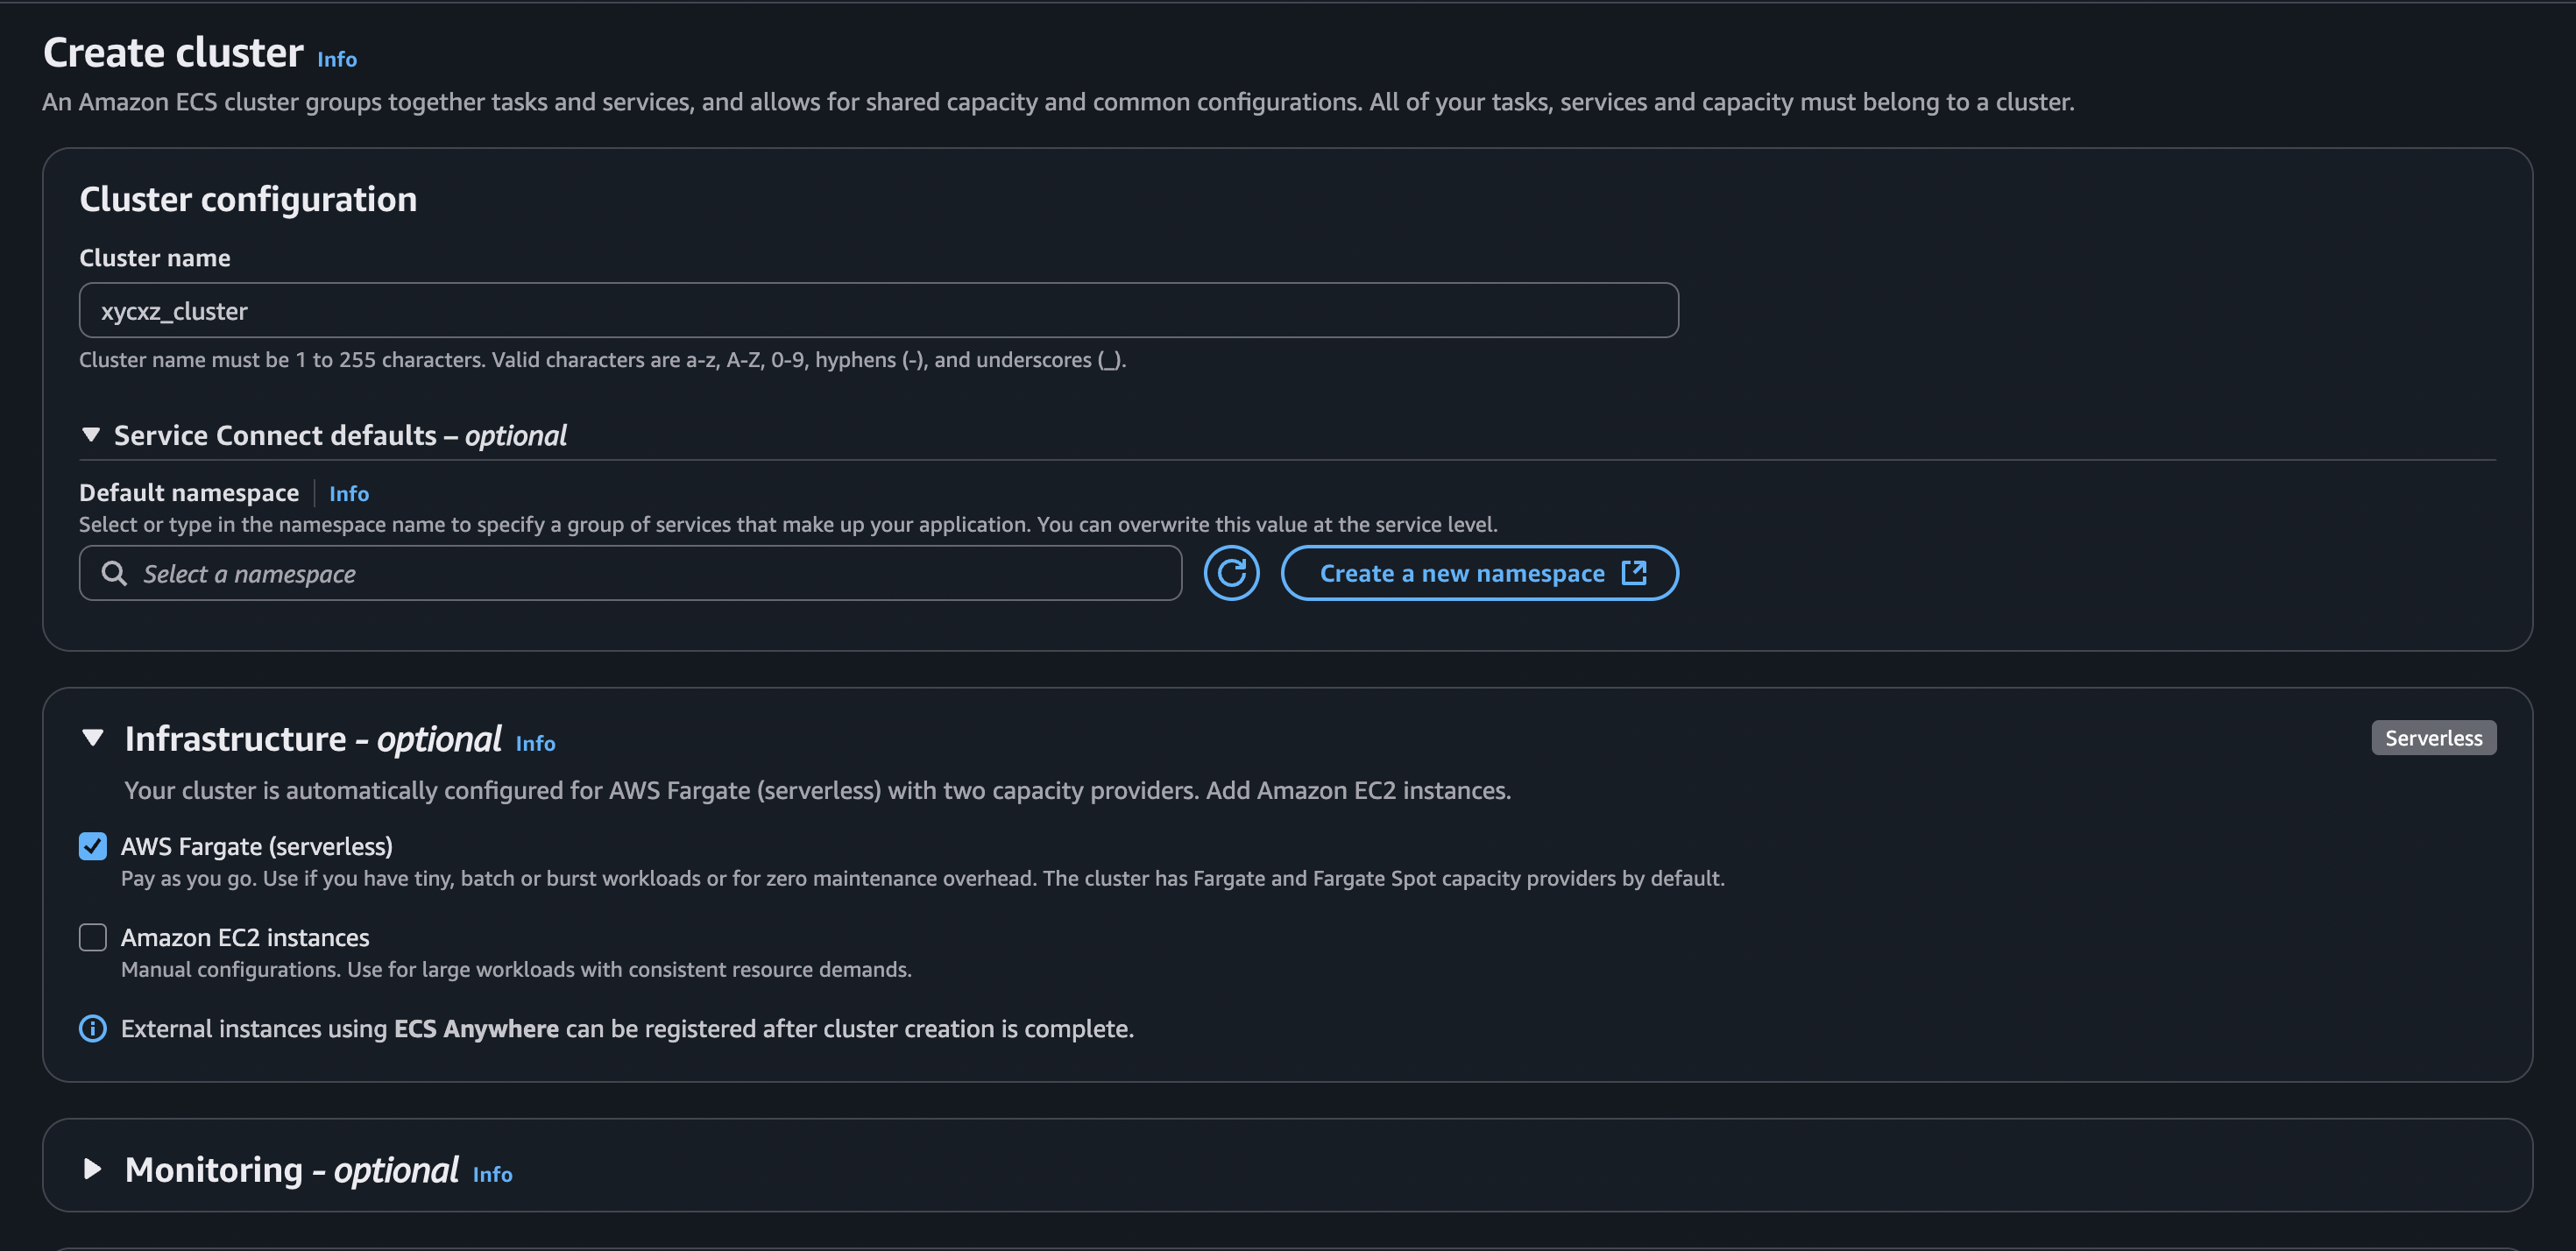
To turn this Task Definition into something that we can execute, we will need to create a Cluster.
ECS Cluster
A Cluster is a logical grouping of the resources our containers run on. It’s the foundational block that provides the environment where we can place and manage our containerised applications (Tasks).
A Cluster needs computing power to be useful. We provide this power, known as capacity, in three main ways: AWS Fargate, EC2 Instances, and on-premises VMs or servers. In our case, we want to run our cluster exclusively on AWS Fargate:
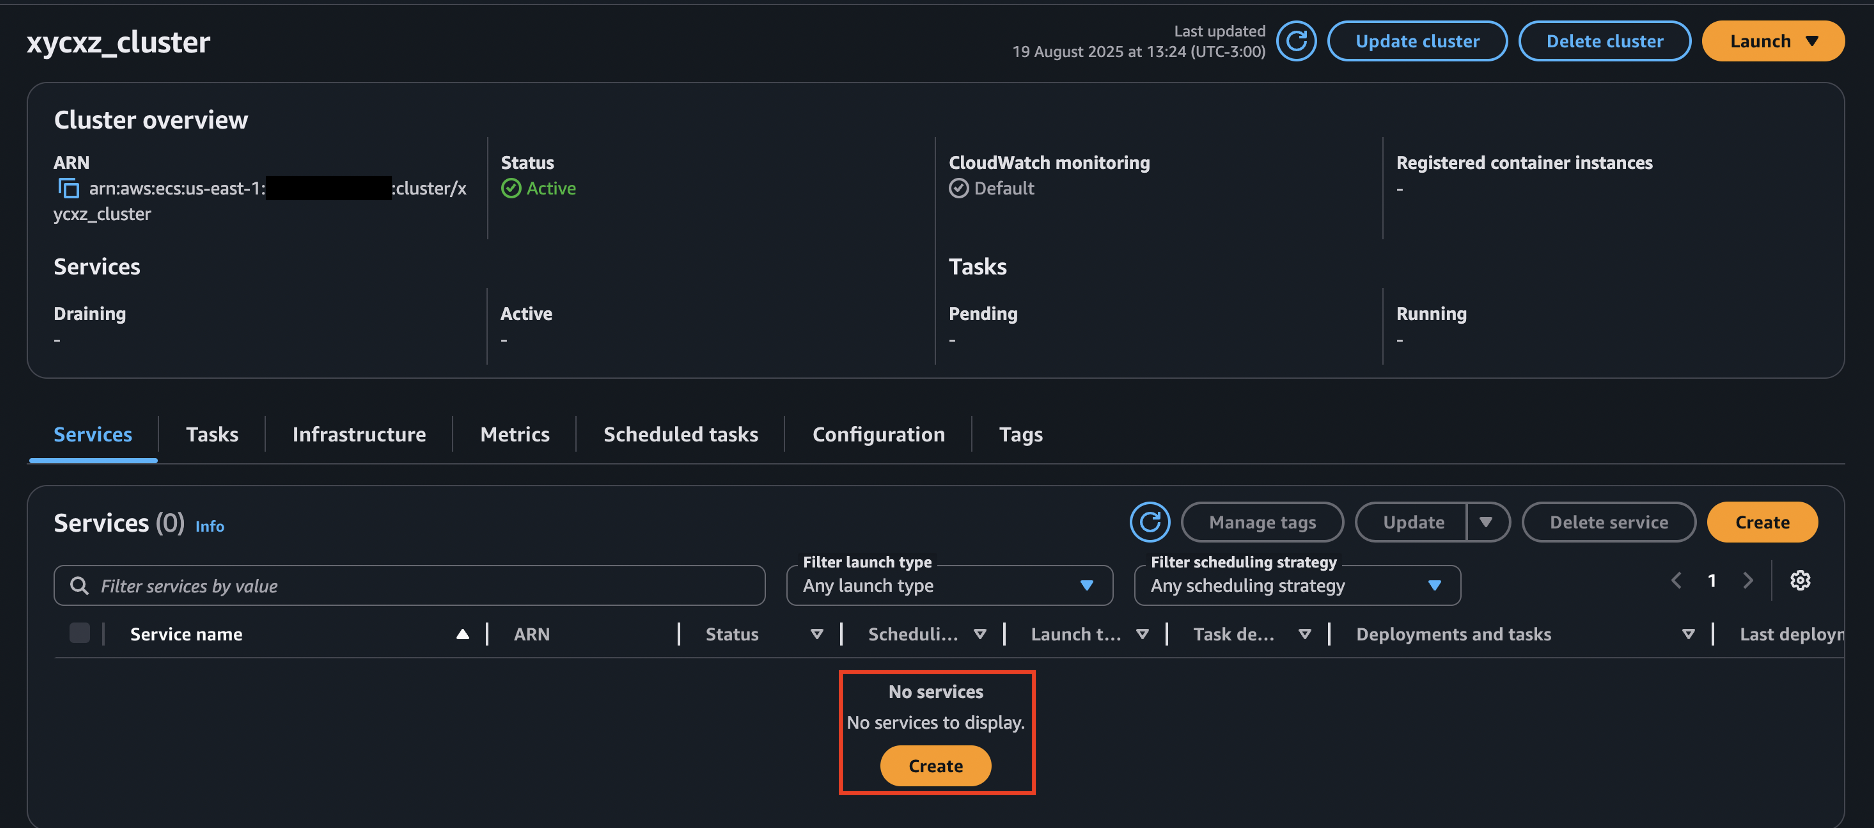
Once we created the cluster, we want to create a Service there.
ECS Service
Even though it is called Service, it does something slightly different than a task. A service is a nice way to deploy our task. We can run a task in the cluster but we know a task is:
- An individual stack of containers that we want to deploy
- It must be defined ahead of time (through a task definition)
- This enables us to run the same task definition multiple times
- If a task crashes, or stops… the
whole task is stopped. For example, if a essential container stops, the whole task stops.
Due to the 4th point, we need to use a service because it describes a desired end state that should be reached. It will automatically create the tasks needed to reach this end state. If a task crashes, a service will automatically try to deploy another one.
We can even update a service to run a different task definition (or revision), which will then seamlessly manage the tasks to fulfil it.
Note: An ECS Service is like a production-grade, cloud-scale version of Docker Compose. Both act as managers that read a blueprint (a docker-compose.yml file for Compose, an ECS Task Definition for the Service) to run and maintain an application’s containers. They share the core job of ensuring the desired number of containers are always running, automatically restarting any that fail. The crucial difference is scale: Docker Compose manages containers on a single host, making it ideal for development, while an ECS Service orchestrates and scales containers across an entire cluster of machines, providing the high availability and resilience needed for production.
To create a service, we can go to our cluster configuration and click on Create as shown below:
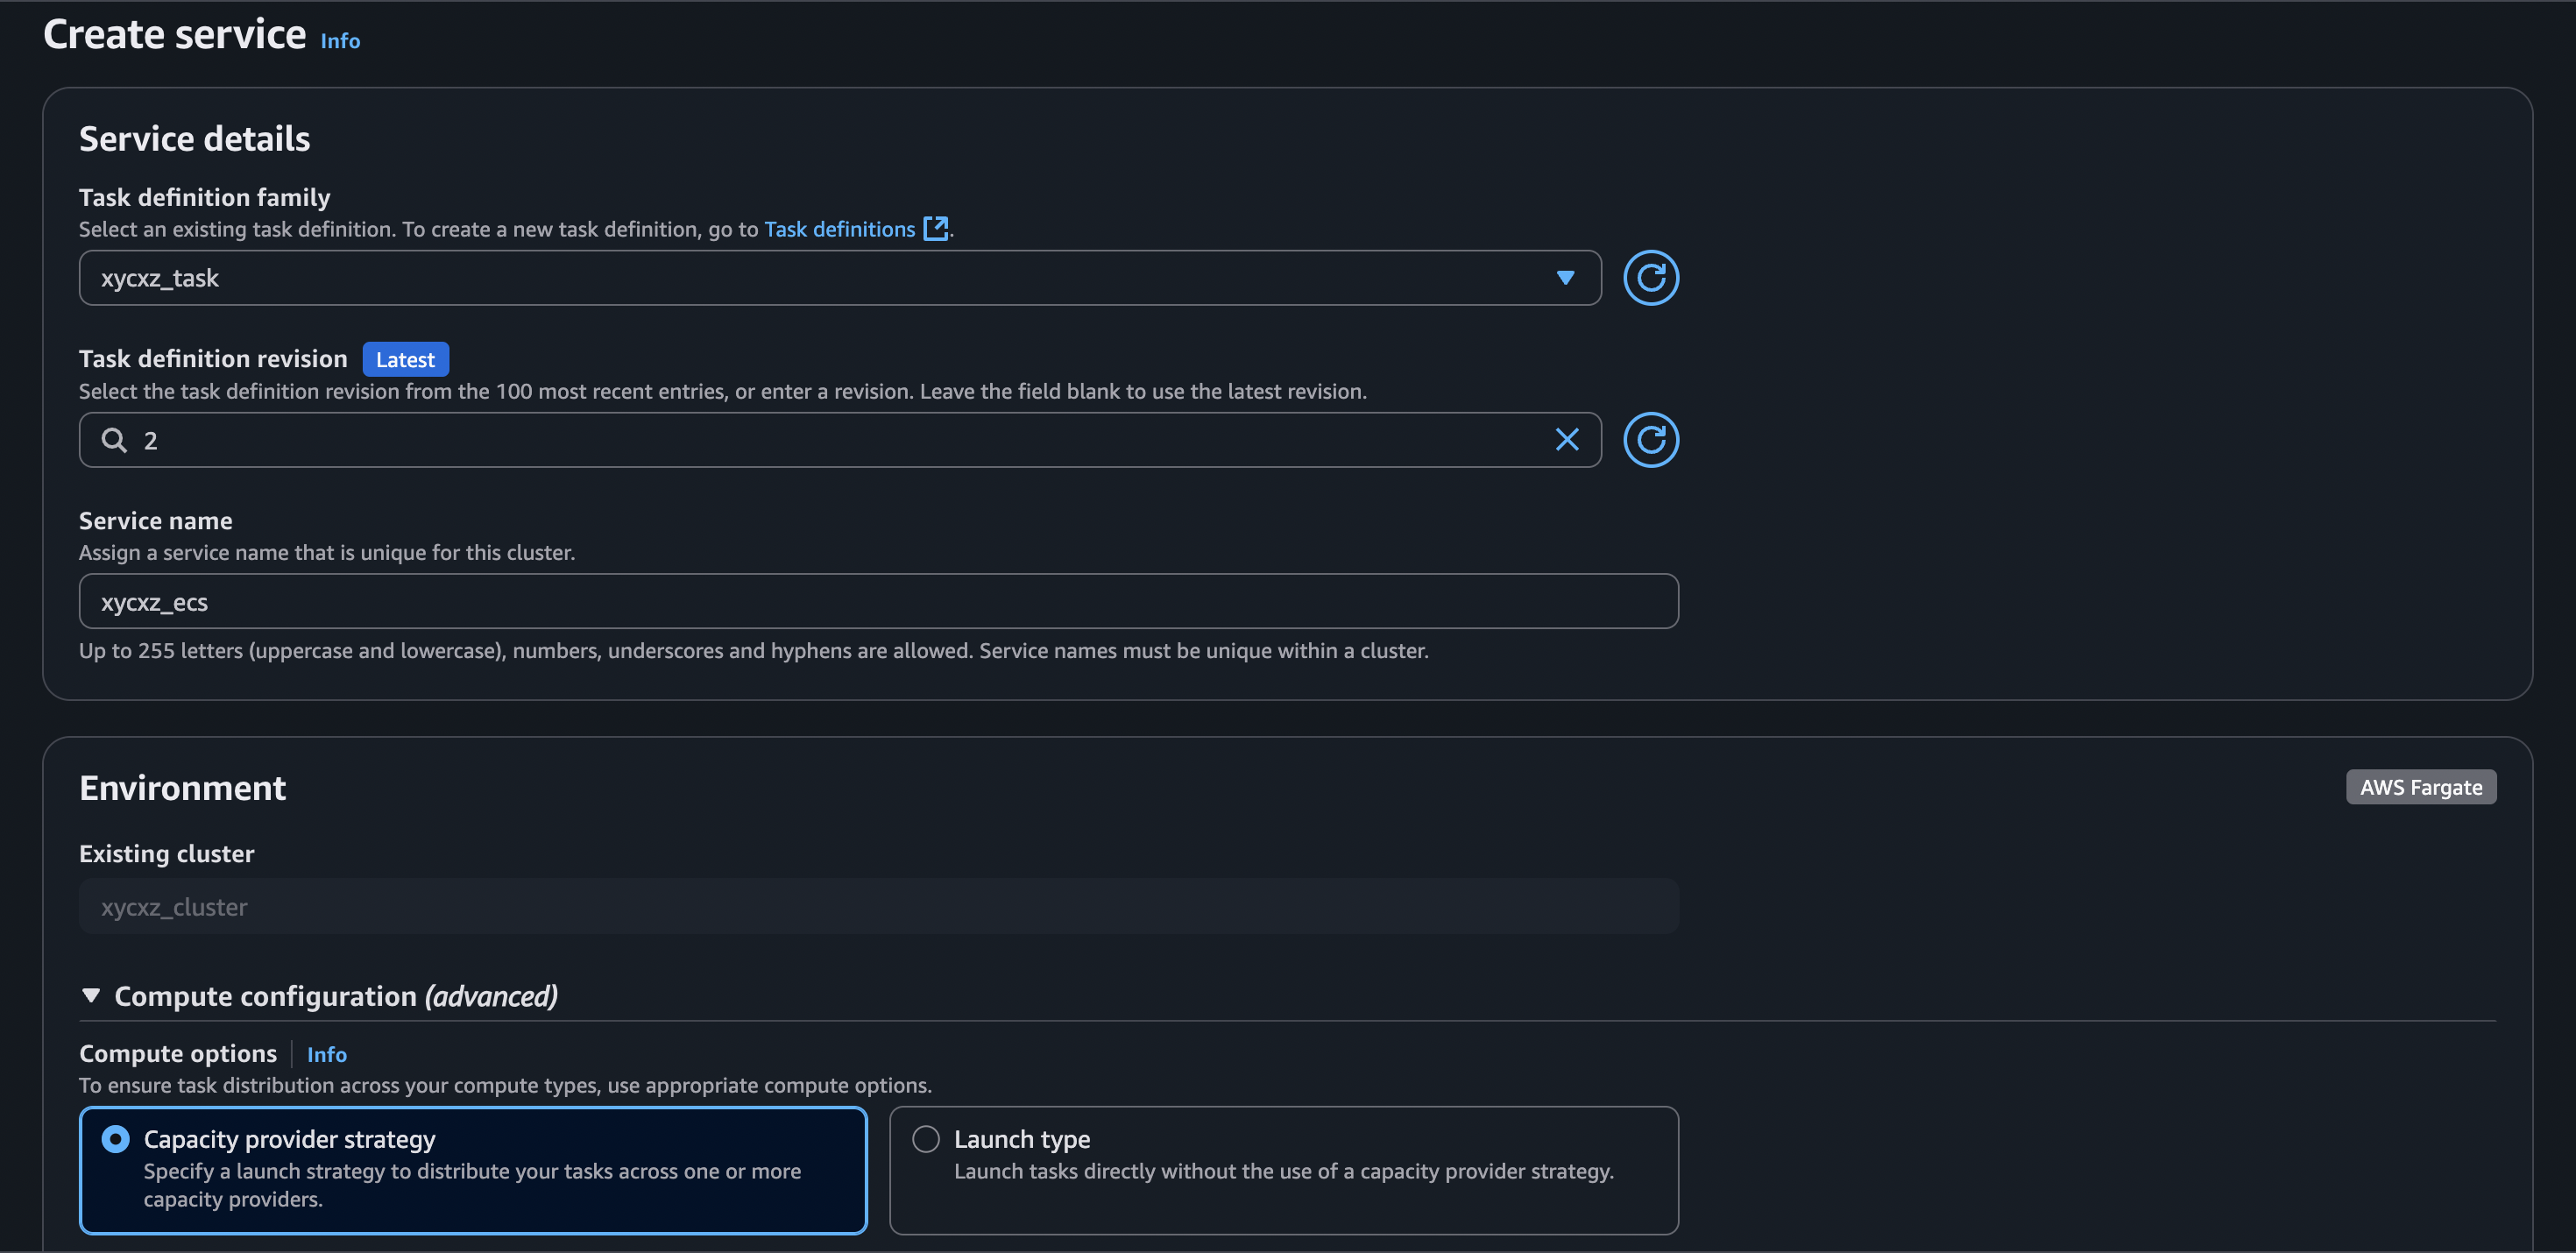
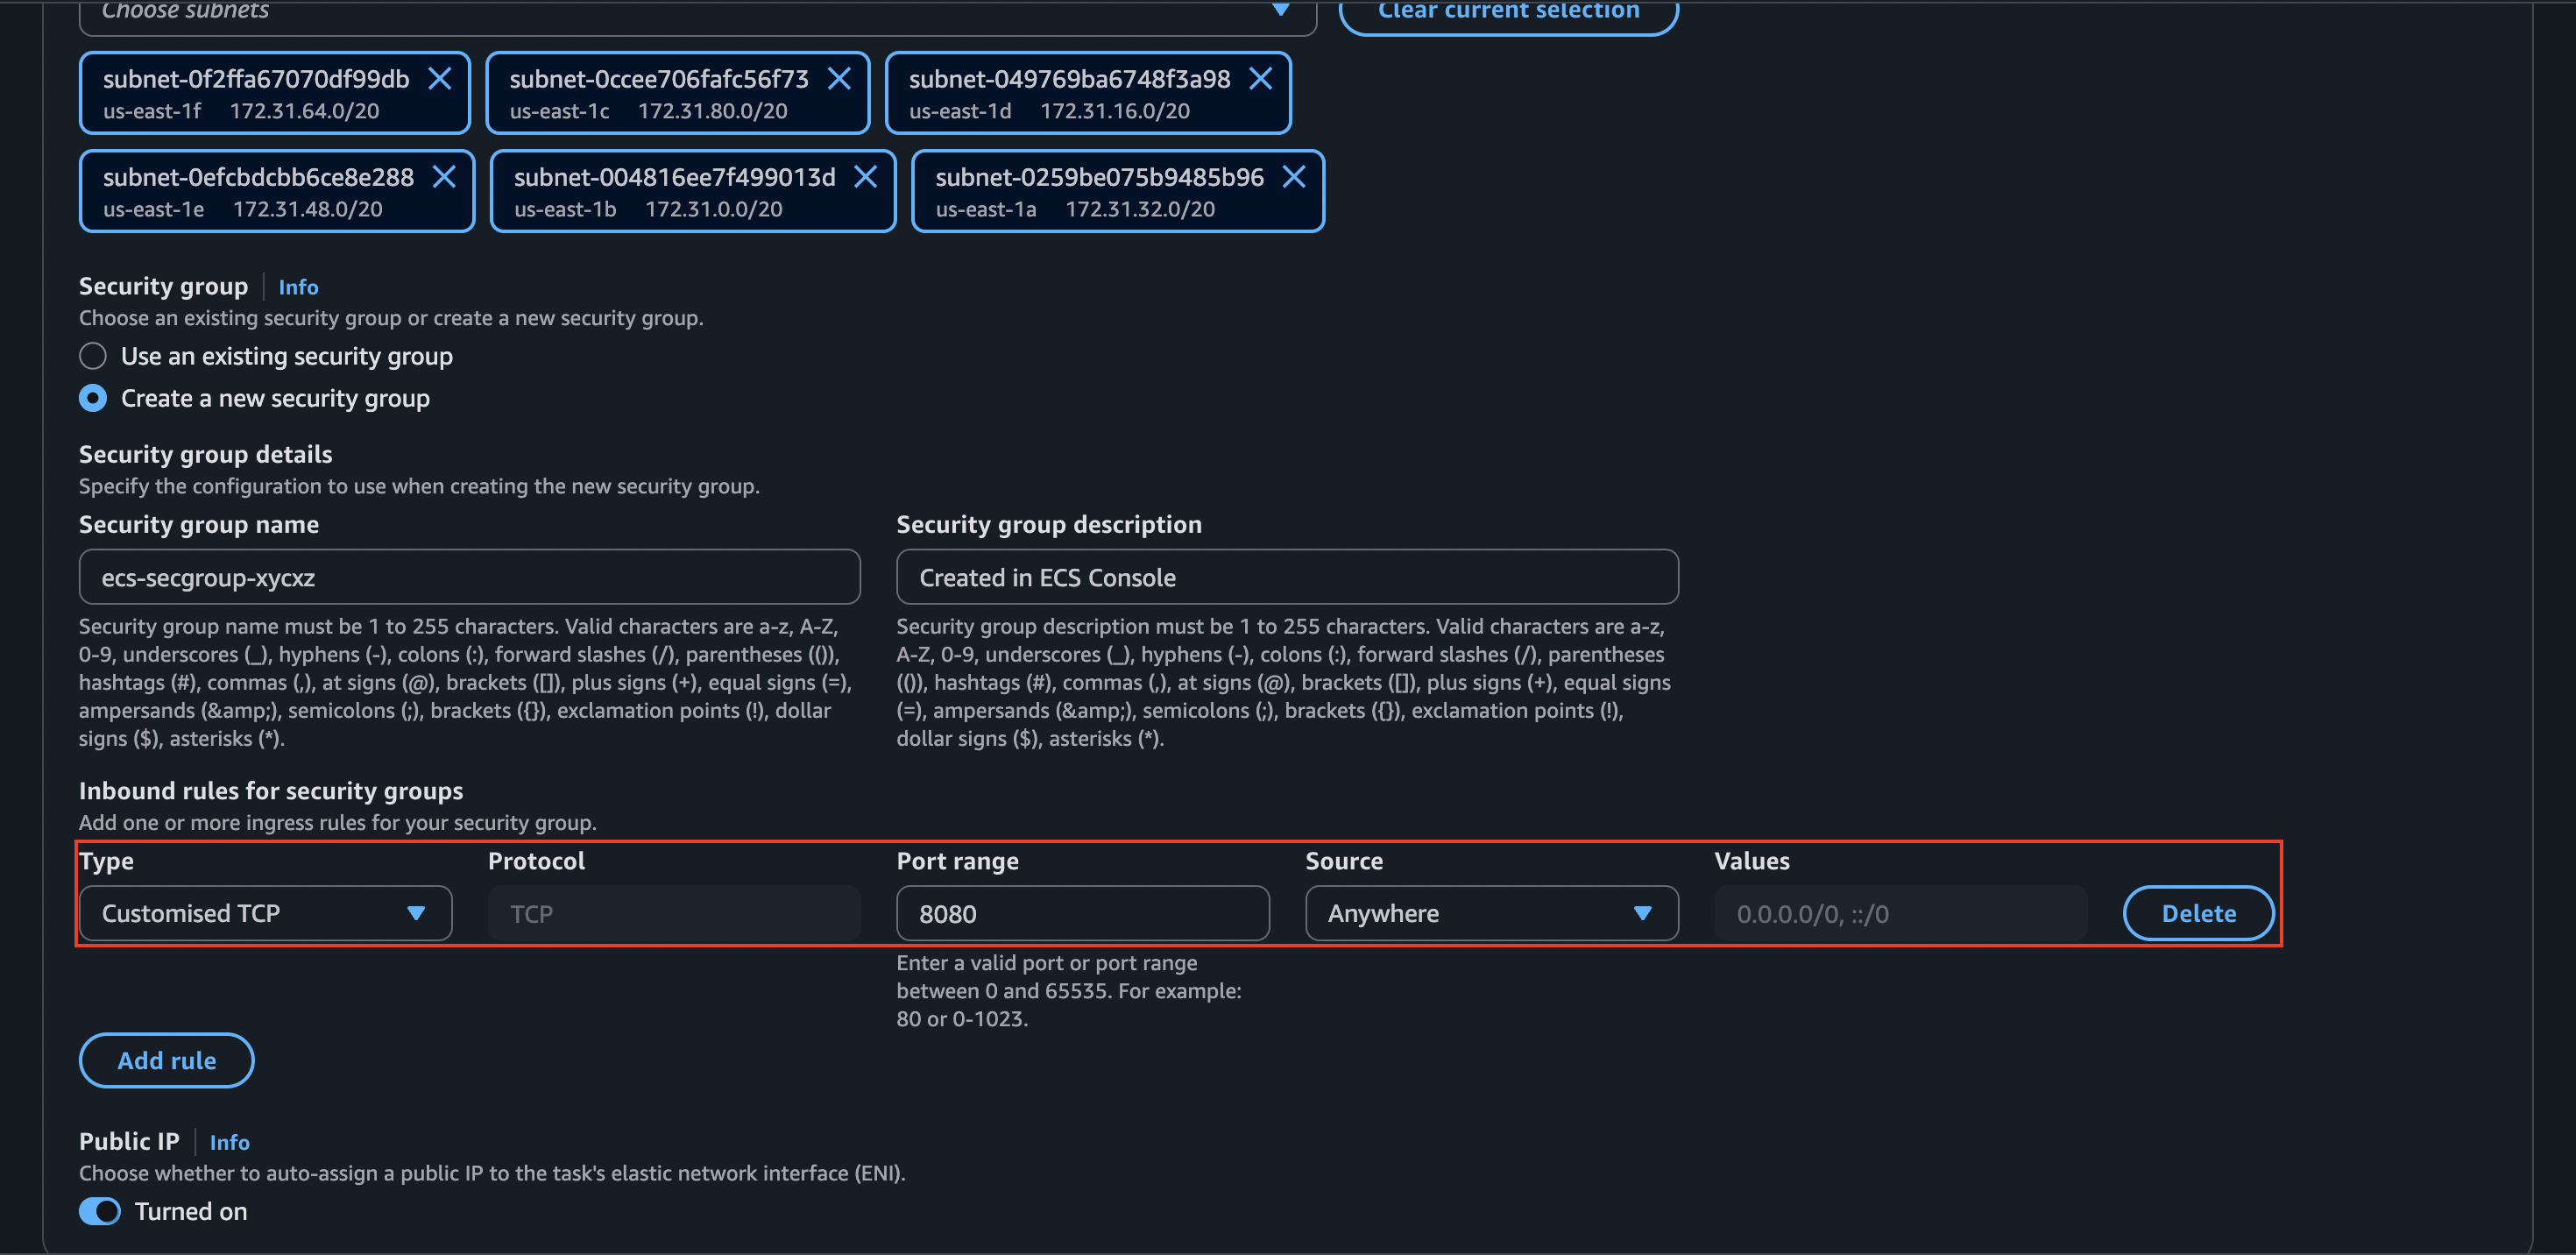
I’ll leave everything as is, except for the networking configuration. The reason is that the security group attached to it won’t allow incoming connections from the internet. We can confirm that by checking the current inbound rules:
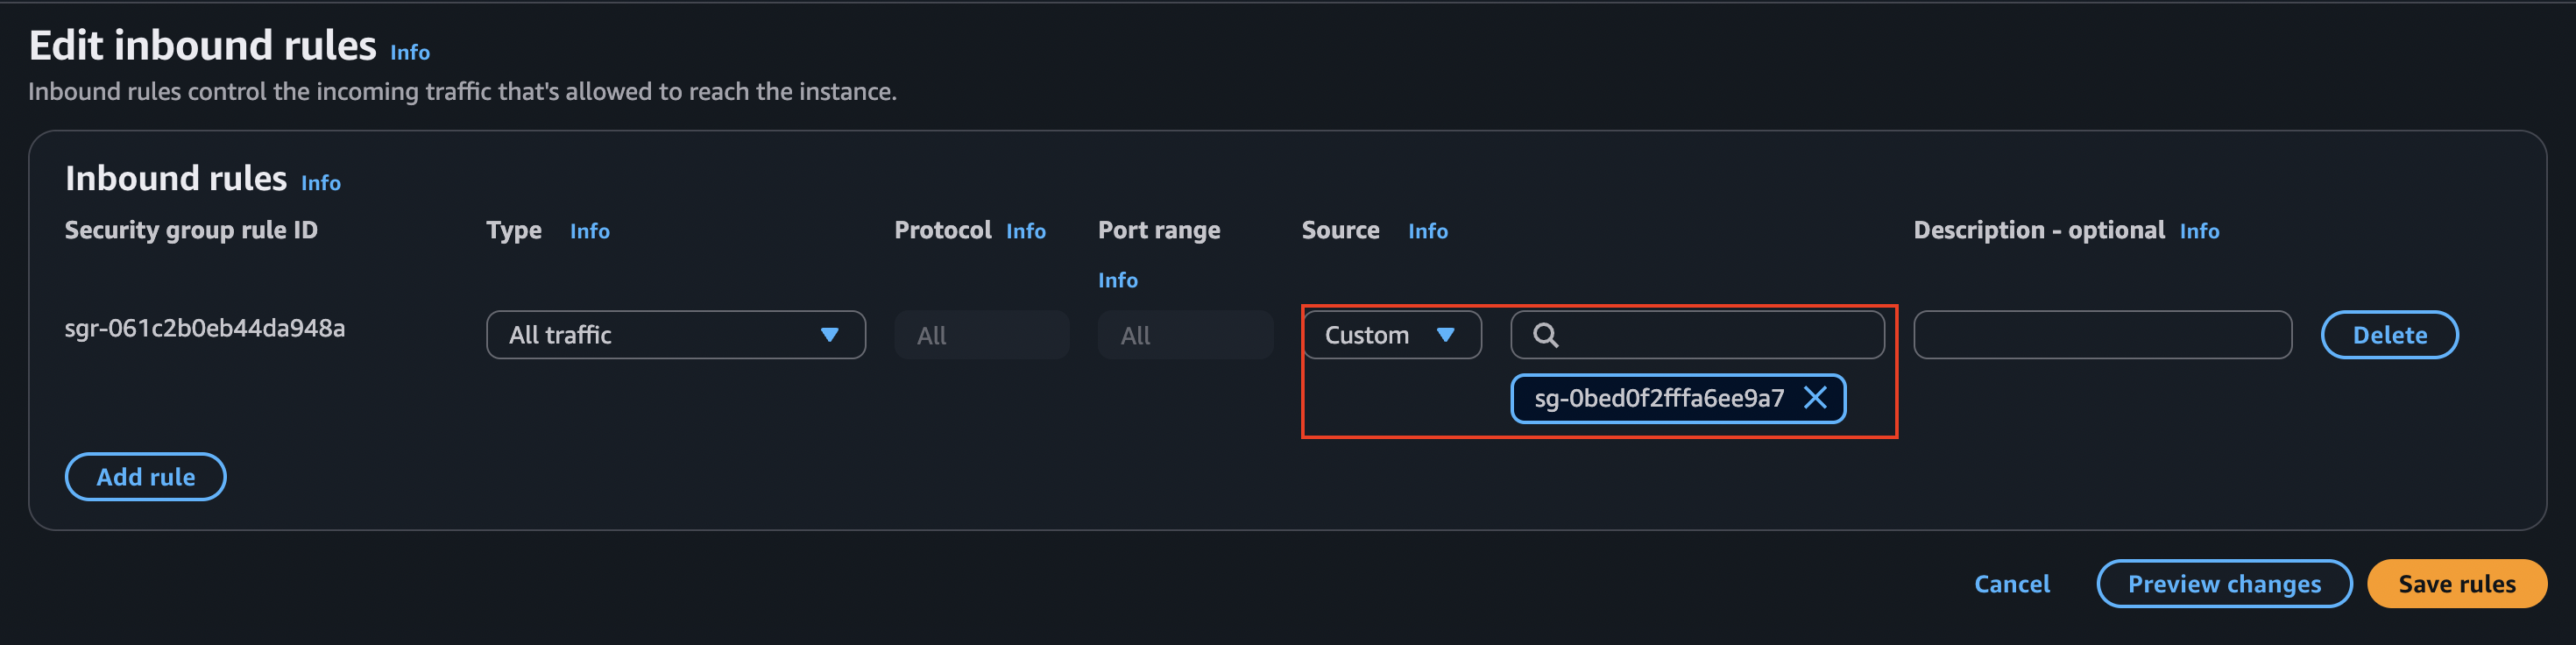
That’s why I’ll be creating a new security group that accepts incoming connections from port 8080 (because this is the one our application is listening on). For that, we will create a customised TCP rule:
After this, we can click on Create. We will see that this service has automatically created a task for us:

If we inspect this task a bit more, we will find the public IP address our service is using to serve our container:
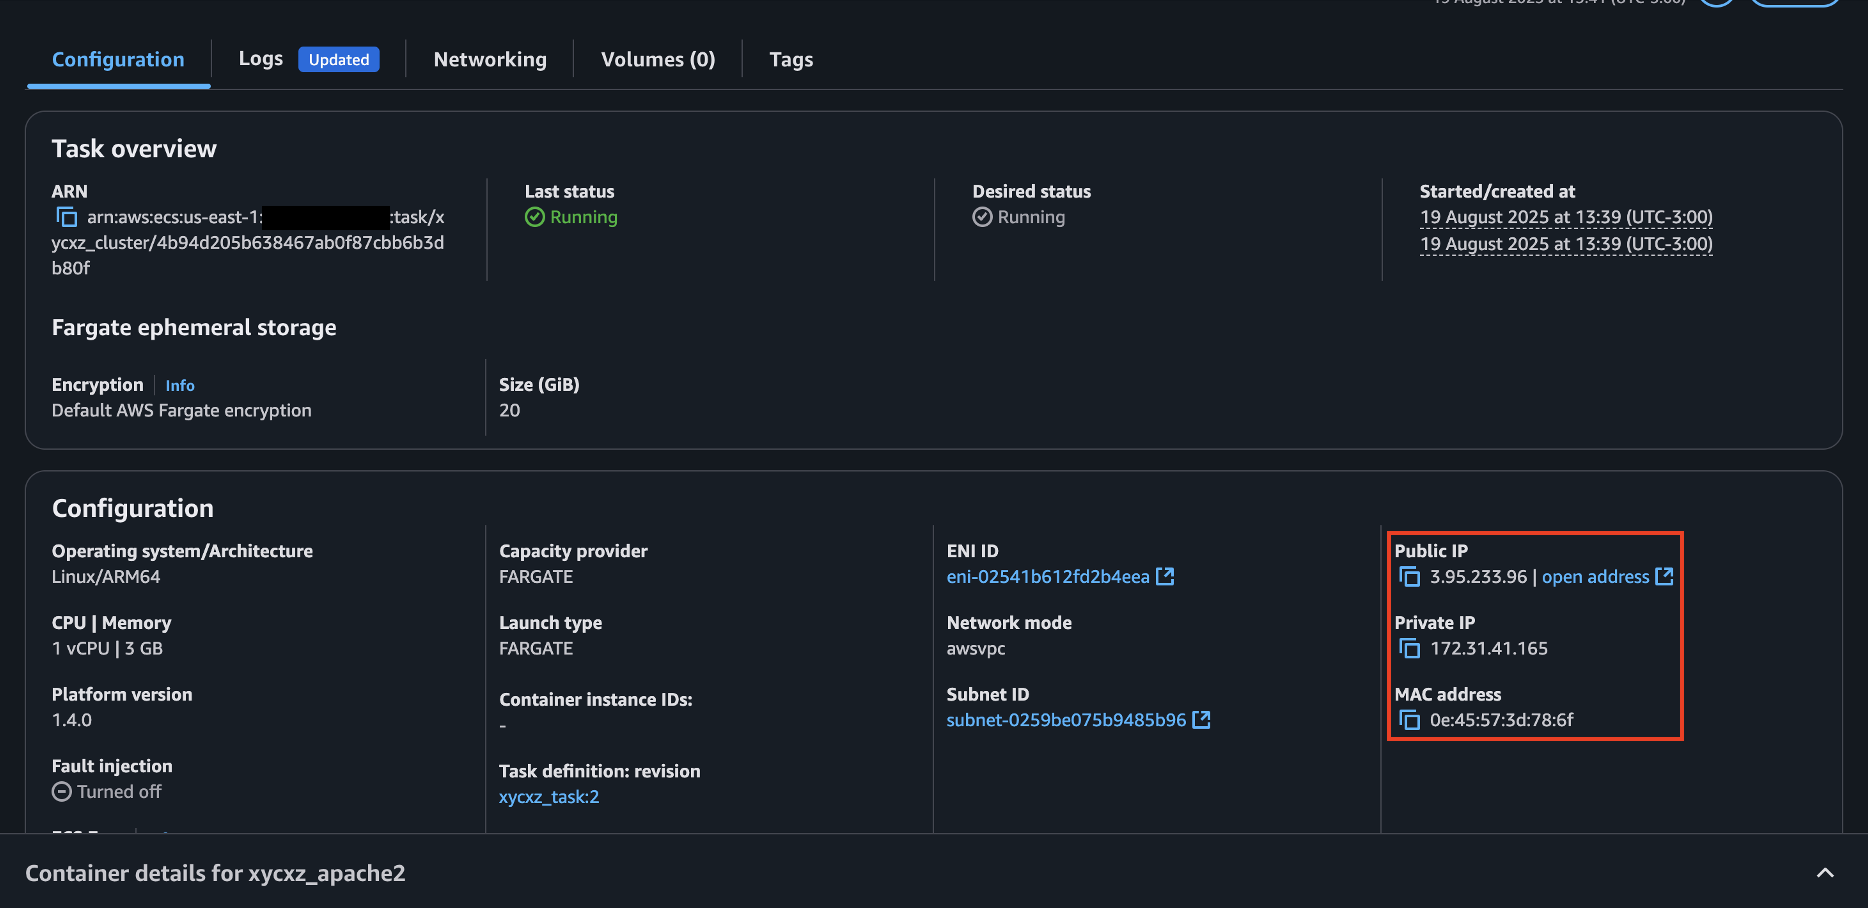

What this is telling us is that our application is successfully running! The reason why we get this error is because the database container is not configured yet. That’s a different service we need to explore to then connect it to the application. However, for now we will leave it like that.
Adding a Load Balancer
Every time our service wants to spin up a new task, the new task will get a new IP address and then we would have to change the IP address where we want to access. We know that DNS takes quite a while to update, so we could not even propagate this IP change to the whole internet for a couple of hours.
Nevertheless, we can solve this issue by adding a load balancer. A nice advantage here is, because the load balancer understands HTTP, our application does not need to implement anything about HTTPS; the load balancer can encrypt the traffic for us.
Note: I explained a bit how a load balancer works here.
How does the load balancer know where it can send requests to? This is defined through a Target Group. A Target Group bundles multiple “things” (like EC2 instances, other services, and even services outside AWS) together that the load balancer could send traffic to. In our case those “things” that we want to send our traffic to would be the tasks we are running in the ECS cluster.
Fortunately for us, the ECS service will configure the Target Group for us and keep it up to date. For example, we have only one PHP task and then we needed another one, the Target Group will be updated to also include the second instance and then the load balancer will take care of distributing the traffic.
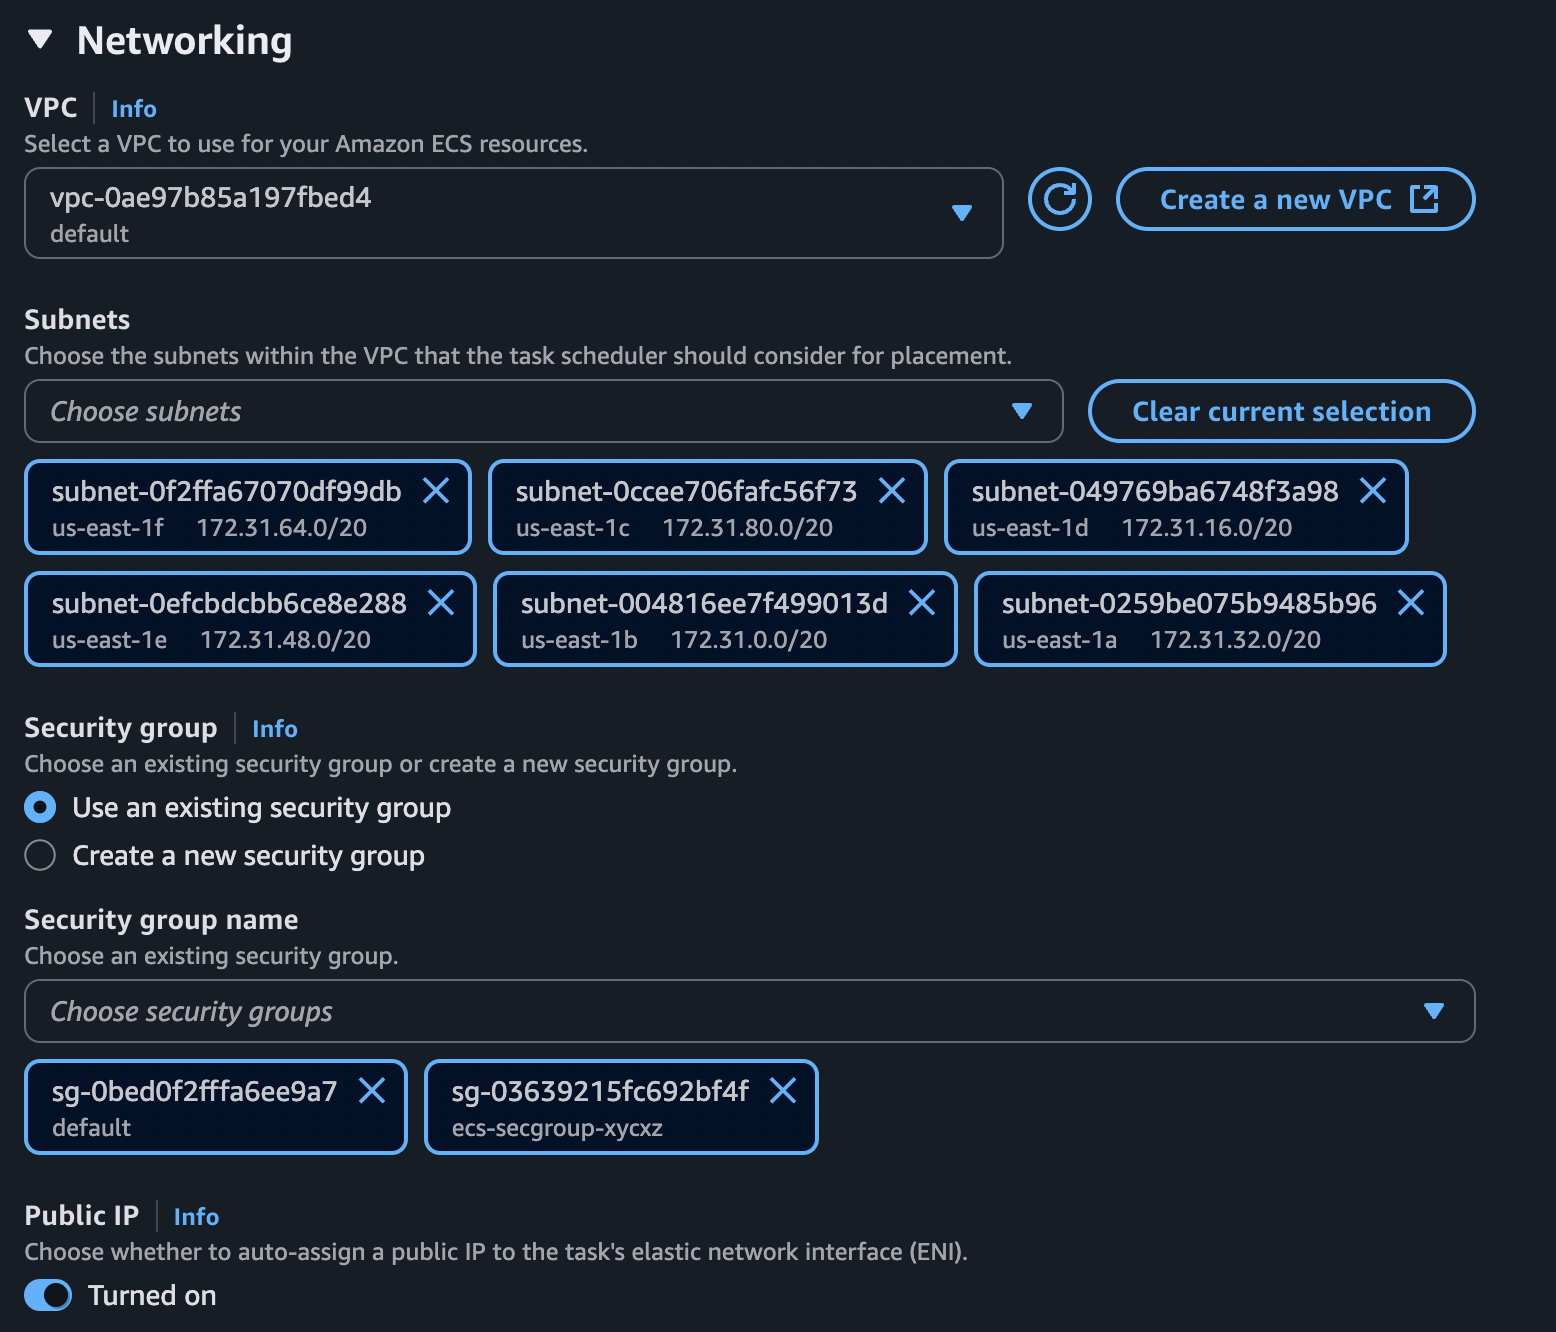
To kick off, we will start by defining a new Task Revision and change the default configuration a bit, specially when it comes to networking and adding the load balancer. First, we will attach the security group that allows HTTP traffic from the internet (so we can access the load balancer from the outside world).

Next, we have to configure the load balancer. In this case, we can leave everything as default:

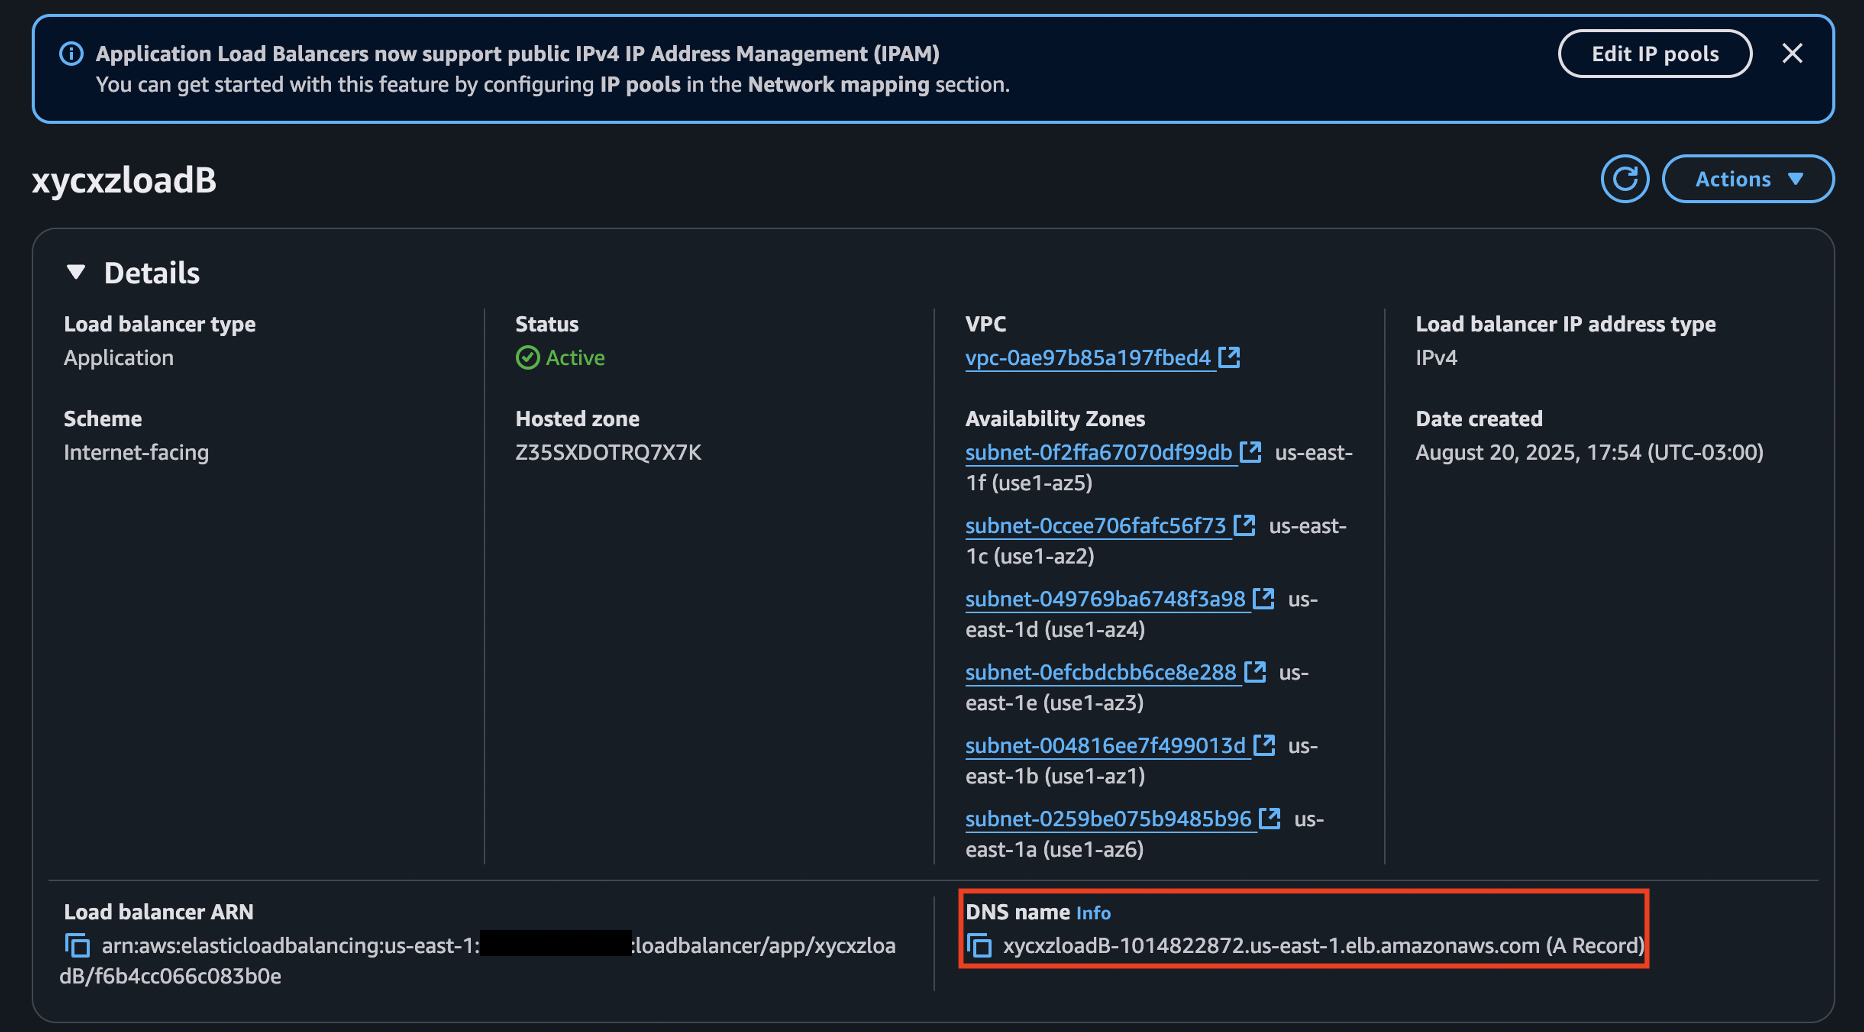
Once that’s finished, we can click on Create. We have to wait a bit until this gets configured and then look at the DNS name to navigate and check our application:

Enabling HTTPS
So far, our application is only working with the HTTP protocol. As we know, this is definitely not a secure way to distribute our application traffic, which makes us think of an encrypted solution: HTTPS.
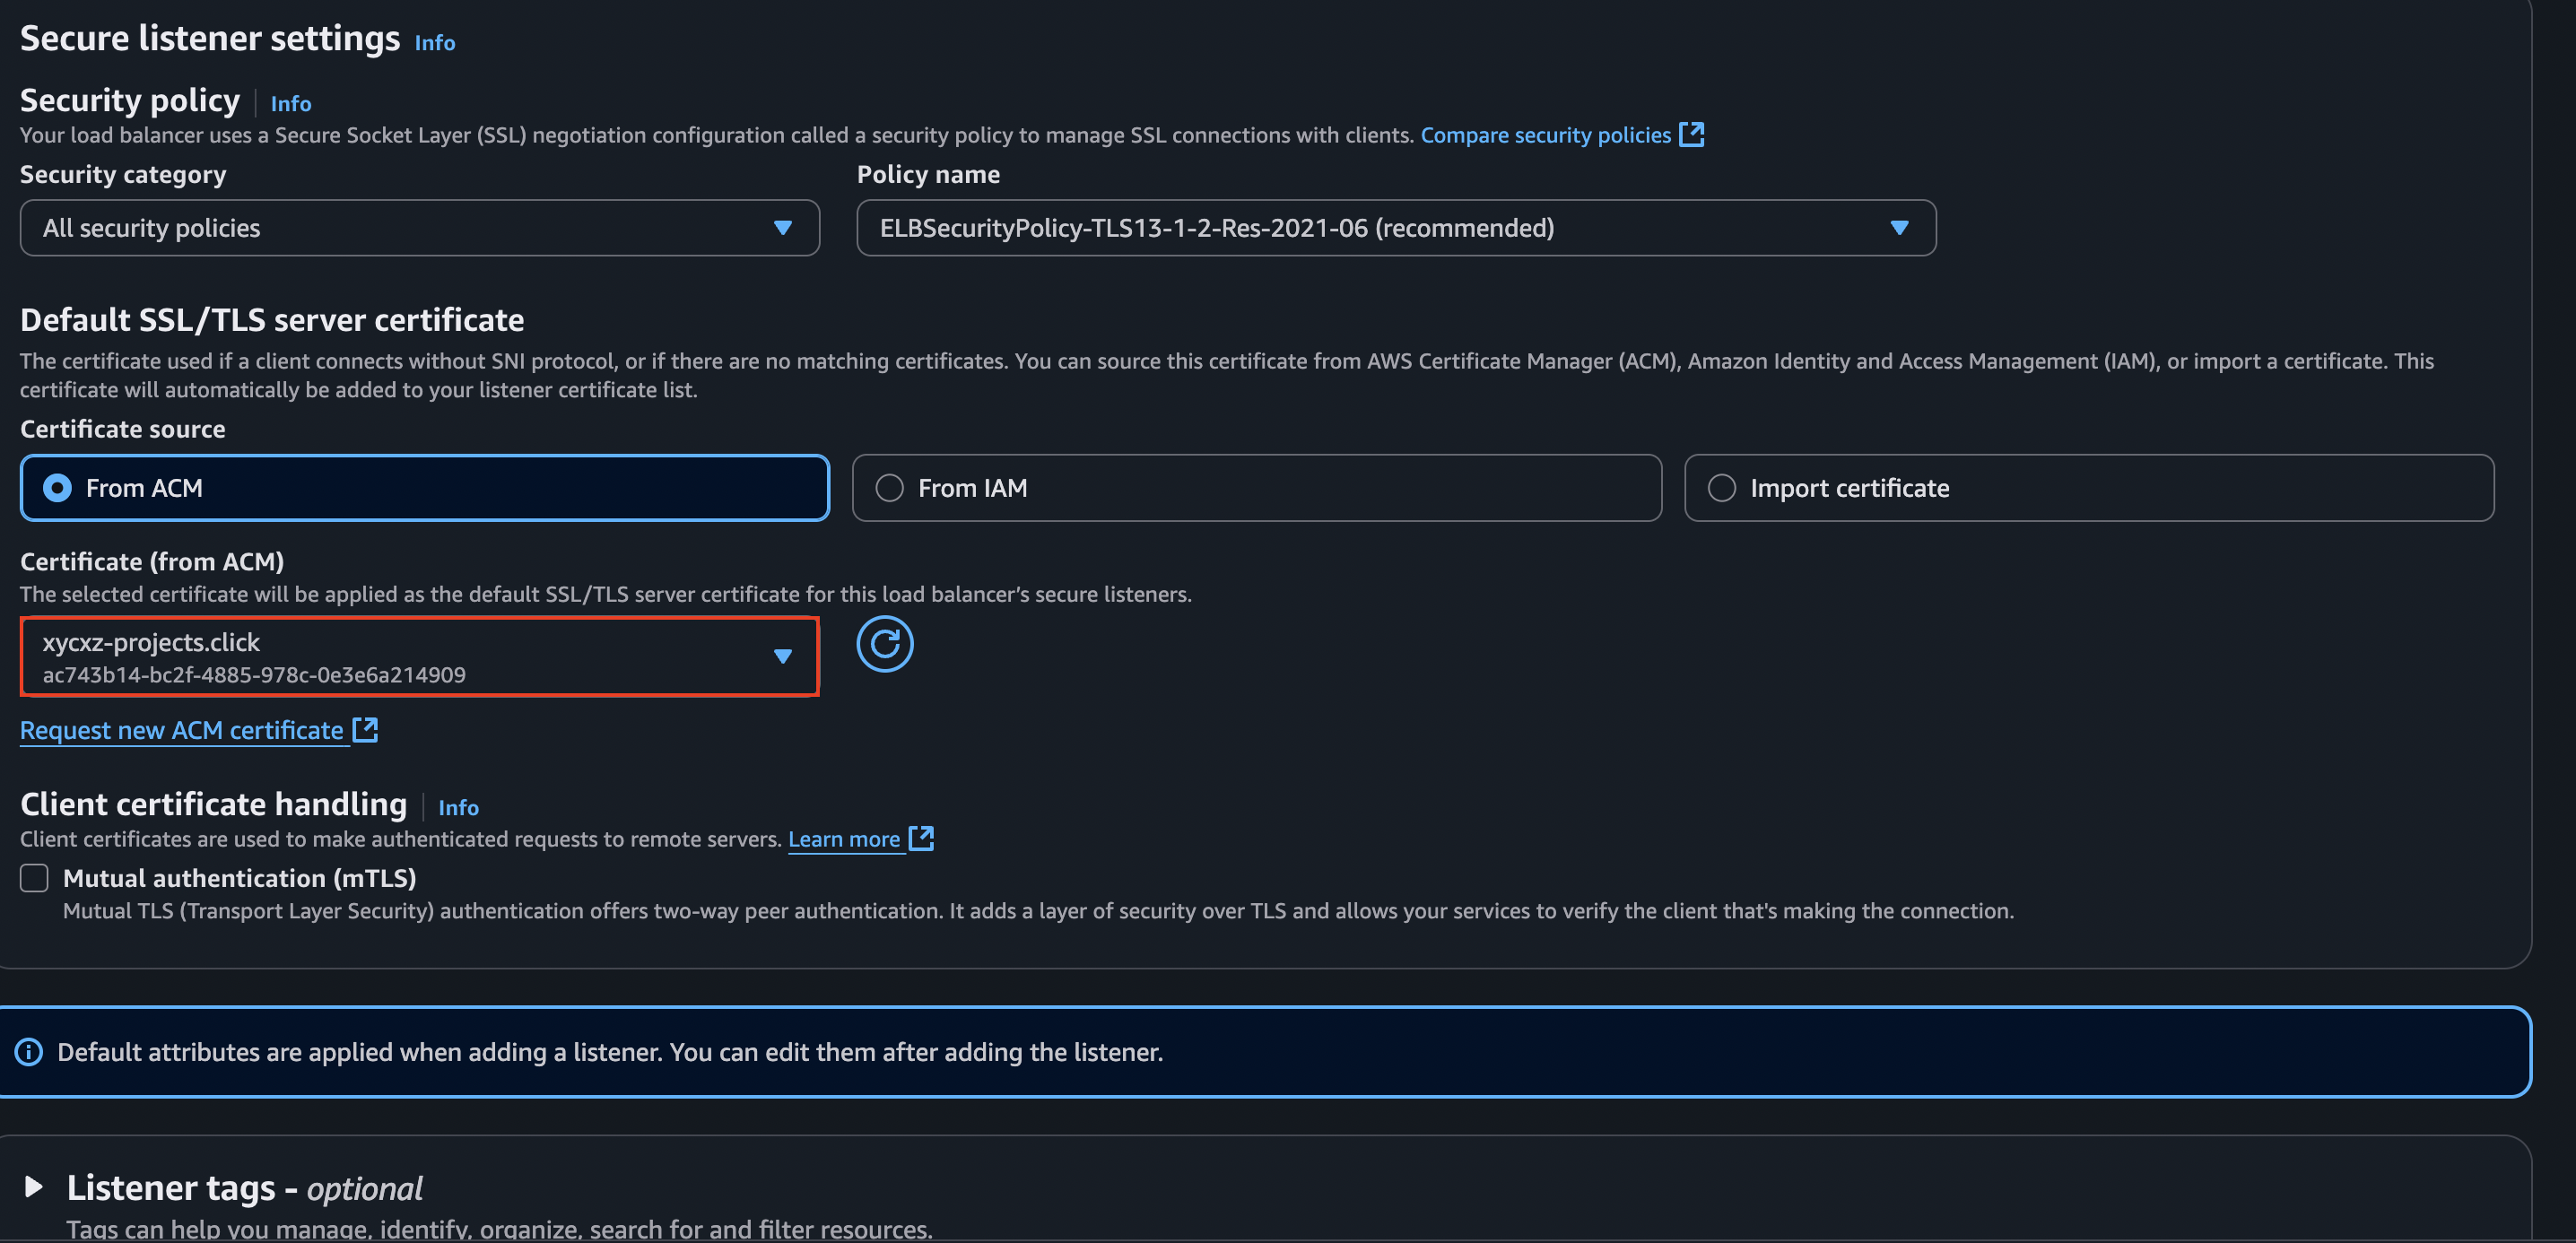
To enable HTTPS, we first need to generate the SSL certificate and add additional CNAME entries into our DNS configuration to prove that we are the owner of the domain (this is how it works in the AWS Cloud). After that, we can enable HTTPS for our load balancer.
We can use the AWS Certificate Manager to request a SSL certificate. Be sure to add all the domains we need to use the same certificate. I’ll skip this part of requesting a SSL certificate because I have done that before in a previous post.
Once we have our certificate issued and attached to our (sub)domain/s, we will go ahead and add a listener to the load balancer:
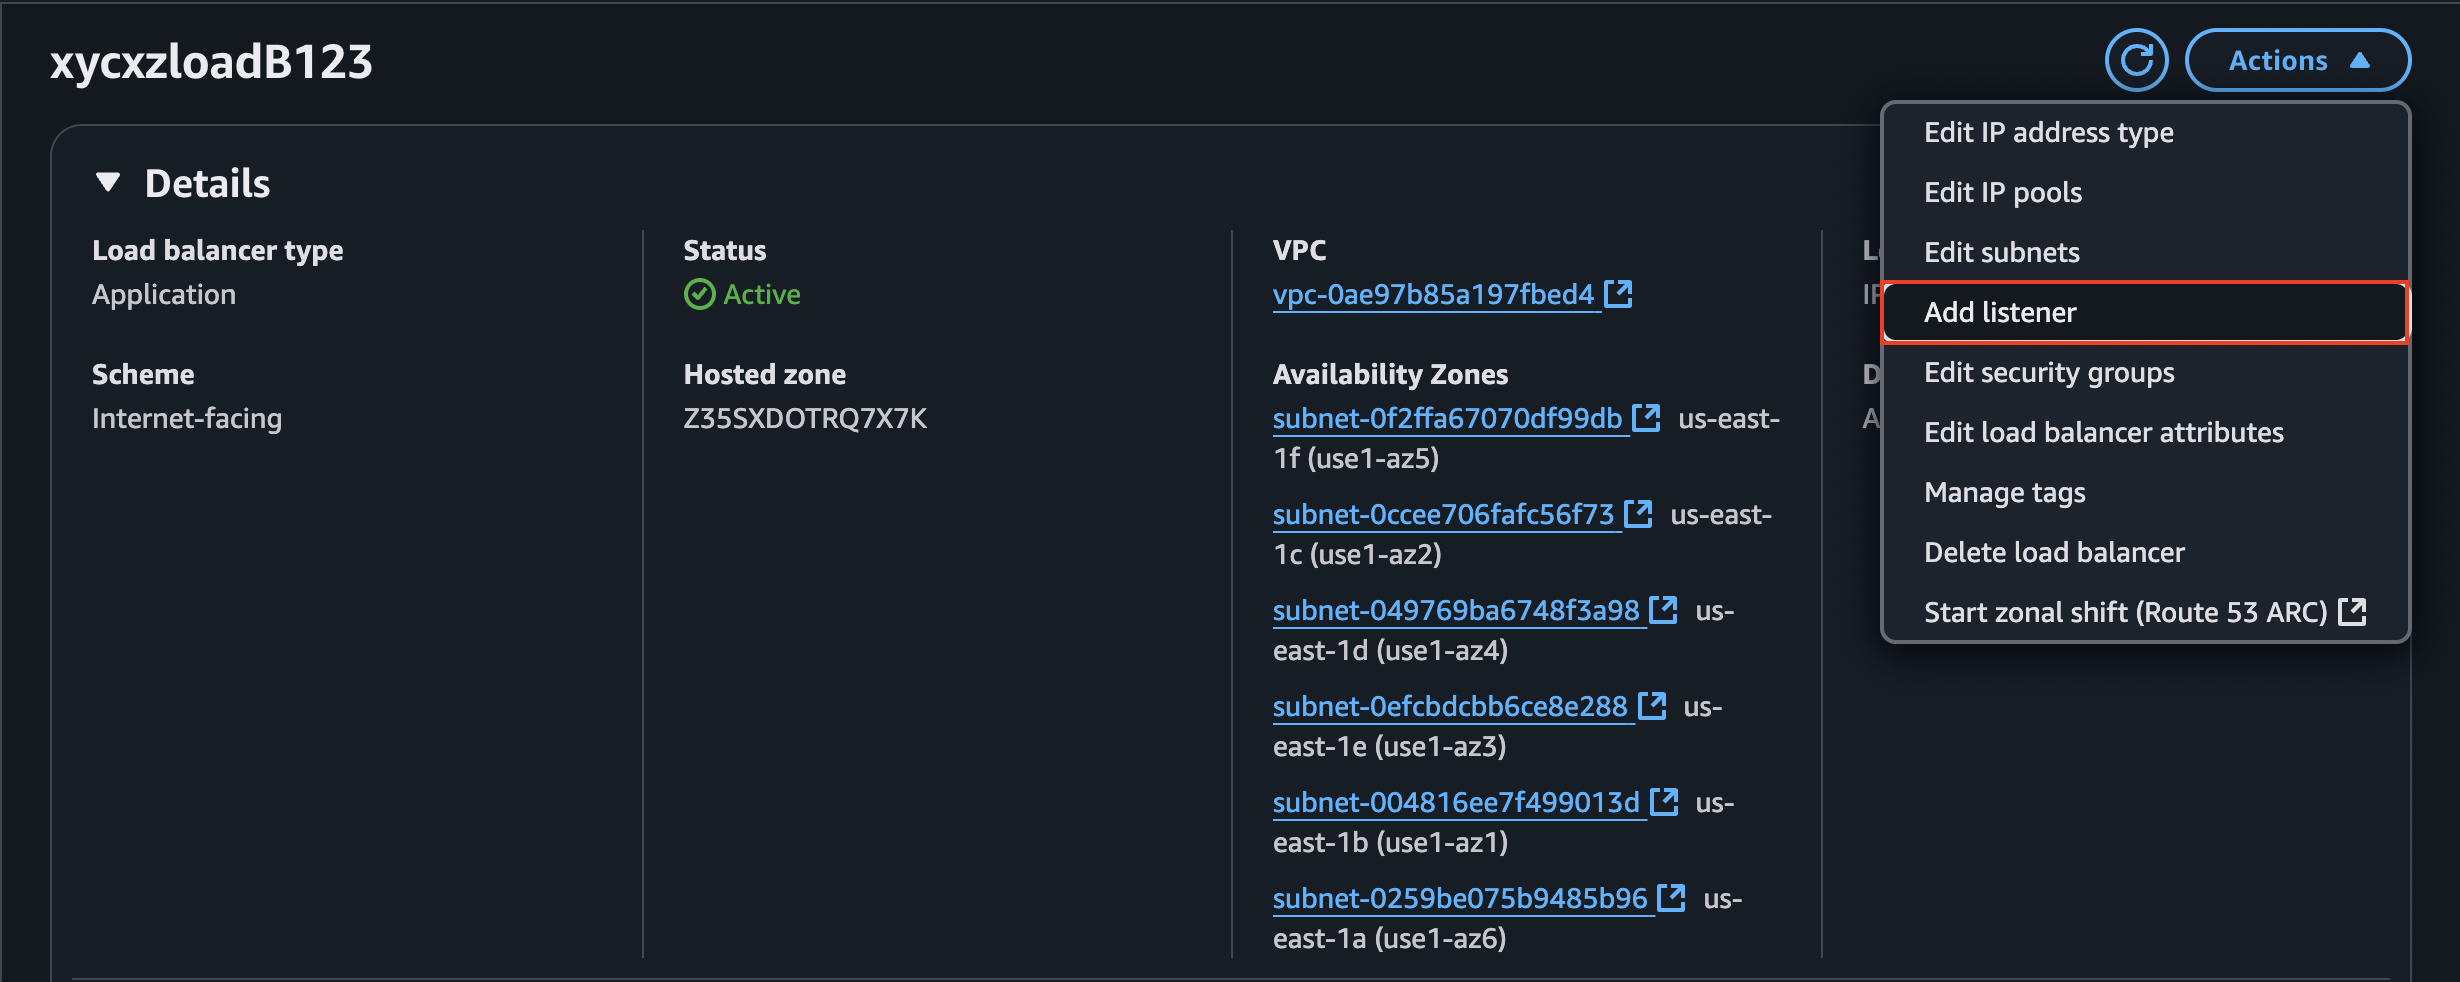
The configuration will look something like this:
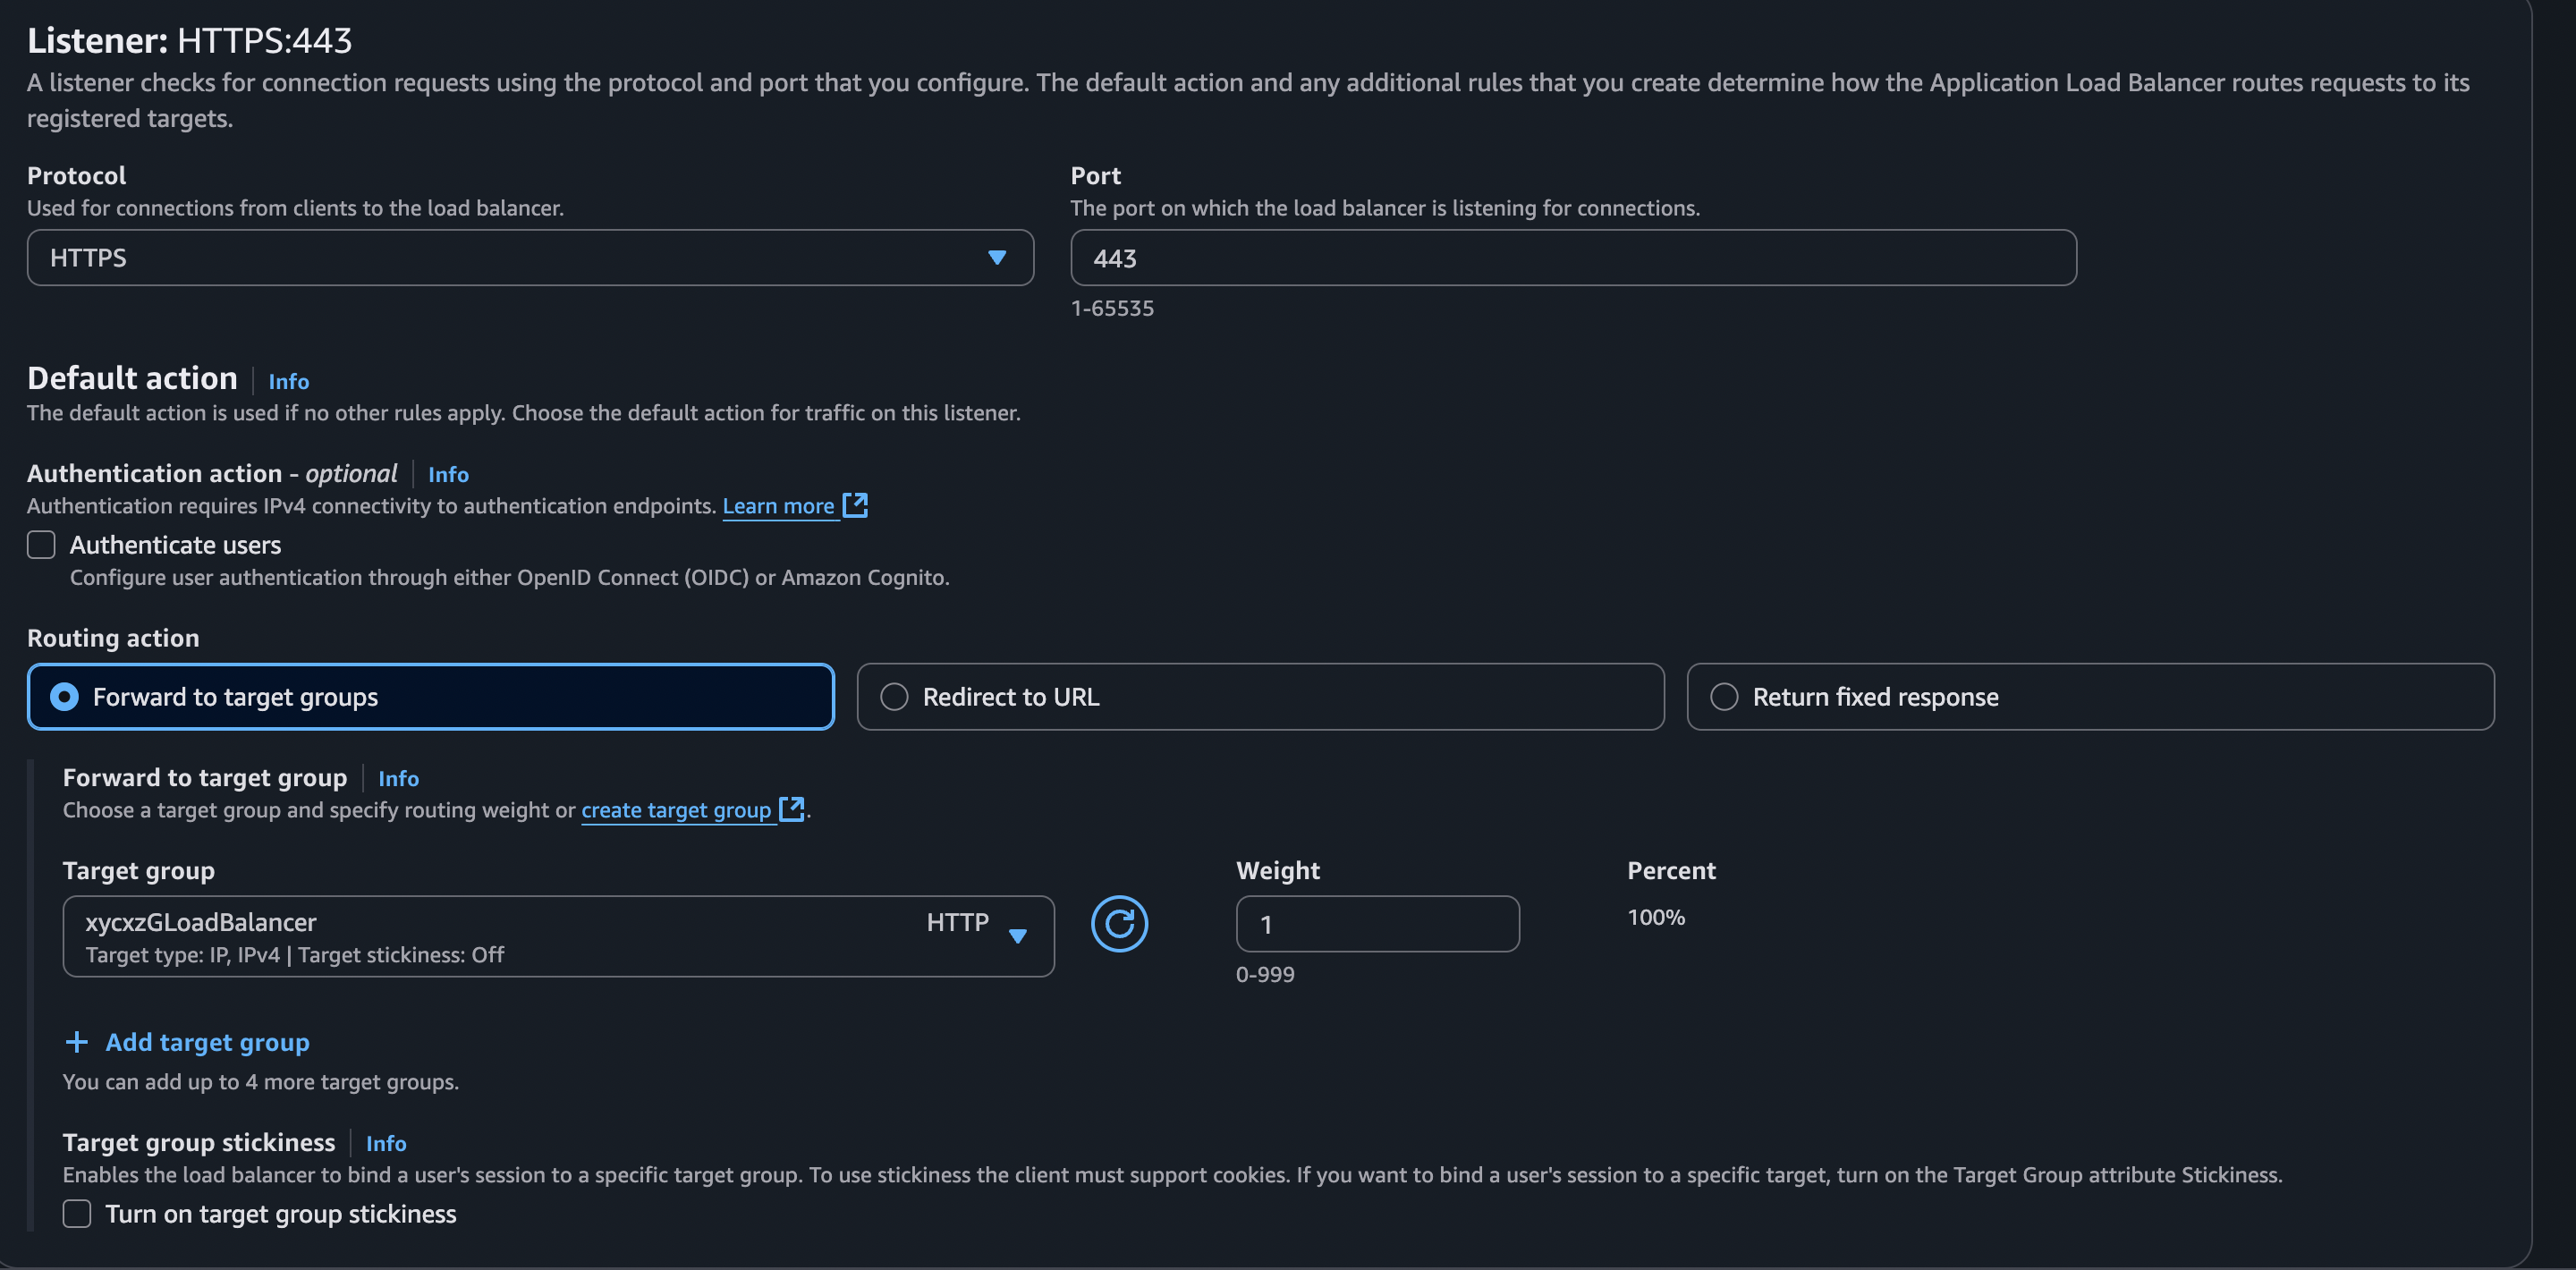
Note: Make sure to use the same Target Group we selected when creating the load balancer.
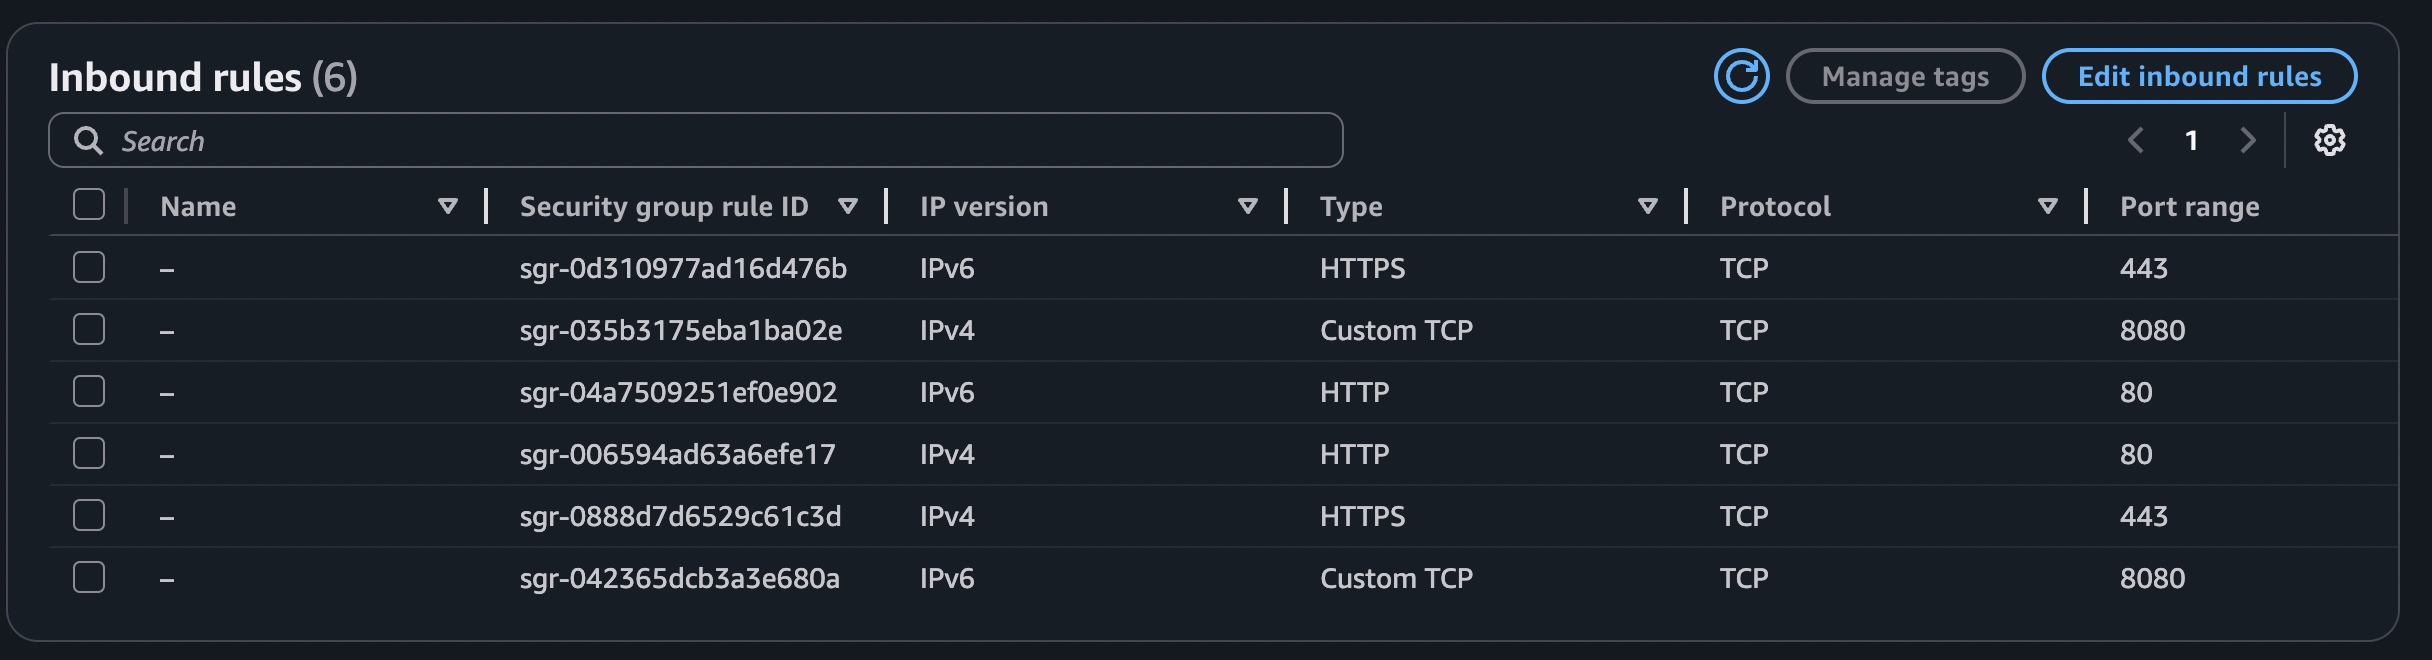
After clicking on Add listener, we should have HTTPS enabled. However, we will have an issue here because we haven’t allowed HTTPS traffic when configuring the security groups. For that, we will modify our security group and add the corresponding protocol:
And that’s it! We should have our application up and running:

Next Steps
We still have to connect our database to the application we just deployed. However, this is going to be a matter of a different post I’ll attach here later on.