EC2 Instances - AWS
Objective
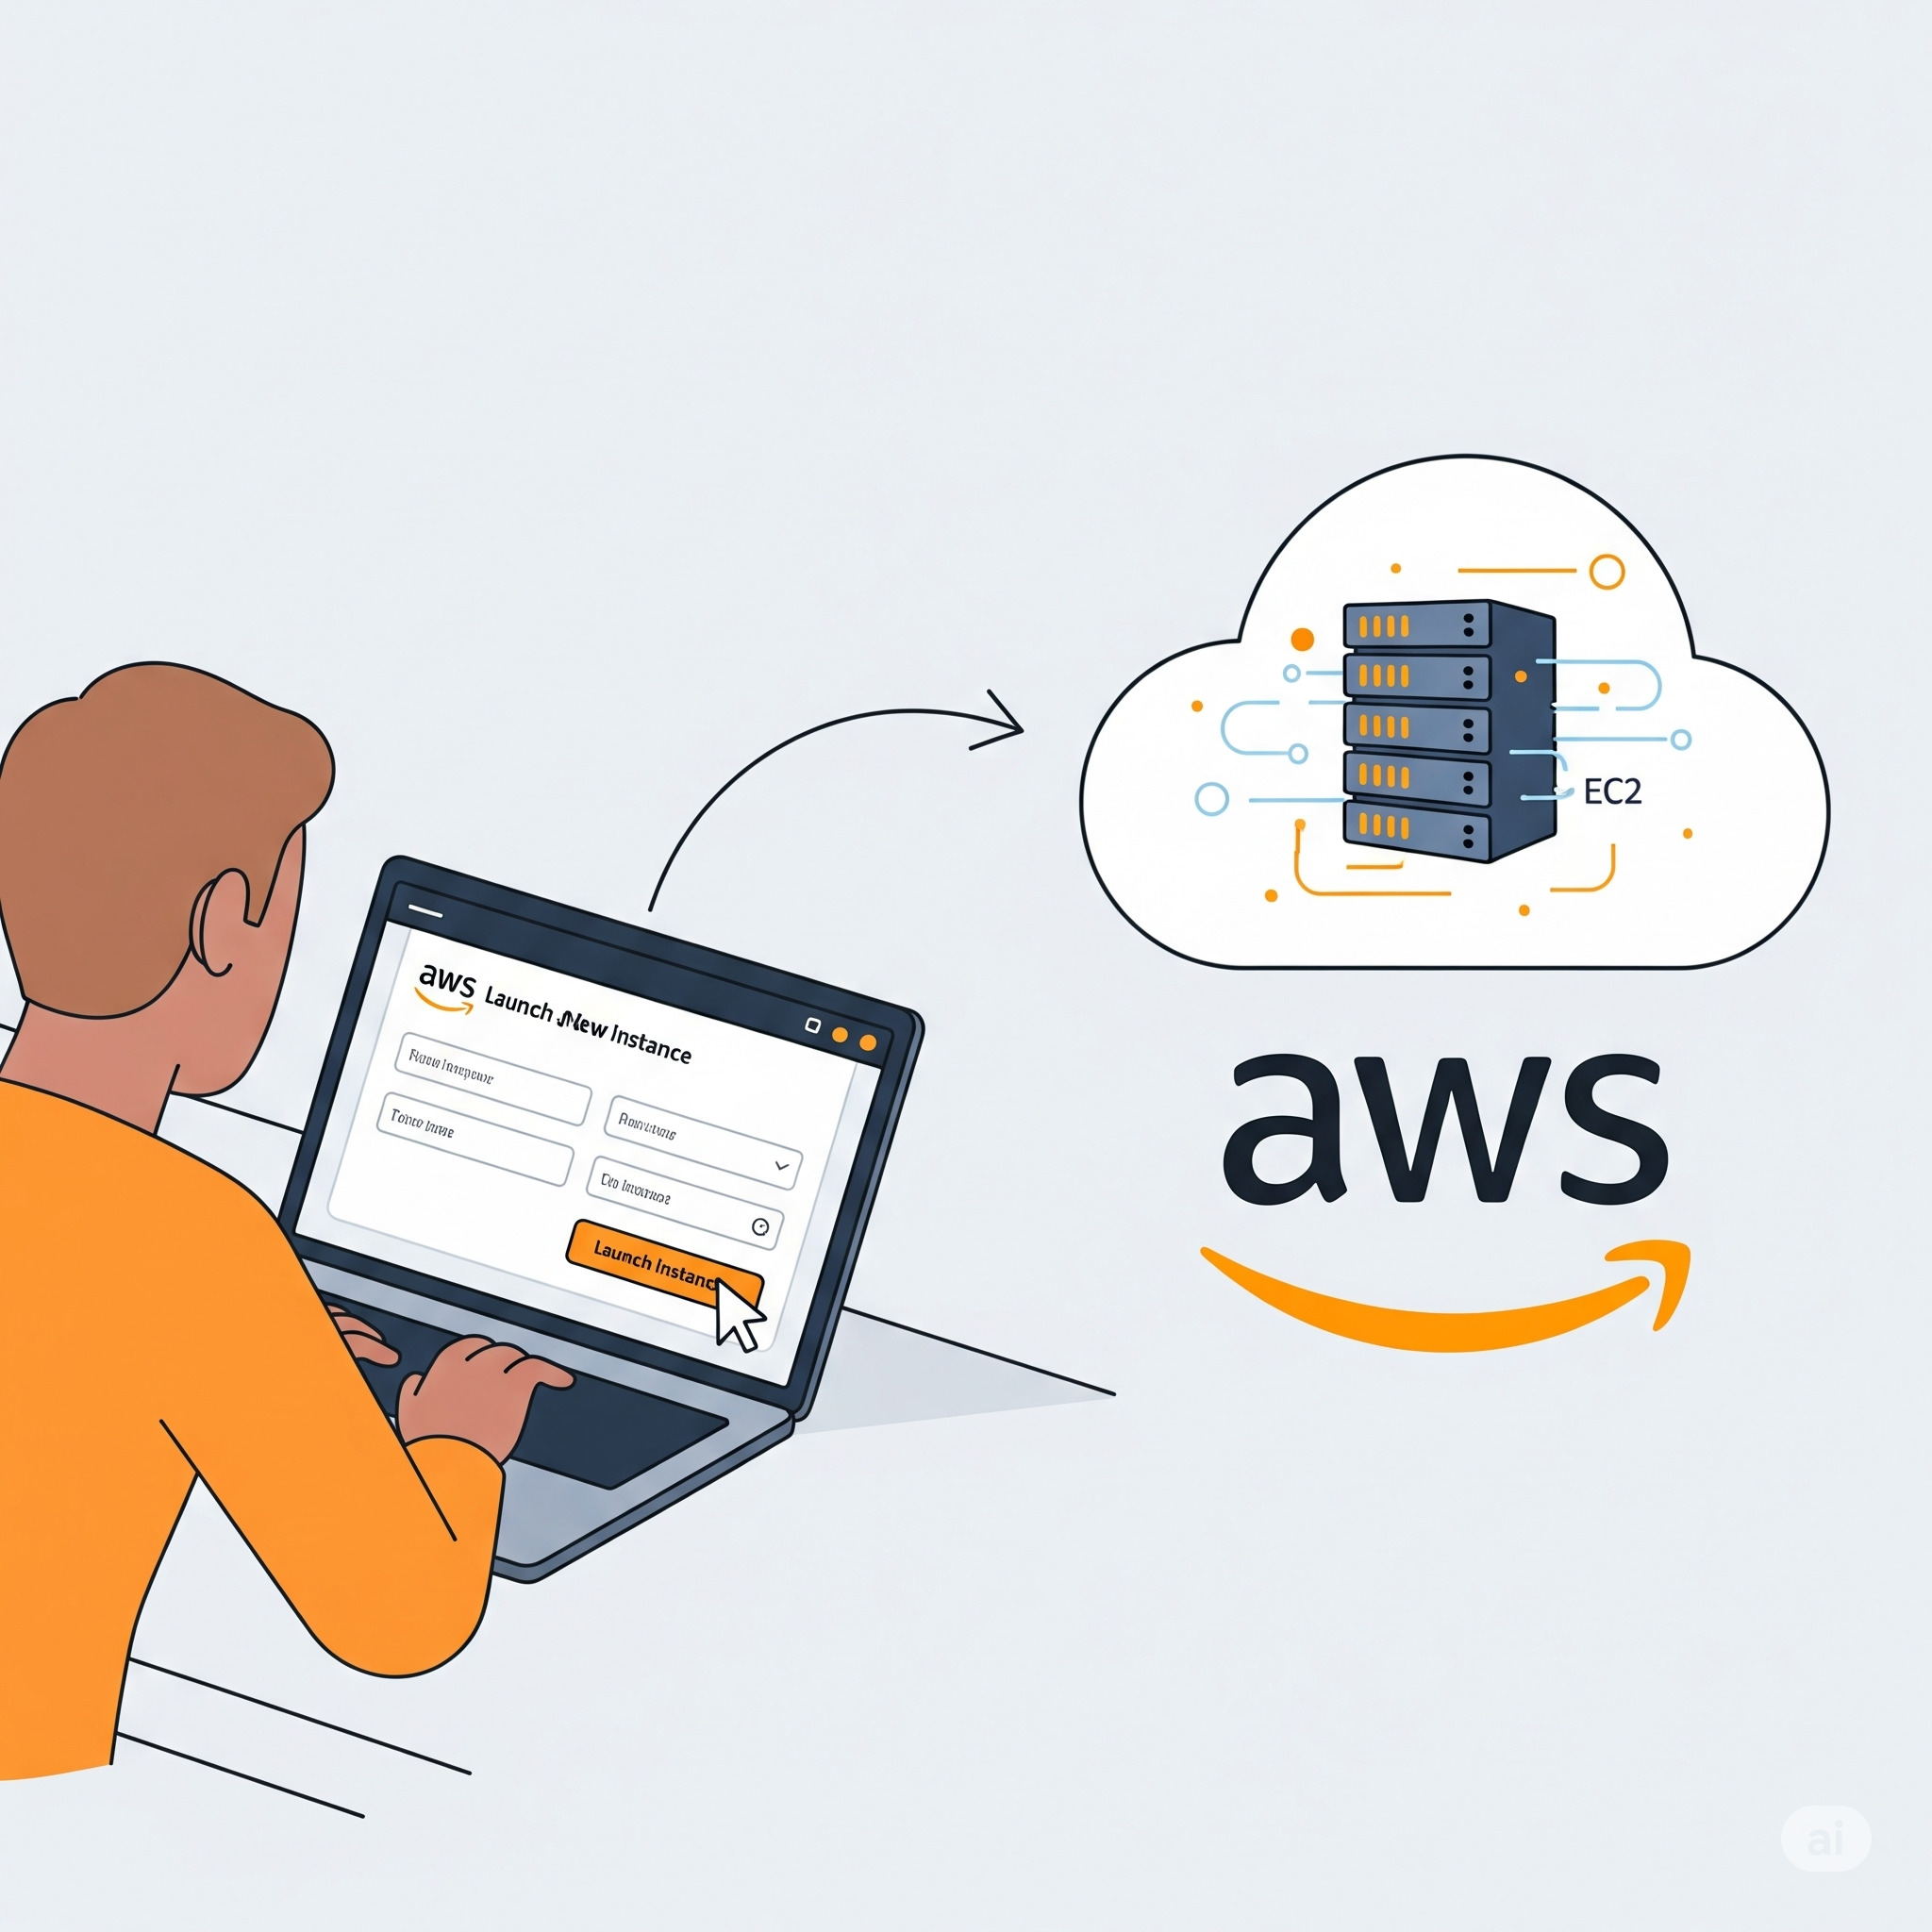
In this blog post I will be showing how to create an EC2 instance using Amazon AWS to launch the containers I previously created. In this case, I will just launch the simple web server container and also give a short explanation of what we should do in case the server (or the instance) crashes/reboots.
Initial Setup
Before starting our AWS configuration, we need to select the data center. Whenever we want to do something with AWS (even though there could be exceptions), we need to select where it should be run so then we can configure what should be run. We always need to be aware where we are at; otherwise things might be empty. For example, the AWS dashboard not showing a server running because it was launched in another region.
We can select the desired region by clicking on the upper-right tab that we see in the below image:
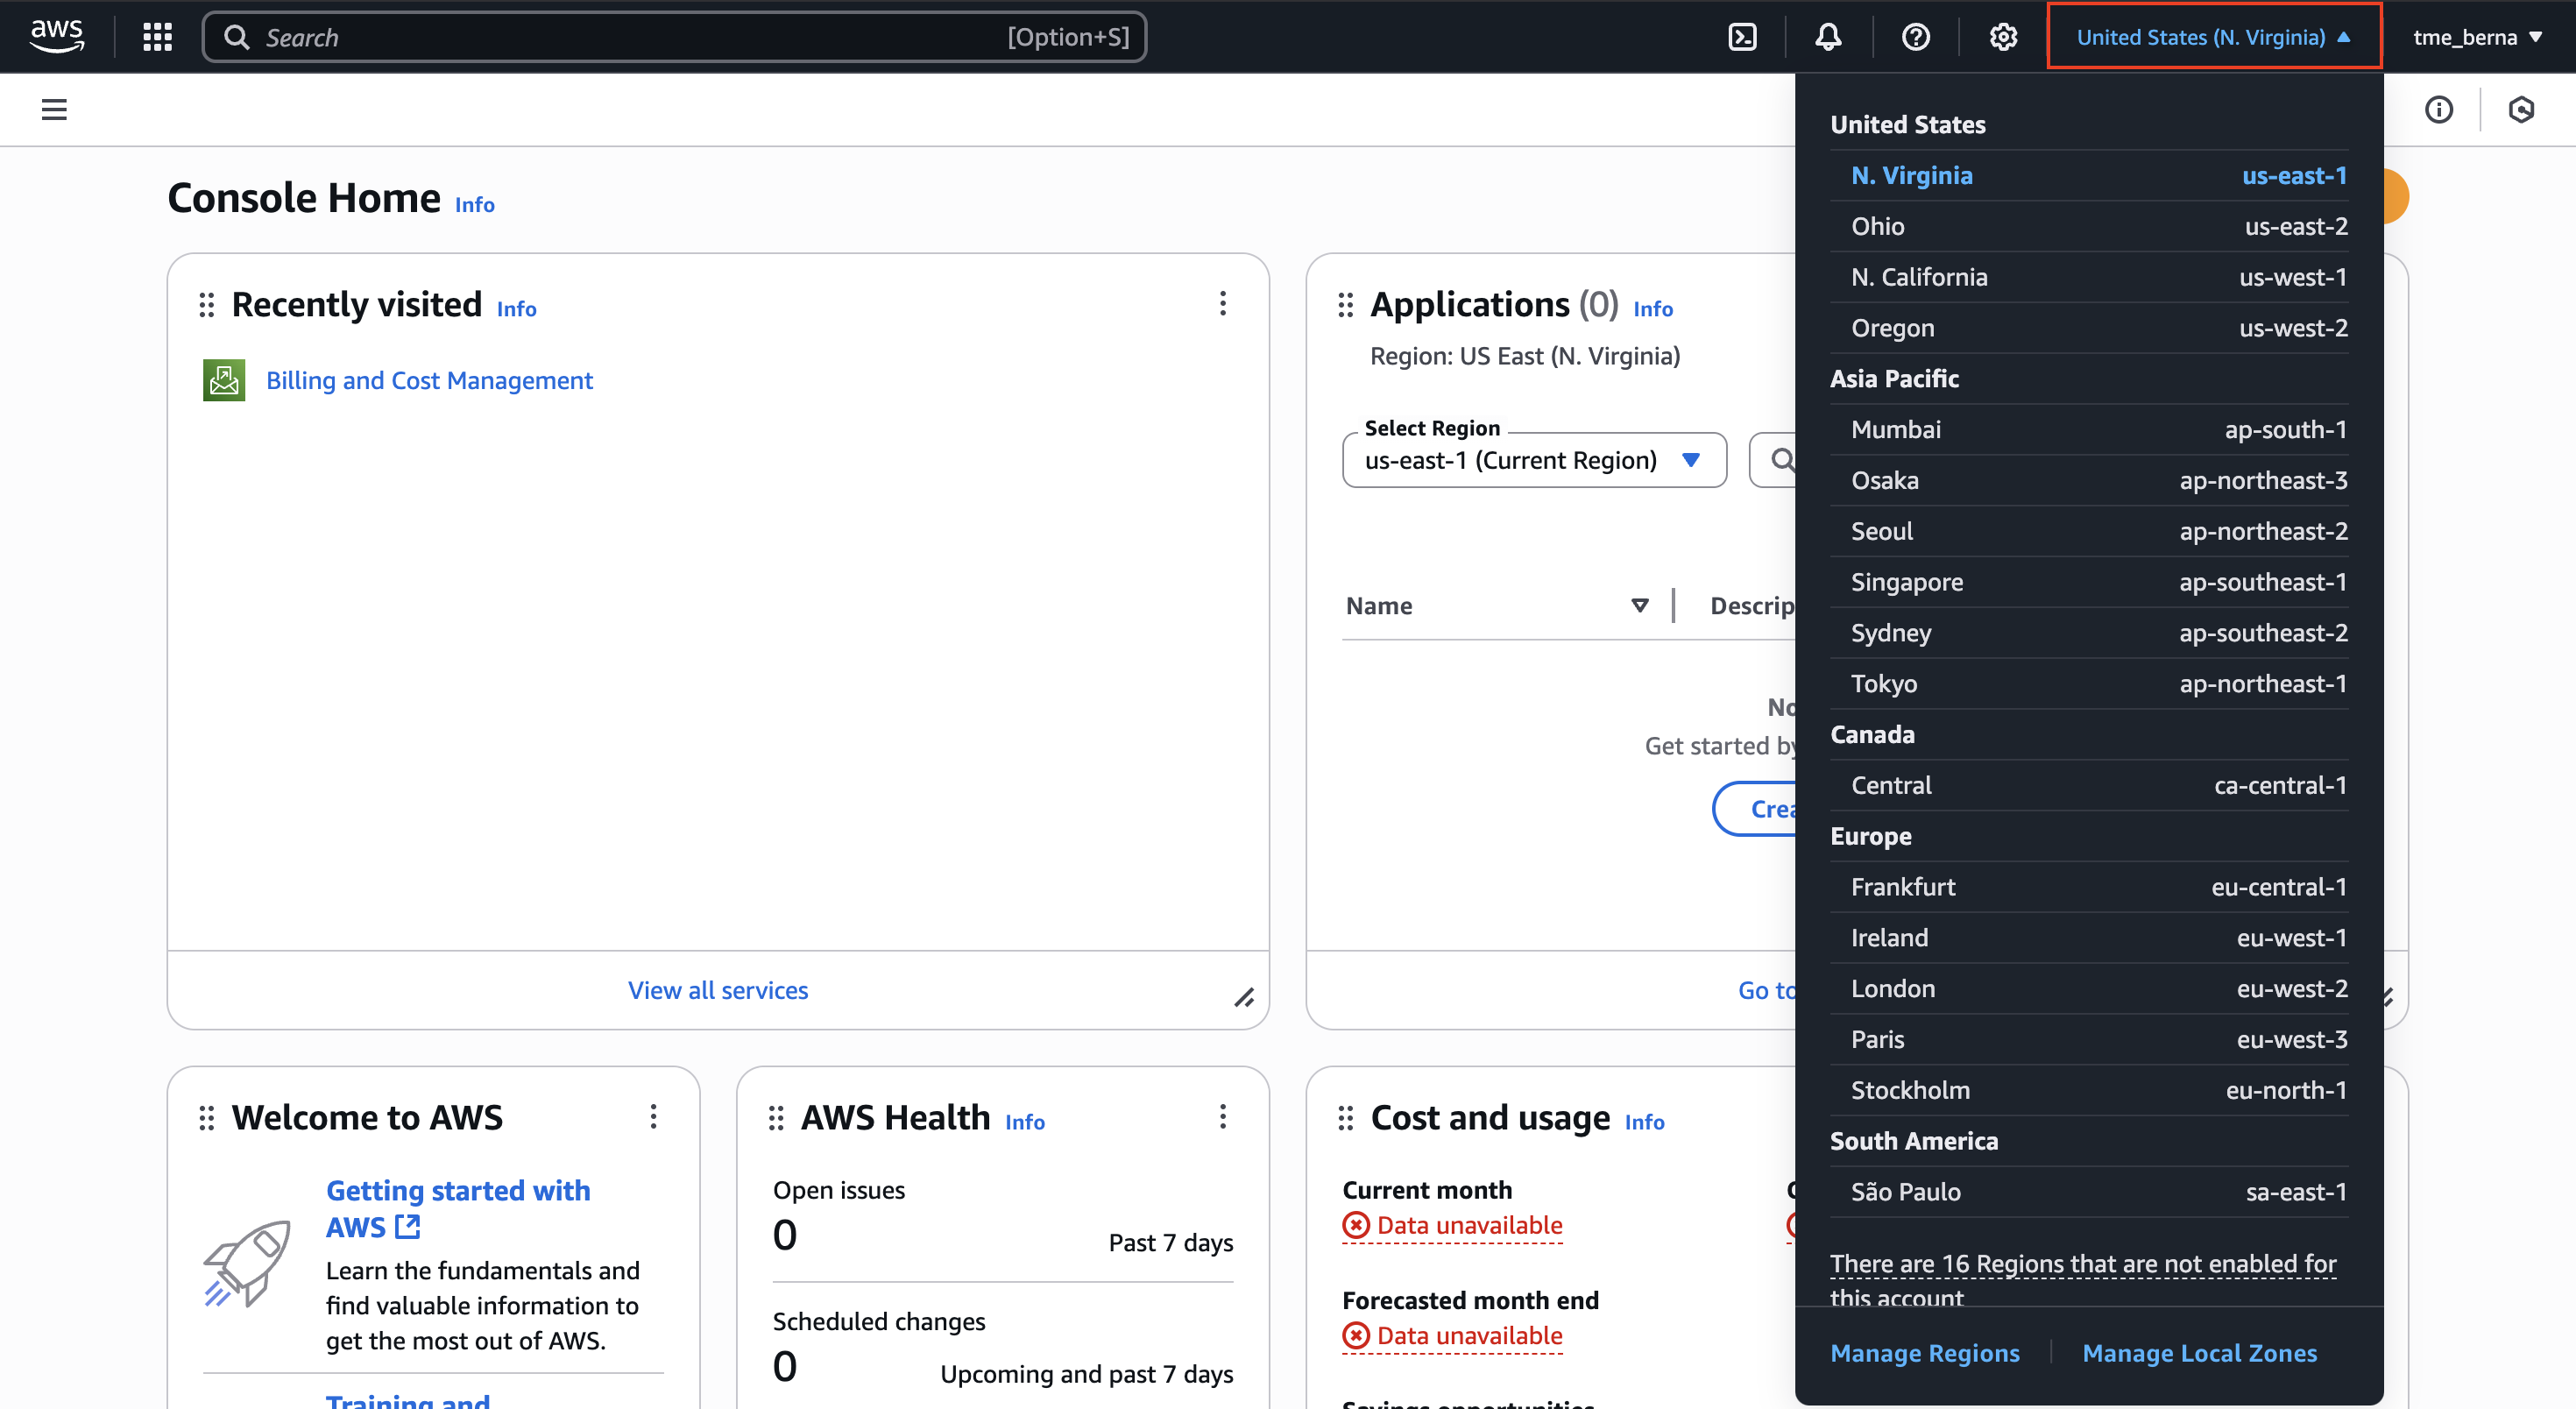
Note: The best region is usually the one that can be as close as possible to our customers. That’s something to bear in mind in our process of region selection! Also be aware that the costs depends on the regions.
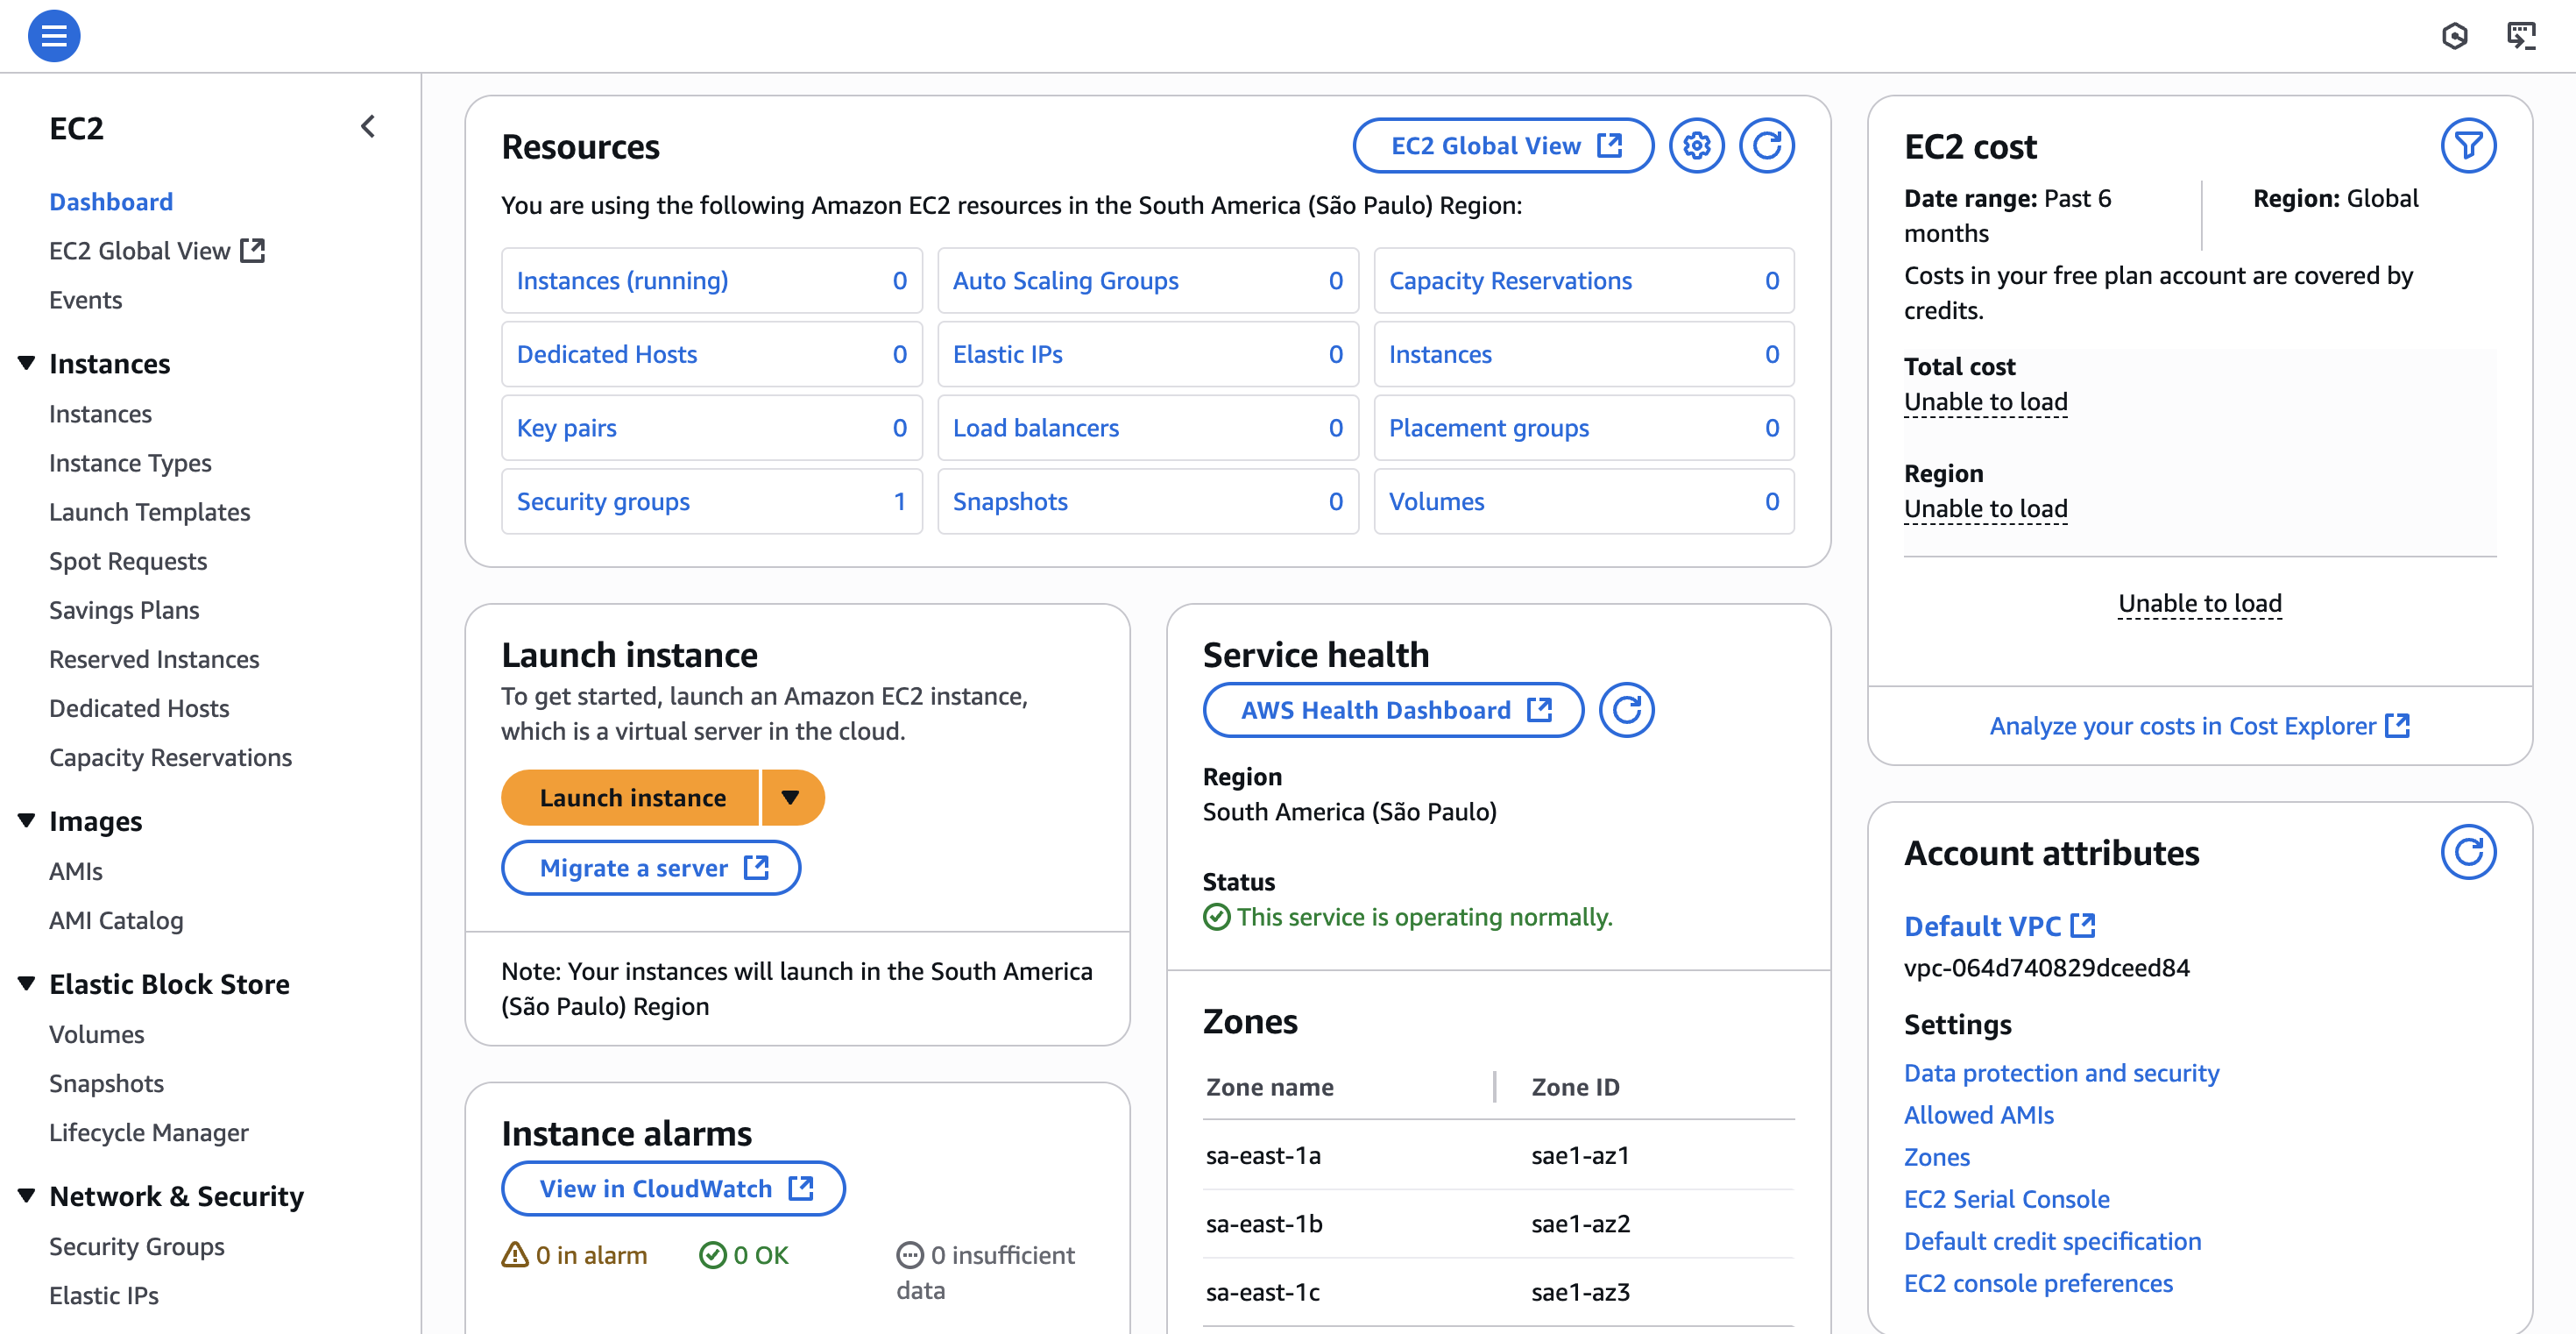
Once we finish selecting the corresponding region, we can also select the corresponding service that we want to access. We can choose this by clicking on the 6 dots of the menu:
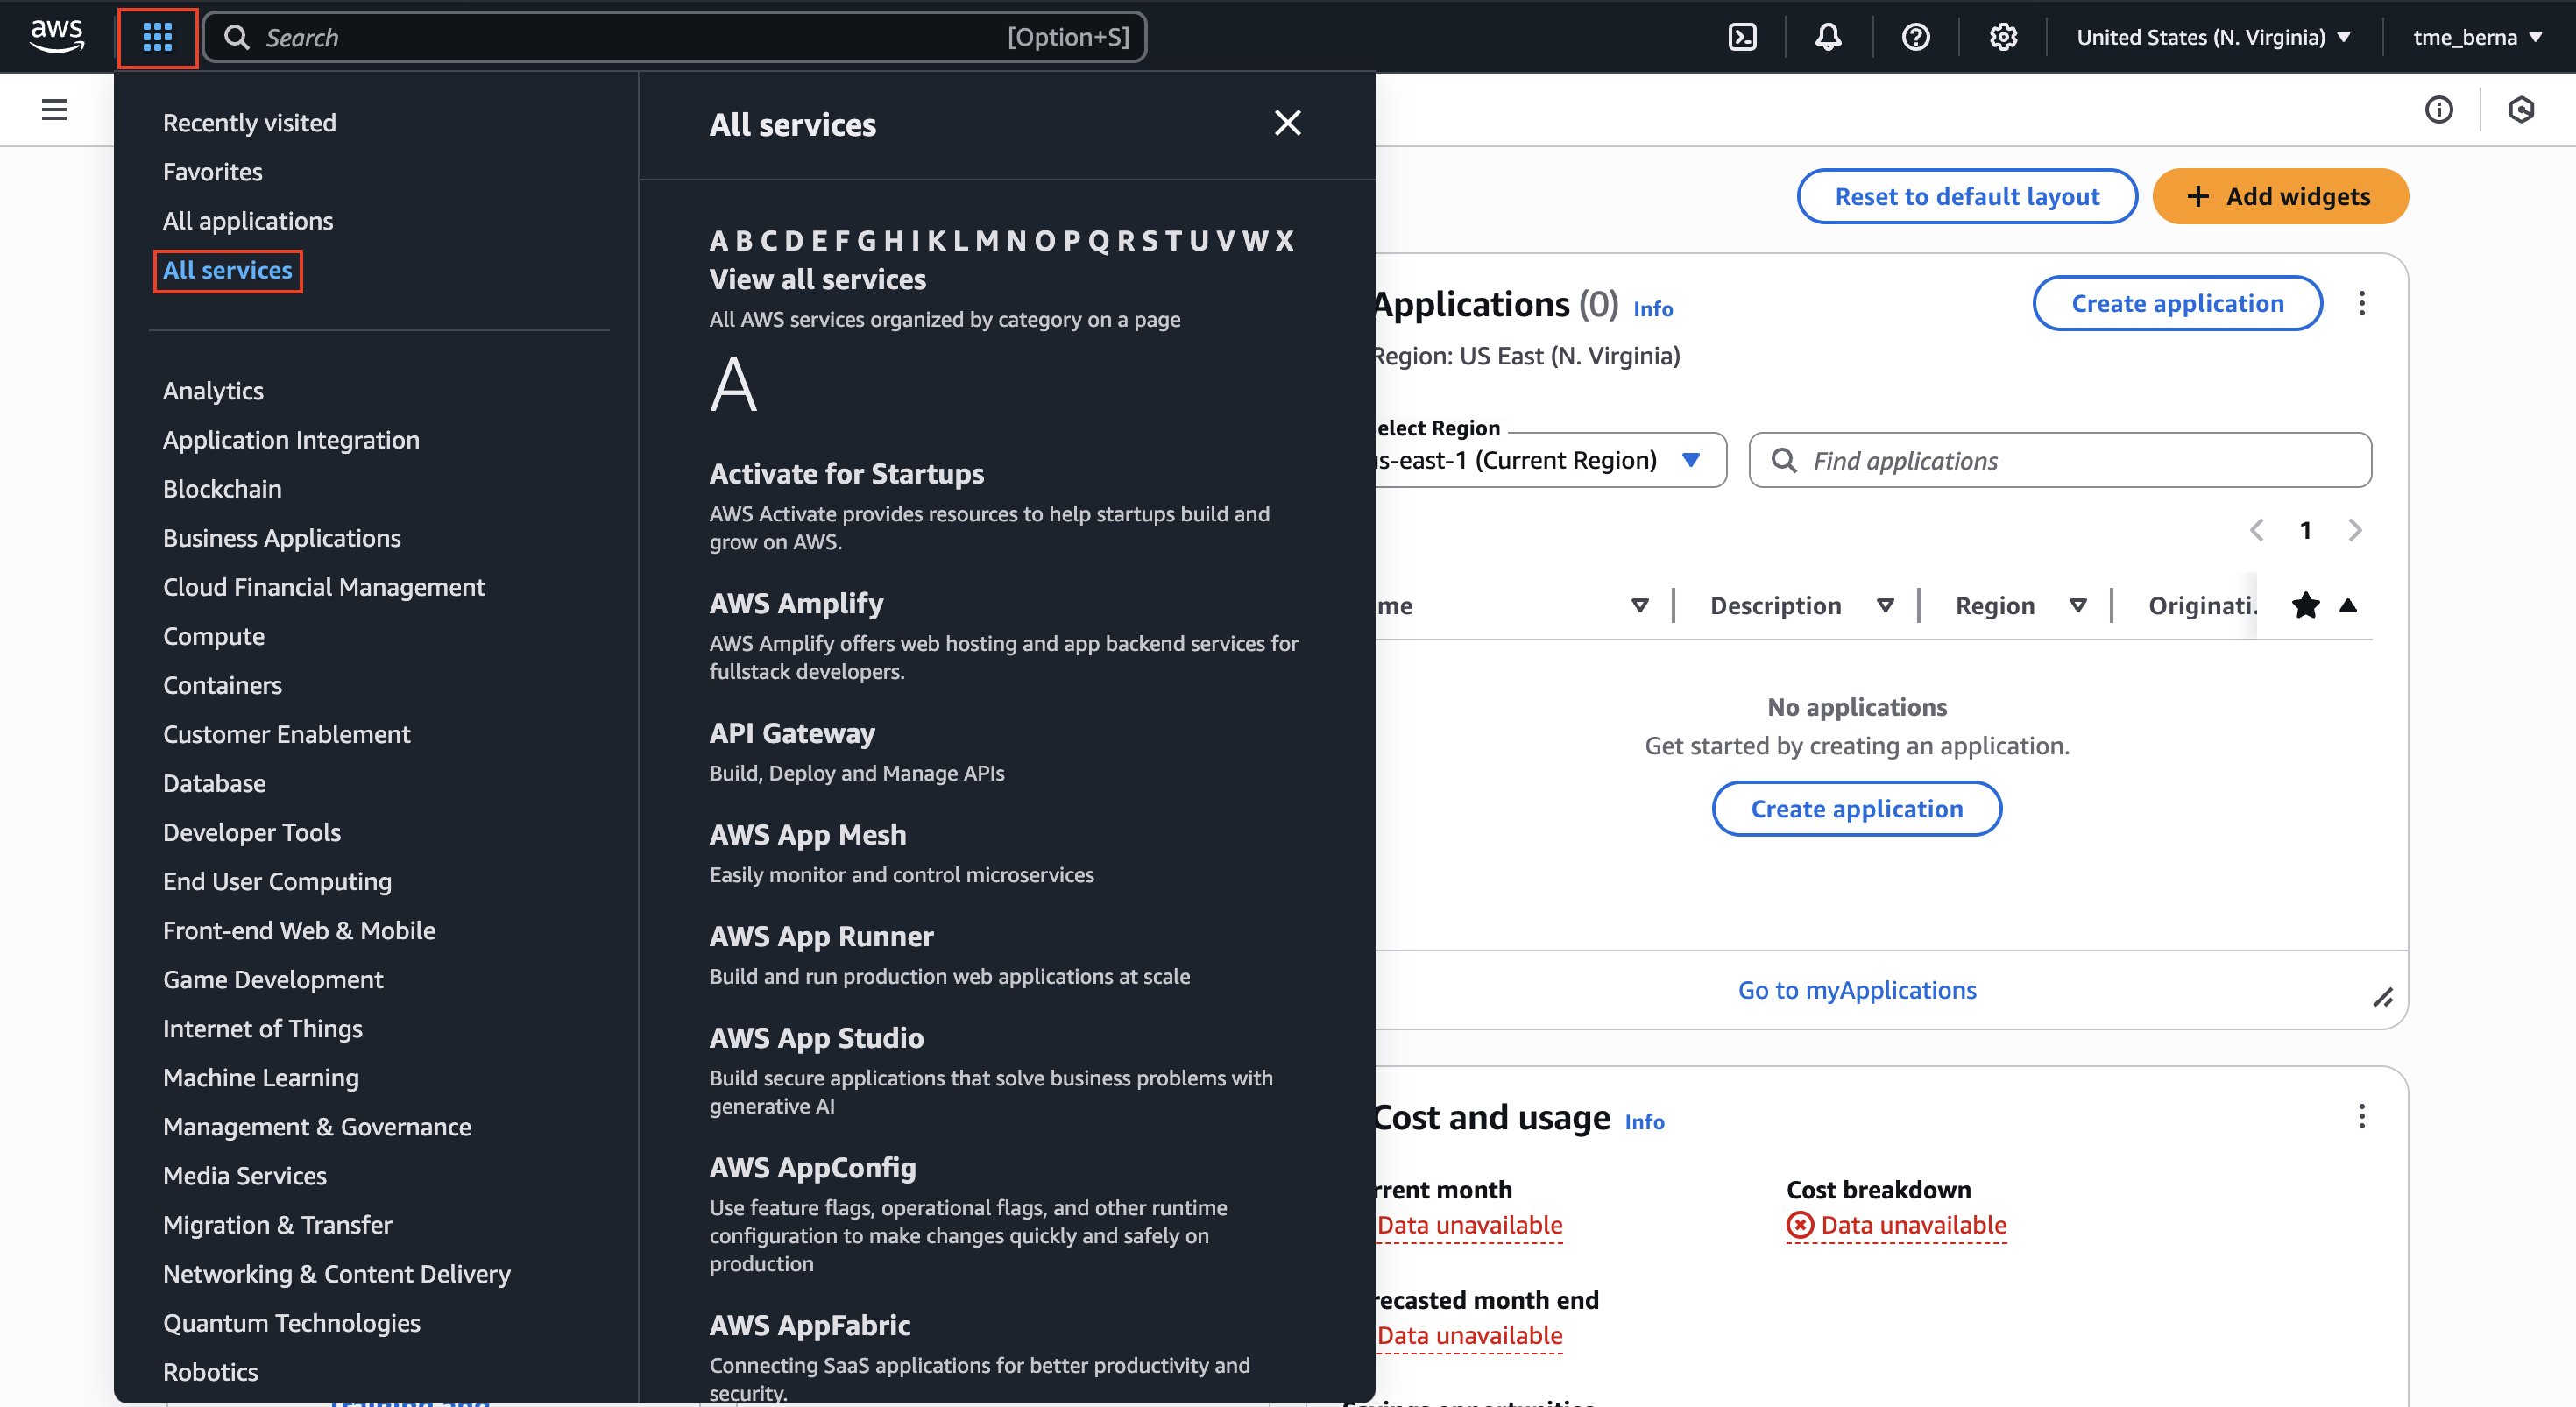
In our case, we will be using the EC2 service. However, what is EC2 exactly?
EC2 Instance Explanation
Taking a look at the official documentation, we see that “[Amazon EC2] is a web service that provides secure, resizable compute capacity in the cloud.” These instances essentially act as Virtual Machines (VMs), which just virtualises the real hardware (owned by Amazon) giving a customer the possibility to rent those VMs for their own projects or ideas. Thanks to this, we have at our disposal a computer that we can choose the OS we want it to have and it will maintain all its functionality.
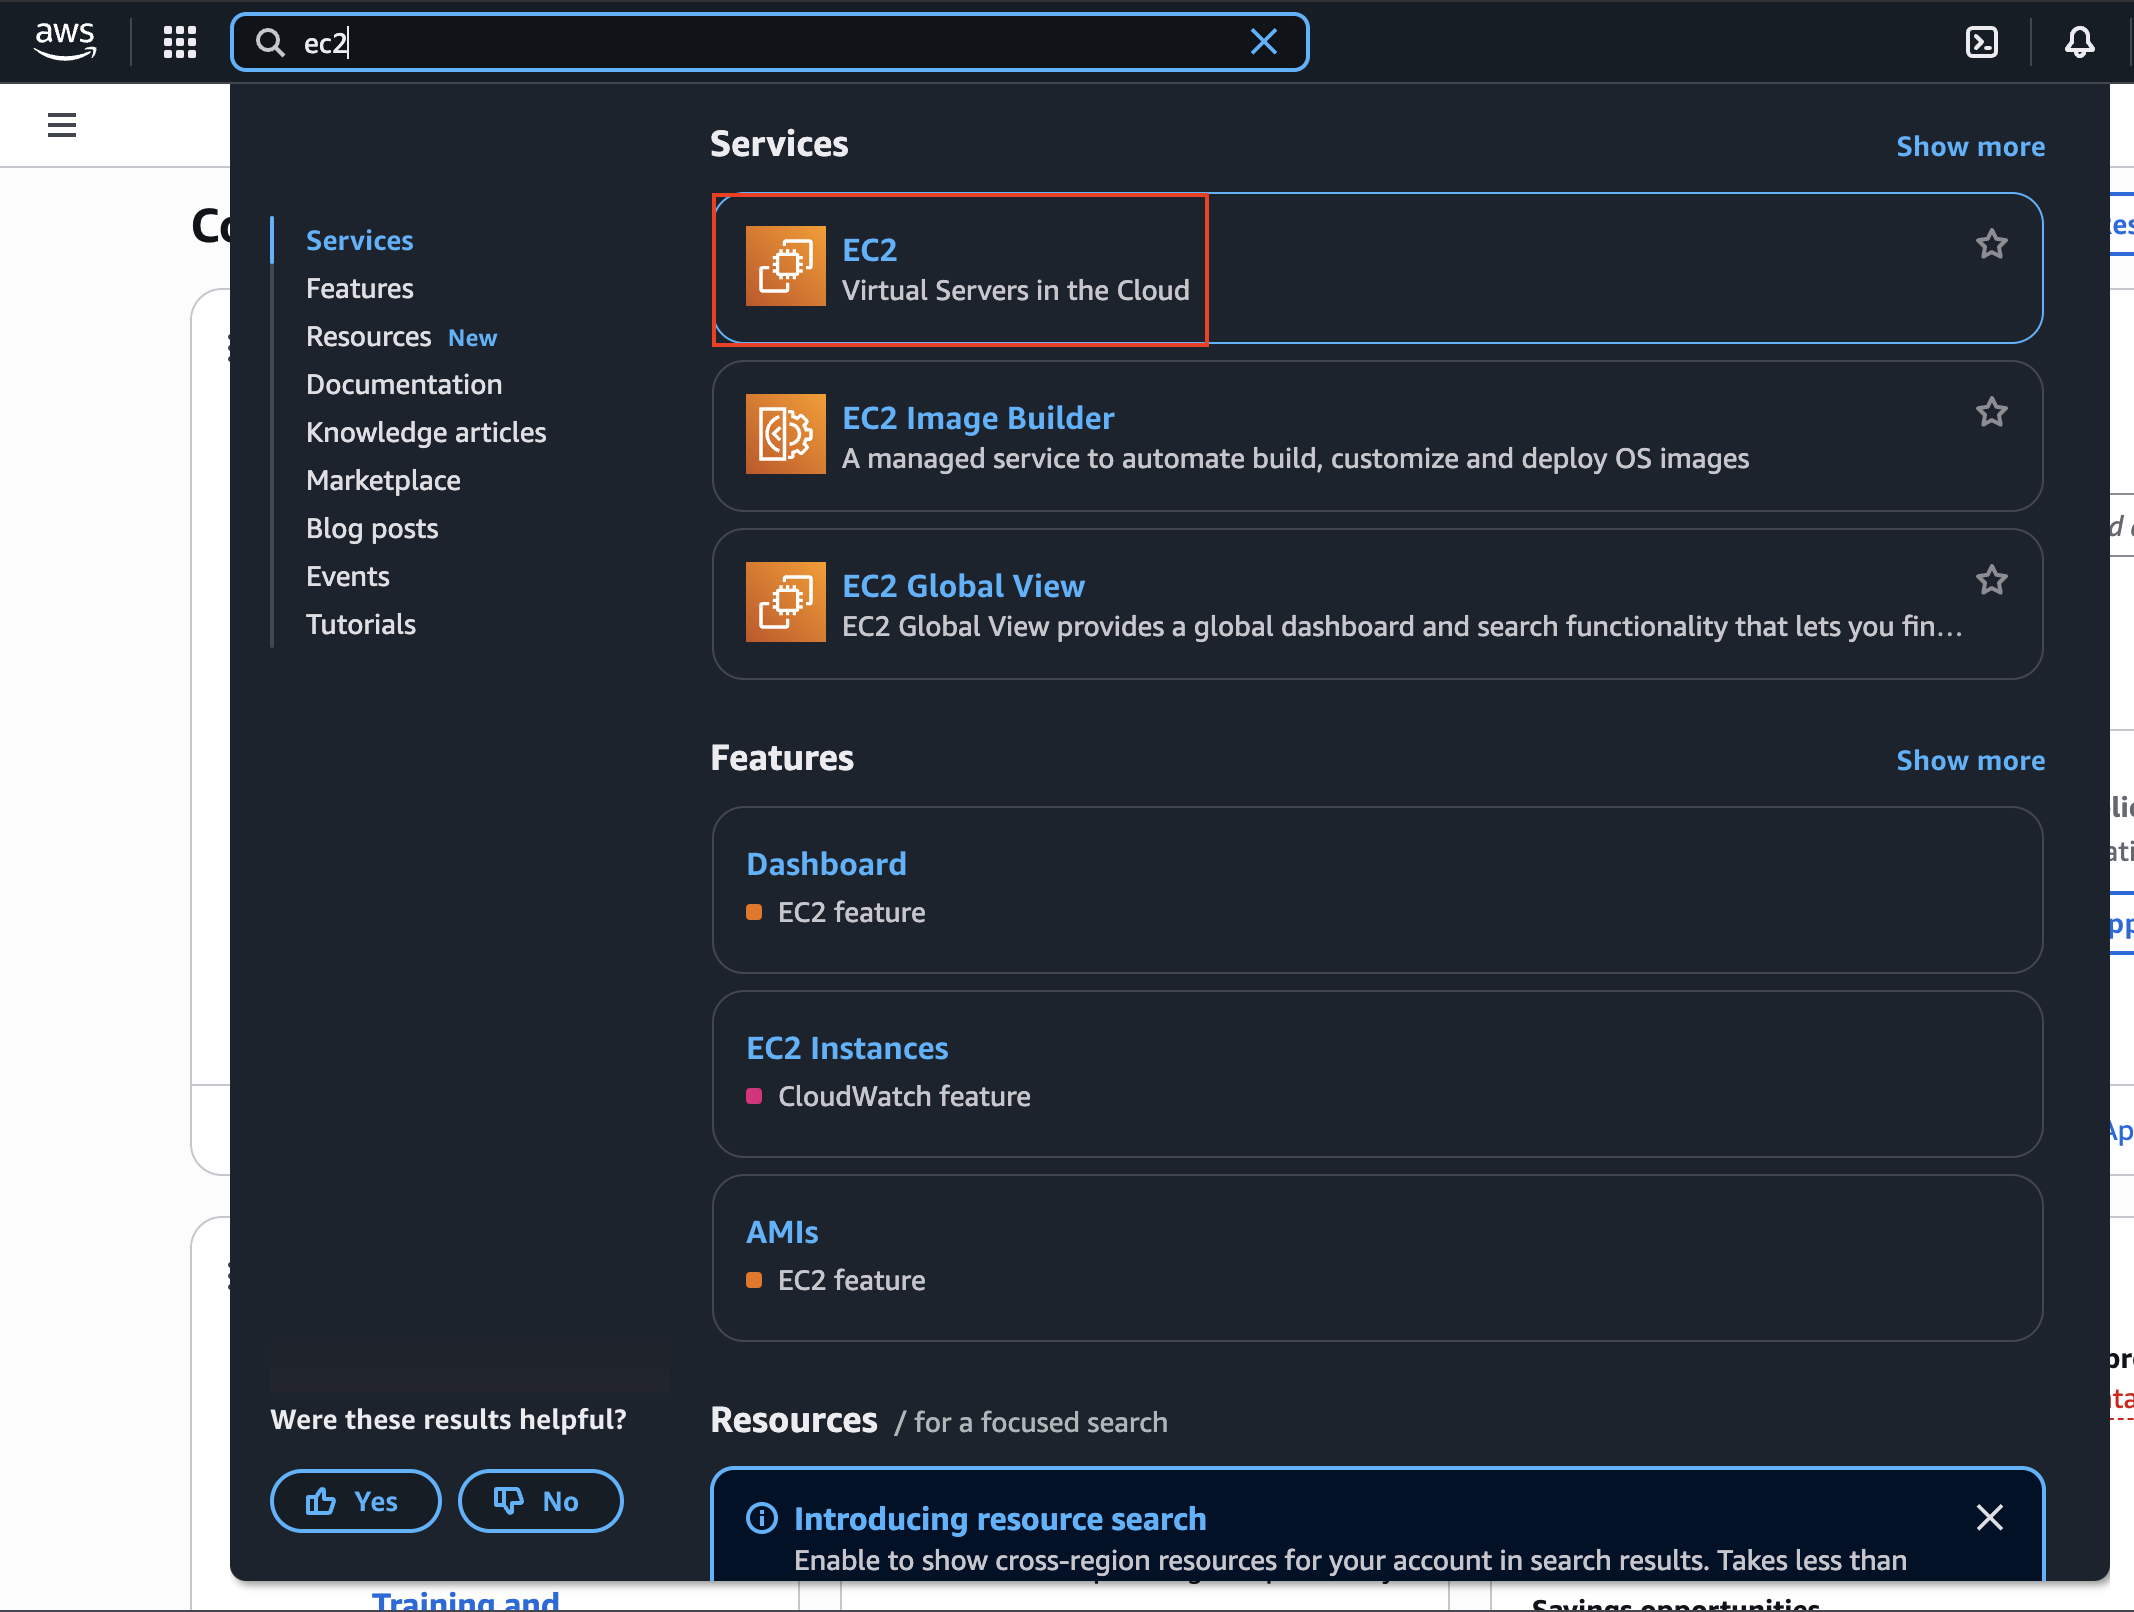
Renting a Server and Launching an EC2 Instance
We will start by navigating to the EC2 service and explore the options we have over there:
In here, we will go to Instances -> Launch Instances. We will be presented with the following:

Because in our project we have been using Ubuntu system so far, we will be selecting that one as our OS image. Once we select the Ubuntu image, we will see that we will have a couple of more options we can specify:

Down the Amazon Machine Image (AMI) title, we have the option to choose which version of Ubuntu we would like to run in our instance. We can also select the architecture of it. In my case, because I am using ARM64 architecture (I am on a Mac with M2 chip), I will change this to run on Arm. The CPU architecture absolutely must match because our Docker image contains compiled code and binaries for the arm64 architecture.
The architecture I use also requires a specific instance type so we don’t get any kind of error. We have to choose an instance type that uses an AWS Graviton processor (which is ARM-based). These are easily identified by the “g” in their name.
We don’t have to match the Ubuntu version of the Instance with any of our containers (in case we use it there) because, remember, a Docker container shares the kernel of the host OS, but it brings its own set of files, libraries, and binaries.
My final configuration on this step will look like this:

Scrolling down a bit, we will be presented with the following configuration fields:

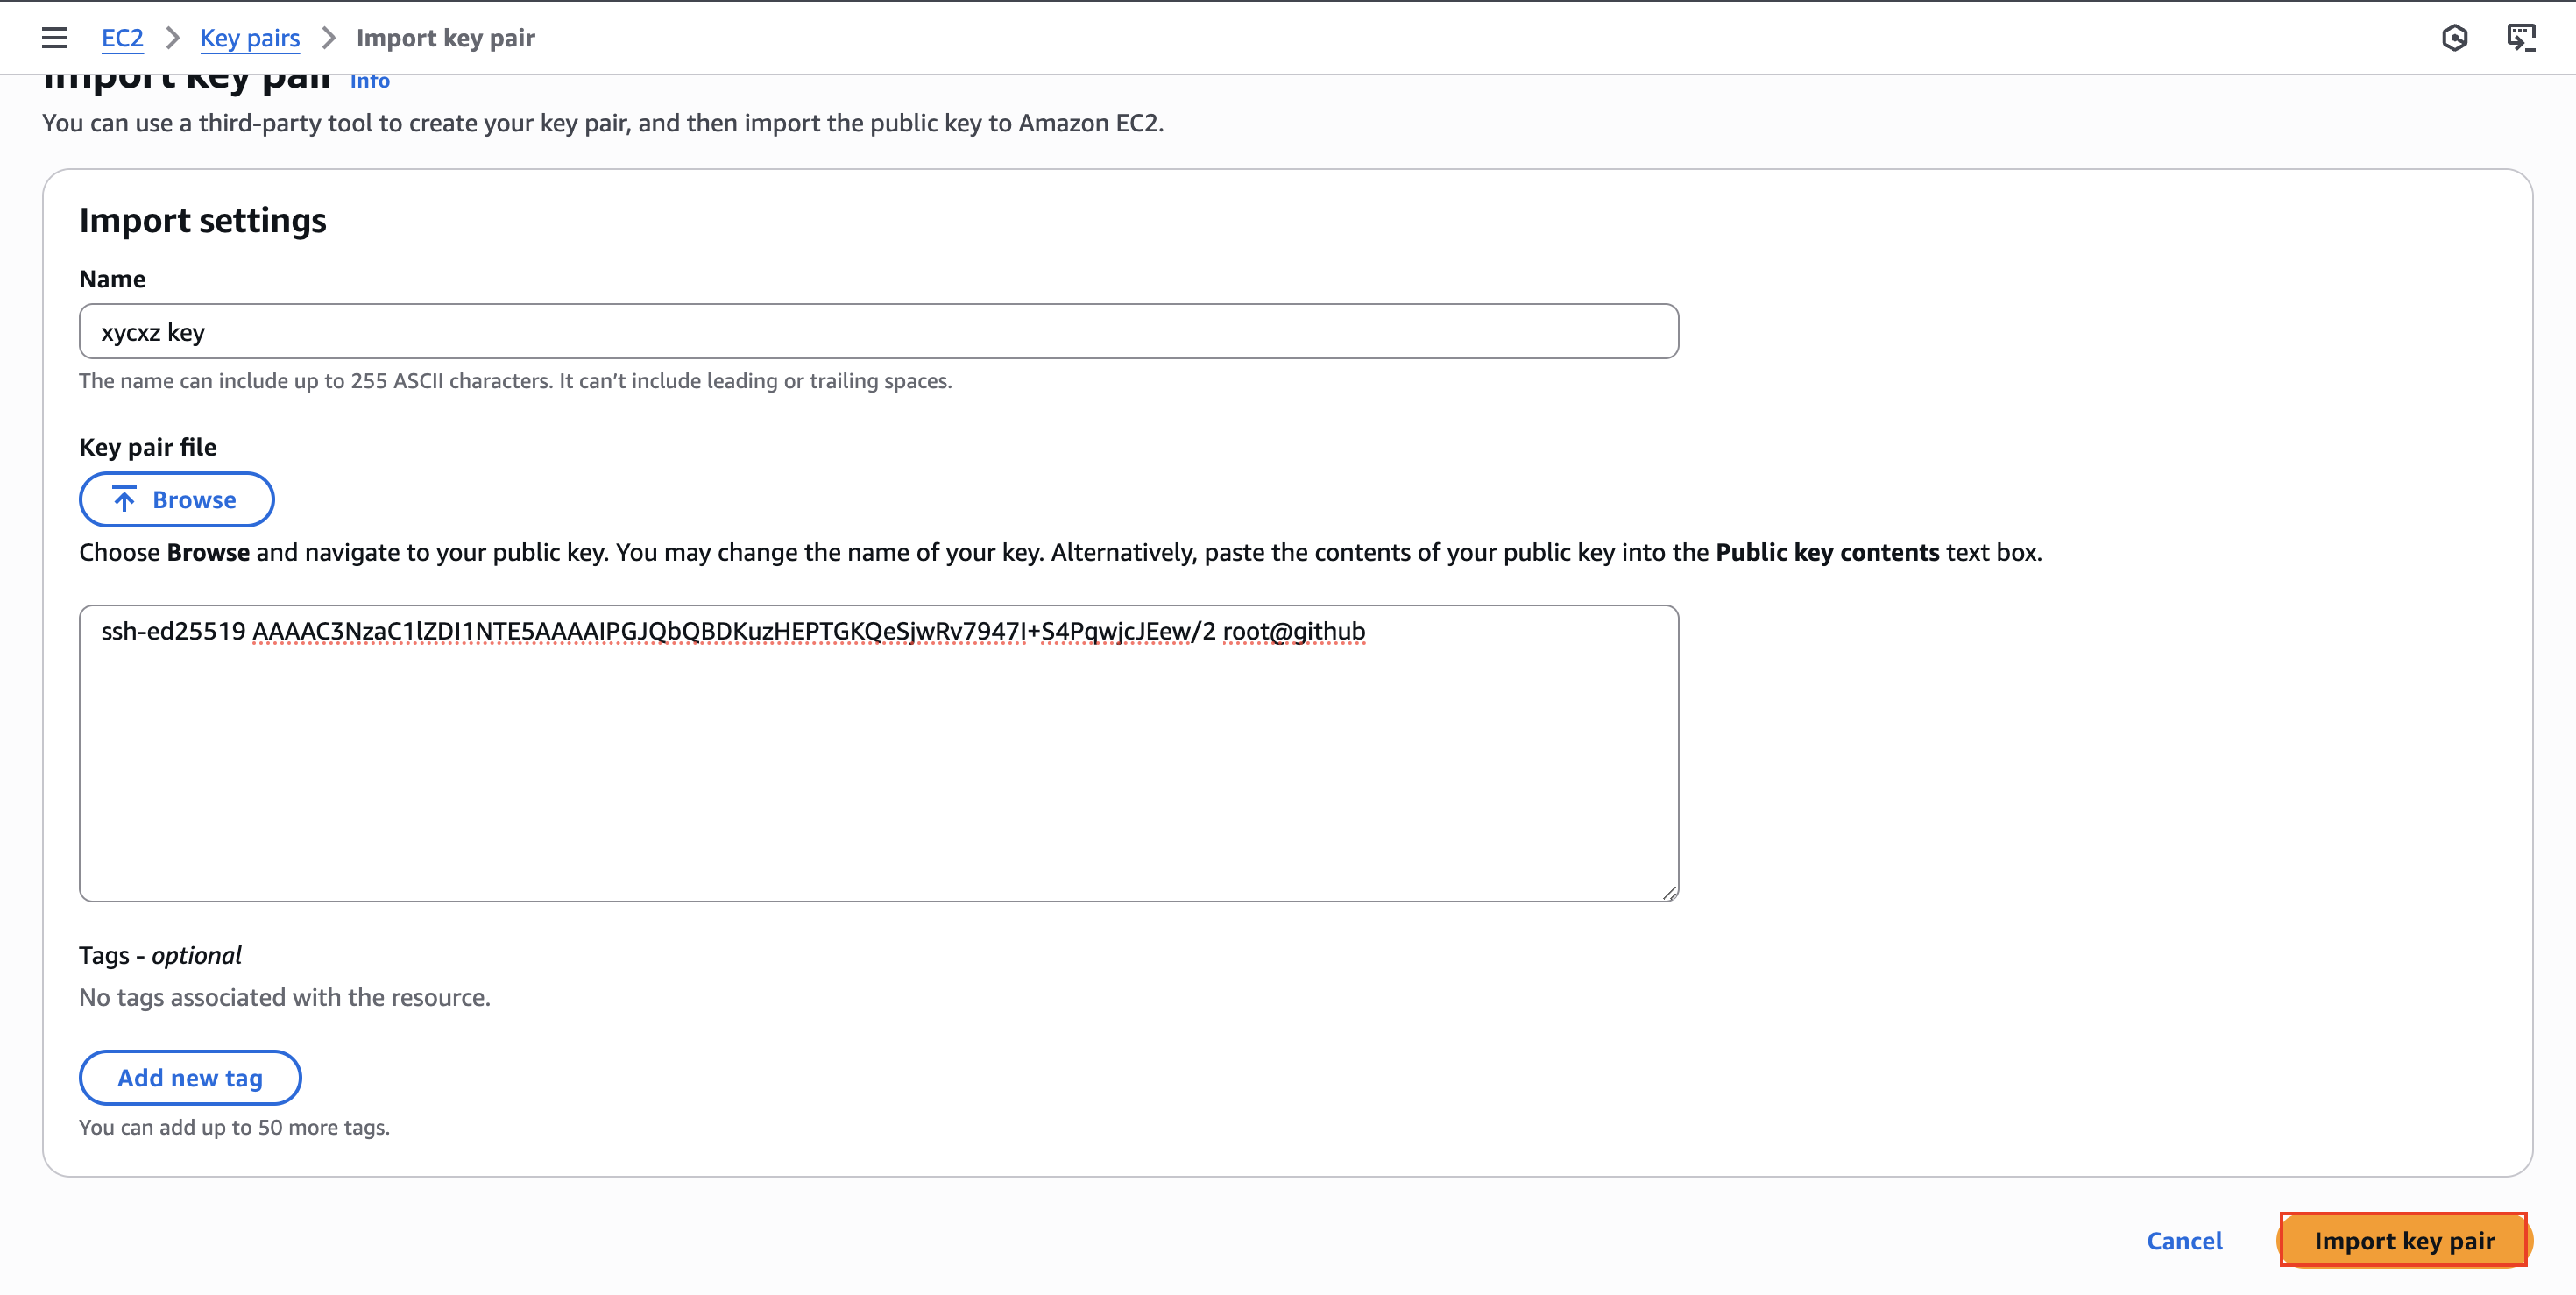
What is this Key pair thing? It is important to know that AWS uses SSH as a secure tunnel for communication and management of a EC2 instance. We can’t use a password for this since AWS enforces the use of a key pair, which consists of a private key (which should never be shared) and a public key. In simple terms, the private key is the one we used to open the lock (public key) which give us access to what we want. This also means that the public key can be shared and the server will have knowledge about it, but won’t let anyone through unless they have the correct key.
AWS offer the option to create a key pair, but we will omit this and create our own running the following command in our terminal:
1
ssh-keygen -t ed25519 // This will be stored in ~/.ssh by default
Note: We can even give a passphrase to our key to enhance security. This is something we should consider when creating ANY kind of key pair.
Now, to be able to use the key pair we just created in our system with AWS, we need to manually import our key pair. For that we can use the search feature in our AWS console and navigate to Key pairs (open this in a new tab so we do not lose progress). Once we are in there, we can go Actions -> Import key pair:

We will be presented with two options to pass in our key. I will just copy and paste it into the text field and then click on Import key pair:
If we go back to our Launch instance tab, we will be able to select the key we just imported. Inside our Networking settings, we will check the three boxes we see on the image below. If we don’t check the ones related to web traffic, it can be tedious to configure afterwards.
Note: I want to make a quick clarification here: Never open ports that you actually don’t need or won’t use (principle of least privilege).

Note: By checking these boxes, AWS is automatically creating a Security Group for our instance. A Security Group acts as a virtual, stateful firewall that controls inbound and outbound traffic. For now, we’re using the default, but in future posts, we’ll explore how to create and manage custom Security Groups for finer-grained control.
Finally, we will configure the storage to have the capacity desired (I will use 30GB). Now we are ready to click on Launch instance. We can navigate to the Instances panel and hit the Refresh button. We will be able to see our instance there (make sure we are on the right region!):
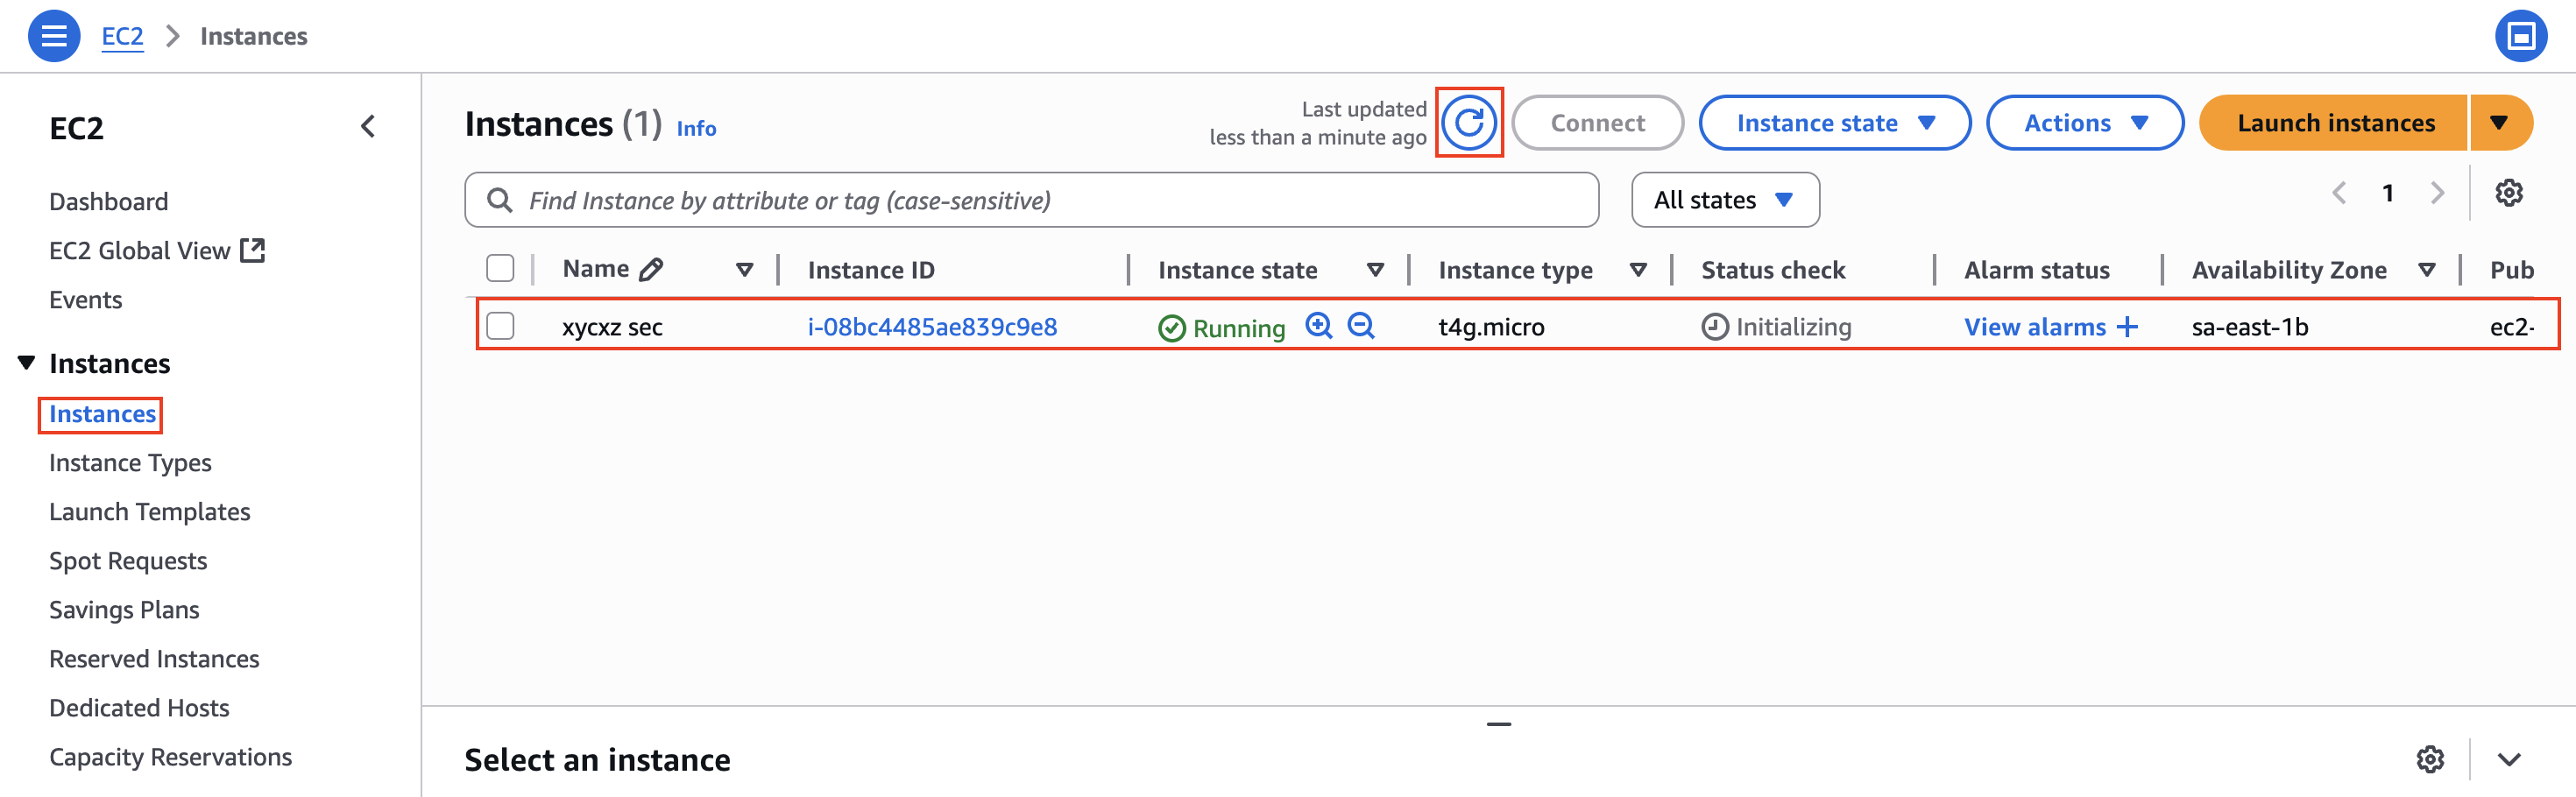
We can click on the Instance ID to see more details about our instance:
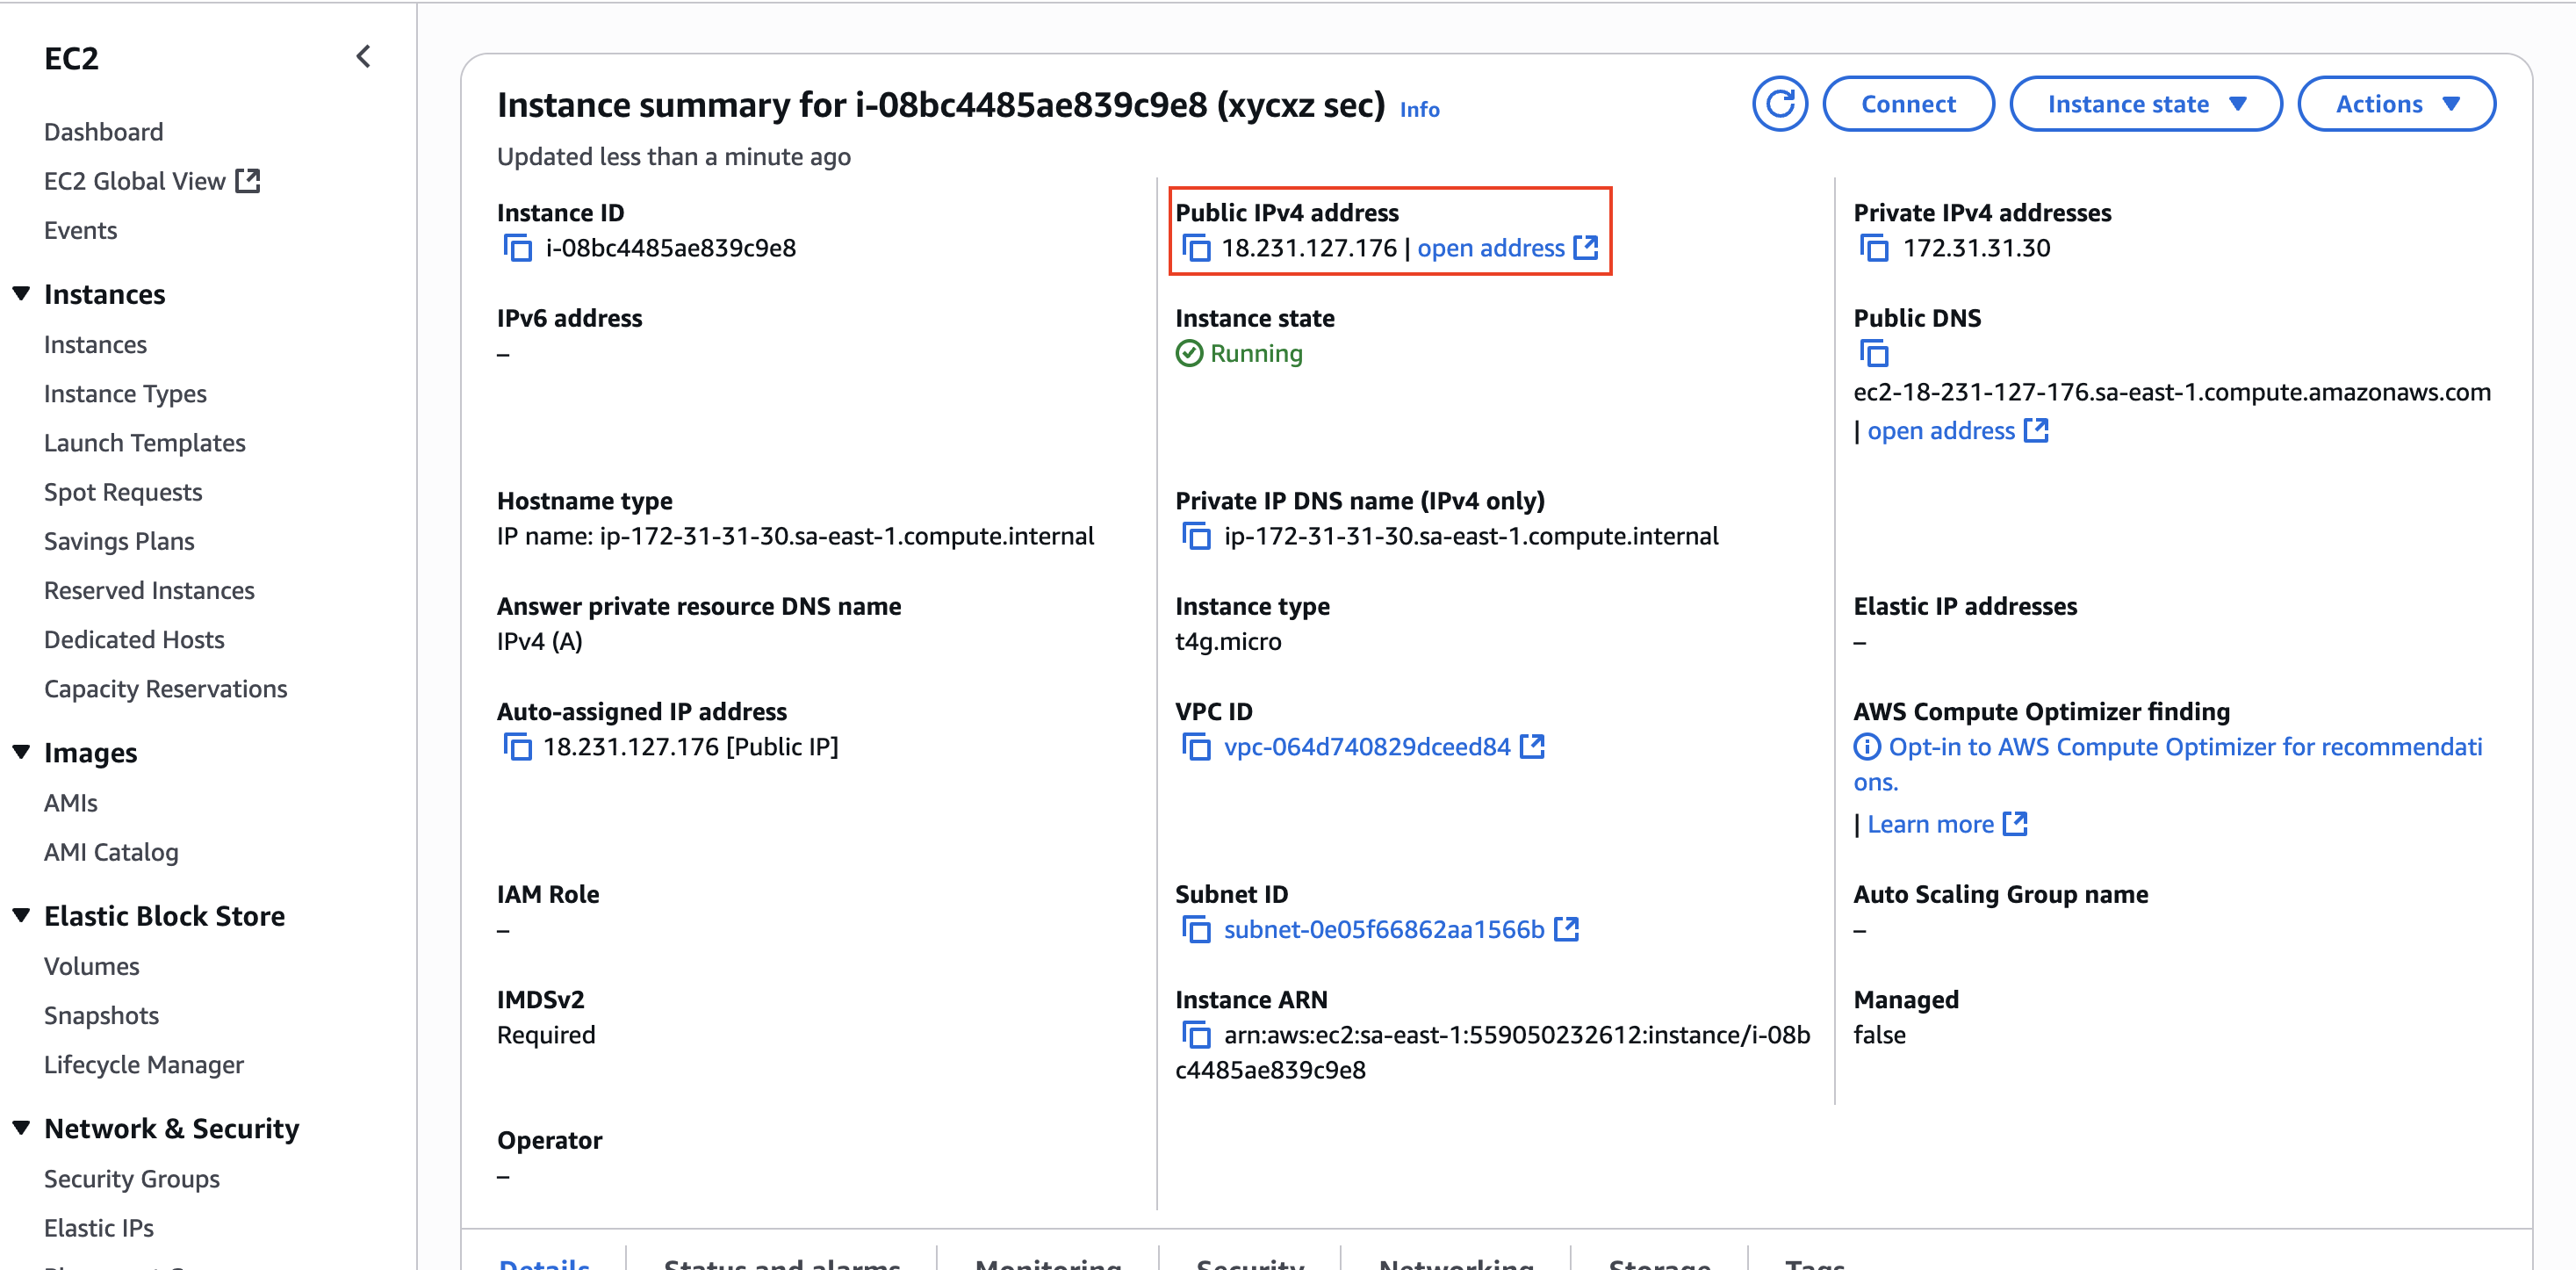
As we can see, we have a public IP address in here. We can use this to connect to our instance over SSH. Let’s connect to it!
1
ssh root@<IP>
For security reasons, we will have to connect with the ubuntu user since the root user in most cloud images, including the official Ubuntu AMI, have direct root login via SSH disabled by default to reduce the attack surface. An attacker would first need to compromise a standard user account before attempting to escalate privileges to root.
We just need to change the user in our command and we will be dropped to a shell inside our instance!
How to Stop an Instance?
I’m writing this section especially as a warning for future configurations. It is a parenthesis on my main explanation and objective I want to achieve, but I consider it important to include. We should know that the public IP given to us is owned by Amazon, which means we are renting it. However, when we stop our instance and relaunch it again, this IP will change and it will require us to change it in any other place we have used it.
Let’s see this on the console:
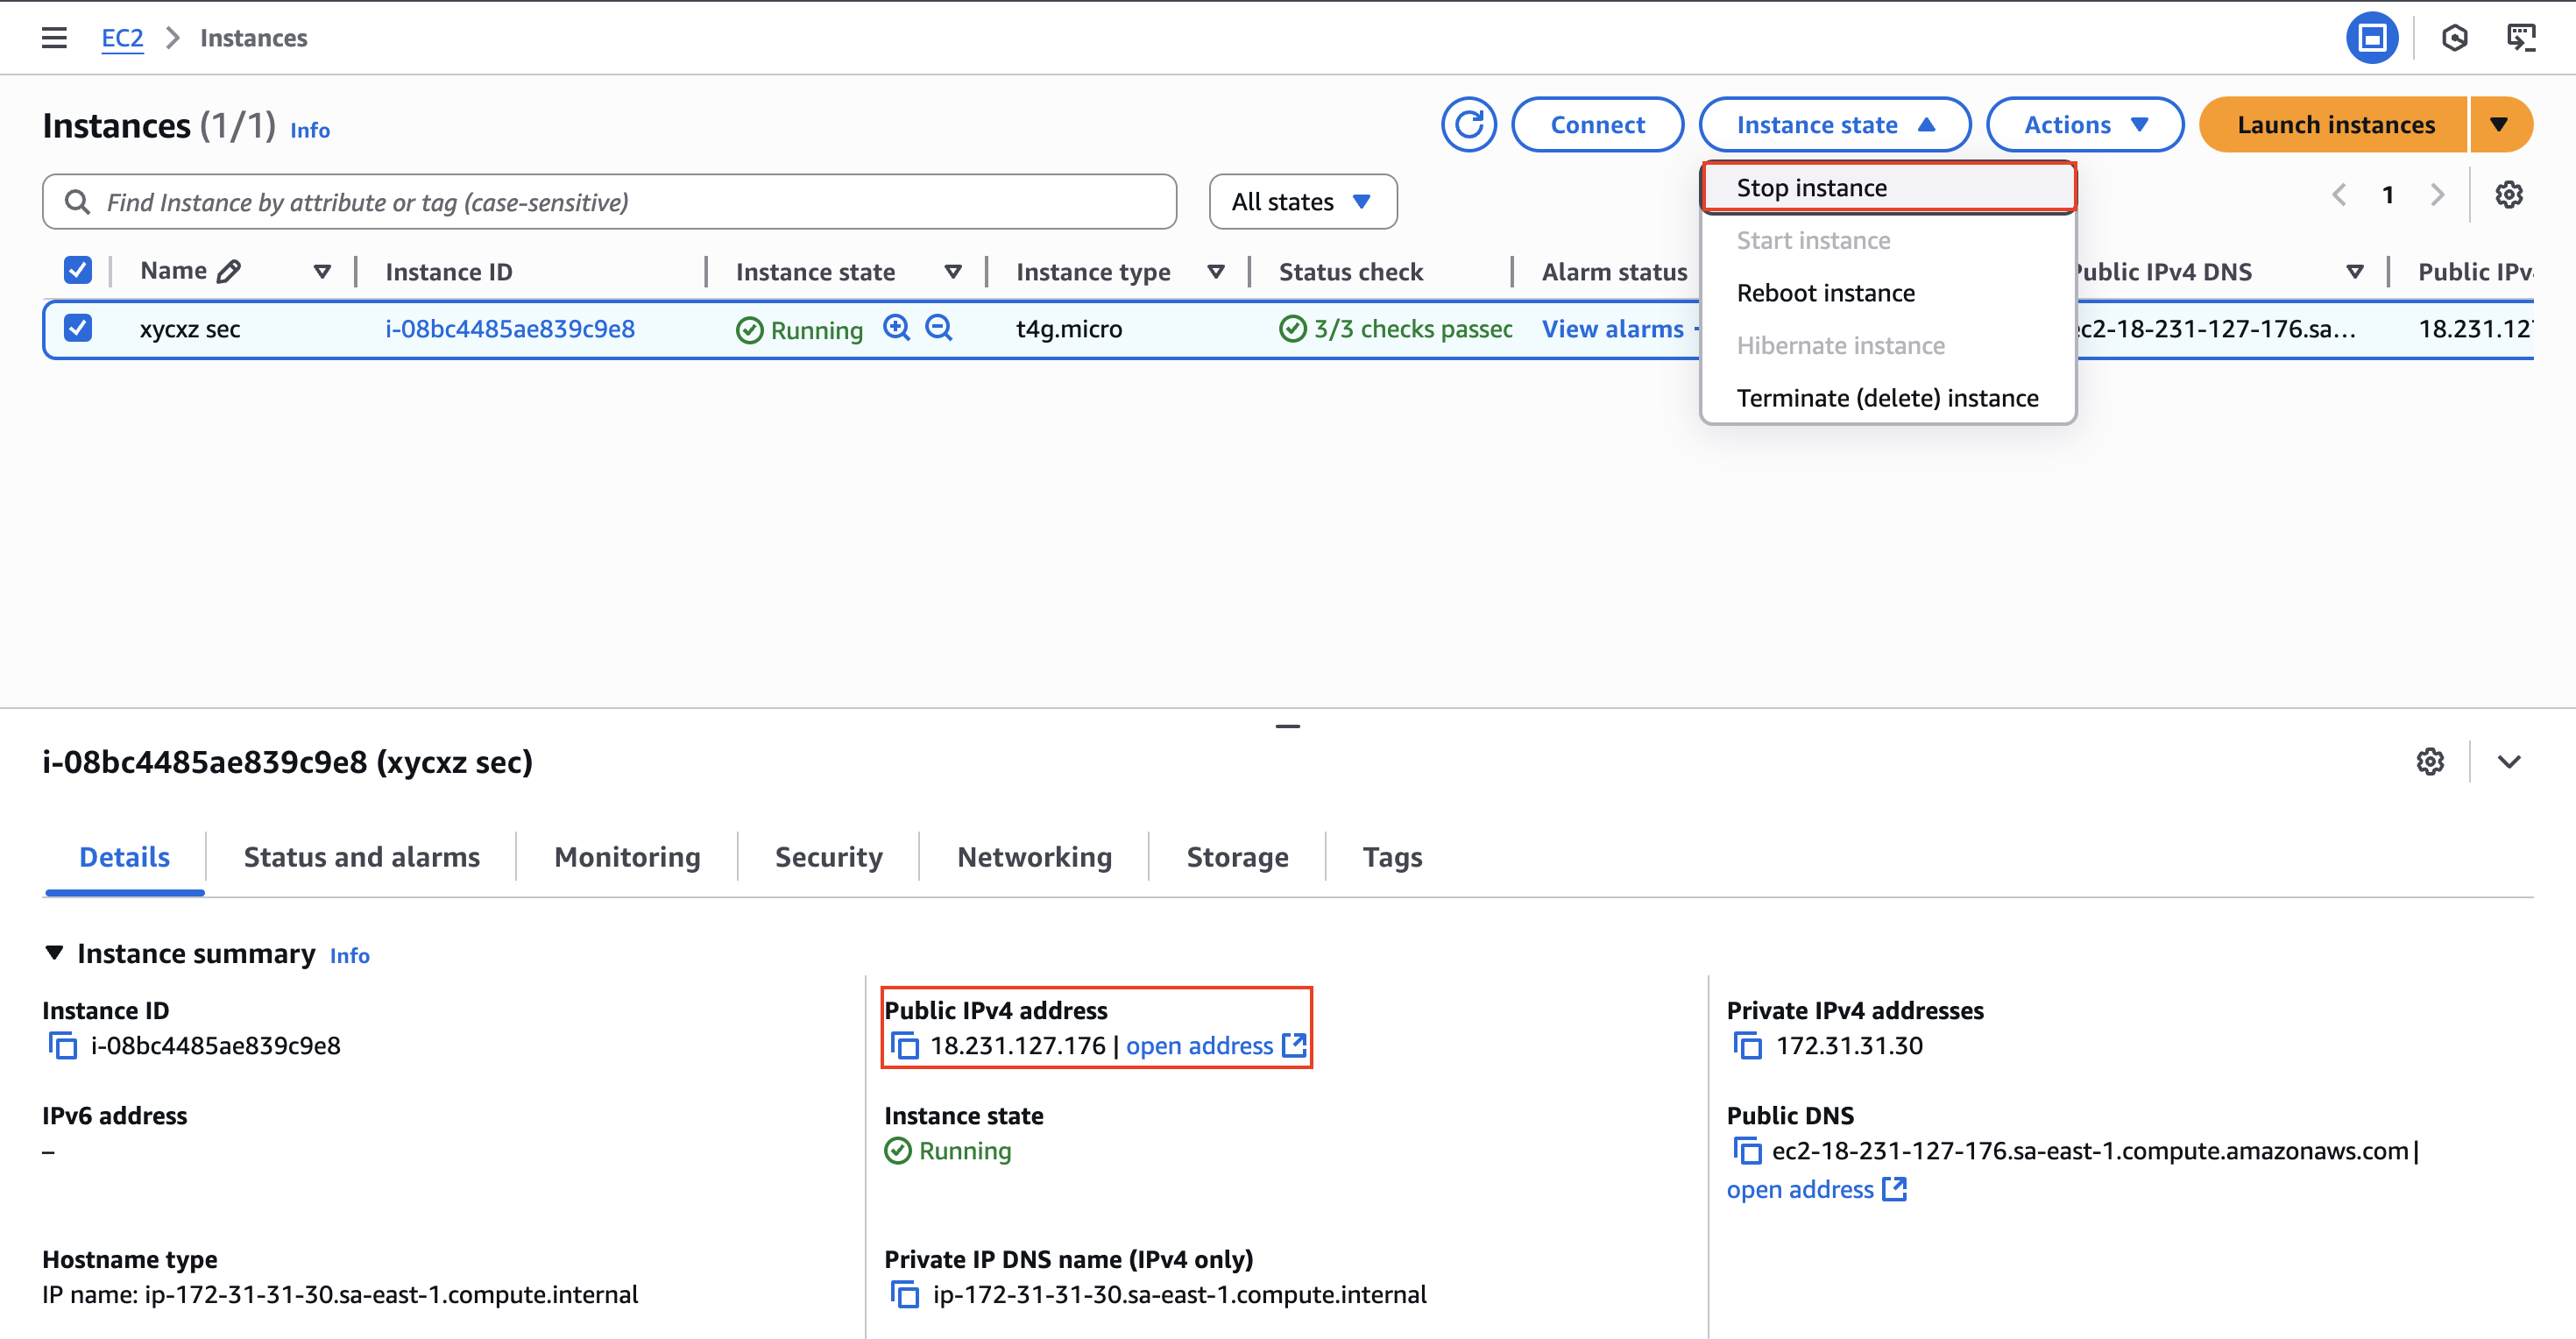
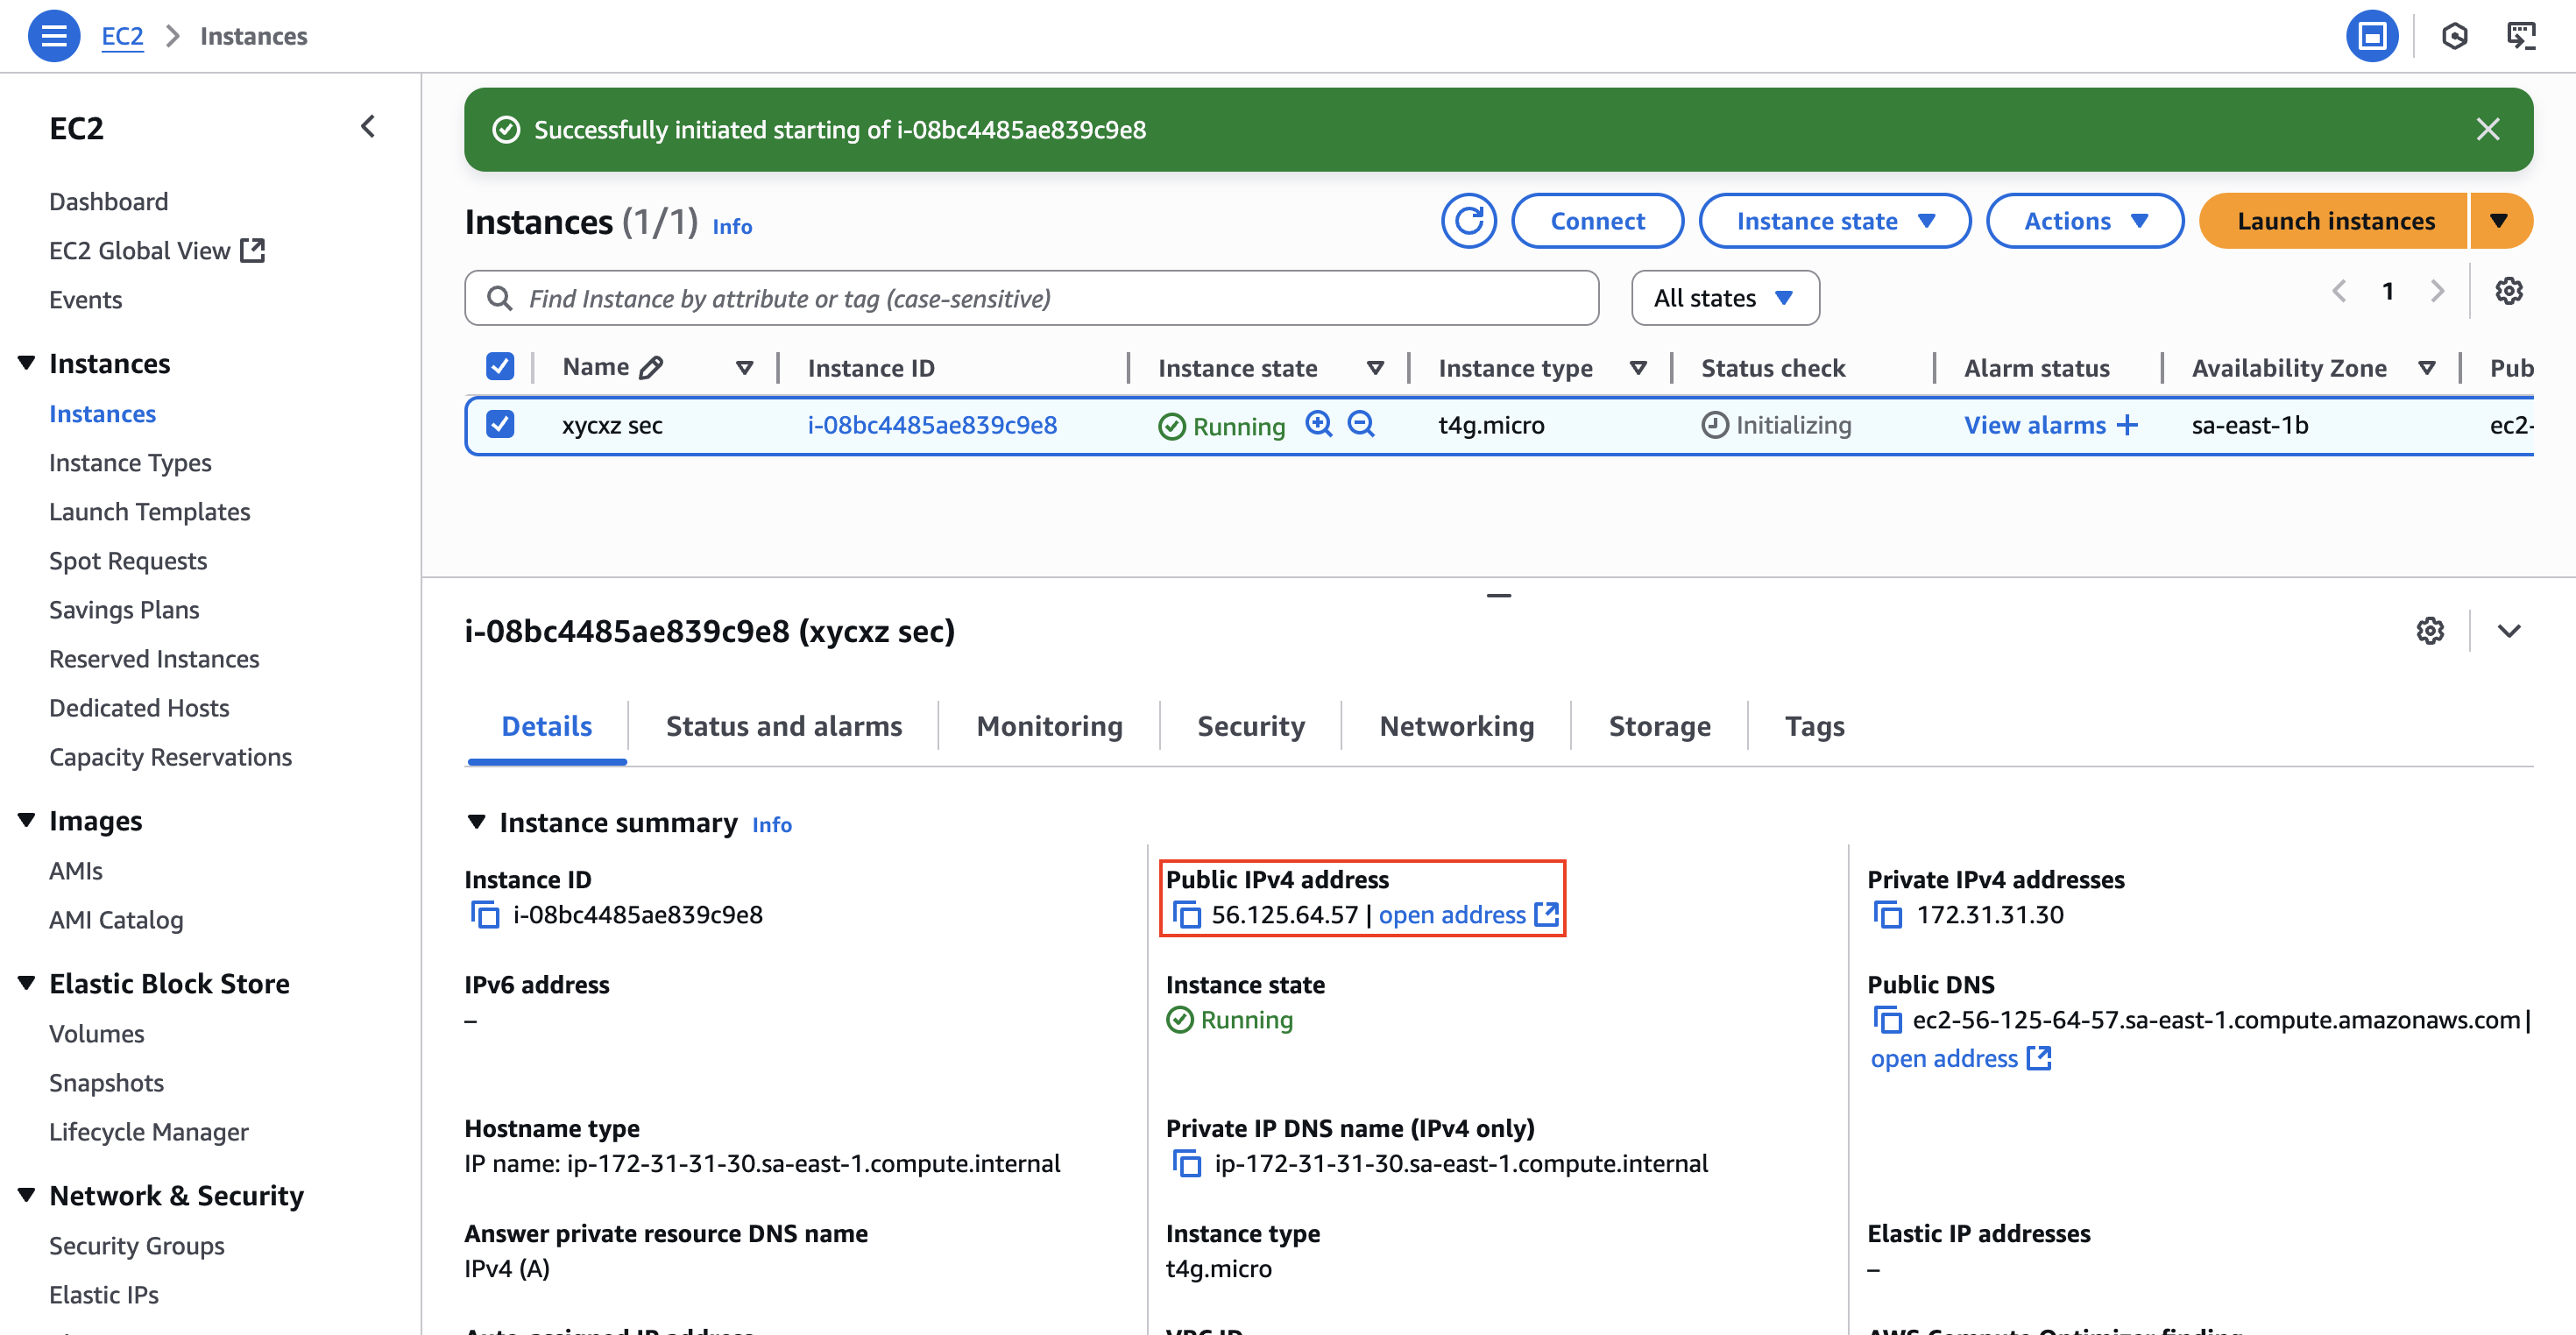
Note: If we reboot the instance, we will keep the IP address assigned to it!
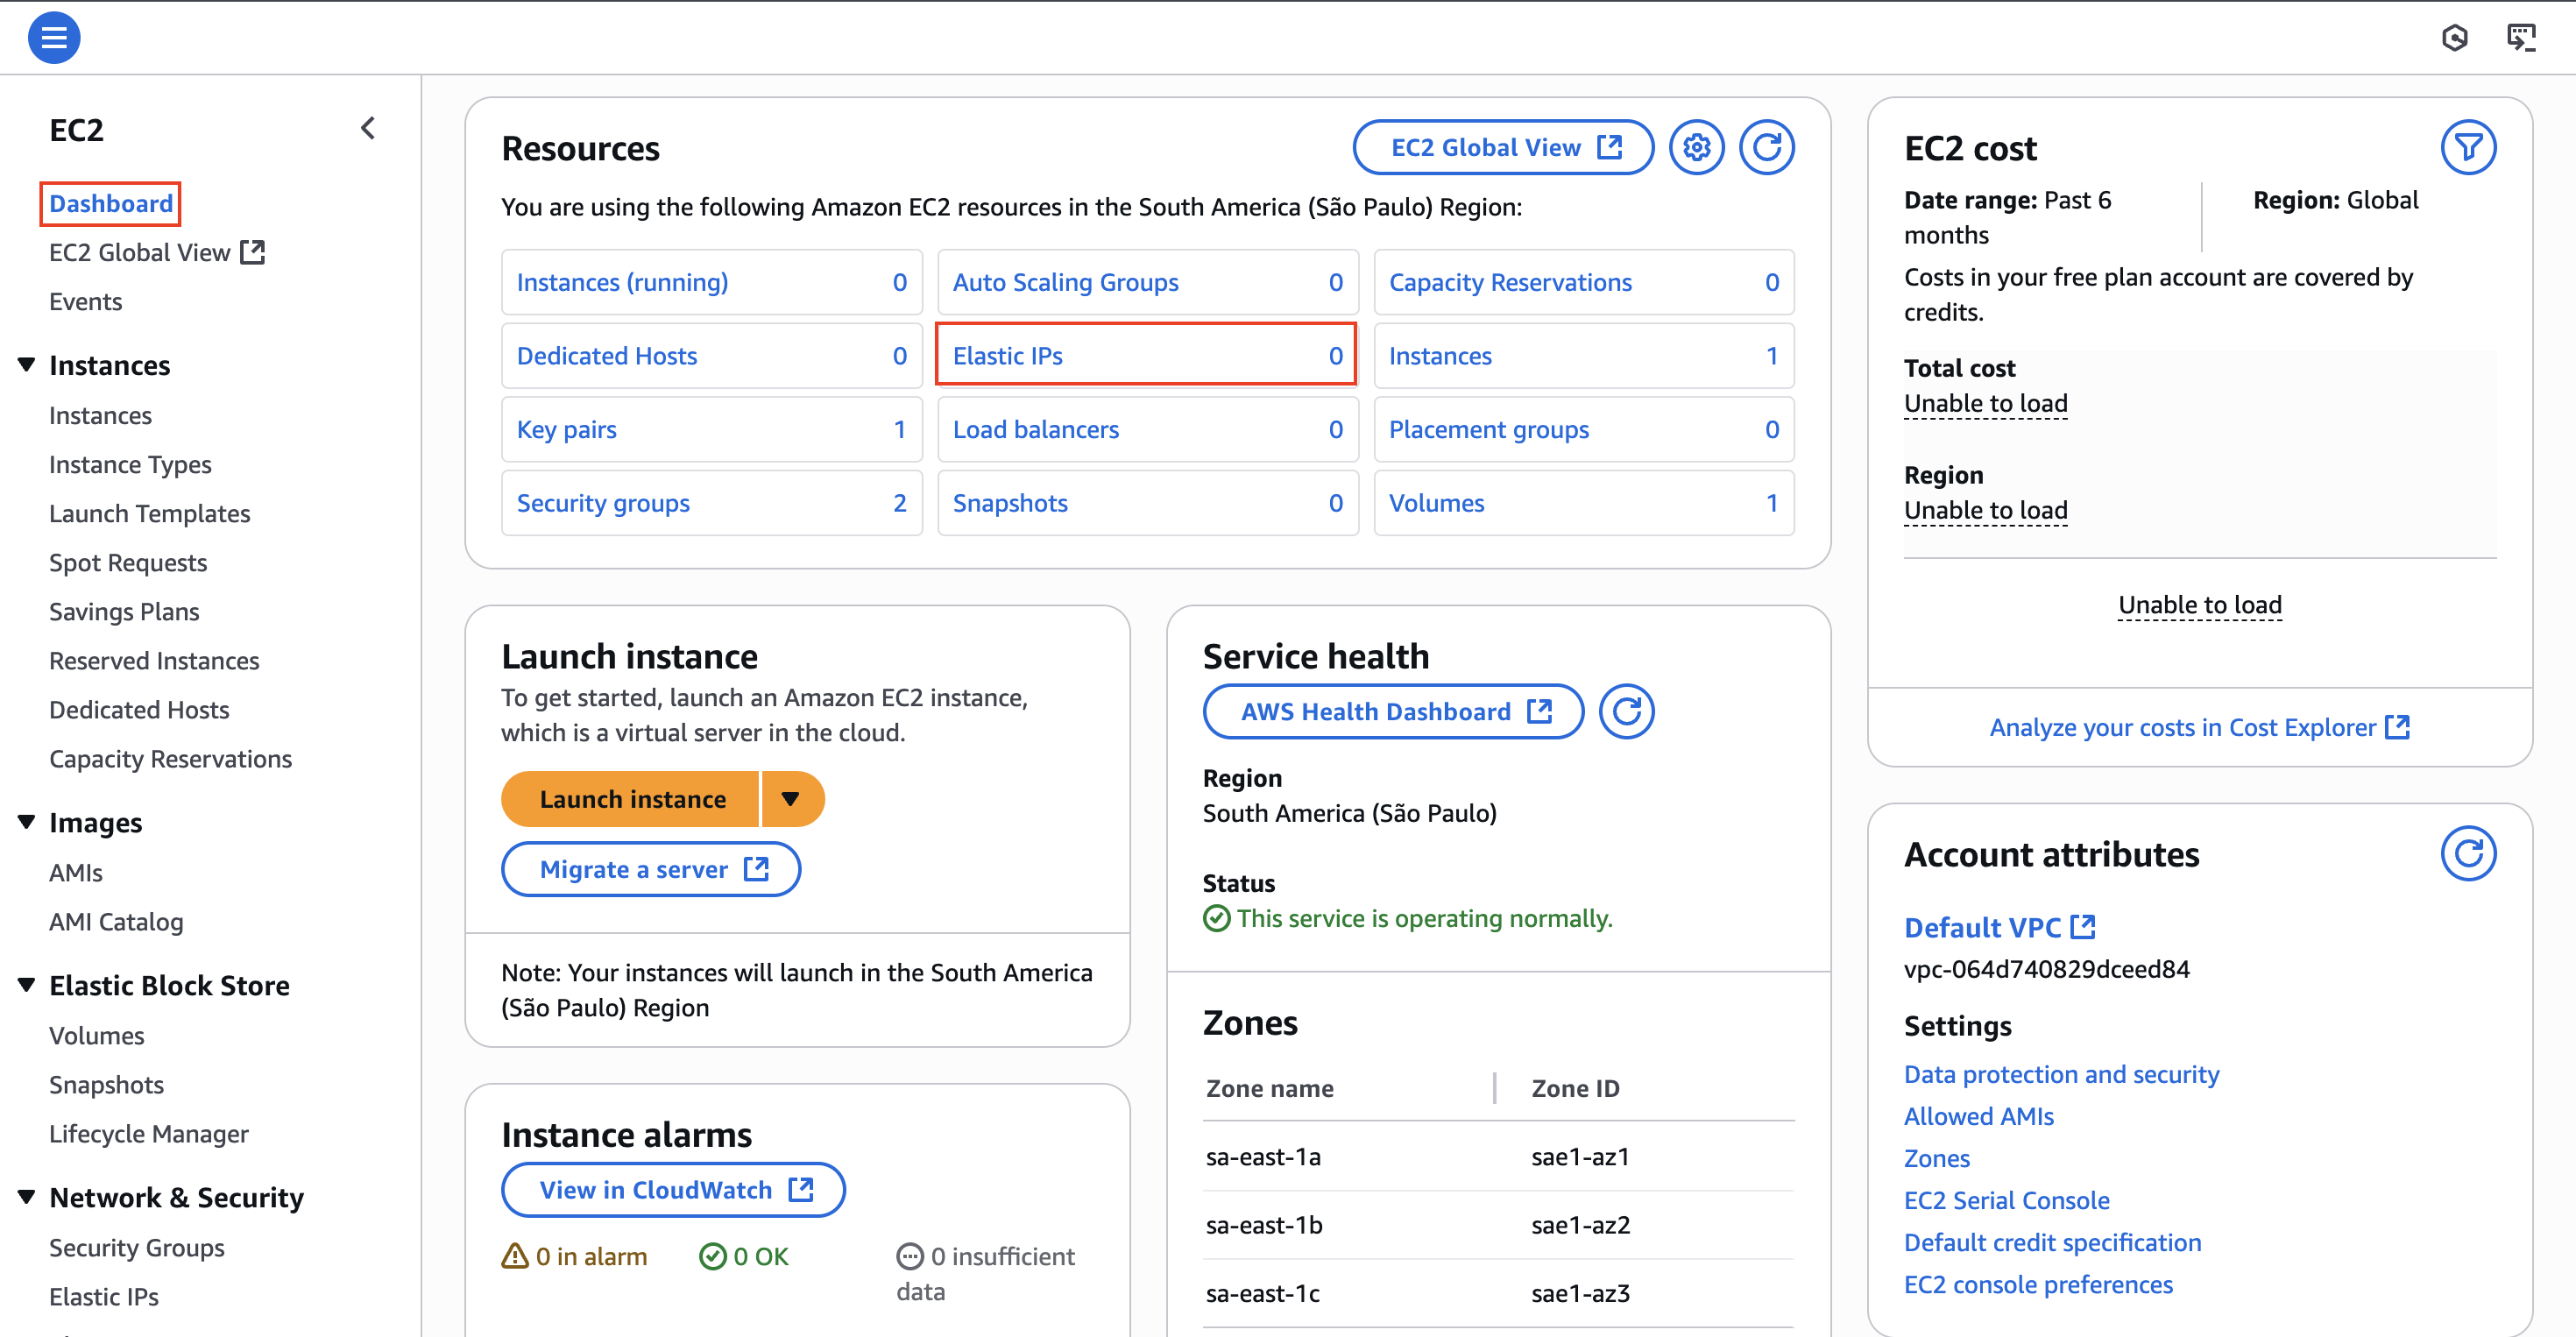
Lucky for us, there is a much better solution that we can achieve using Elastic IPs. These are static, public IPv4 address that we can allocate to our AWS account. We can attach it to any EC2 instance, and it will not change even if we stop and restart the instance.
To assign an Elastic IP address to our instance, we have to navigate to the EC2 Dashboard and then click on Elastic IPs:
Inside the Elastic IP addresses panel, we can click on Allocate Elastic IP address -> Allocate . This should be enough to give us a fixed IP address that we can attach to our instance:
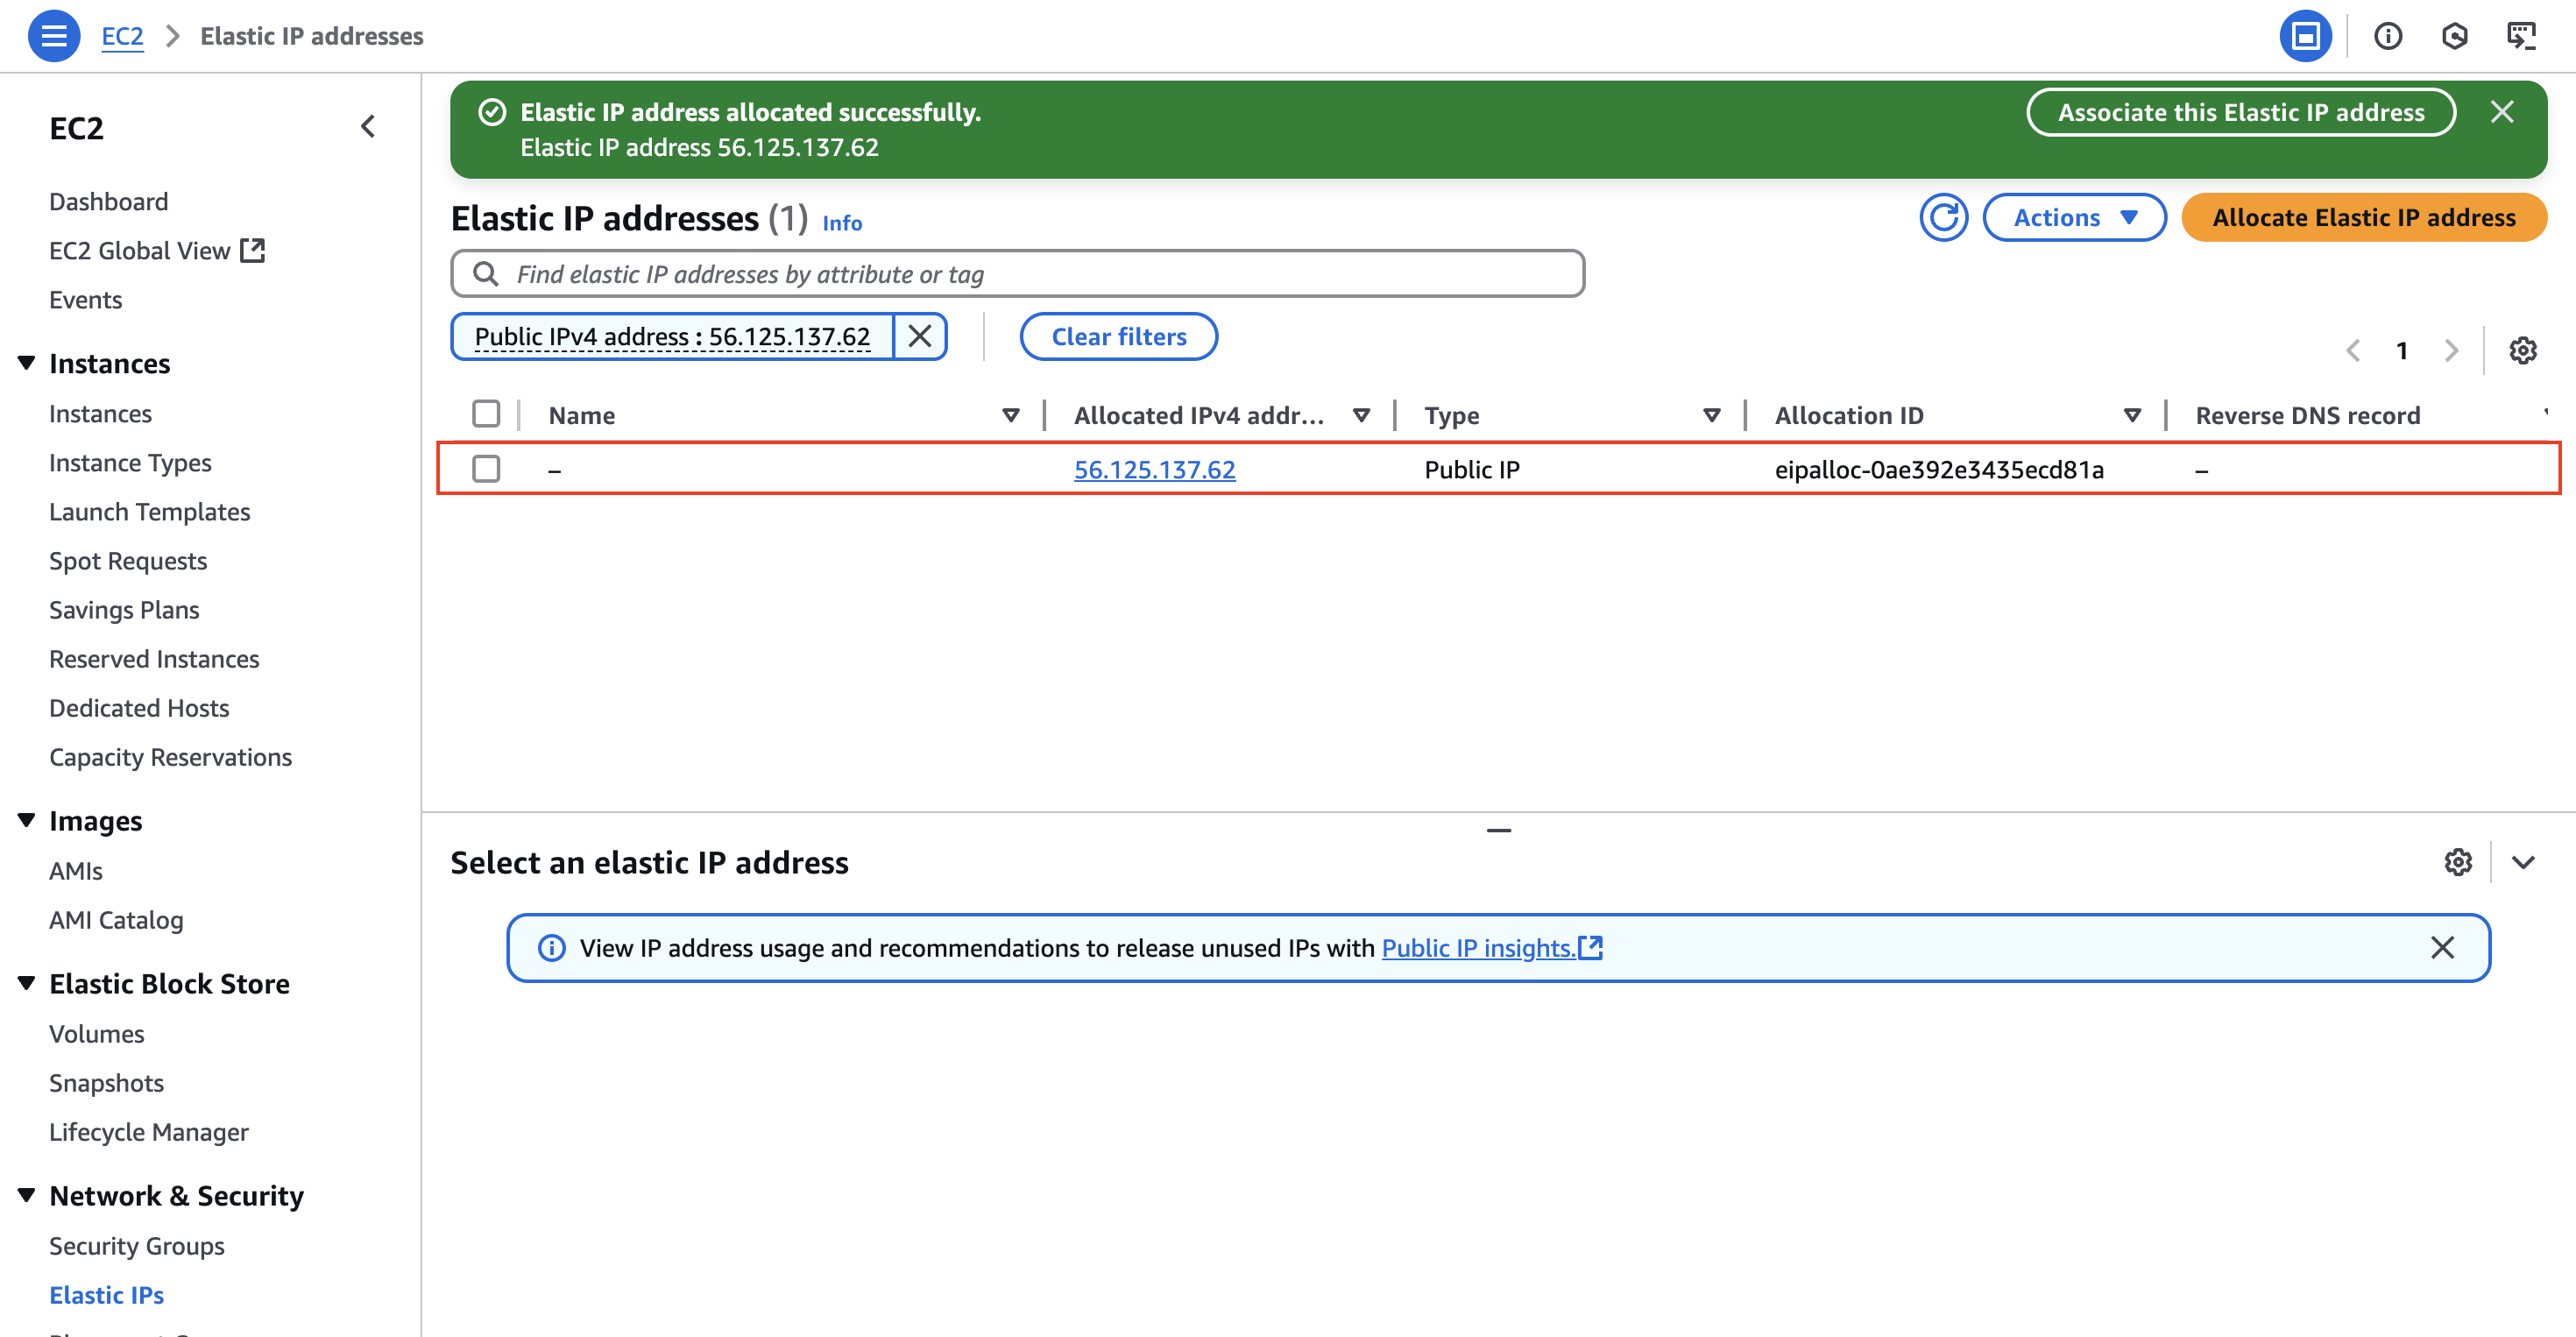
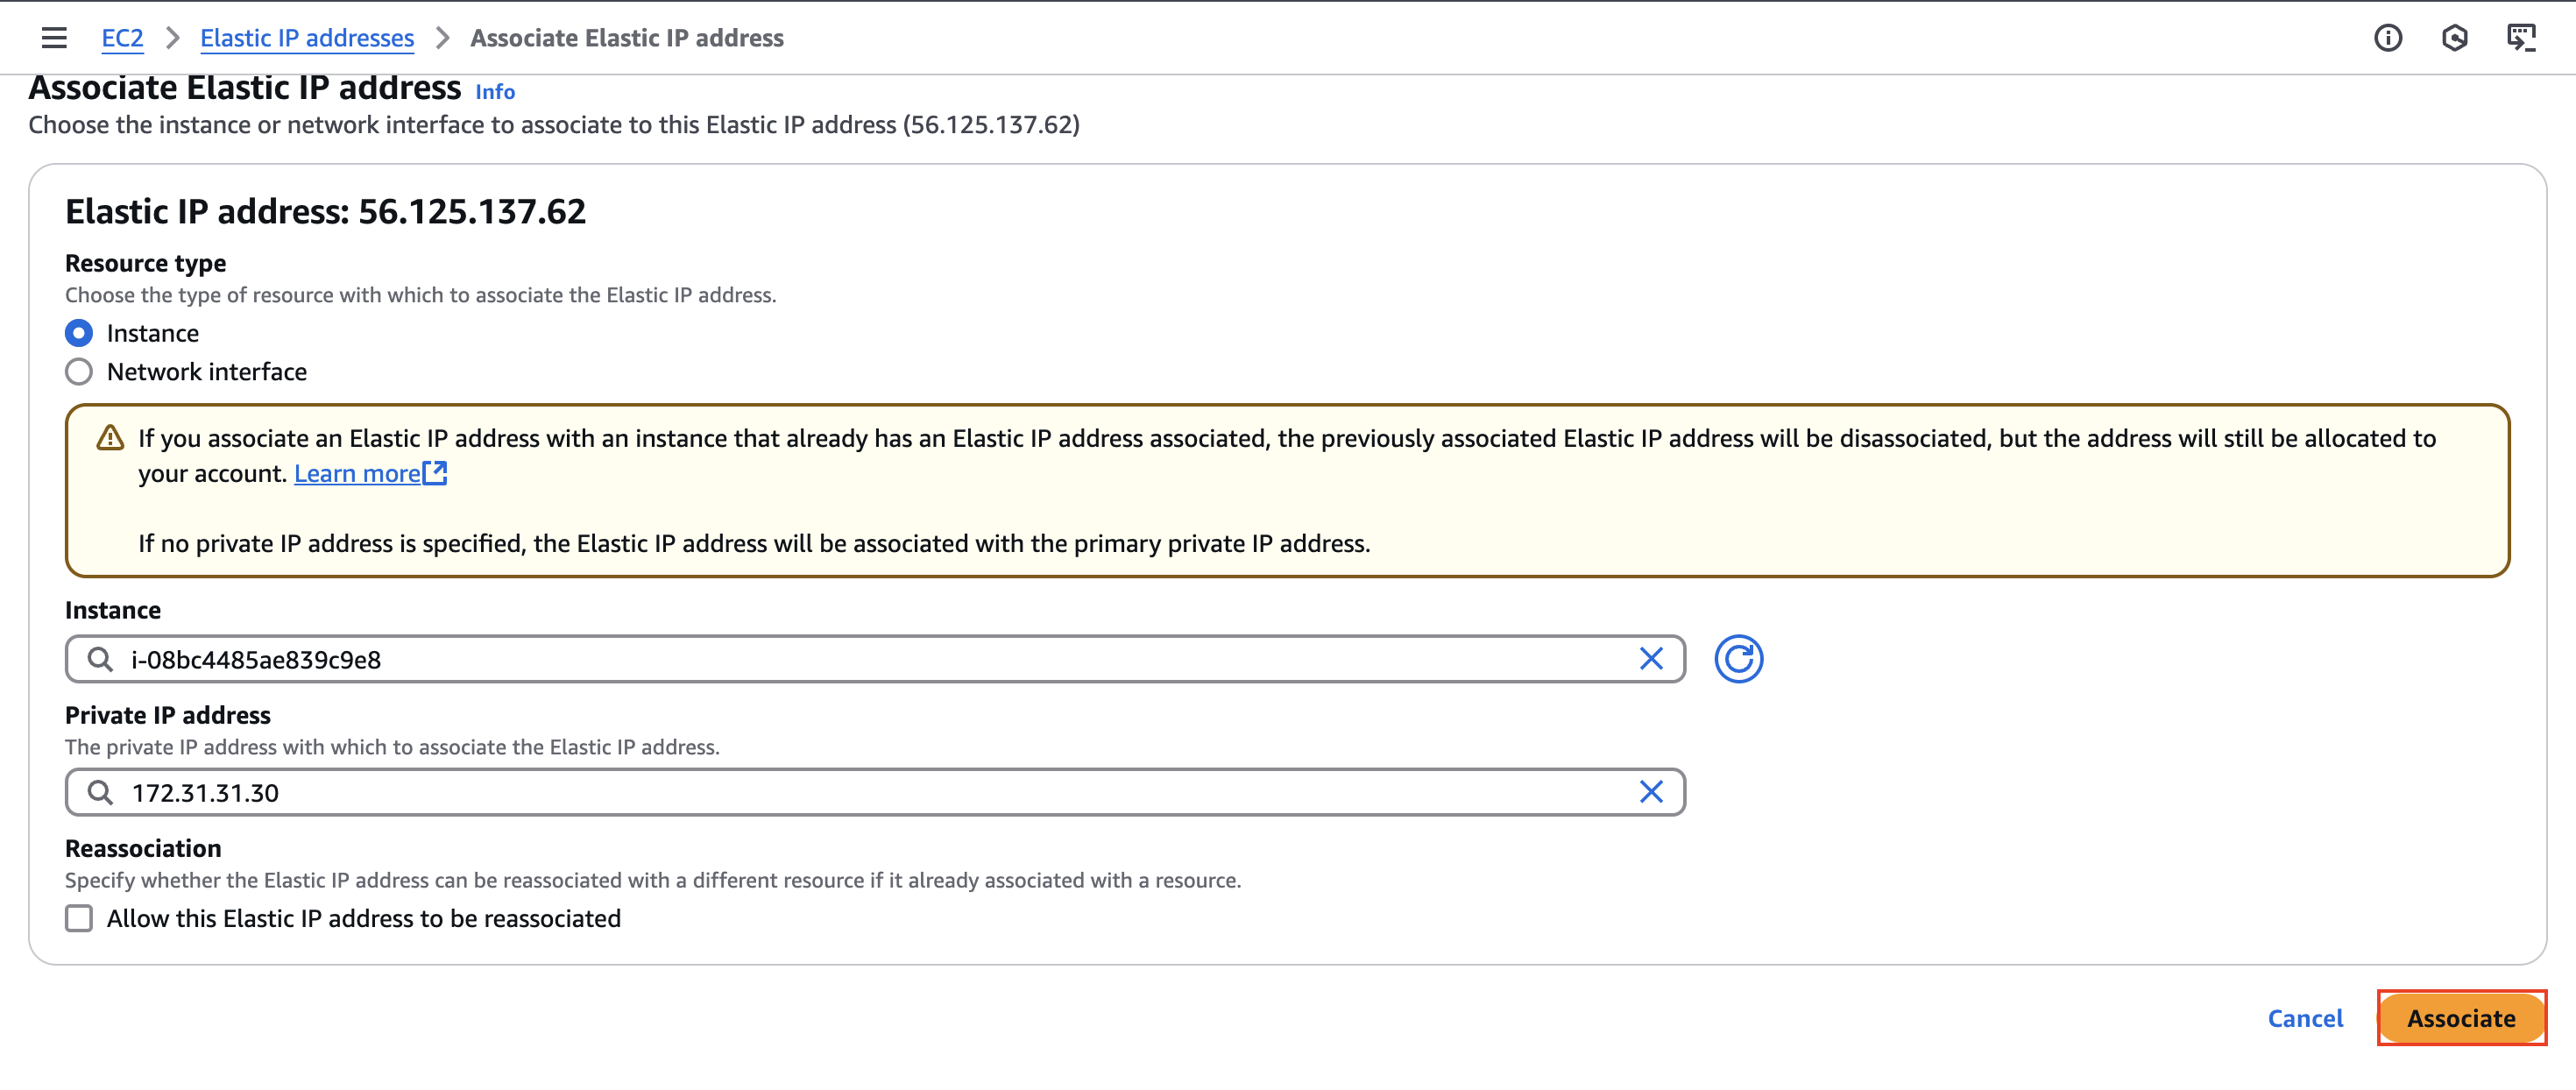
Now we can click on it and then go to Actions -> Associate Elastic IP address and then choose the instance we want to associate this IP address to:

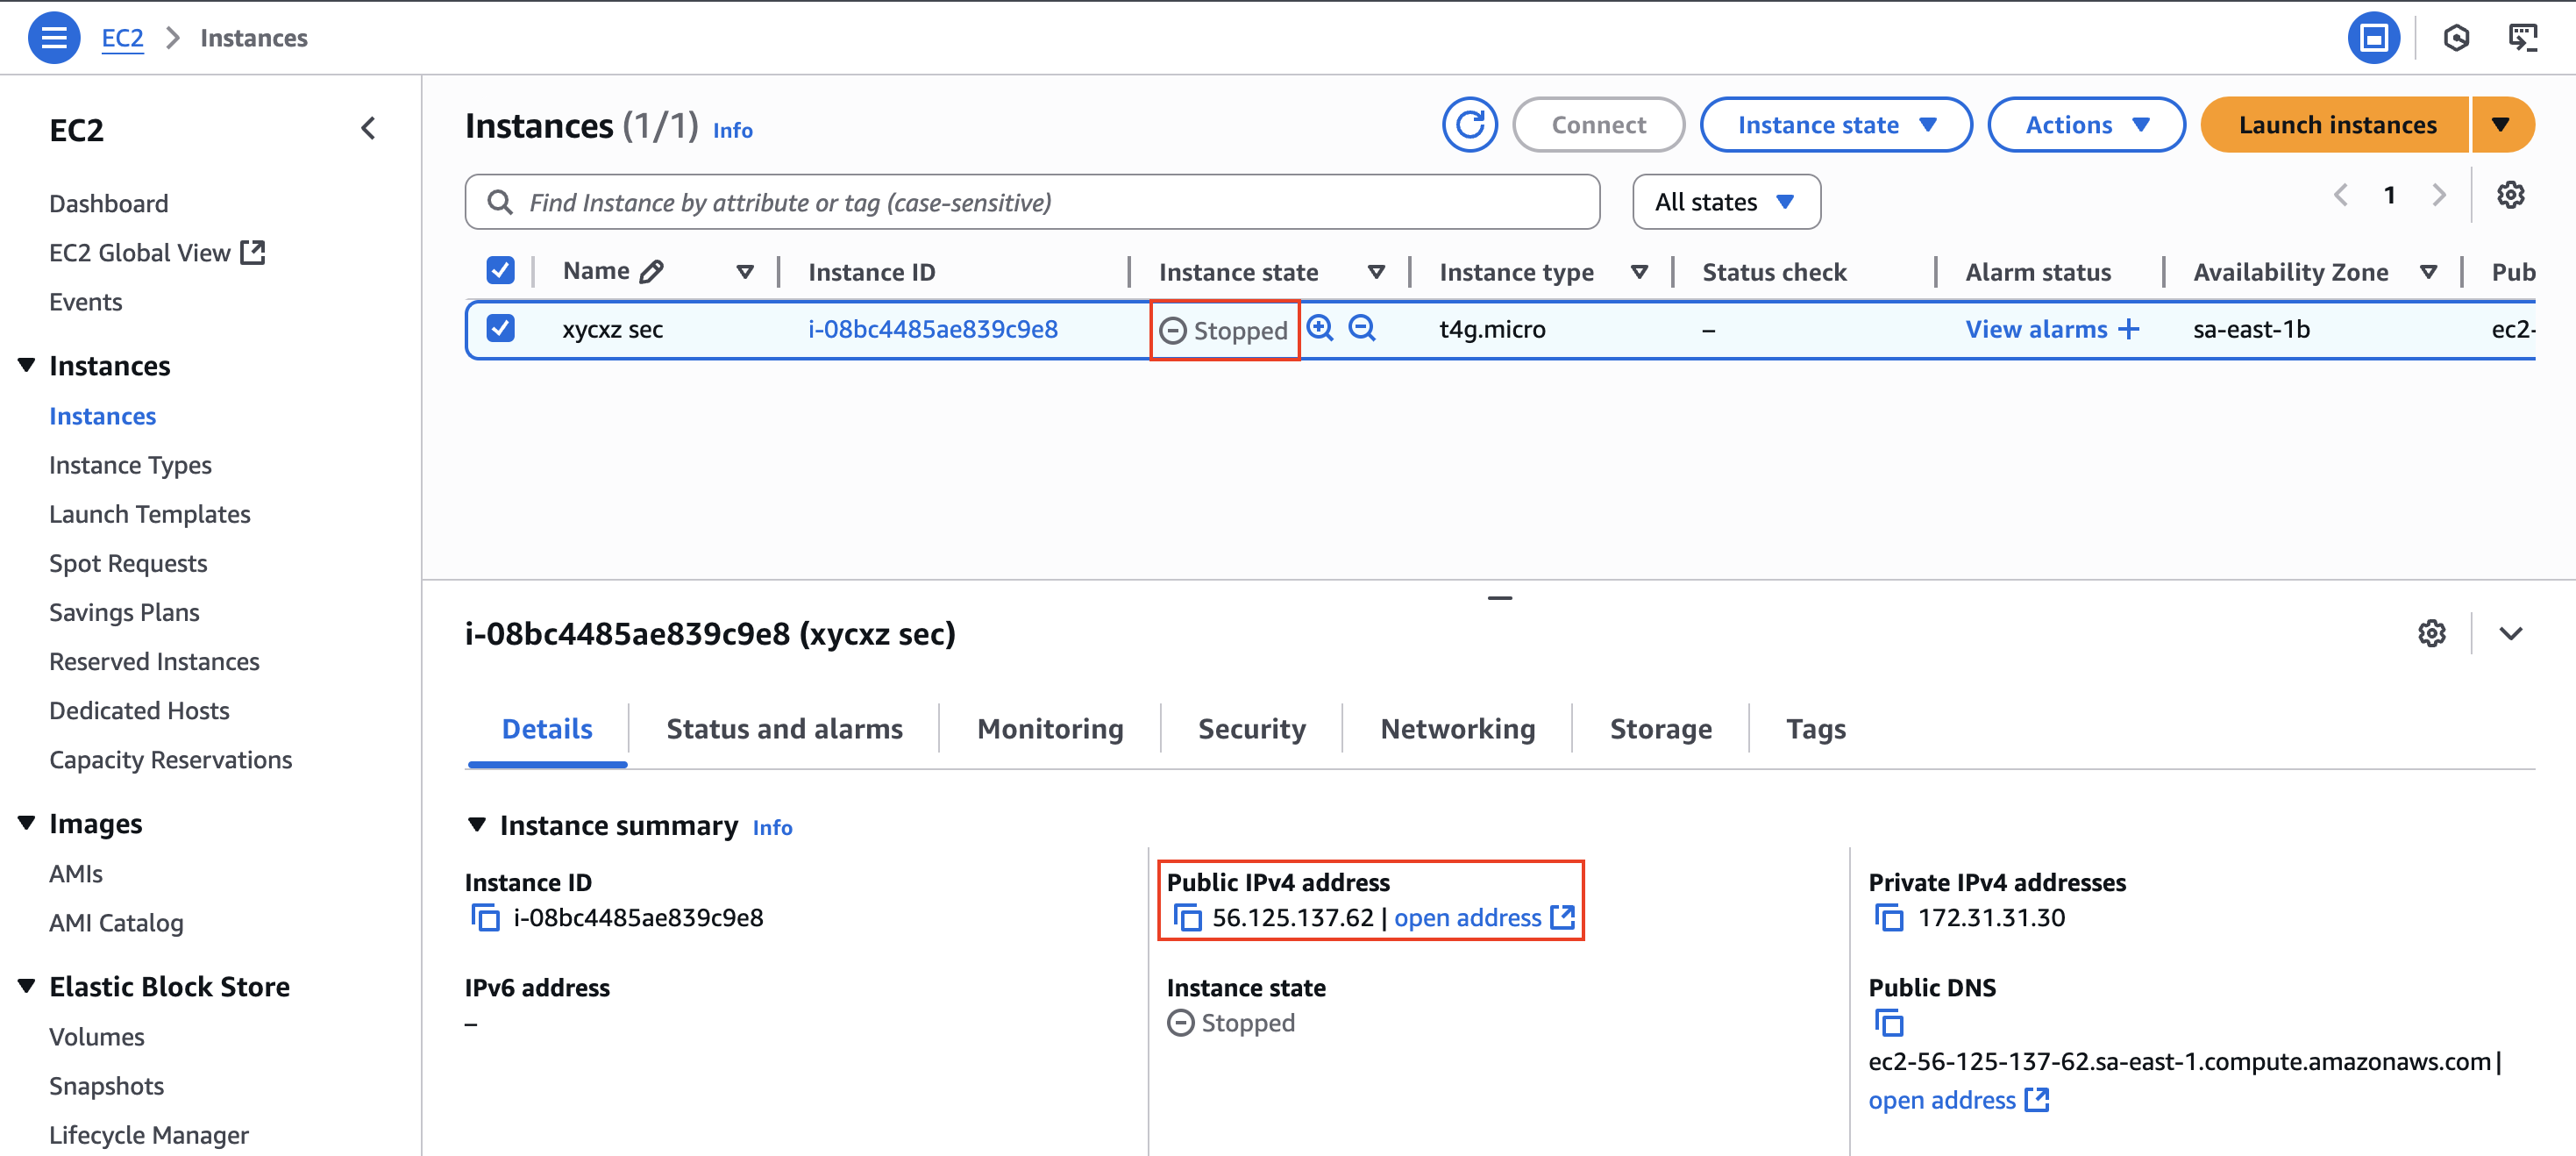
If we go back to our instance panel, we will see that even when stopped it keeps the IP address:
Cost Warning
Elastic IPs are free under one condition: they must be attached to a running EC2 instance. If we have an Elastic IP address allocated to our account that is NOT attached to a running instance, AWS will charge us a small hourly fee for it. This is done to prevent people from hoarding the limited supply of IPv4 addresses.
Installing Docker on our Instance
Now that we have our EC2 instance up and running, we have to download Docker on it so we are able to create the containers I previously designed. For this, we will use a script which can be seen here.
Note: Even though it can be very convenient, it is NOT recommended to use the method in production environments since we don’t have much control over what we are doing. We would be also trusting that the source we are using there is not malicious code!
1
2
3
4
5
6
7
8
# Pull the script
curl -s https://get.docker.com/ -o docker.sh

# Give execution permissions
chmod +x docker.sh

# Run the script
./docker.sh
Note: This script will add an additional repository to our Ubuntu package manager (apt), which means that, for the future, if we do a sudo apt update && sudo apt upgrade it will update to the latest version of Docker.
Running our Web Server in the Cloud
Once we are finished installing Docker on our Instance, we can transfer our Dockerfile to it using the scp command:
1
scp -r <PATH-TO-WEB-SERVER-DIRECTORY> ubuntu@<EC2-IP>:<DESTINATION-DIRECTORY>
Note: While building the image directly on the EC2 instance is great for our lab, in a professional production environment, the workflow is typically different. Developers would build the Docker image on their local machine or in an automated CI/CD pipeline, push the finished image to a container registry (like Docker Hub or AWS’s own Elastic Container Registry - ECR), and then the EC2 instance would simply docker pull the pre-built, tested image. This ensures consistency and separates the build environment from the production environment. We will explore how to set up a registry in AWS in a future post!
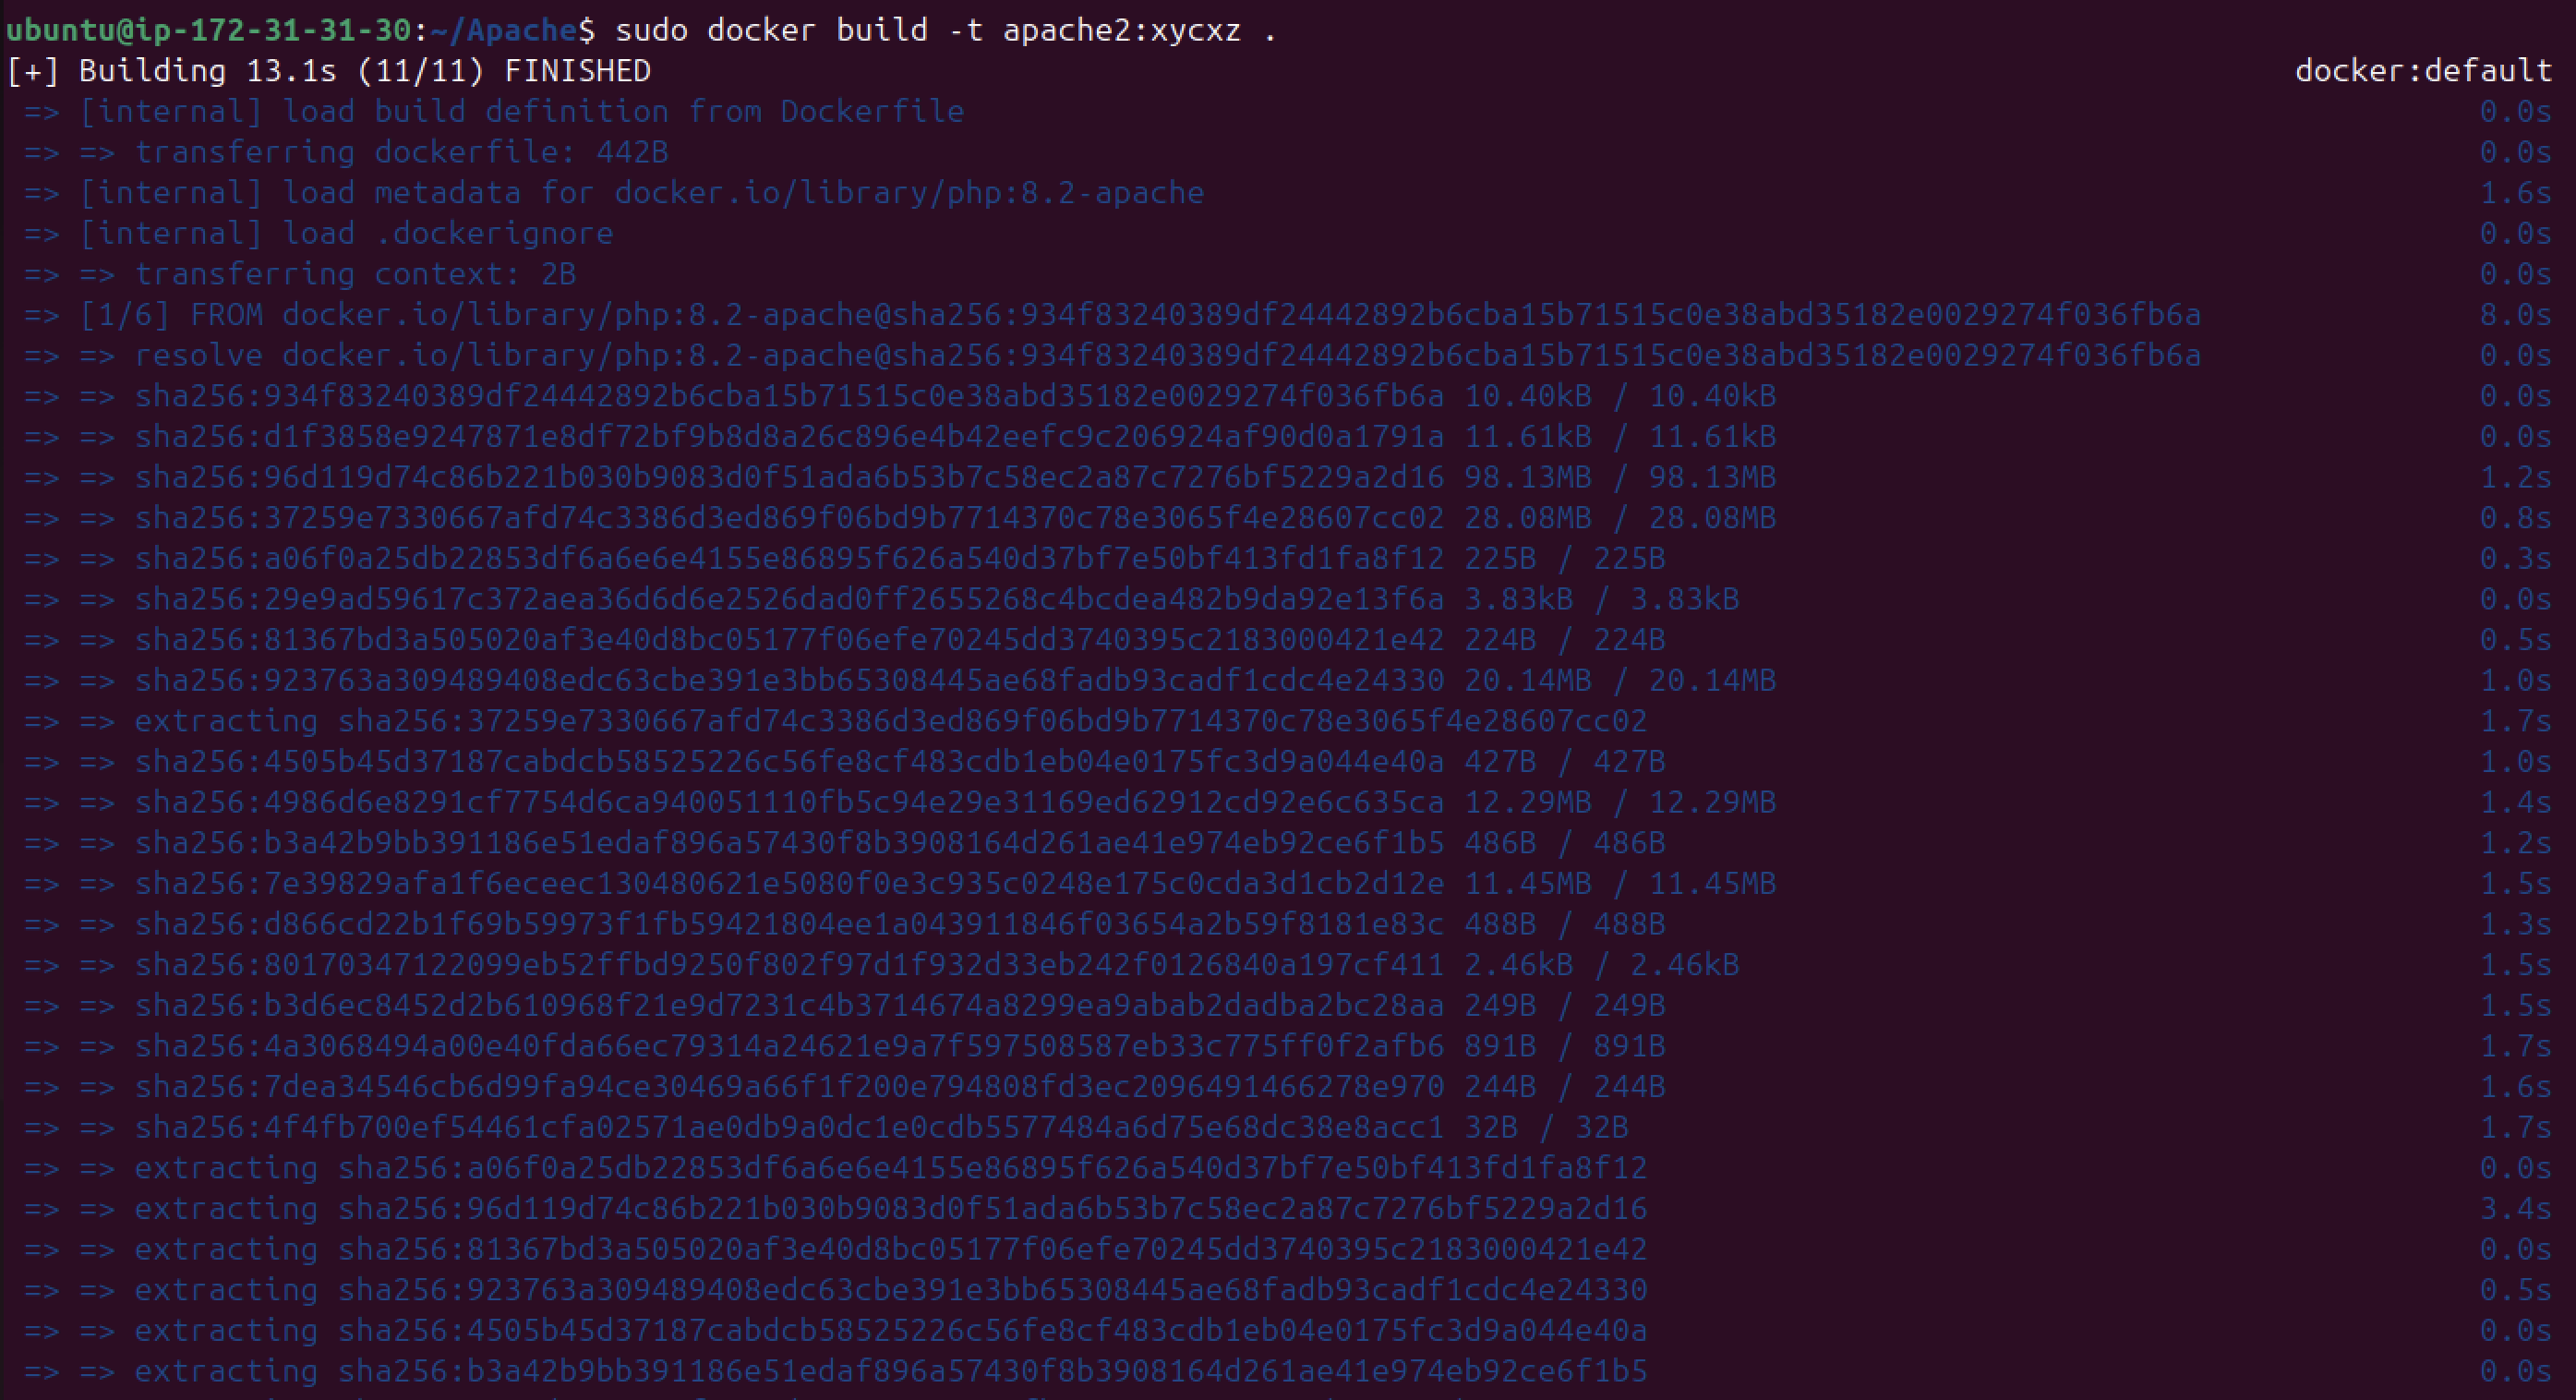
Let’s build our image now:
1
sudo docker build -t <NAME>:<TAG> <DIRECTORY>
With our image ready, we can run the following command:
1
sudo docker run -d --name <NAME> -p 80:8080 <IMAGE>
We can now check our instance IPv4 public address and check if we can see our web page. Bear in mind that we are using http here, so we need to make sure to use the correct URL scheme:
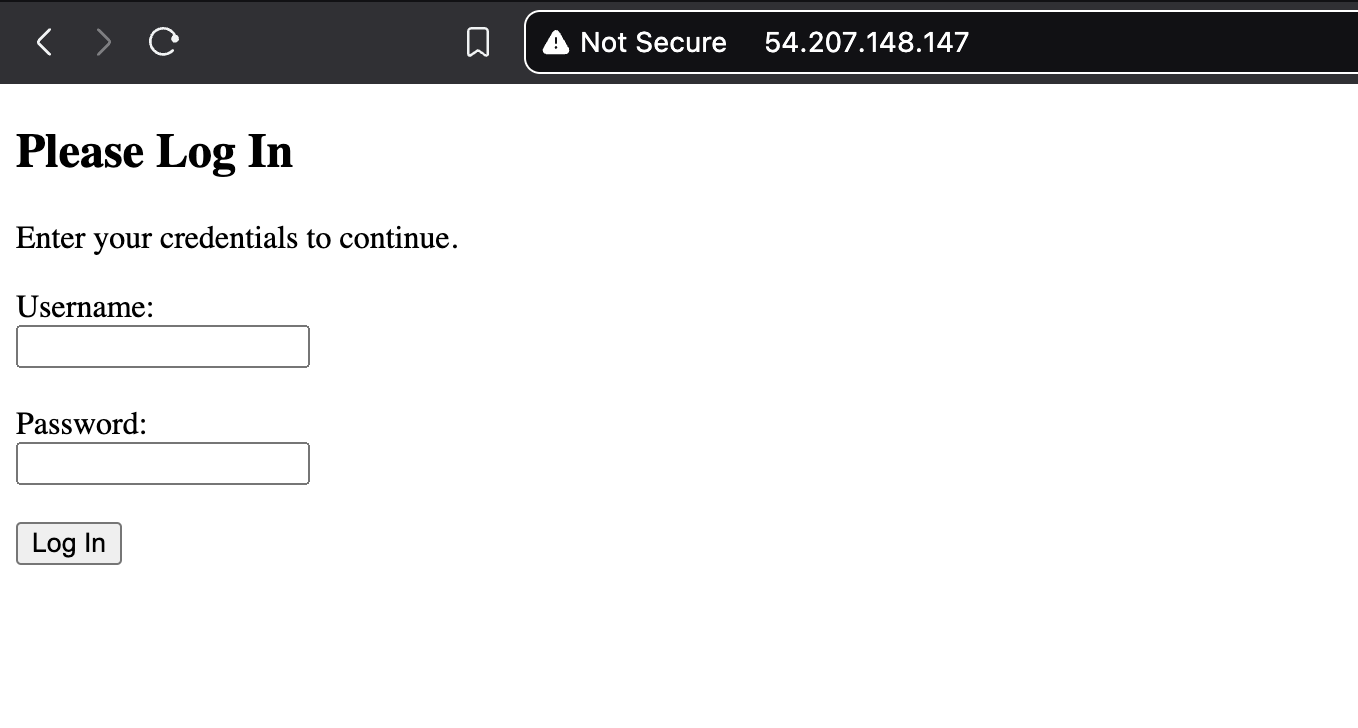
It works! We were able to launch the same container but this time in the cloud! As you might have guessed from the beginning, the process is exactly the same when we did it in our own VM because this is just a VM hosted by a provider (Amazon) with the exact same functionality. However, now we can publicly show our work by renting an IP address on the internet!
For now, we won’t apply any kind of encryption (we are using HTTP on port 80), but we will do it in the future.
The Major Problem
So far, we were able to fulfil our initial objective. Nevertheless, what would happen if we have to reboot our instance or if the server crashes? Well, what would happen (and what we would expect to happen) is that our container will stop working and won’t be served anymore unless we manually relaunch it again.
In a huge production environment (or very important) this could cause significant losses and a poor experience for customers.. This is the reason why we need to give a solution to this issue. Luckily for us, Docker is smart enough to give us what we just need: Restart policy of a container.
We can configure the restart policy in many different ways:
on-failure[:max-retries]: In case of an error, the container should be restarted. This means that if we have (for example) a web server process and then crashes for whatever reason, the container will get restarted. However, this WON’T detect all failures. Just the main process of the container is the reference for it to restart!always: The container should always be restarted unless we stop it manually. In that case, the container will only be started at the next launch of Docker Daemon.unless-stopped: The container will always be restarted but if we stop the container it will remain stopped even if we reboot the machine.
We can apply the policies when running the container or we can also update the policies of an existing container.
New Container
1
2
3
sudo docker run -d --restart <POLICY> <IMAGE>

sudo docker create --restart <POLICY> <IMAGE>
Existing Container
1
sudo docker update --restart <POLICY> <CONTAINER ID/NAME>
Next Steps
The main thing I wanted to show here was how we create an EC2 instance and launch one of the containers that we already created on it. We can now proceed by integrating all our containers on this instance so we can talk about some security features as well.