DocumentDB & AppRunner - AWS
Objective
Today, we will be exploring a new service in Amazon AWS. However, this time I will deviate from my application project and use another one because what matters this time are the concepts. Afterwards, we will see how to use some of these and implement them in the original project.
This does not mean I will use all of them. Nonetheless, they are important in production environments and it is very common for companies to have the kind of application I will be showing today (a web page with front-end & back-end). I will separate this side project into 2 or 3 different posts, so don’t forget to check all of them!
Introduction: Stateless vs Stateful Services
My application uses React library for the frontend and NodeJS + MongoDB for the backend. In a previous post, we saw how to upload a stateless service to AppRunner, which means that our application does not store client session data on the server between requests. Let me expand a bit more here:
Stateless applications still interact with databases and other data stores, but they don't remember anything about a specific user's interaction from one moment to the next. Every request made to a stateless application is treated as a completely independent, isolated transaction. All the information needed to process the request must be provided by the client with the request itself.
The client holds onto the necessary information (like a user ID, authentication token…) and sends it to the server with every single request.
This information is often sent in:
- HTTP Headers: Using an authorisation token (like a JSON Web Token or JWT).
- Cookies: Storing session identifiers.
- The Request Body: Including all necessary data for the operation.
The main advantage of the stateless model is scalability. Since no server holds user-specific session data, any request from any user can be handled by any available server. This makes it incredibly easy to add more servers (horizontal scaling) to handle increased traffic. If one server goes down, a load balancer can simply redirect the user’s next request to a different server without any loss of data or session information, making the system more resilient and reliable.
However, when we talk about databases we are talking about stateful services, which means it remembers information about a client’s session from one request to the next.
Because a specific server holds a user’s session data, all subsequent requests from that user must be routed back to the same server. If that server fails, the user’s session data is lost. Scaling also becomes more complex because we can’t simply distribute traffic to any available server; we have to manage which user is “stuck” to which server.
Deploying a database directly on AWS AppRunner is a critical architectural mistake because the service is fundamentally designed for stateless applications. The primary issue is that AppRunner containers are ephemeral, meaning their local storage is completely erased every time an instance is restarted or replaced for scaling or updates, which would lead to an irreversible data loss.
Furthermore, App Runner’s scaling model creates multiple isolated copies of our application, which for a database would result in out-of-sync, inconsistent data across different instances.
Deploying the Backend
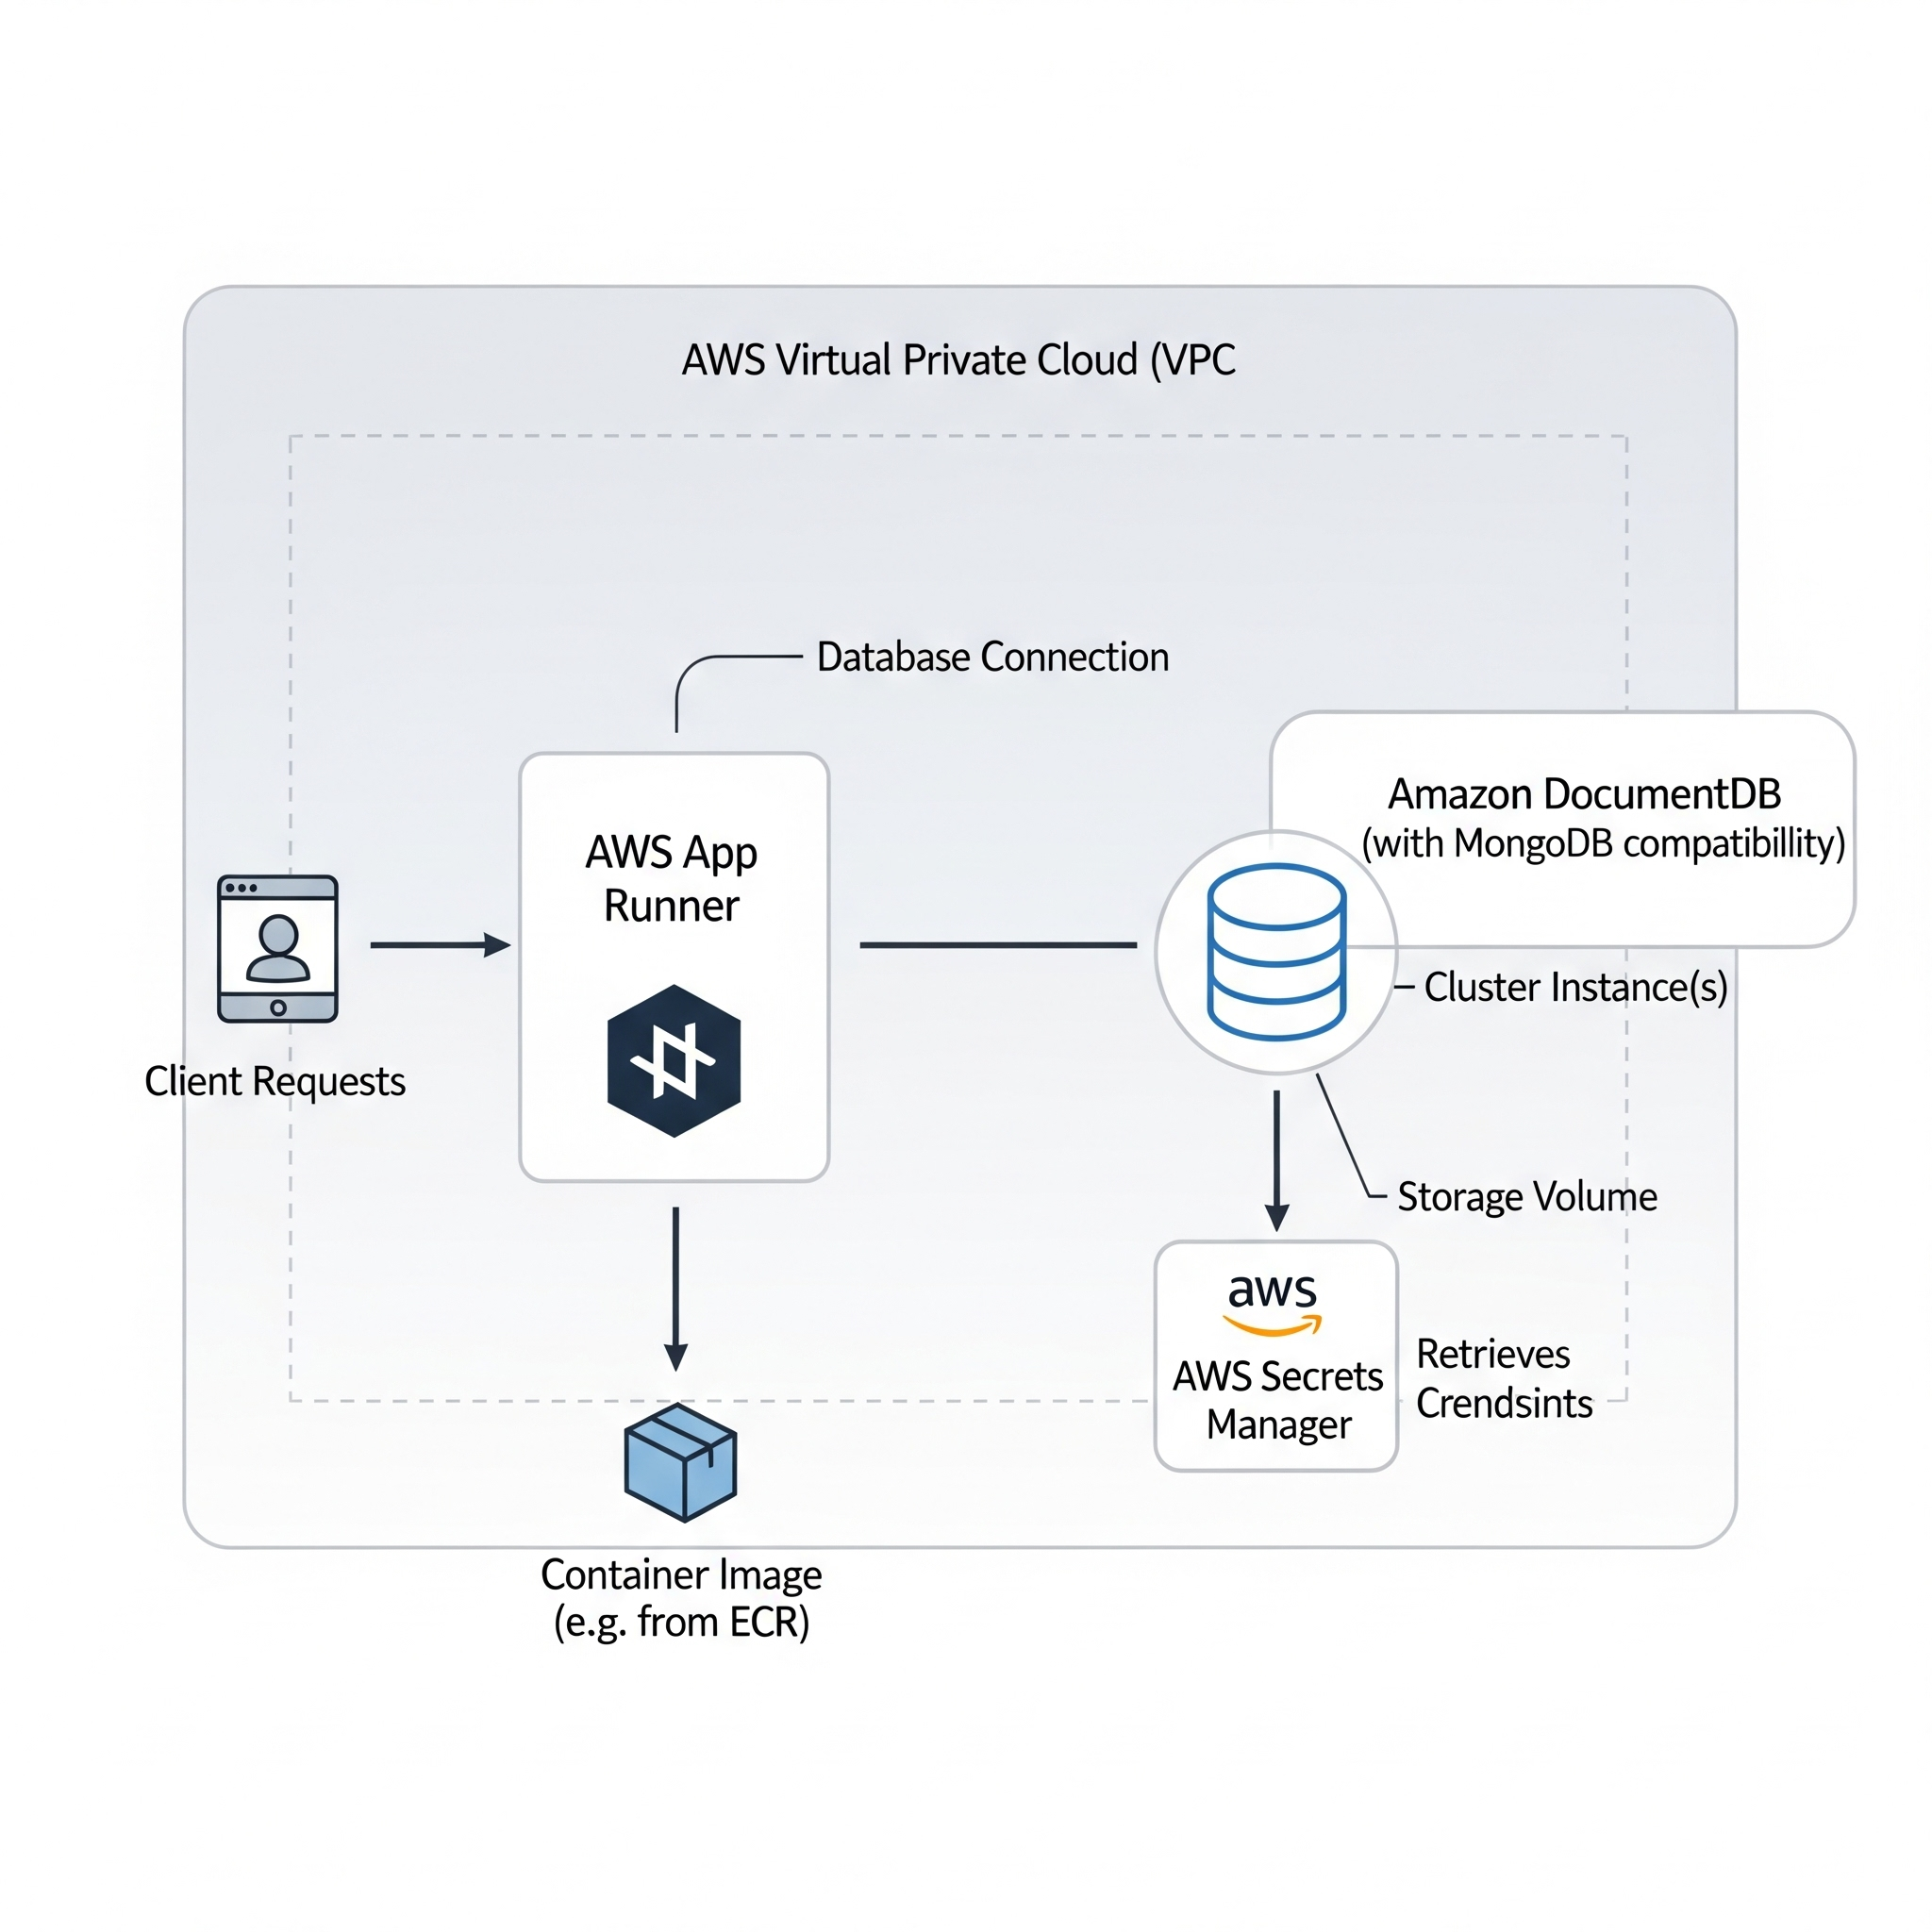
After seeing an overview of stateless and stateful services, we will explore how to deploy our application. Because my backend has both a stateless component (the NodeJS app) and a stateful one (the database), I will use two different services: AppRunner for the application and Amazon DocumentDB for the database.
Note: Be aware that Amazon DocumentDB could be pretty expensive. I don’t recommend using it for long periods of time unless strictly needed. You can see prices here.
I won’t be showing how to deploy the application on AppRunner because we have done that before. However, we should absolutely do this ourselves to follow along what I am going to do.
Amazon DocumentDB
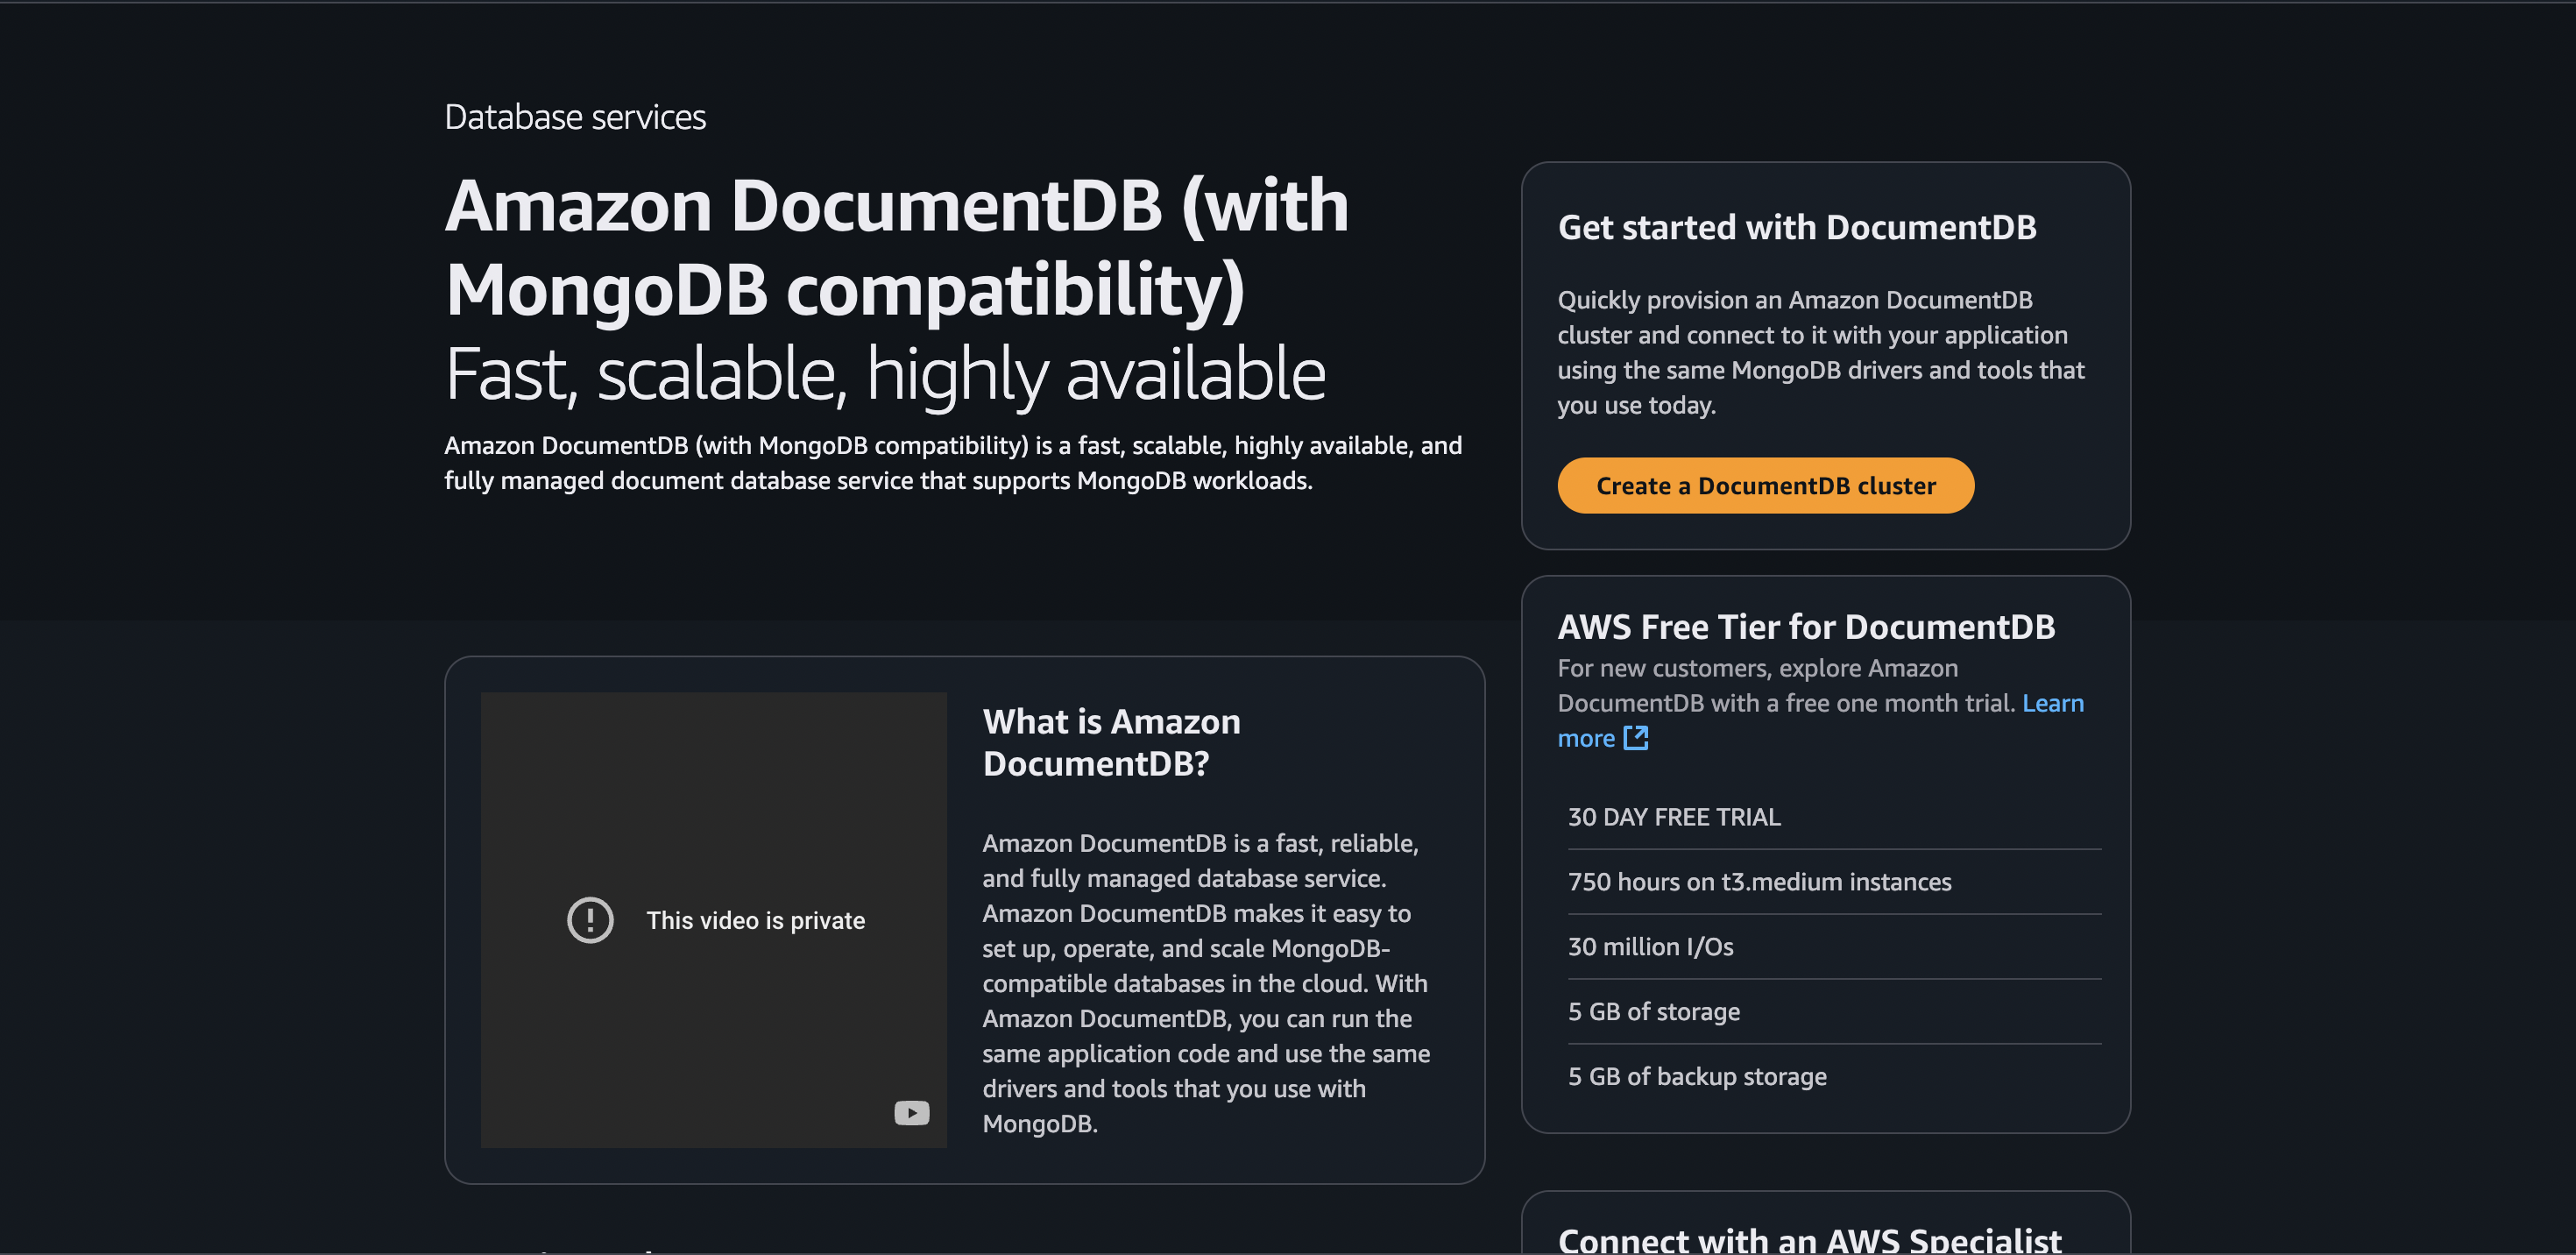
Amazon DocumentDB is a fully managed database service and it is designed to be compatible with MongoDB workloads. It is ideal for storing, querying, and indexing JSON data. To start using this service, we can click on Create a DocumentDB cluster:
Nonetheless, before getting into the configuration of the database, let’s explore a bit more how is this system designed. I consider this to be very important because, even though this service is managed by Amazon, we should understand the infrastructure behind it in case we want to draw a good architecture of our system and take costs into account properly.
Exploring Amazon’s DocumentDB Core
A DocumentDB cluster is a logical group of resources (instances + shared storage + configuration) that contains everything needed for the database to run.
At its foundation is a shared storage volume (cluster volume) where all data is automatically replicated six times — two copies in each of three Availability Zones (AZs) — to ensure durability and high availability. This storage is built on AWS-managed SSD hardware and coordinated by intelligent software that handles replication and recovery automatically.
Inside the cluster are the compute instances (specialised EC2-like instances) that process queries. Their roles are separated for both consistency and performance:
Primary Instance: Handles all
write operations(insert, update, delete) to ensure data integrity. It can also handle reads.Replica Instances: Their main role is to handle
read operations(find), allowing the application to serve more users without overloading the primary. They also act ashot standbys, ready to be promoted if the primary fails.
To manage traffic, DocumentDB provides two special endpoints (which behave like intelligent reverse proxies):
Cluster Endpoint – Directs all write traffic to the primary instance (and can serve reads if needed).
Reader Endpoint – Acts as a load balancer, distributing read traffic across all replicas.
This architecture keeps the database fast, highly available, and resilient, even under heavy traffic.
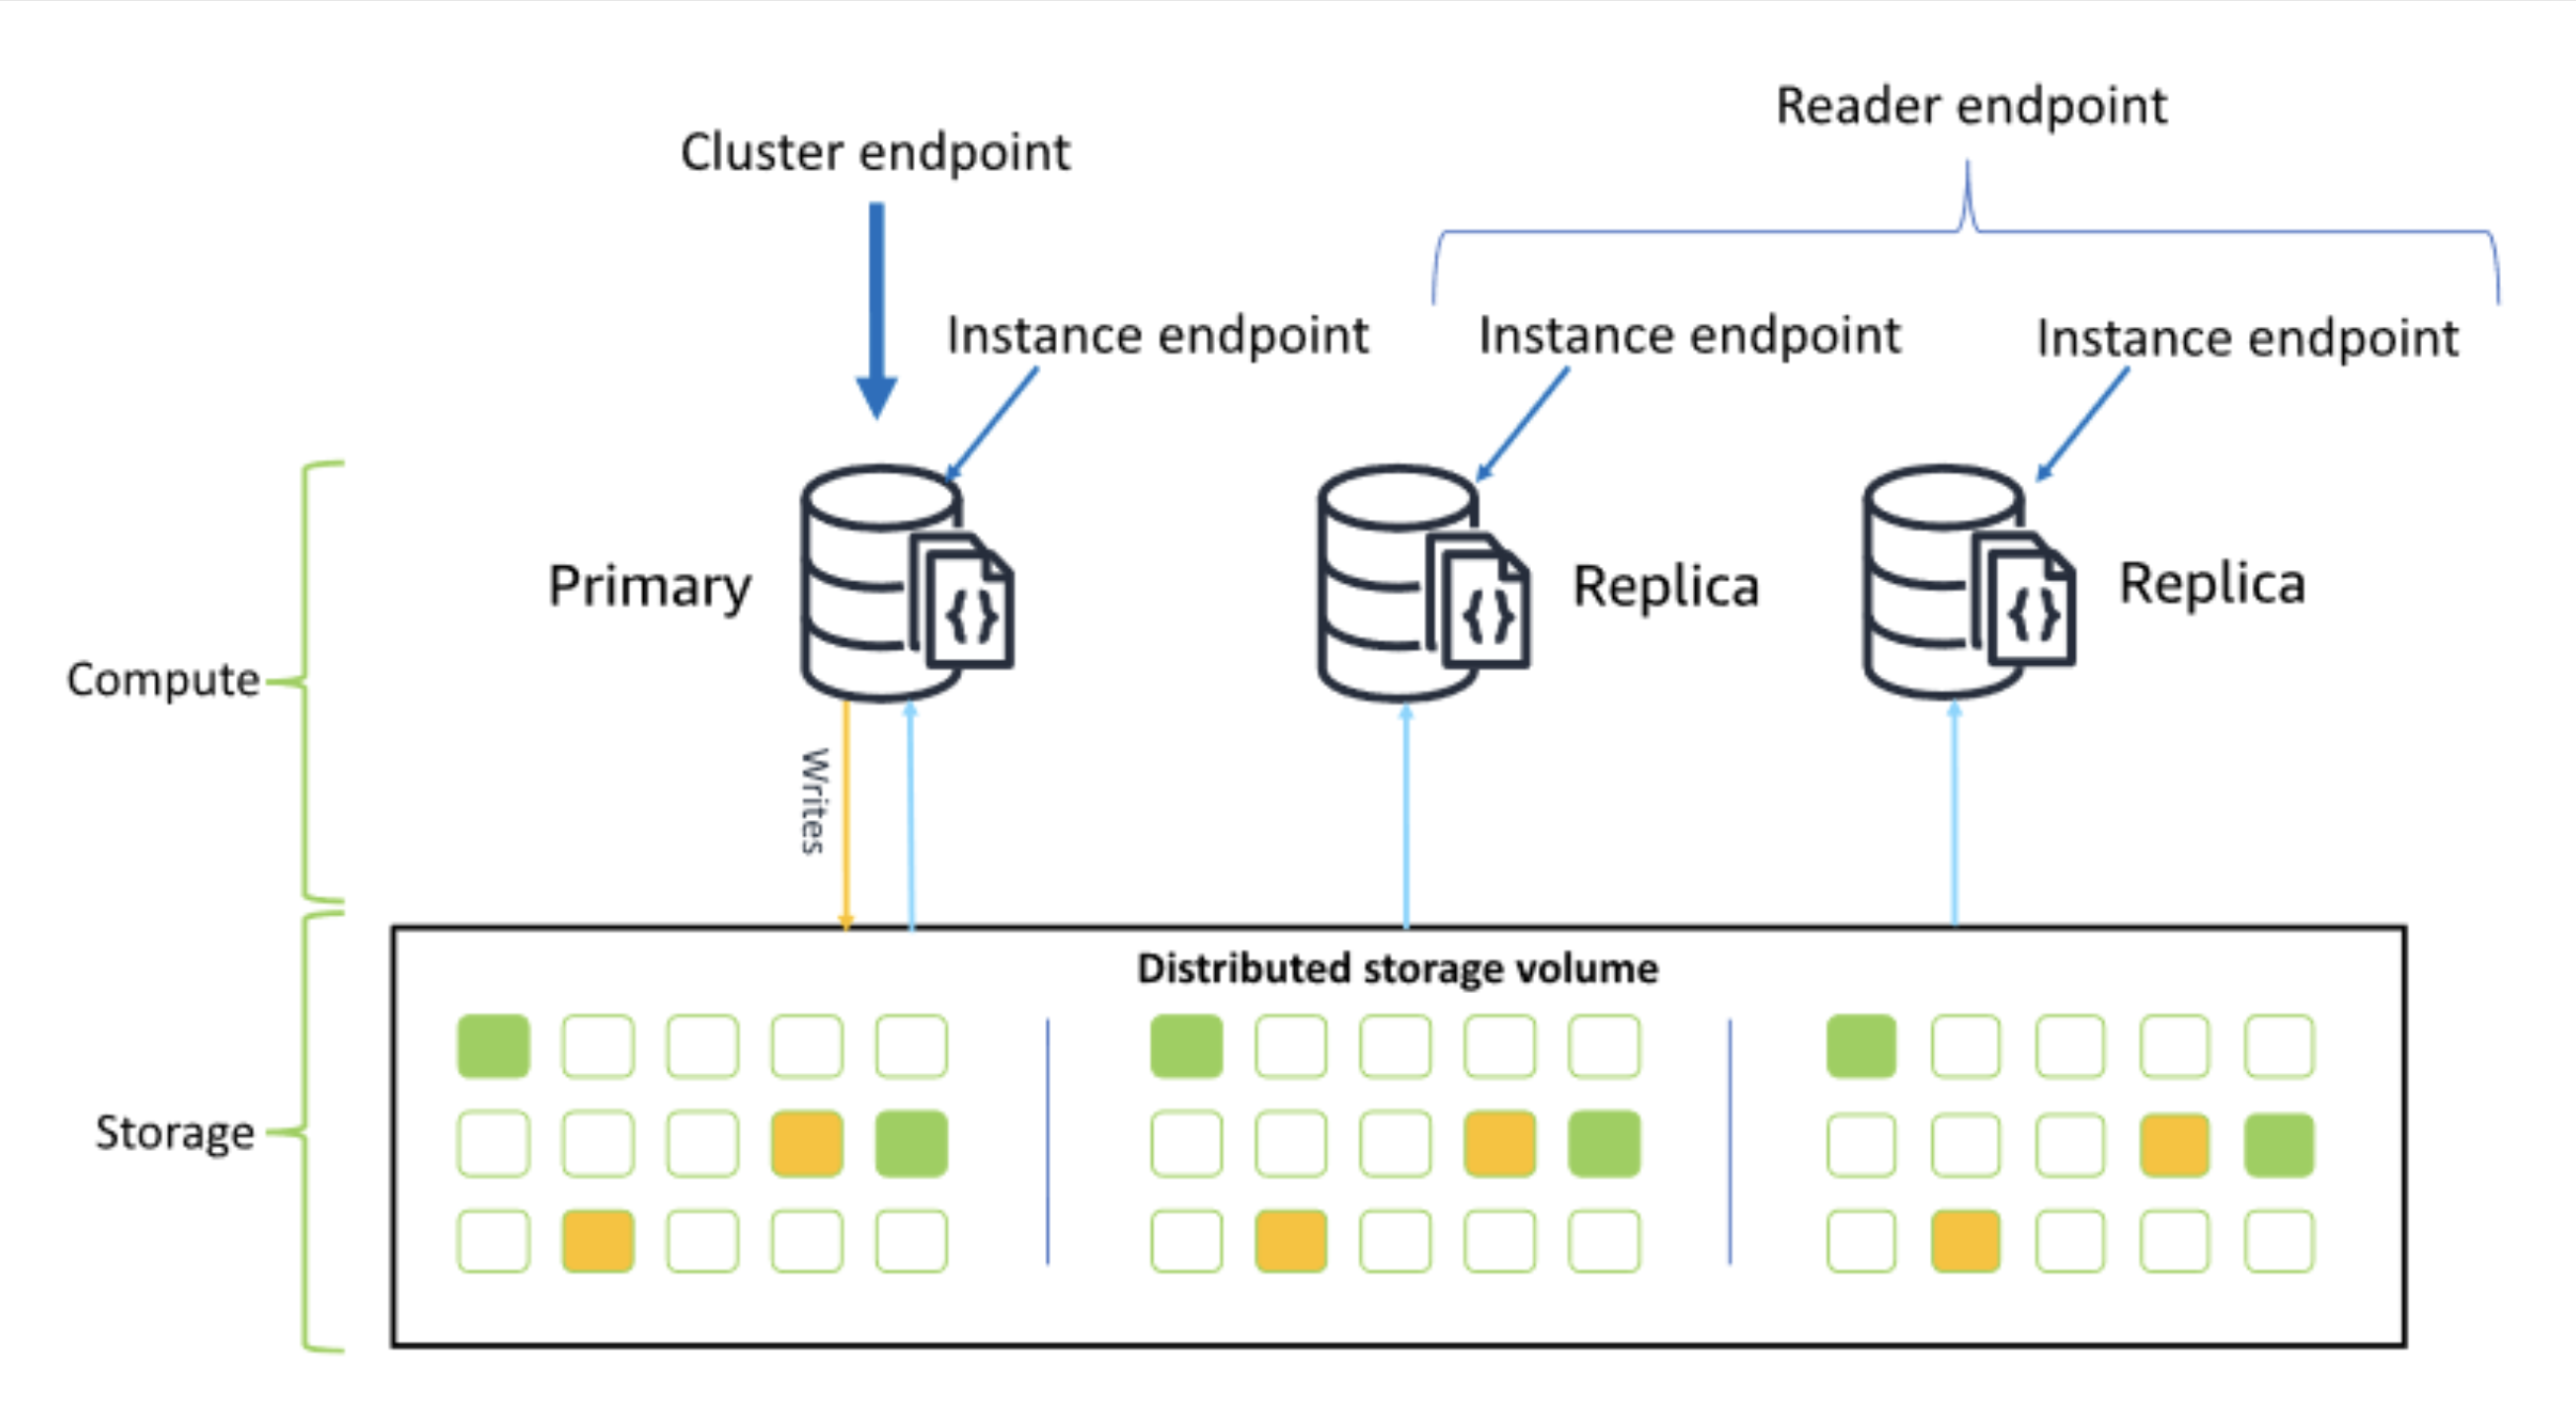 Source: Amazon DocumentDB
Jumping into the Configuration
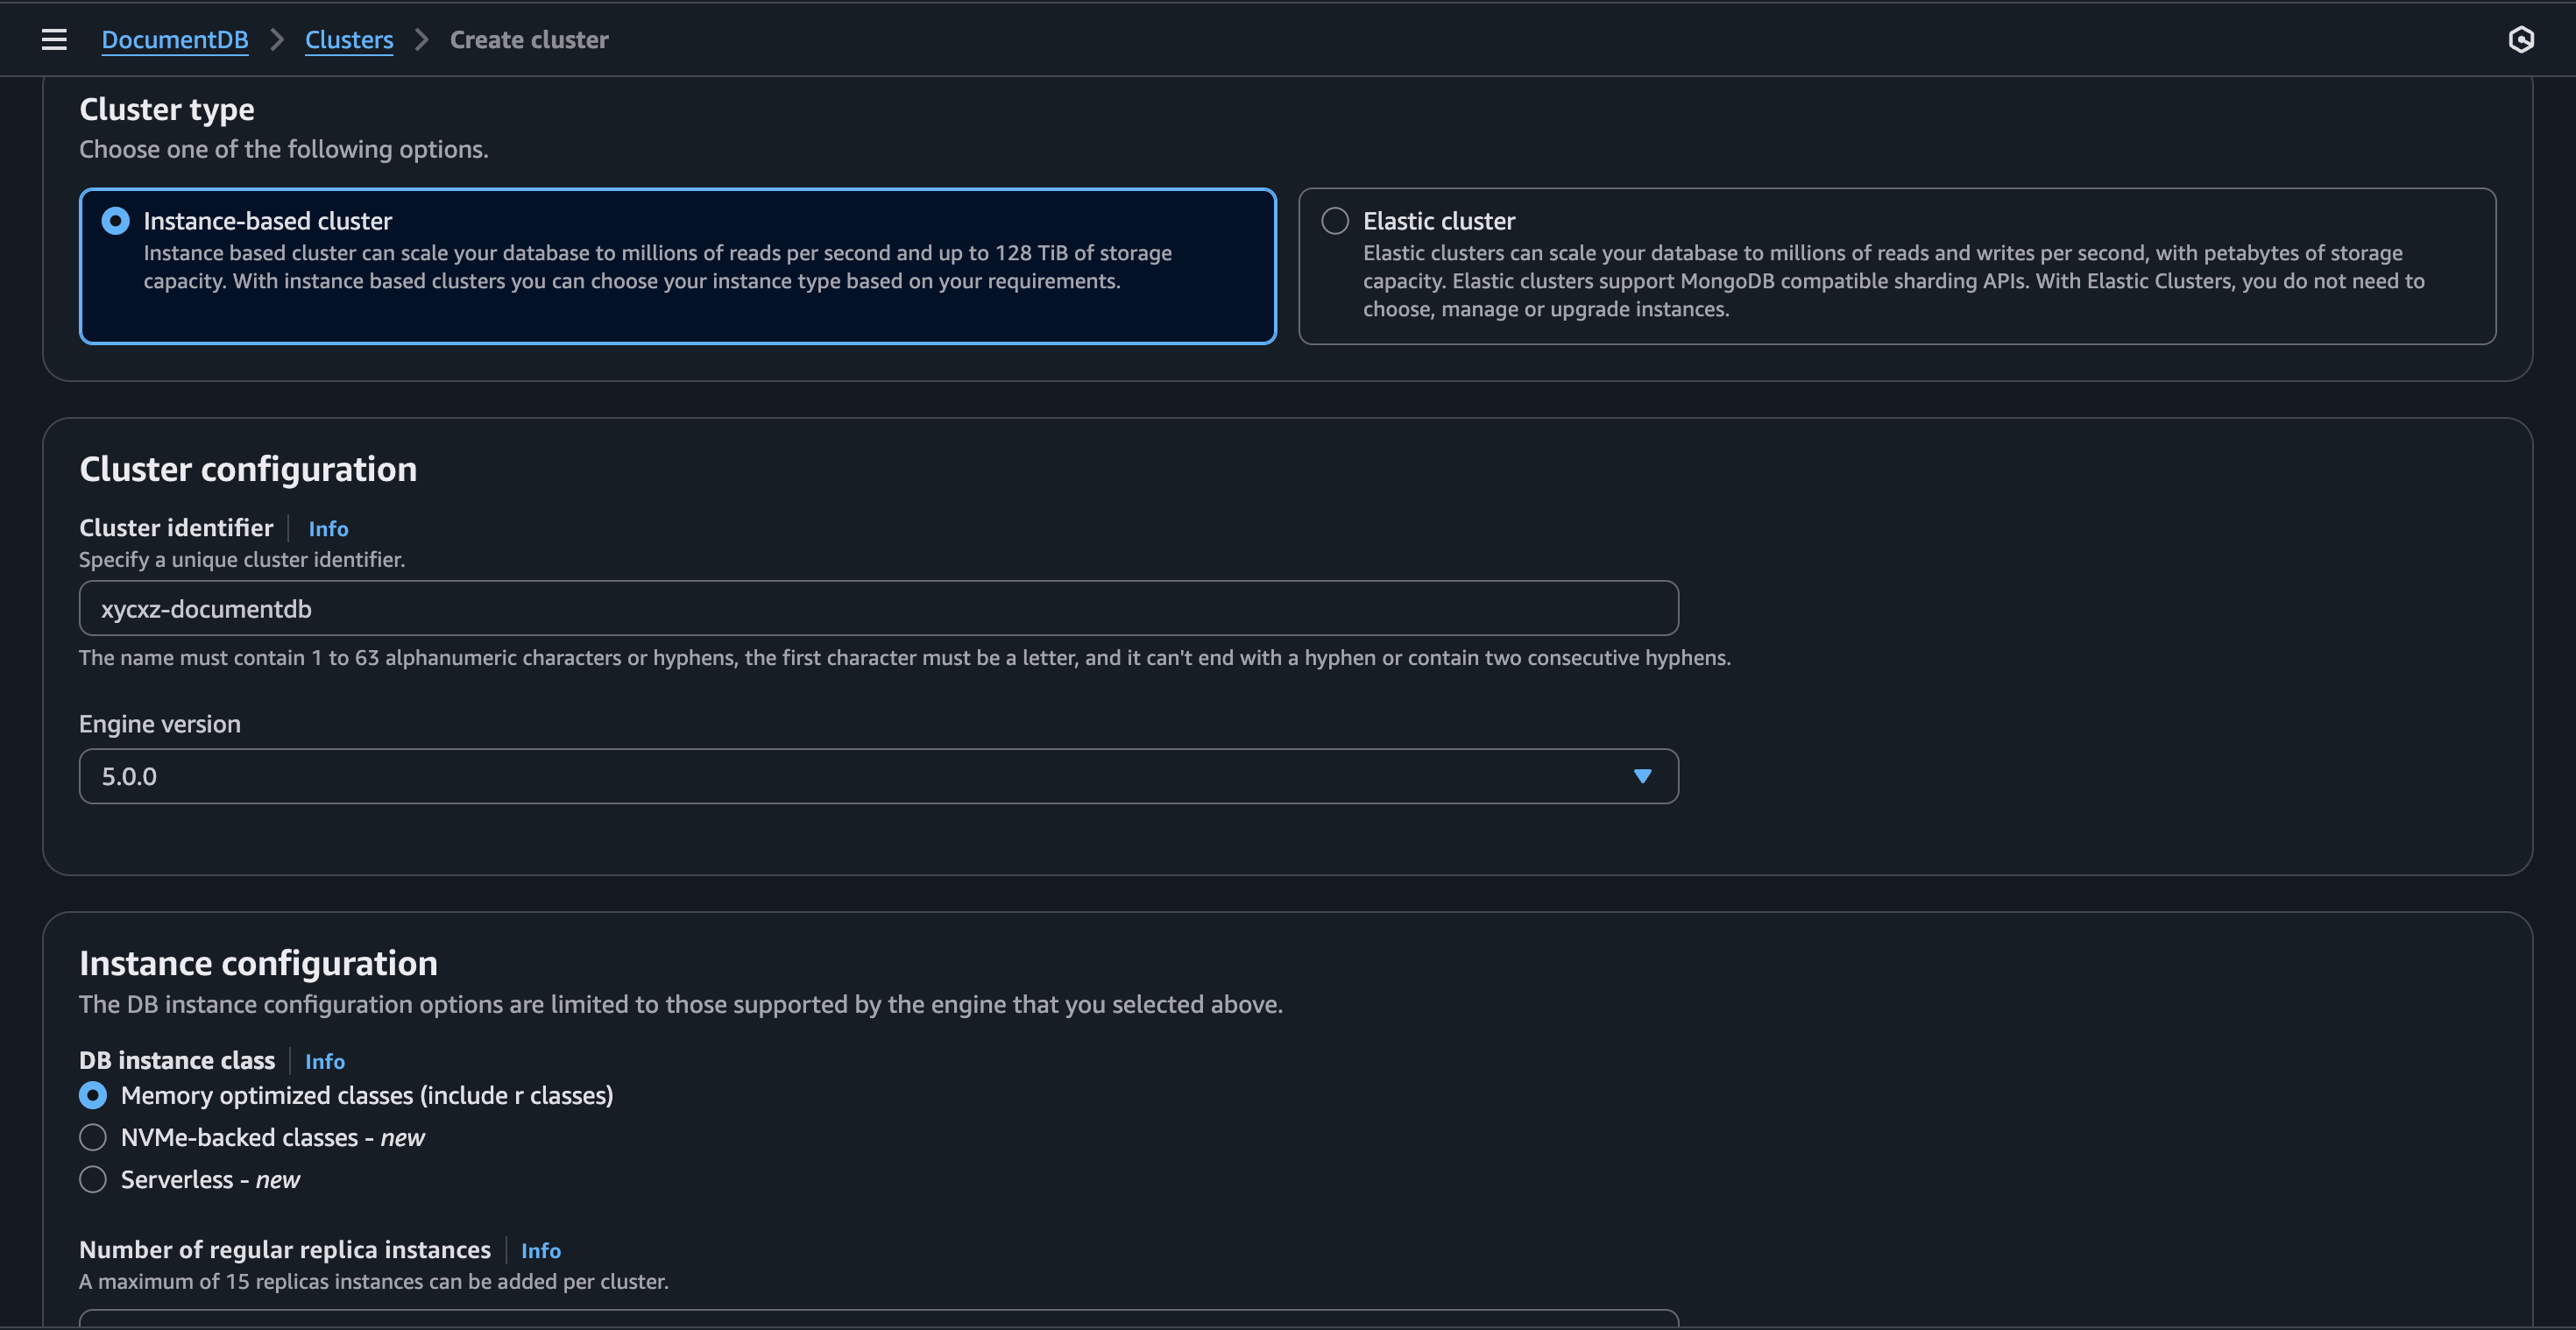
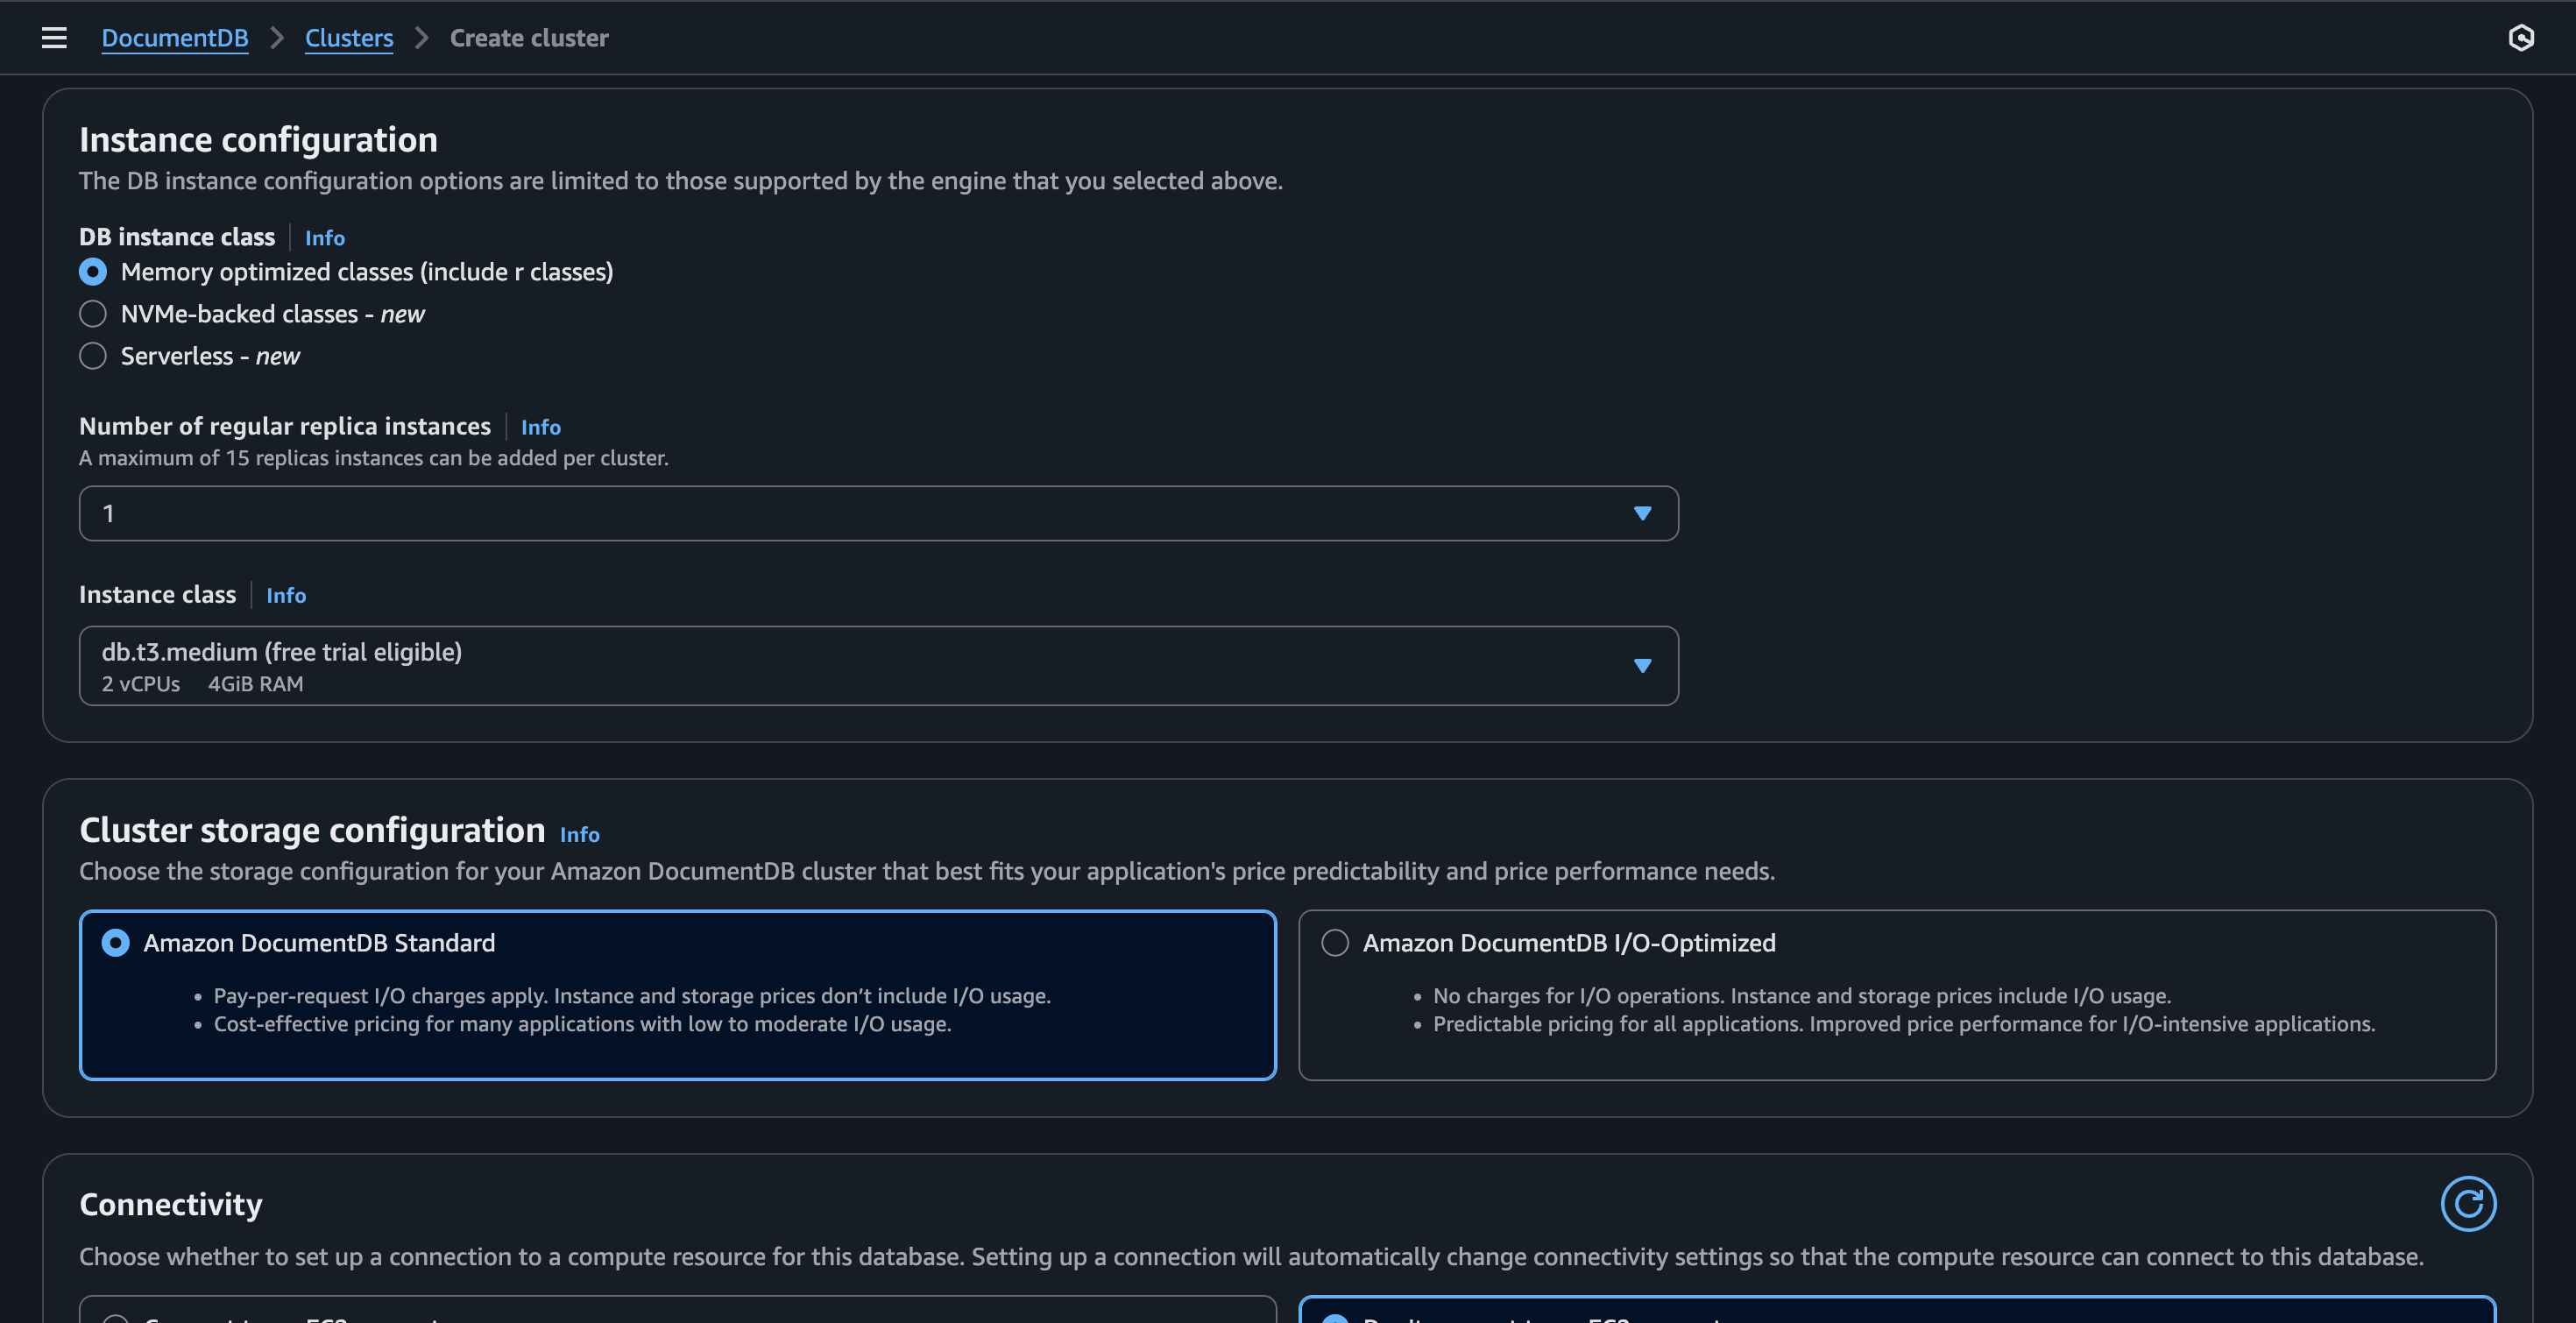
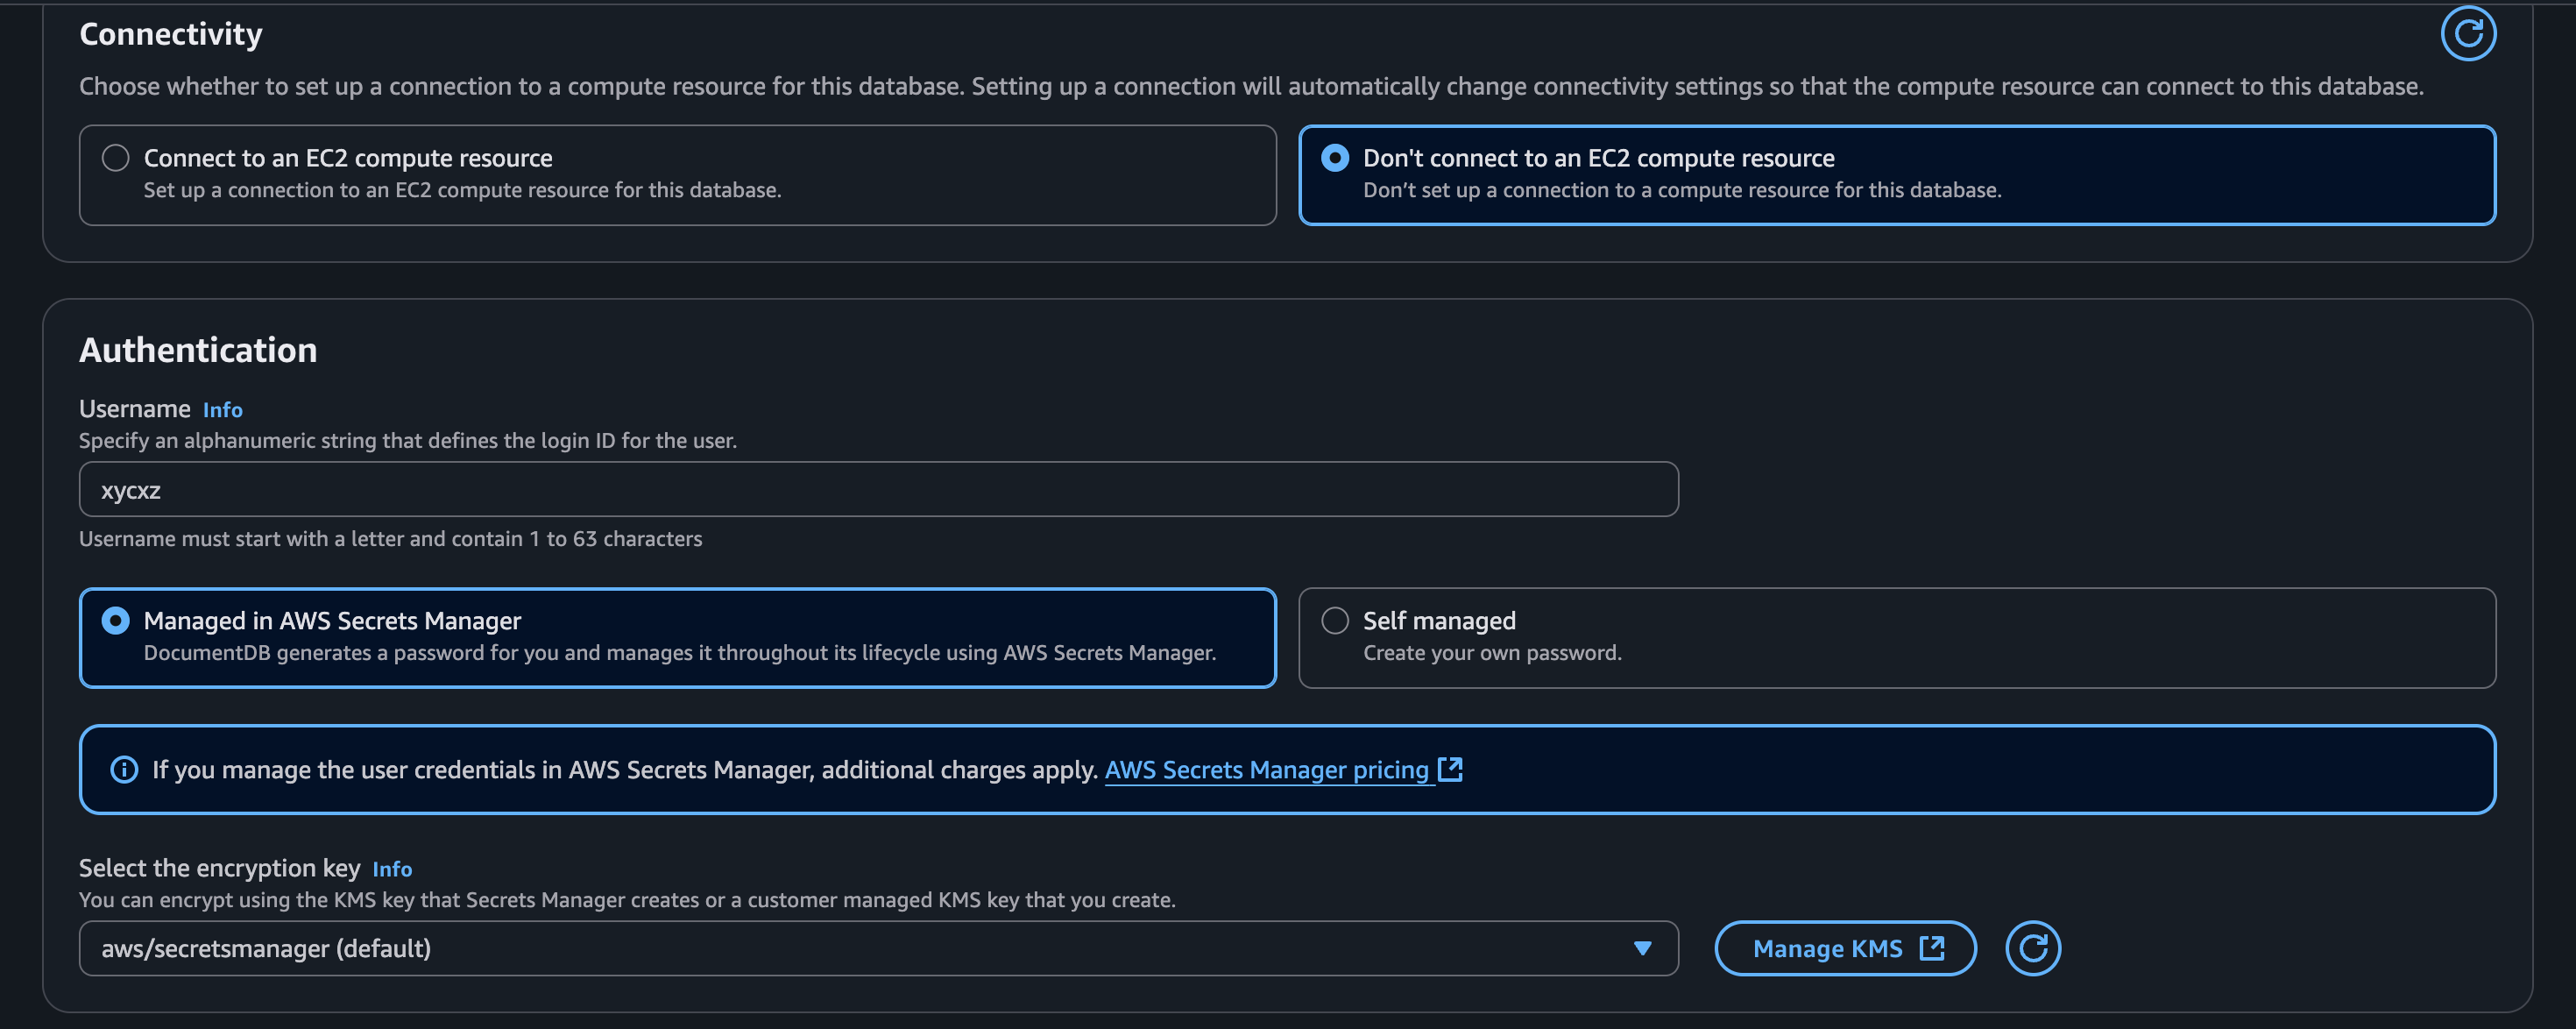
The configuration will look as follows:
Note: I will only use 1 replica in this case for demonstration purposes. In production environments we might need more!
Note: I’ll be using AWS Secrets Manager, which help us “manage, retrieve, and rotate database credentials, application credentials, OAuth tokens, API keys, and other secrets throughout their lifecycles.” This is crucial to enhance security in the cloud.
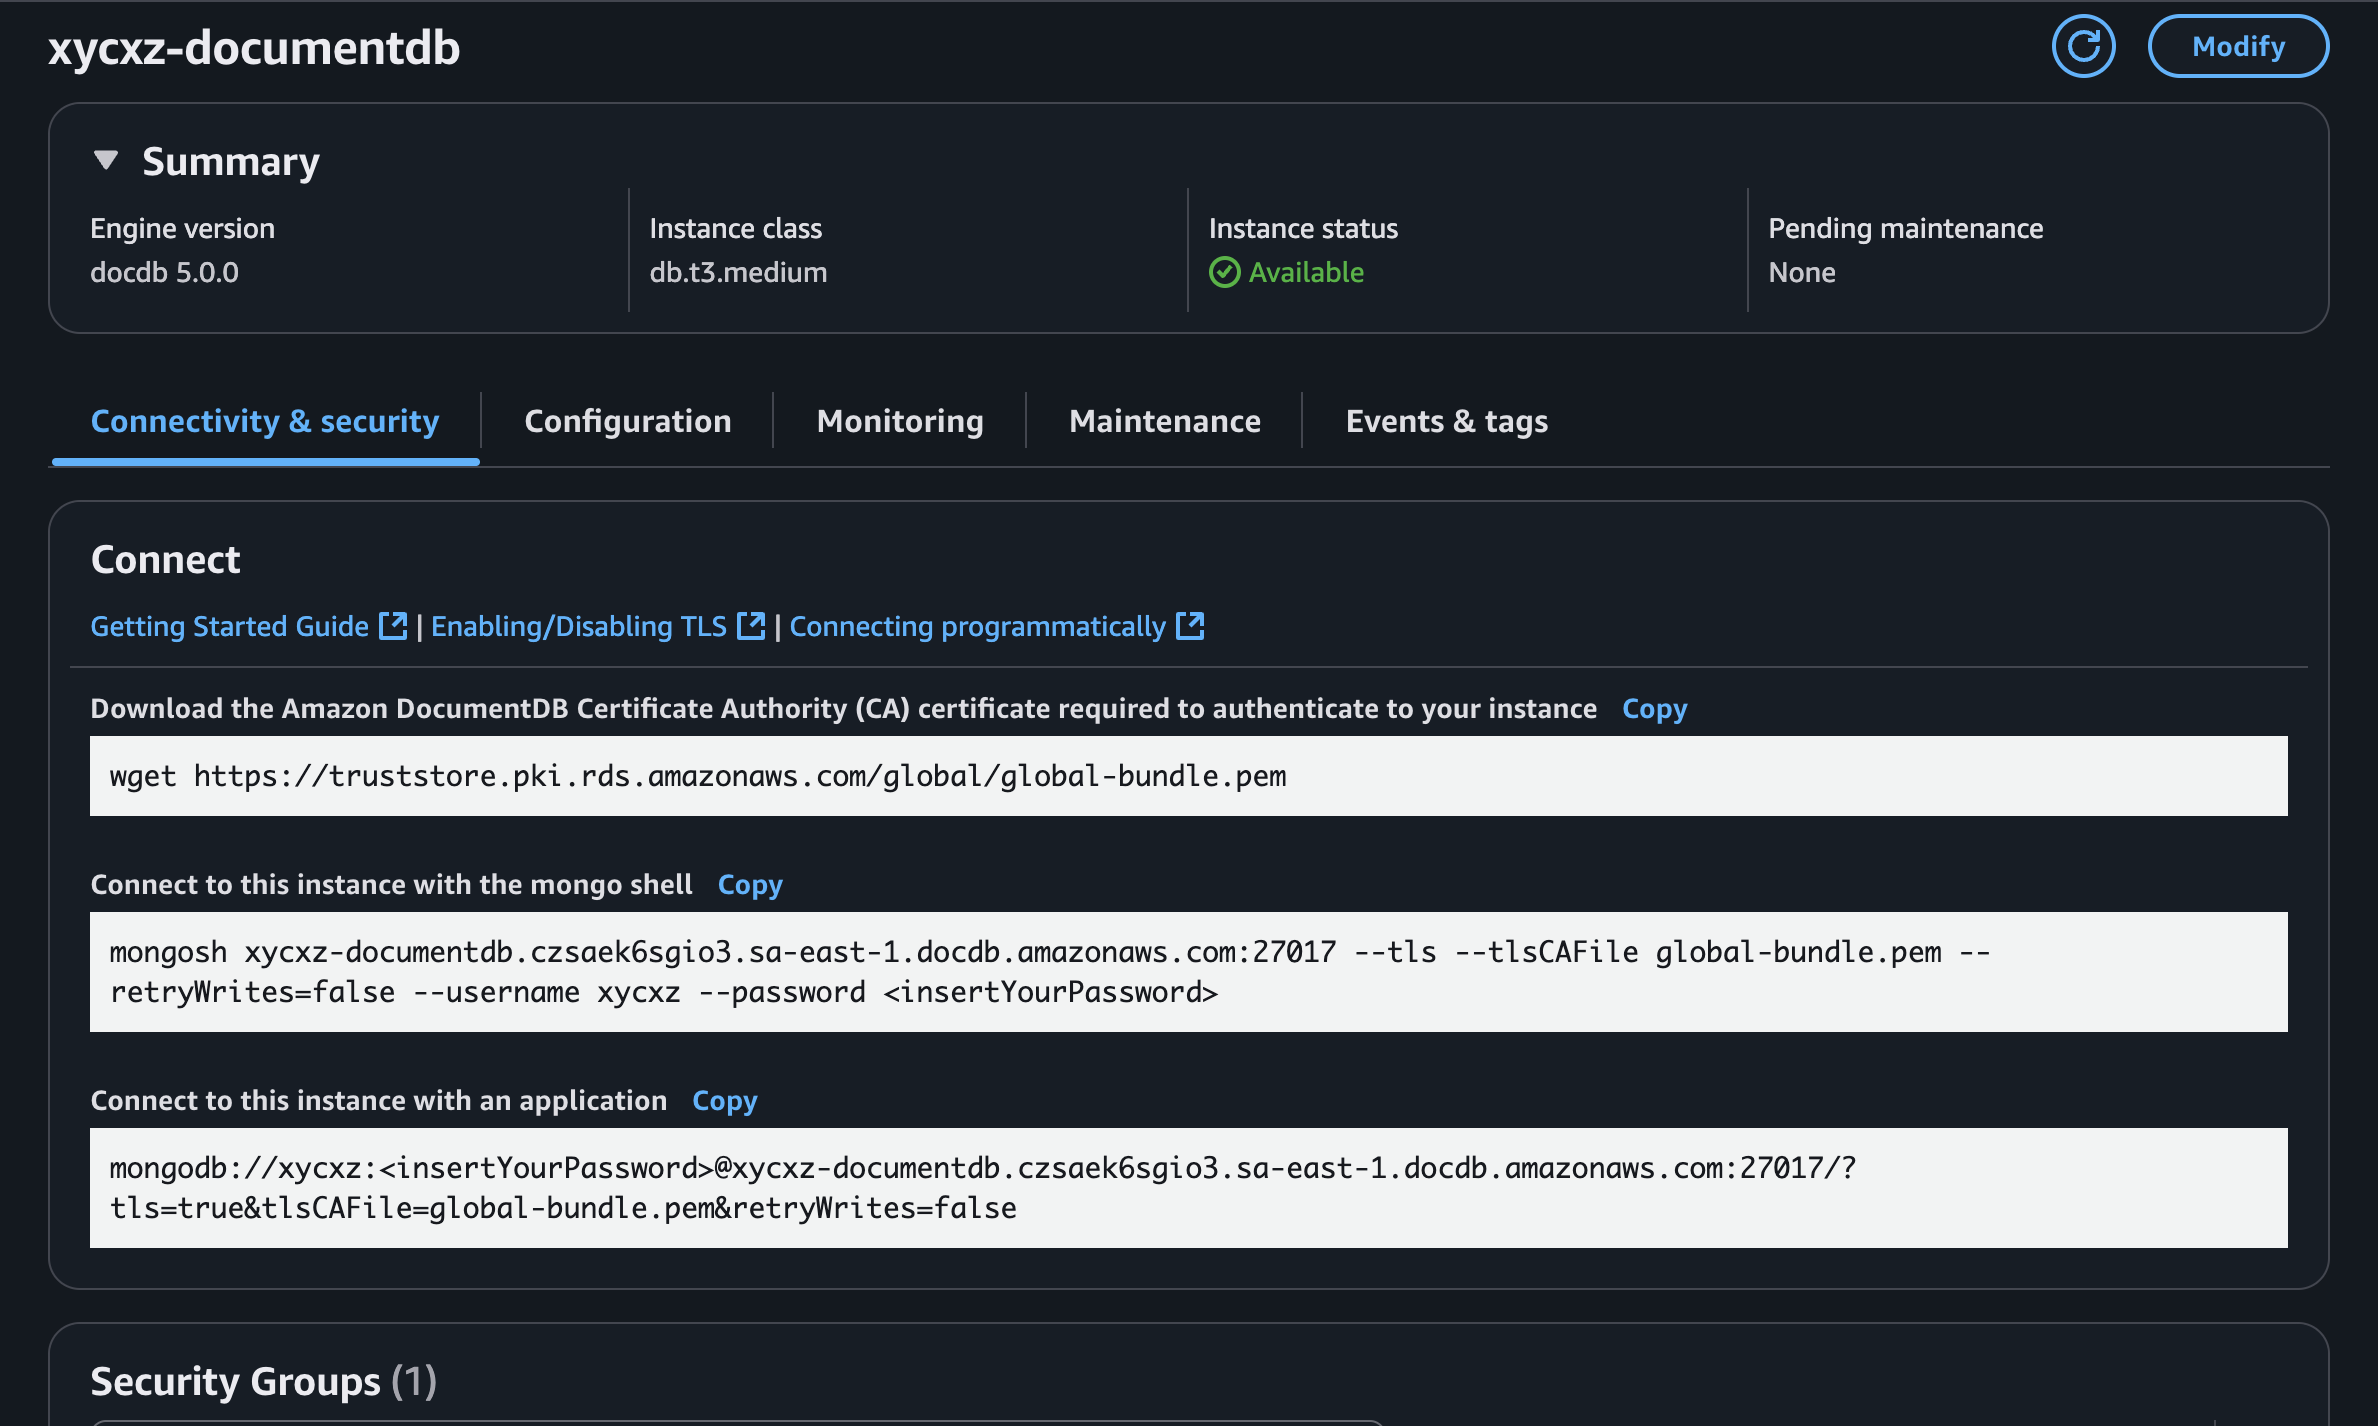
Once we click on Create Cluster, we will see the following:
Note: Pay attention to the Role tab. This is how we know what resource is defined.
If we click on the Primary intance, we will notice that we can do some configuration there:
Here are the steps we need to follow to claim that the instance is actually ours. This will allow us to connect our database to this service securely and let AWS manage the rest. We can follow this post to help us with this.
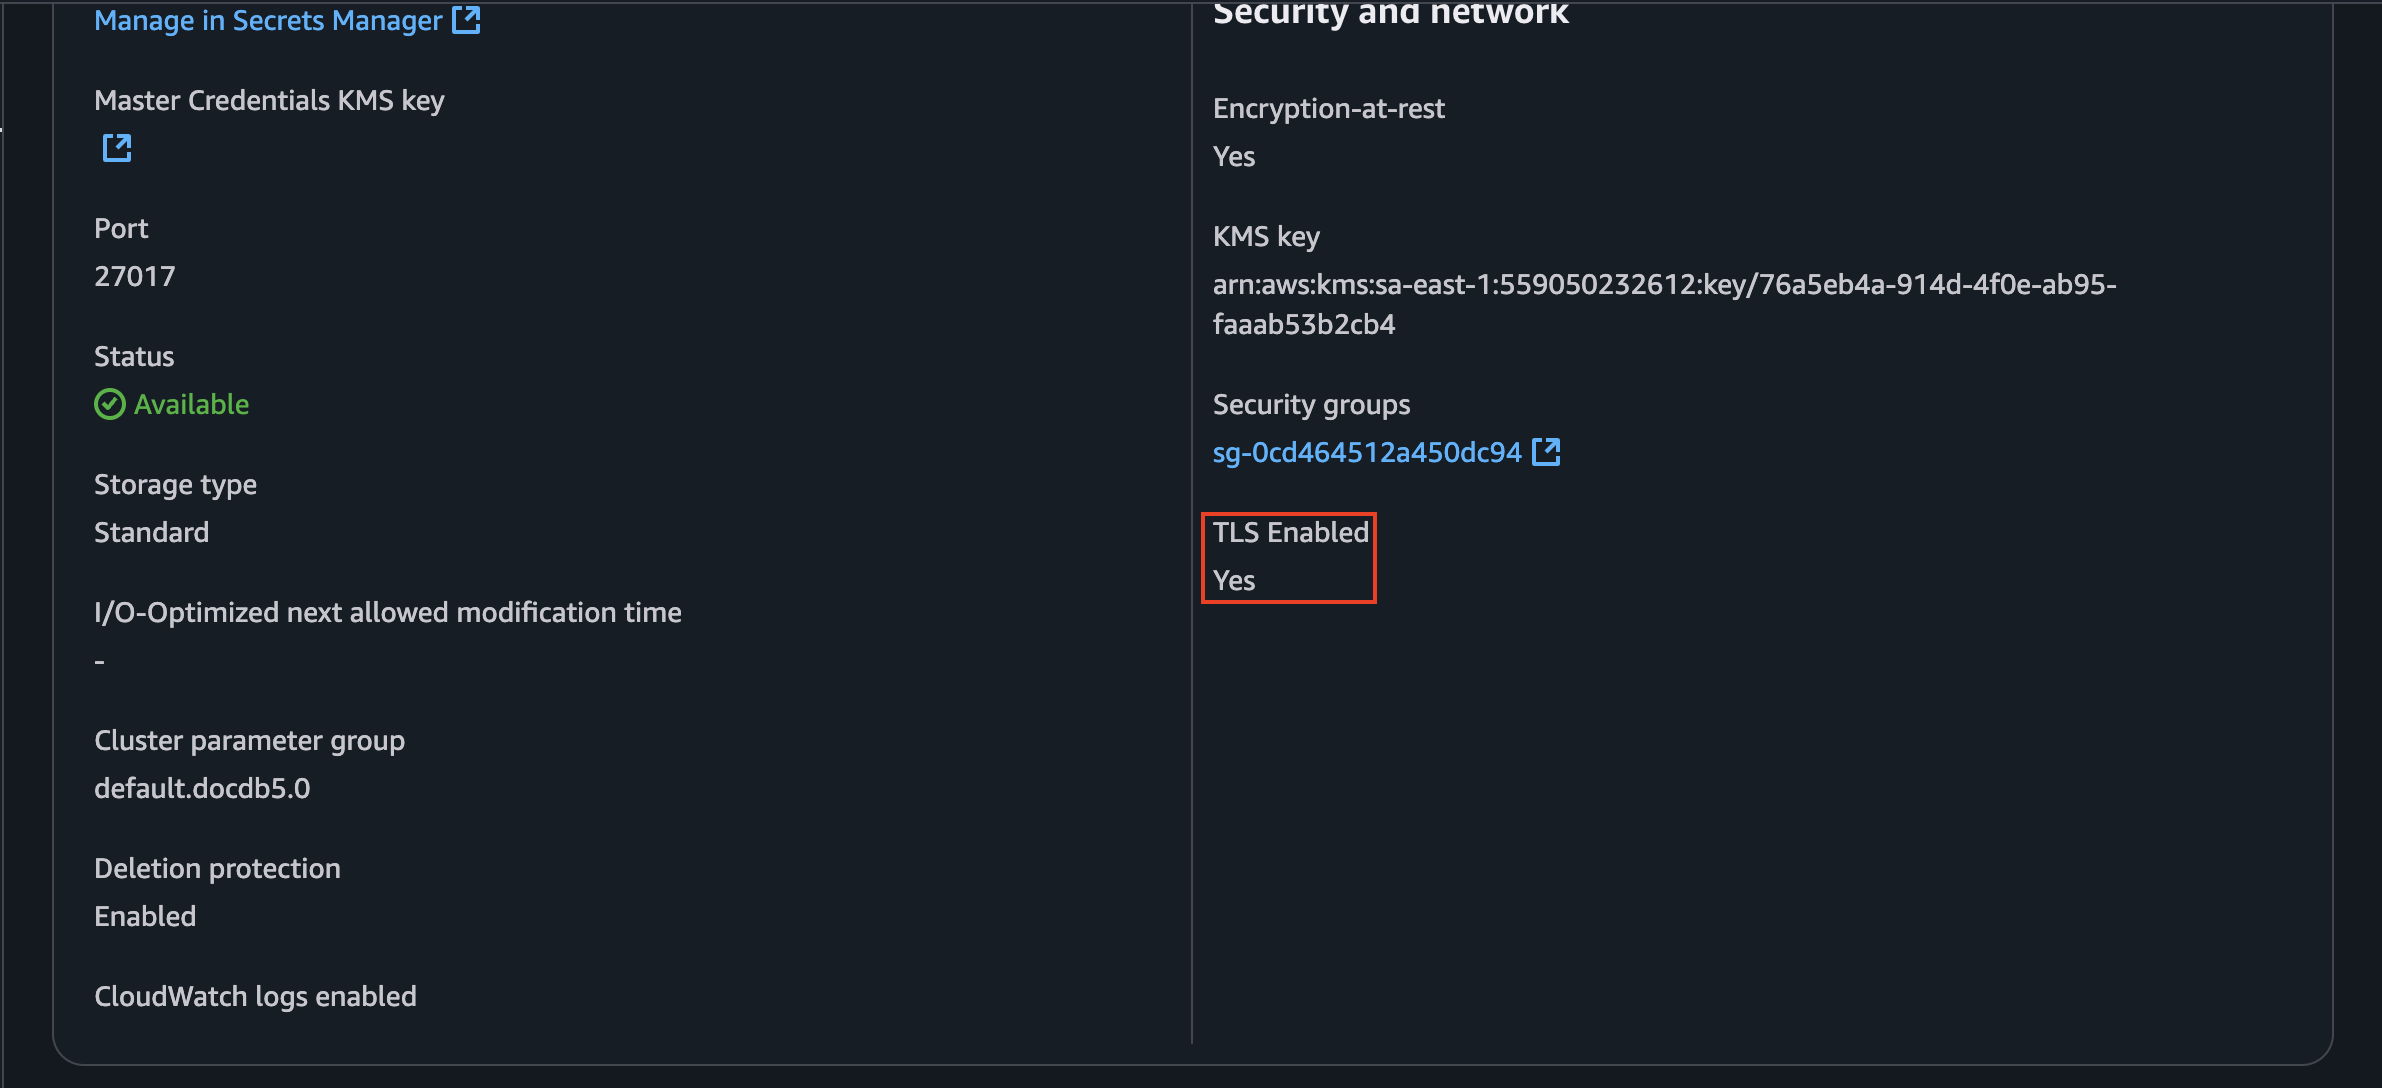
However, first we need to figure out if our DocumentDB is using TLS or not. We can check that by going to the cluster configuration tab:
Since it is enabled, I will be following the steps shown in the post for this case. Because I’m using NodeJS for the backend, I need to choose the correct language and see what I have to add to my code to make this work properly:
1
2
3
4
5
6
7
8
9
10
11
12
13
14
15
16
17
18
19
20
21
22
23
24
25
26
27
28
29
30
31
32
var MongoClient = require('mongodb').MongoClient

//Create a MongoDB client, open a connection to DocDB; as a replica set,
//  and specify the read preference as secondary preferred

var client = MongoClient.connect(
'mongodb://sample-user:password@sample-cluster.node.us-east-1.docdb.amazonaws.com:27017/sample-database?tls=true&replicaSet=rs0&readPreference=secondaryPreferred&retryWrites=false',
{
  tlsCAFile: `global-bundle.pem` //Specify the DocDB; cert
},
function(err, client) {
    if(err)
        throw err;

    //Specify the database to be used
    db = client.db('sample-database');

    //Specify the collection to be used
    col = db.collection('sample-collection');

    //Insert a single document
    col.insertOne({'hello':'Amazon DocumentDB'}, function(err, result){
      //Find the document that was previously written
      col.findOne({'hello':'Amazon DocumentDB'}, function(err, result){
        //Print the result to the screen
        console.log(result);

        //Close the connection
        client.close()
      });
   });
});
The documentation uses the MongoDB client while I’m using Mongoose. Nevertheless, the same config options are supported in both cases. I’ll download the required certificate on the Docker container that holds my NodeJS application:
1
2
3
4
5
6
7
8
9
10
11
FROM --platform=linux/amd64 node:20

EXPOSE 3000
WORKDIR /app
COPY package.json package-lock.json ./
RUN npm install
COPY . .

RUN wget https://truststore.pki.rds.amazonaws.com/global/global-bundle.pem # Here

ENTRYPOINT npm run start
Note: This global-bundle.pem file is a certificate bundle provided by AWS. The tlsCAFile option tells our application to use this bundle to verify that it is connecting to a legitimate Amazon DocumentDB endpoint, which is a critical step in preventing MitM attacks.
Now, I have to add the tlsCAFile option where we connect to the database to pick up the file Mongoose needs in order to allow the SSL connection with AWS.
1
2
3
4
5
6
const db = mongoose.connect(mongoDbUri, {
connectTimeoutMS: 1000,

tlsCAFile: (process.env.NODE_ENV == 'production' ? 'global-bundle.pem': undefined) // Here - I addedd the NODE_ENV variable in case we are on the development phase of the application

});
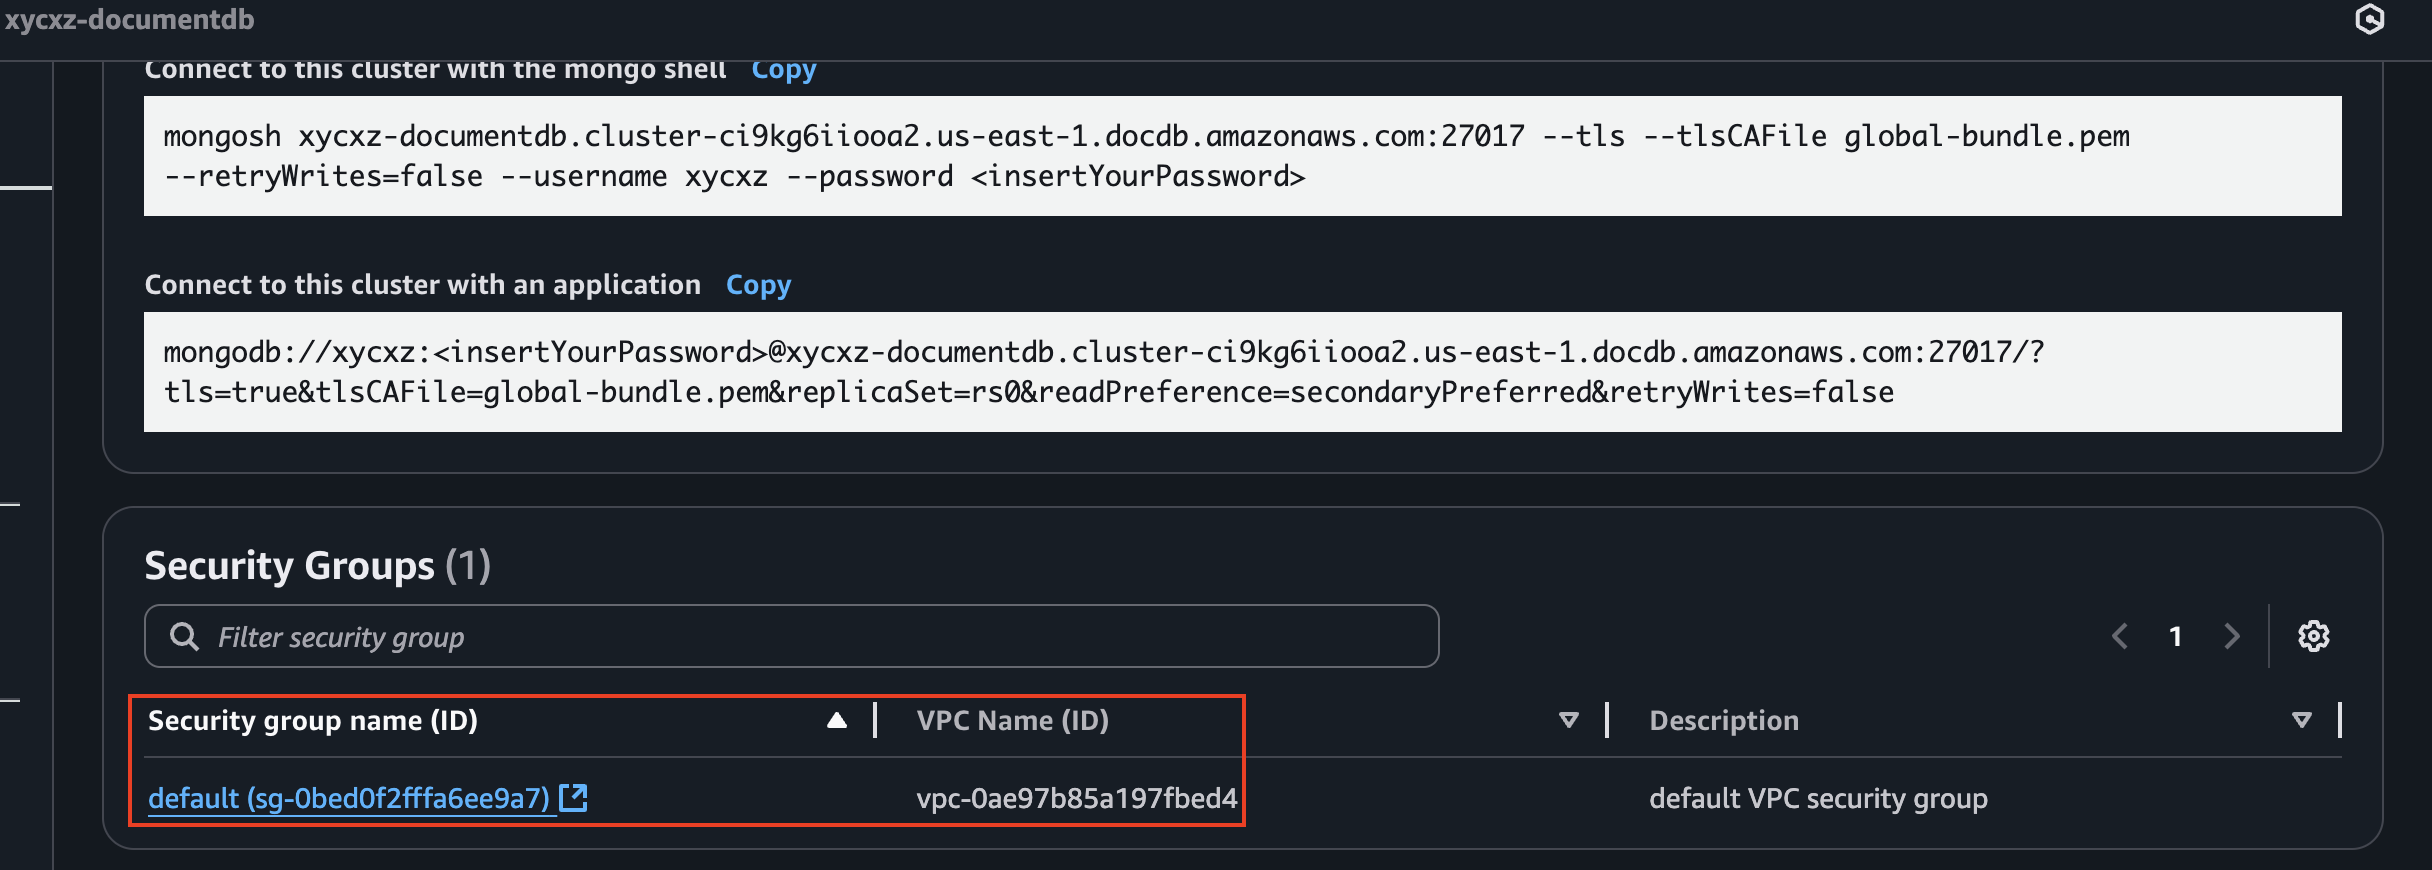
Once we are done with this, we can upload our application to AppRunner. However, we need to check for connectivity before doing this, because when we create a cluster a VPC is always attached to it. Let’s check this and then configure AppRunner to make sure both services can communicate to each other:
We also need to check for the MONGODB_URI environmental variable to connect AppRunner to the database. Let’s check how my code looks like:
1
const mongoDbUri = process.env.MONGODB_URI || 'mongodb://localhost:27017/xycxz';
Let’s break this down quickly:
1) process.env.MONGODB_URI looks for a configuration setting called MONGODB_URI that has been provided by the hosting environment (like Docker, AWS AppRunner, or a Linux server).
2) If process.env.MONGODB_URI doesn’t exist, the code will use the value on the right side of the ||.
To successfully connect our database to AppRunner, we need to use this environmental variable with the following command:
1
mongodb://xycxz:<insertYourPassword>@xycxz-documentdb.cluster-ci9kg6iiooa2.us-east-1.docdb.amazonaws.com:27017/xycxz?tls=true&tlsCAFile=global-bundle.pem&replicaSet=rs0&readPreference=secondaryPreferred&retryWrites=false
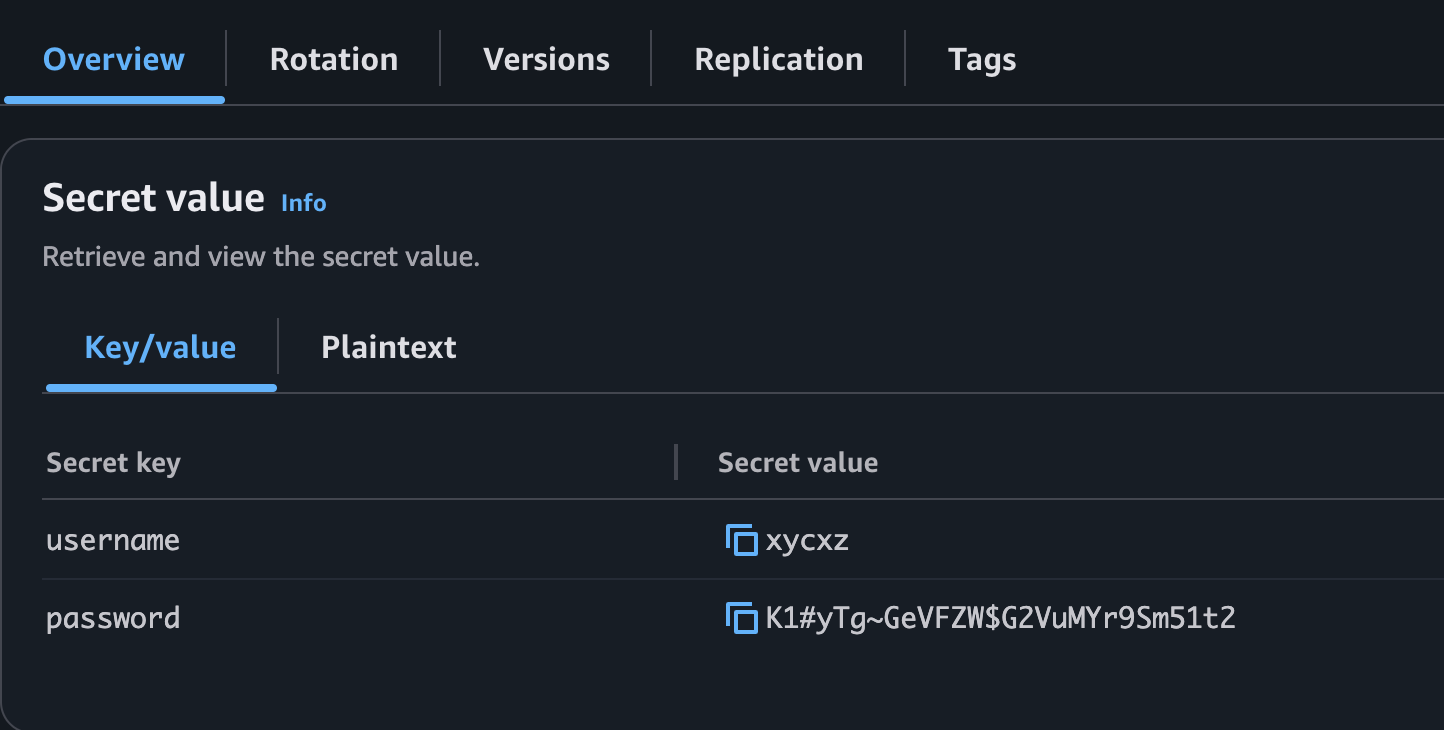
Because I used AWS Secrets Manager, I have to take a look to my credentials and then pass them to the environmental variable:
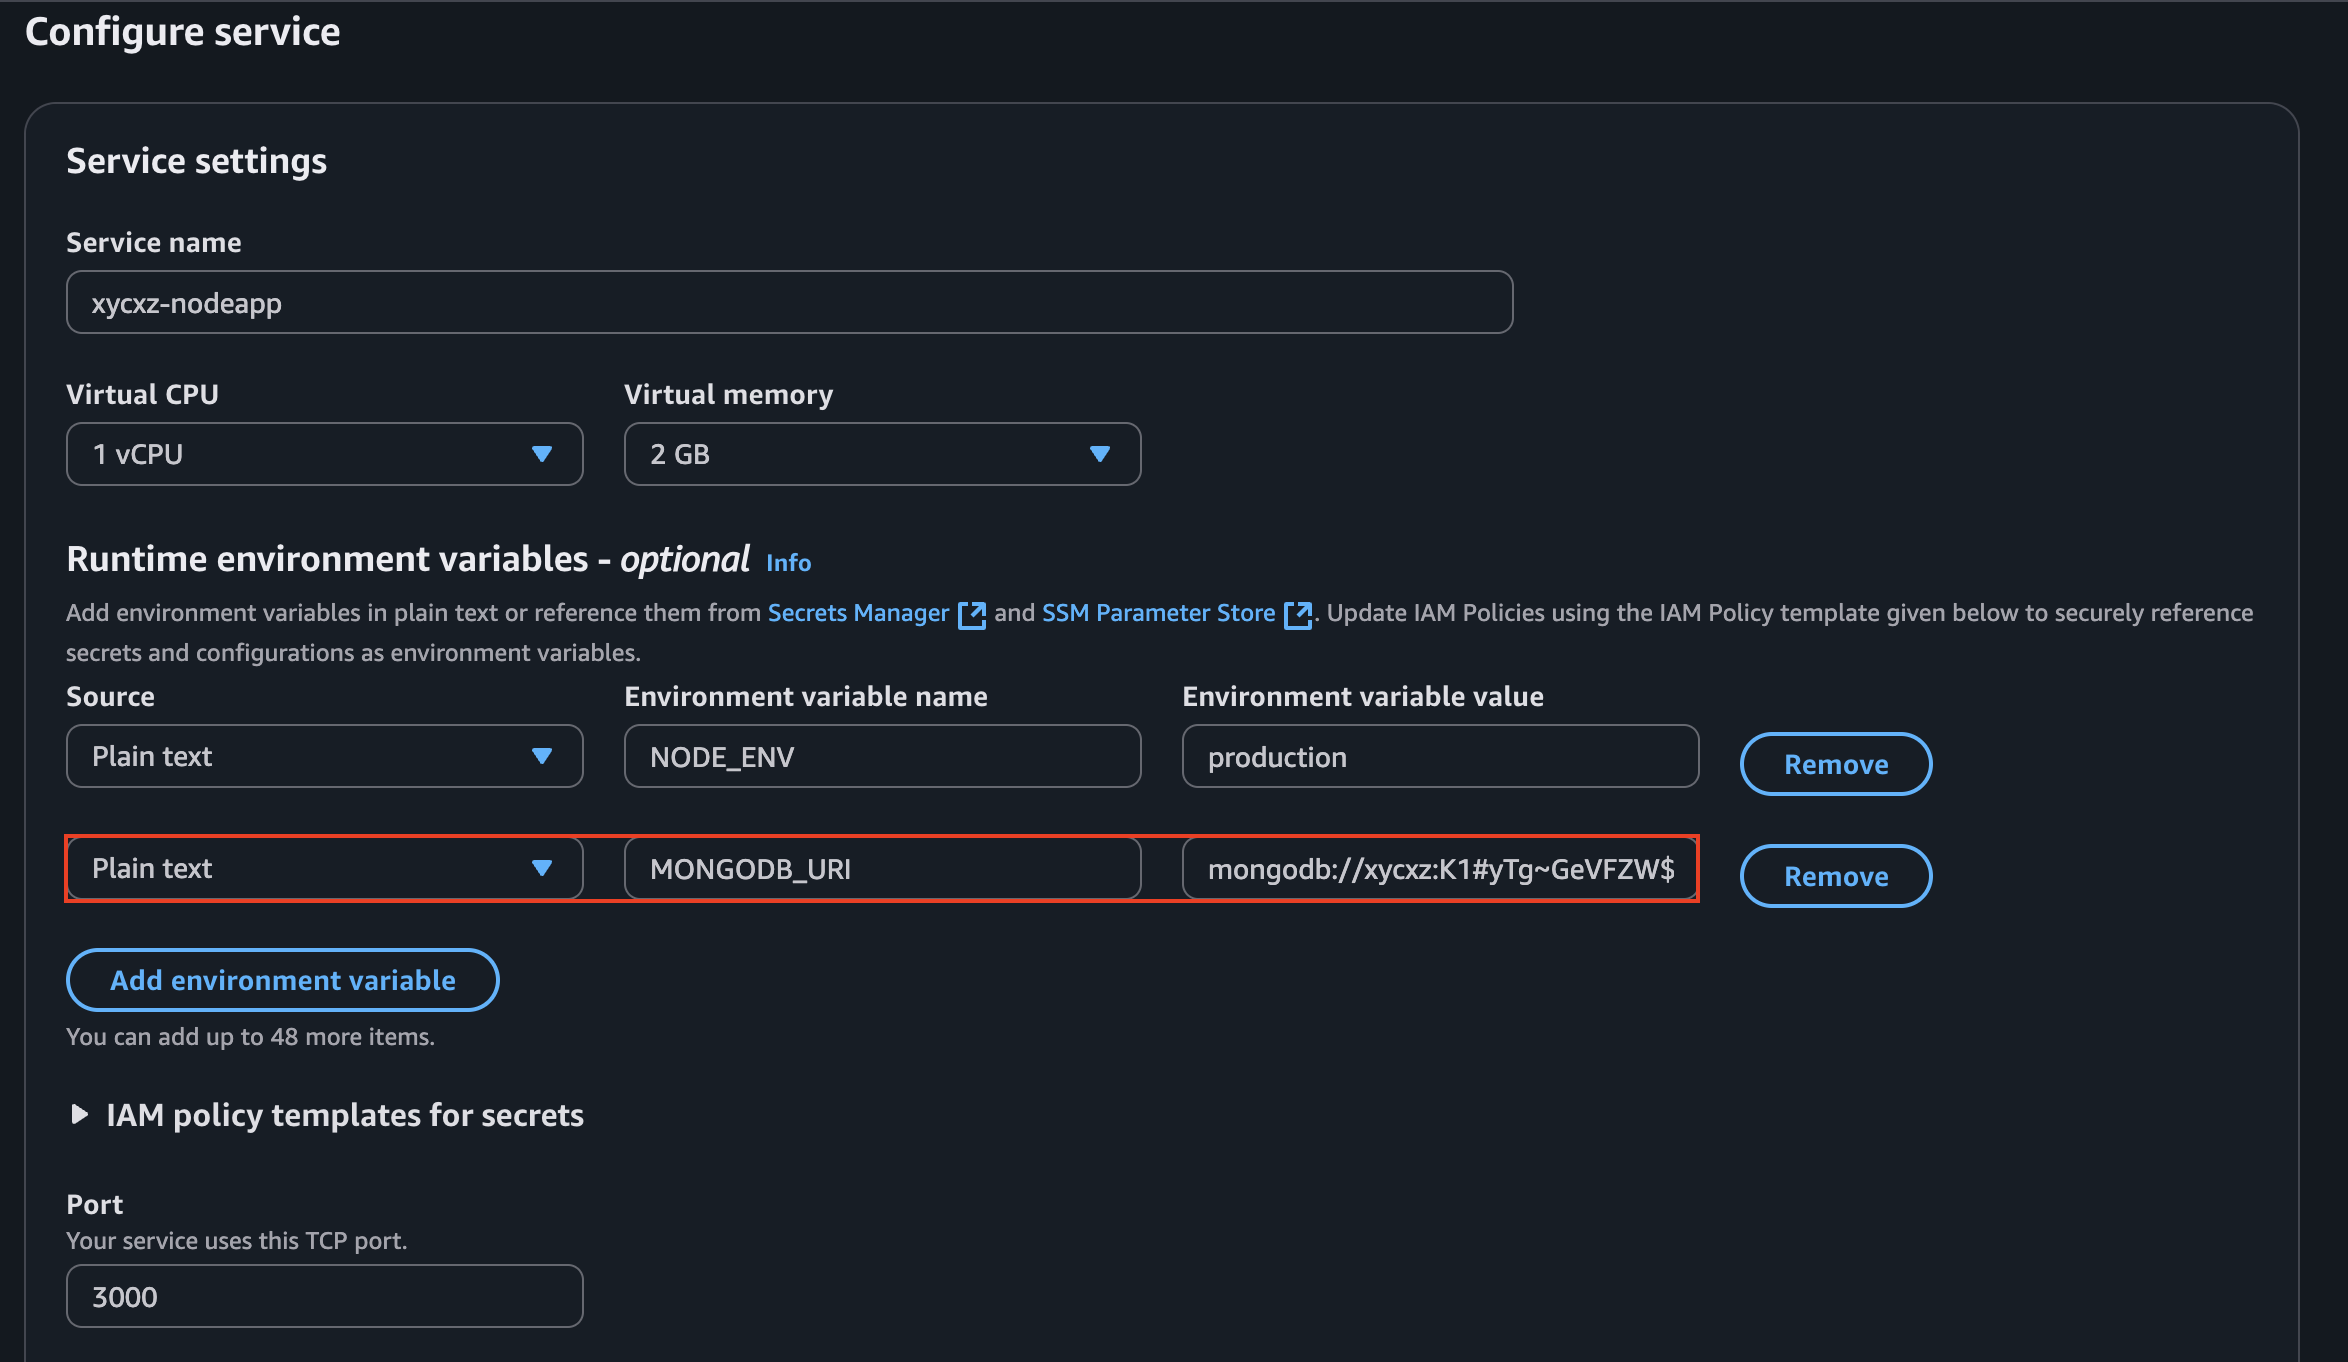
Then, I can pass this to AppRunner:
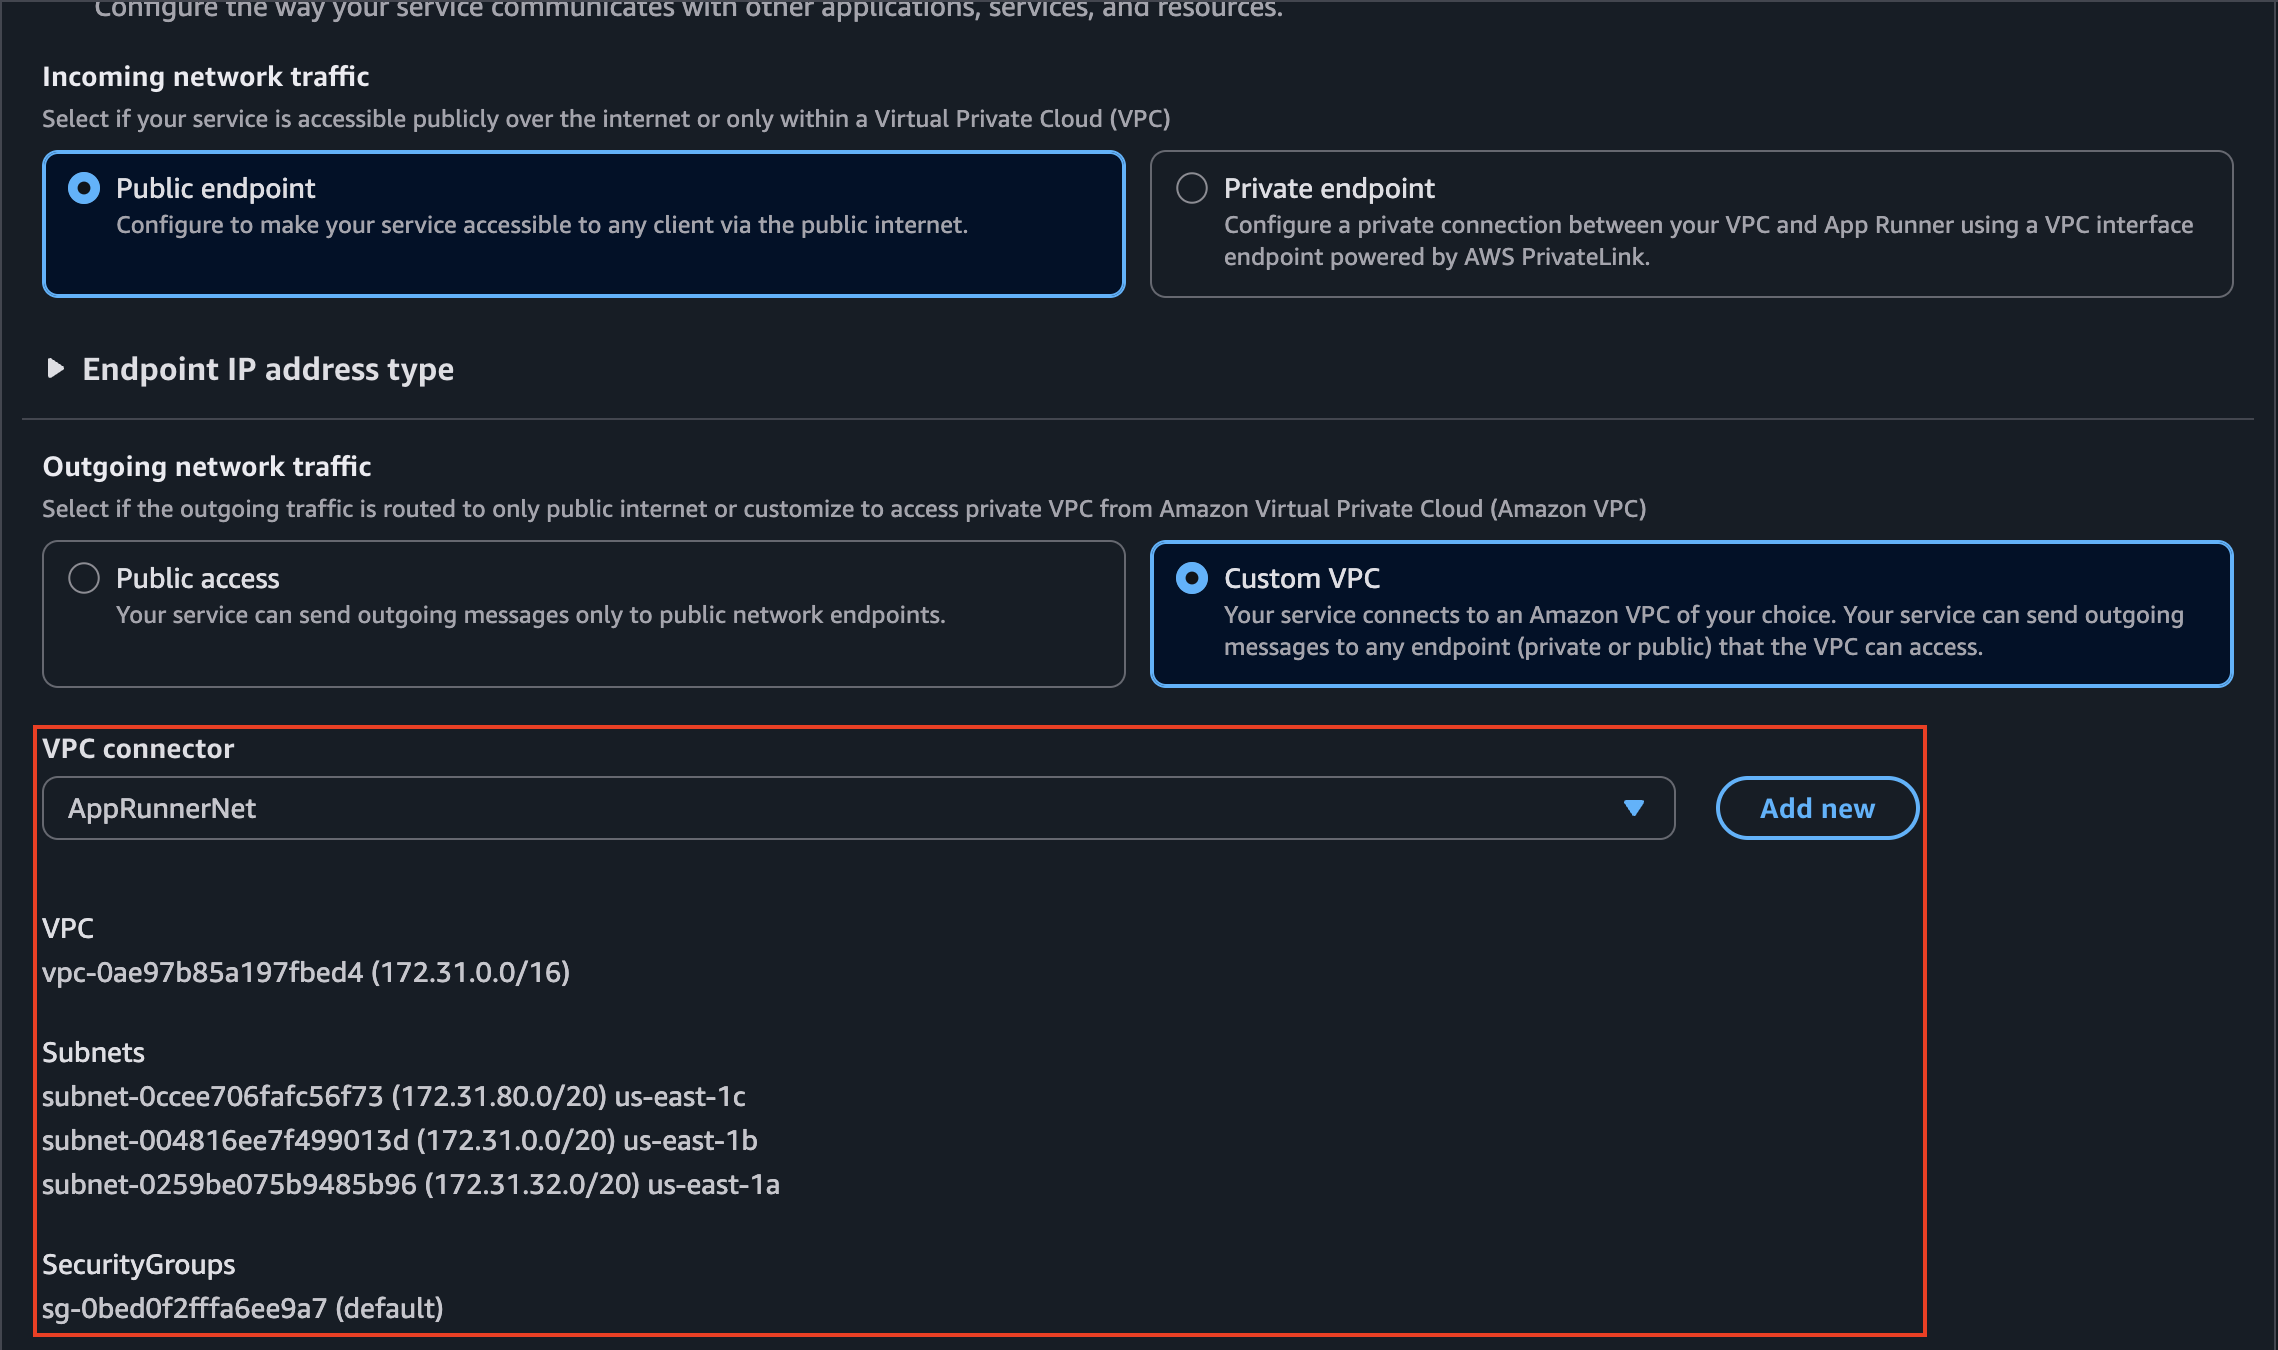
Now AppRunner will know where to connect to, but we still need to put it into the correct network. For that, we will create a custom VPC that matches the VPC of our cluster:
This should be enough to have everything up and working. Let’s try building the application and see what we get:
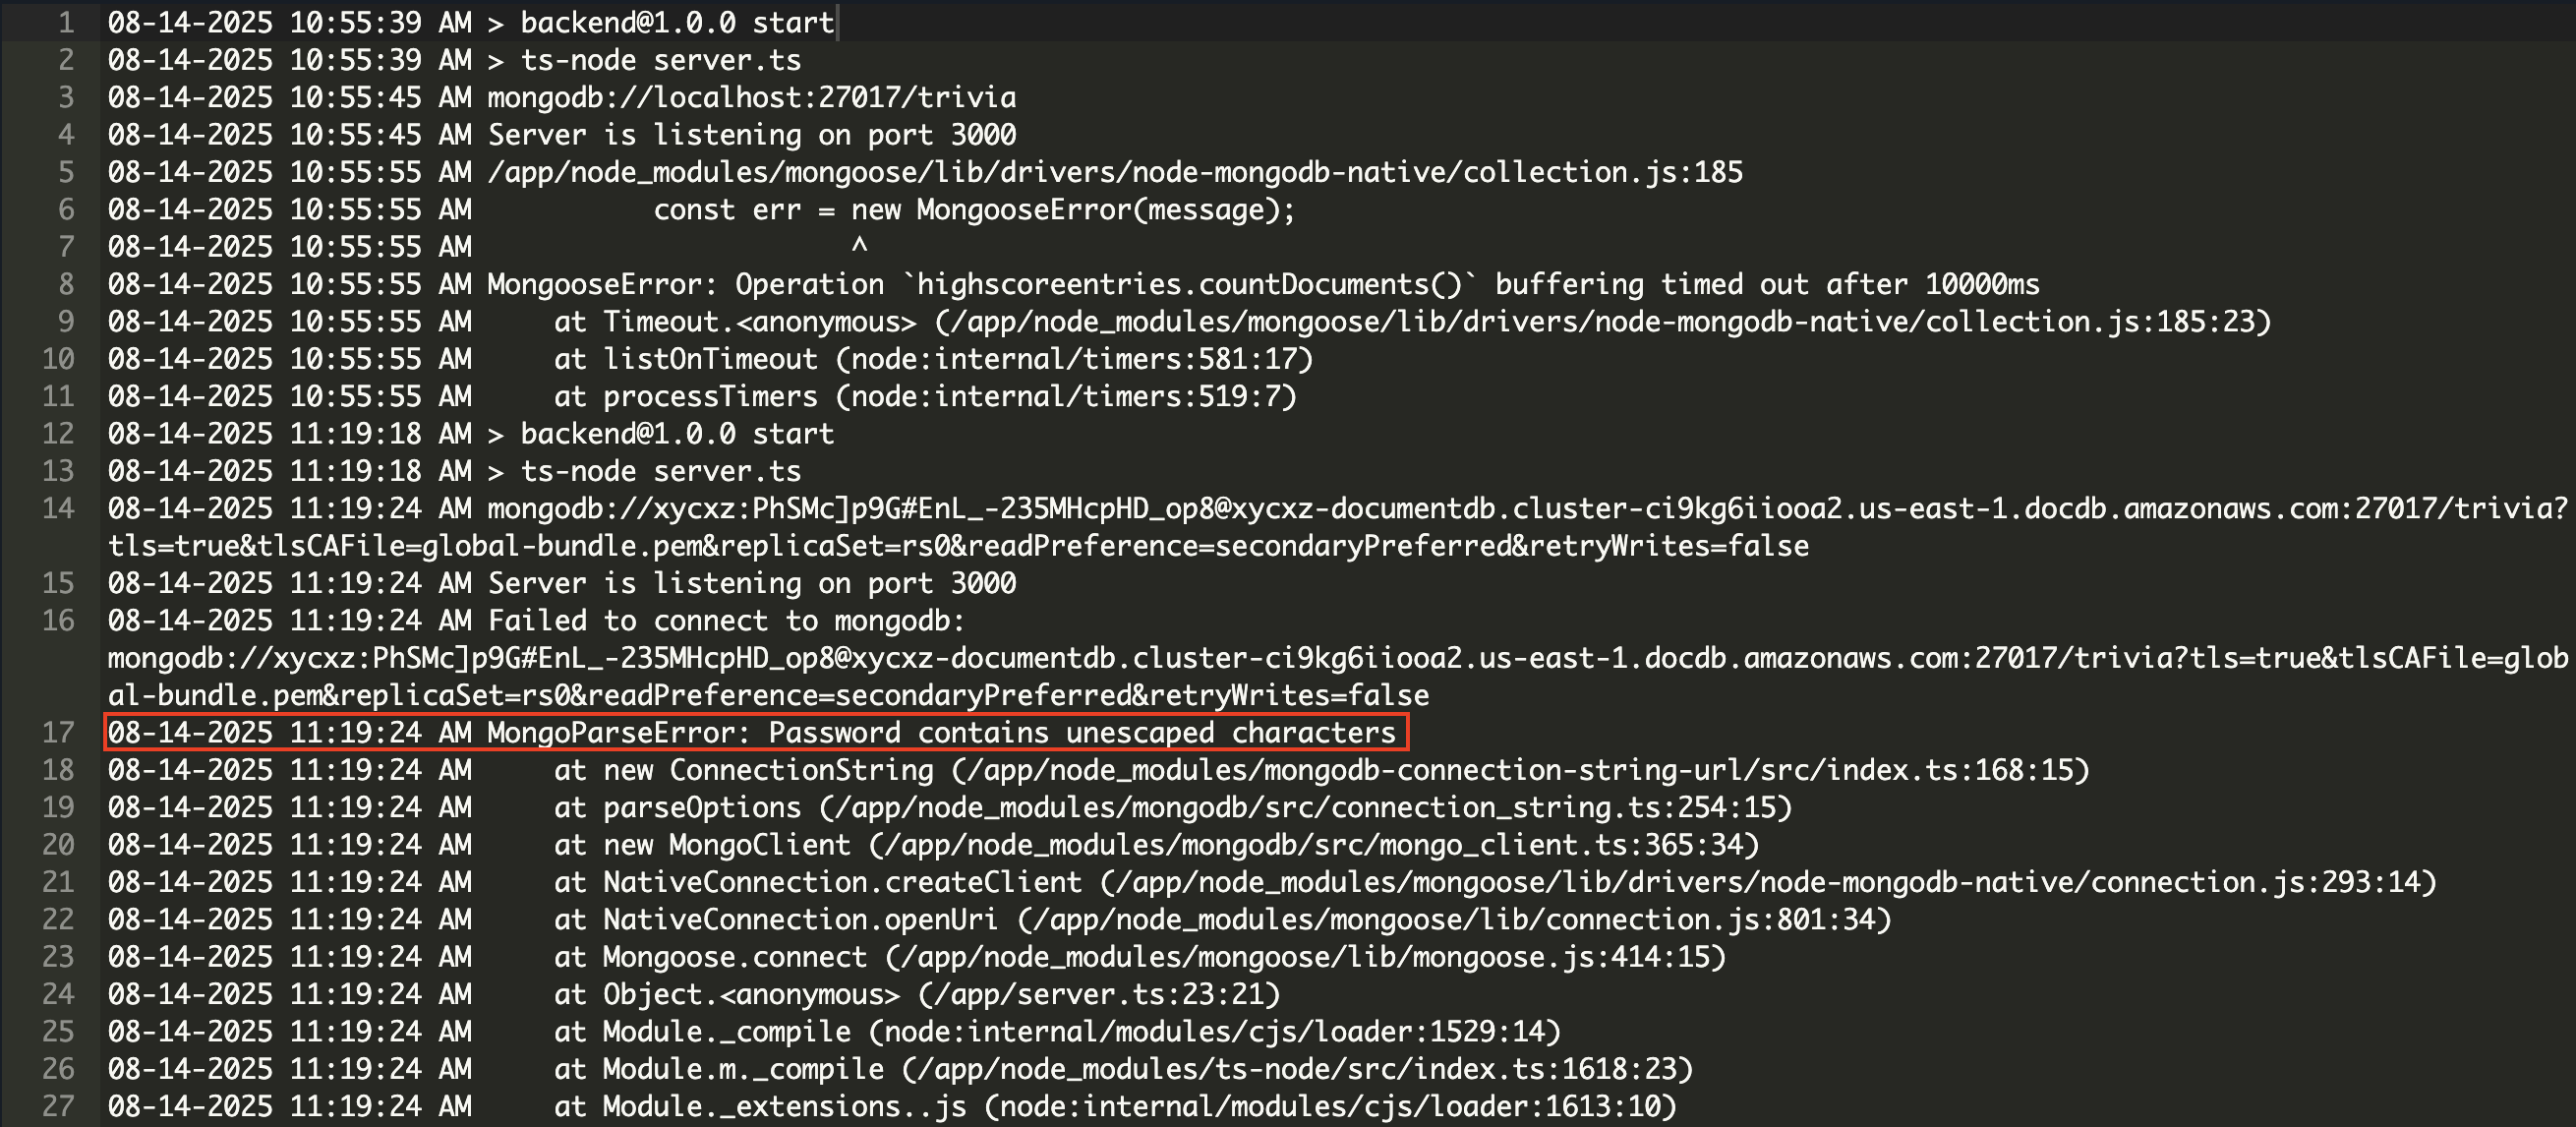
As we can see, the application failed to upload several times. After inspecting the application logs, I was able to find the root cause of the issue:
There is a parsing error because MongoDB is having problems trying to read the password of my user (it contains special characters). We can solve this quickly by URL encoding special characters and then passing in the password to the MONGODB_URI environmental variable once again:
The deployment of our backend is successful this time! We can navigate to the domain provided by AppRunner and see how everything works perfectly:
Next Steps
Now that we have finished deploying the backend of our application, we have to do the same but this time with the frontend side. In this case, the frontend does not contain any code that needs to get executed. Even though we could serve this using AppRunner, there are cheaper solutions to this.
This is what we will be exploring on the next post, so stay tuned!
